
Wooden Cutting Board Maintenance: It’s more than just wiping down your board after chopping veggies! Have you ever wondered why your beautiful wooden cutting board seems to be losing its luster, or worse, harboring unwanted smells? I’m here to tell you, you’re not alone! For centuries, wooden cutting boards have been a kitchen staple, prized for their durability, beauty, and gentleness on knives. From rustic farmhouse kitchens to modern culinary spaces, they’ve been trusted tools for preparing countless meals.
But here’s the thing: these workhorses need a little TLC to stay in top shape. Neglecting proper wooden cutting board maintenance can lead to dryness, cracking, and even bacterial growth – things we definitely want to avoid! That’s why I’ve put together this guide packed with easy DIY tricks and hacks to keep your wooden cutting board looking and functioning its best for years to come.
Think of it this way: a well-maintained cutting board is an investment in your kitchen and your health. I’ll show you simple, cost-effective ways to clean, condition, and protect your board, ensuring it remains a safe and beautiful surface for all your culinary creations. Let’s dive in and give your wooden cutting board the love it deserves!
Revive Your Beloved Wooden Cutting Board: A DIY Guide
Hey there, fellow DIY enthusiasts! I’m so excited to share my go-to method for keeping my wooden cutting boards in tip-top shape. A well-maintained wooden cutting board is a kitchen essential, not just for its aesthetic appeal but also for its hygienic properties. Unlike plastic boards, wood has natural antibacterial qualities, but it needs a little TLC to stay that way. This guide will walk you through a simple yet effective process to clean, sanitize, and condition your wooden cutting board, ensuring it lasts for years to come. Let’s get started!
What You’ll Need
Before we dive in, let’s gather our supplies. I like to keep these handy so I can give my boards a quick refresh whenever they need it.
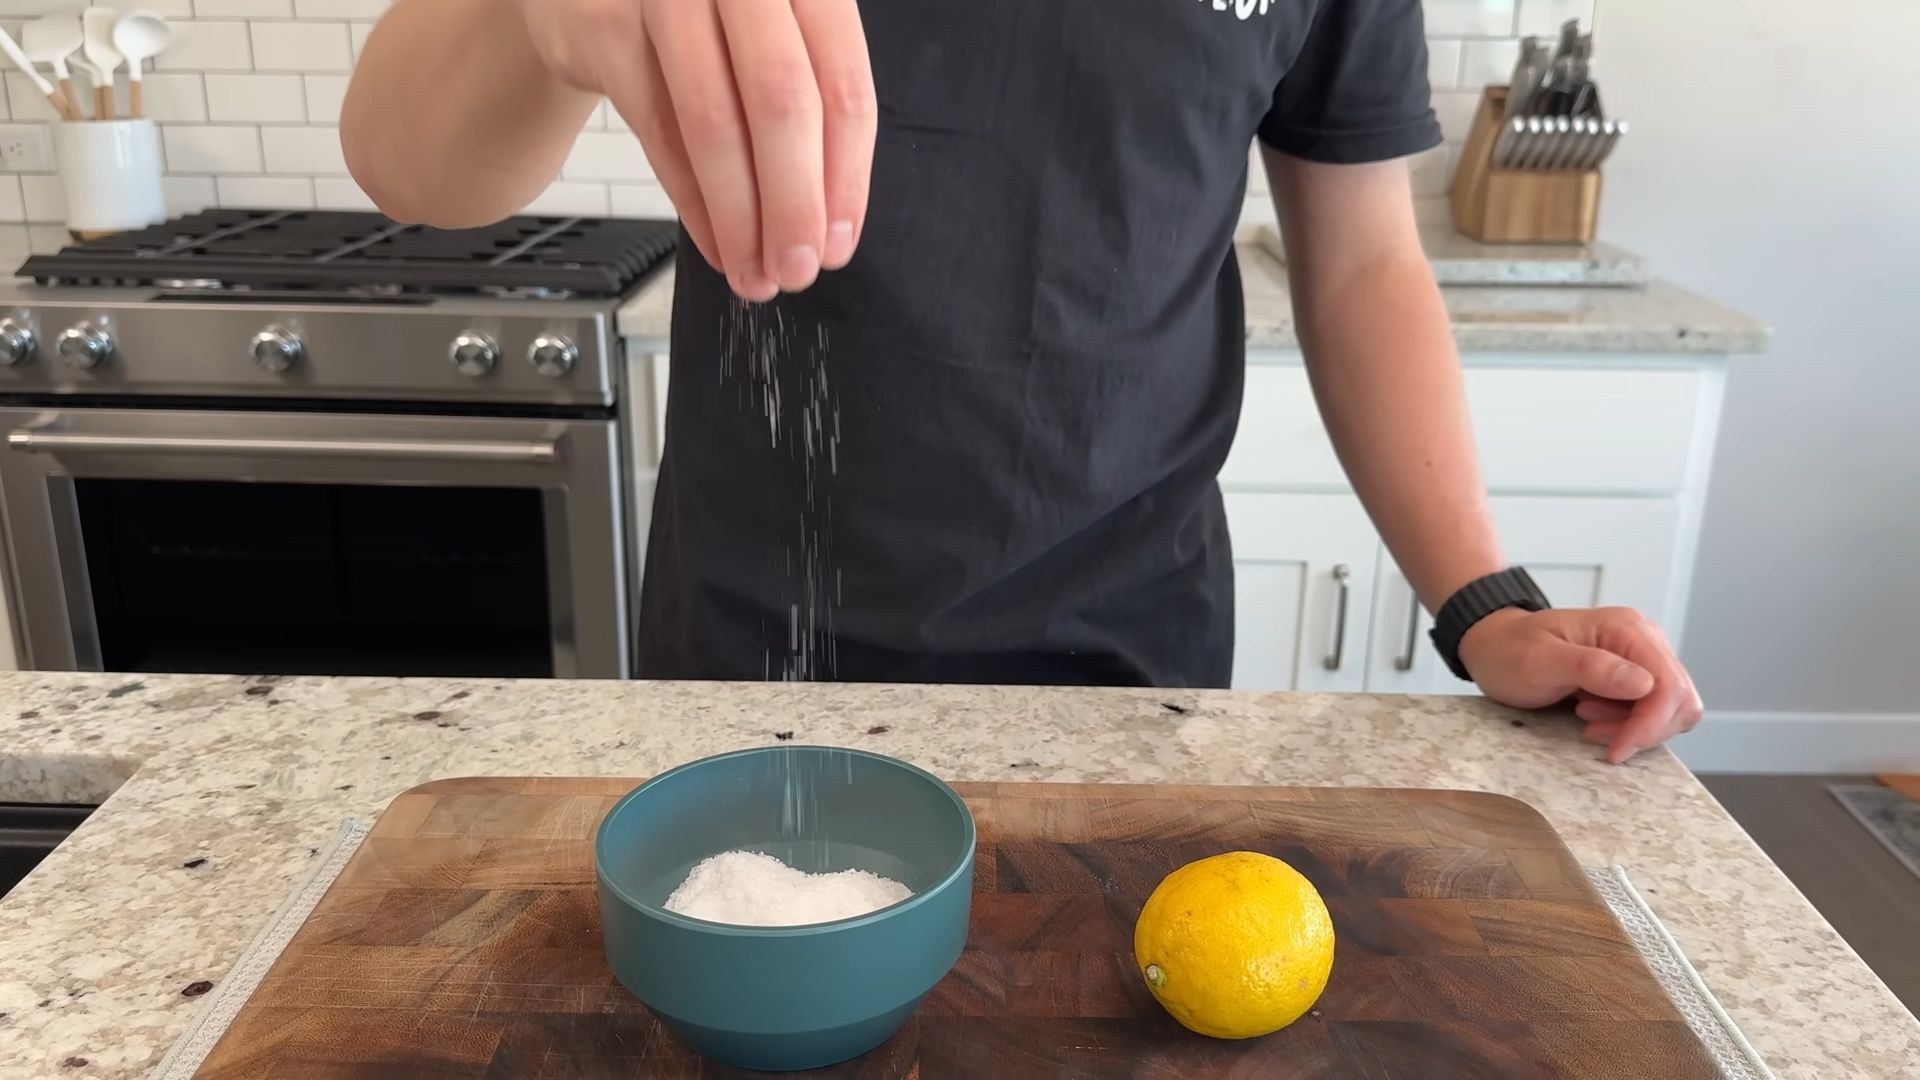
* **Coarse Salt:** This acts as a gentle abrasive to scrub away food particles. I prefer sea salt, but any coarse salt will do.
* **Lemon (or White Vinegar):** Lemon juice is a natural disinfectant and deodorizer. White vinegar works just as well if you don’t have a lemon on hand.
* **Clean Cloth or Sponge:** You’ll need this for scrubbing and wiping.
* **Food-Grade Mineral Oil (or Beeswax/Mineral Oil Blend):** This is crucial for conditioning the wood and preventing it from drying out and cracking. I personally love using a beeswax/mineral oil blend for extra protection.
* **Clean, Dry Towels:** For drying the board after cleaning and oiling.
* **Optional: Sandpaper (120-grit and 220-grit):** If your board has deep scratches or stains, you might want to sand it down first.
* **Optional: Scraper:** A bench scraper or even a sturdy spatula can help remove stubborn stuck-on food.
Section 1: Cleaning and Sanitizing Your Cutting Board
This is the most important step! A clean board is a happy board (and a safe one!).
1. **Remove Loose Debris:** Start by scraping off any loose food particles with a bench scraper or spatula. This will prevent them from getting ground into the wood during the cleaning process.
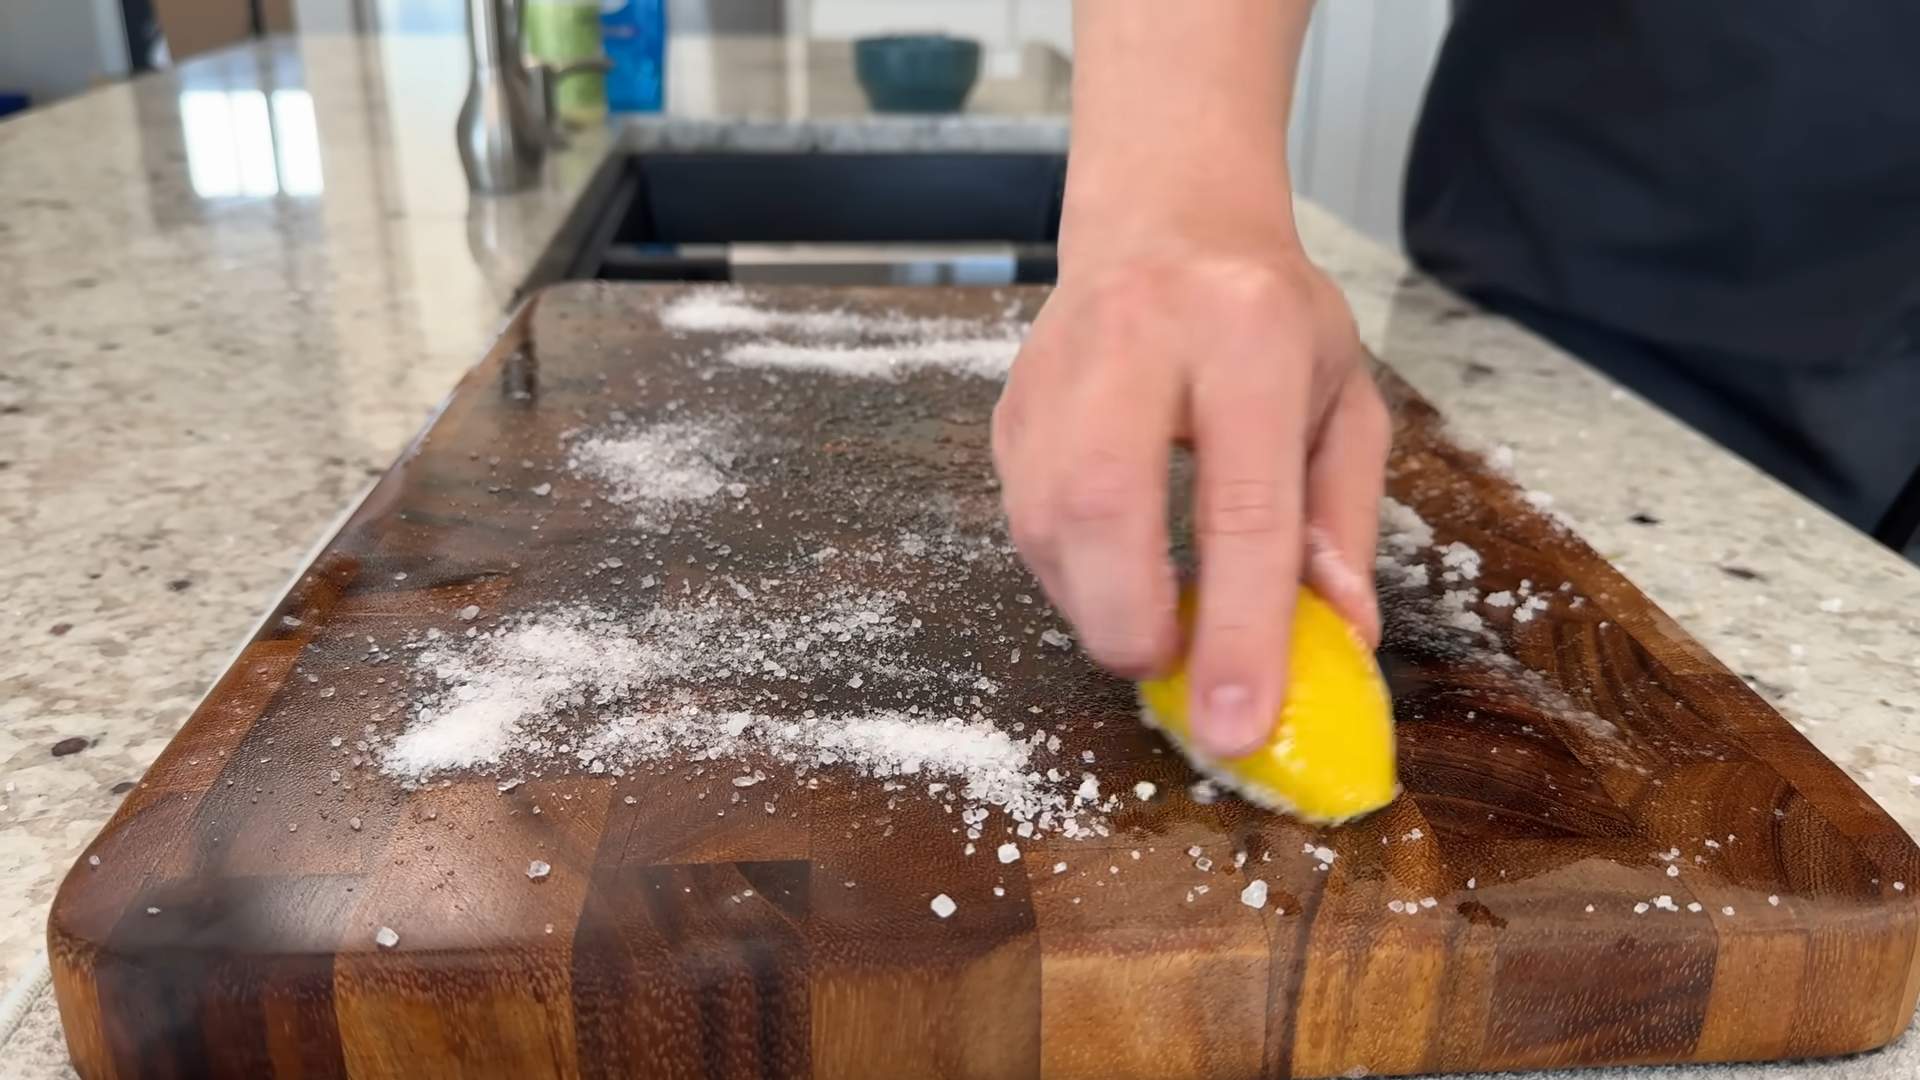
2. **Apply Salt and Lemon (or Vinegar):** Generously sprinkle coarse salt over the entire surface of the cutting board. Then, cut a lemon in half and use the cut side to scrub the salt into the wood. If you’re using vinegar, simply pour a small amount onto the board and use a cloth or sponge to spread it around.
3. **Scrub Thoroughly:** Apply firm pressure and scrub the board in circular motions, ensuring you cover every inch. The salt will act as an abrasive, lifting away dirt and grime, while the lemon juice (or vinegar) will disinfect and deodorize. Pay special attention to areas with visible stains or food residue. I usually spend a good 5-10 minutes on this step, depending on how dirty the board is.
4. **Rinse with Warm Water:** Once you’ve scrubbed the board thoroughly, rinse it with warm water. Make sure to remove all traces of salt and lemon juice (or vinegar).
5. **Dry Thoroughly:** Use a clean, dry towel to dry the cutting board completely. Don’t let it air dry, as this can cause the wood to warp or crack. I like to pat it dry and then leave it standing on its side to air dry for a little while longer, just to be extra sure.
Section 2: Sanding (If Necessary)
If your cutting board has deep scratches, knife marks, or stubborn stains that won’t come out with cleaning, sanding is the way to go. This step is optional, but it can make a huge difference in the appearance and longevity of your board.
1. **Prepare Your Sandpaper:** Start with 120-grit sandpaper to remove the deeper imperfections. Then, switch to 220-grit sandpaper for a smoother finish.
2. **Sand with the Grain:** Sand the cutting board in the direction of the wood grain. Apply even pressure and avoid sanding in circles, as this can create unevenness. I usually sand in long, smooth strokes, overlapping each stroke slightly.
3. **Remove Sawdust:** After sanding, use a clean, dry cloth to remove all the sawdust from the board. You can also use a vacuum cleaner with a brush attachment to get rid of any remaining dust.
4. **Repeat Cleaning Process:** After sanding, repeat the cleaning and sanitizing process described in Section 1 to remove any residual sawdust and prepare the board for oiling.
Section 3: Conditioning Your Cutting Board with Oil
This is the final and arguably most important step in maintaining your wooden cutting board. Oiling the board replenishes the natural oils that are lost during cleaning and use, preventing it from drying out, cracking, and warping.
1. **Ensure the Board is Completely Dry:** Before applying any oil, make sure the cutting board is completely dry. Any moisture trapped under the oil can lead to mold or mildew growth.
2. **Apply Food-Grade Mineral Oil (or Beeswax/Mineral Oil Blend):** Pour a generous amount of food-grade mineral oil (or your beeswax/mineral oil blend) onto the cutting board. I like to start with a small puddle in the center and then spread it out with a clean cloth or my hands.
3. **Rub the Oil into the Wood:** Use a clean cloth to rub the oil into the wood, working with the grain. Apply firm pressure and make sure to cover every inch of the board, including the edges and sides. The wood should readily absorb the oil.
4. **Let the Oil Soak In:** Allow the oil to soak into the wood for at least a few hours, or preferably overnight. The longer the oil soaks in, the better protected the board will be. I usually oil my boards before I go to bed and let them sit overnight.
5. **Apply Additional Coats (If Necessary):** After the initial soaking period, check the board to see if it has absorbed all the oil. If there are any dry spots, apply another coat of oil and let it soak in for a few more hours. Repeat this process until the wood is fully saturated and no longer absorbs the oil readily.
6. **Wipe Off Excess Oil:** Once the board is fully saturated, use a clean, dry towel to wipe off any excess oil. You want the board to be lightly oiled, not greasy.
7. **Let the Board Dry Completely:** Allow the board to dry completely before using it. This will ensure that the oil has fully penetrated the wood and won’t transfer to your food. I usually let my boards dry for another 24 hours after wiping off the excess oil.
Tips for Maintaining Your Cutting Board
* **Clean After Each Use:** The best way to keep your cutting board in good condition is to clean it after each use. Simply rinse it with warm water and soap, and then dry it thoroughly.
* **Avoid Dishwashers:** Never put your wooden cutting board in the dishwasher. The high heat and harsh detergents can damage the wood and cause it to warp or crack.
* **Oil Regularly:** How often you need to oil your cutting board will depend on how often you use it. As a general rule, I recommend oiling it at least once a month, or more often if it starts to look dry or faded.
* **Store Properly:** Store your cutting board on its side to allow air to circulate and prevent moisture from building up.
* **Separate Boards for Raw Meat:** To prevent cross-contamination, use separate cutting boards for raw meat, poultry, and seafood.
* Don’t be afraid to experiment! Every wood is different, and you might find that your board responds better to a particular oil or cleaning method.
By following these simple steps, you can keep your wooden cutting board looking and performing its best for years to come. Happy cooking!
Conclusion
So, there you have it! Mastering the art of wooden cutting board maintenance isn’t just about keeping your kitchen looking spick and span; it’s about extending the life of a valuable tool, ensuring food safety, and even enhancing the flavors of your culinary creations. Think of your wooden cutting board as an investment – an investment in your cooking, your health, and the longevity of a beautiful, natural piece of kitchen equipment.
Why is this DIY approach a must-try? Because it’s simple, effective, and uses ingredients you likely already have in your pantry. Forget expensive, commercially produced cleaners filled with harsh chemicals. This method is gentle on your board, tough on bacteria, and incredibly cost-effective. You’re not just cleaning; you’re nourishing the wood, preventing it from drying out and cracking, and keeping it in prime condition for years to come.
But the beauty of this DIY method lies in its adaptability. Feel free to experiment with variations to suit your specific needs and preferences. For example, if you’re dealing with particularly stubborn odors, consider adding a few drops of tea tree oil to your cleaning solution for its powerful antibacterial and antifungal properties. Just be sure to use it sparingly, as it has a strong scent. Another variation involves using different types of oil for conditioning. While mineral oil is the standard recommendation due to its food-safe and non-rancid properties, you can also explore options like walnut oil (if you’re not allergic) or even coconut oil, keeping in mind that these oils may impart a slight scent.
And don’t limit yourself to just cleaning! Consider incorporating regular oiling into your routine. A well-oiled board is a happy board, resistant to moisture and less prone to warping. Aim to oil your board at least once a month, or more frequently if you notice it starting to look dry.
Ultimately, the best way to discover the perfect wooden cutting board maintenance routine for you is to get hands-on and experiment. We wholeheartedly encourage you to try this DIY method and see the difference it makes. You’ll be amazed at how easy it is to keep your wooden cutting board looking and performing its best.
But don’t just take our word for it! We want to hear about your experiences. Did you try a variation that worked particularly well? Did you discover a new trick for removing stubborn stains? Share your tips, tricks, and photos in the comments below. Let’s create a community of wooden cutting board enthusiasts, all dedicated to keeping our boards clean, safe, and beautiful for years to come. Your insights could help other readers discover the joy of properly caring for their wooden cutting boards. So go ahead, give it a try, and let us know what you think! We can’t wait to hear from you.
Frequently Asked Questions (FAQ)
Why is wooden cutting board maintenance so important?
Wooden cutting board maintenance is crucial for several reasons. First and foremost, it ensures food safety. Wood, while naturally antibacterial, can still harbor bacteria if not properly cleaned and maintained. Regular cleaning and oiling prevent the growth of harmful microorganisms that could contaminate your food. Secondly, maintenance extends the lifespan of your cutting board. Wood can dry out, crack, and warp if not properly cared for. Oiling helps to keep the wood moisturized and prevents these issues. Finally, a well-maintained cutting board is simply more pleasant to use. It looks better, feels better, and performs better, making your food preparation experience more enjoyable.
What type of oil should I use to condition my wooden cutting board?
The best type of oil to use for conditioning your wooden cutting board is food-grade mineral oil. Mineral oil is non-toxic, odorless, tasteless, and doesn’t go rancid, making it ideal for use on surfaces that come into contact with food. You can typically find food-grade mineral oil at pharmacies, hardware stores, or online retailers. Avoid using vegetable oils like olive oil or canola oil, as they can go rancid over time and create an unpleasant odor. Walnut oil is another option, but only if you are sure no one using the board has a nut allergy.
How often should I clean and oil my wooden cutting board?
You should clean your wooden cutting board after each use with warm, soapy water. For a deeper clean, use the DIY method described in this article, which involves using lemon and salt. As for oiling, aim to oil your board at least once a month, or more frequently if you notice it starting to look dry. The frequency of oiling will depend on how often you use your board and the humidity levels in your environment. If you live in a dry climate or use your board frequently, you may need to oil it more often.
Can I put my wooden cutting board in the dishwasher?
No, absolutely not! Putting your wooden cutting board in the dishwasher is a surefire way to ruin it. The high heat and harsh detergents will strip the wood of its natural oils, causing it to dry out, crack, and warp. Always hand-wash your wooden cutting board with warm, soapy water and dry it thoroughly.
How do I remove stubborn odors from my wooden cutting board?
Stubborn odors, such as garlic or onion, can be removed by using the lemon and salt method described in this article. The lemon juice acts as a natural deodorizer, while the salt helps to scrub away any lingering odors. You can also try making a paste of baking soda and water and applying it to the affected area. Let it sit for a few minutes before rinsing it off. For particularly persistent odors, consider using a small amount of white vinegar diluted with water.
What if my wooden cutting board has knife marks?
Knife marks are a natural part of using a wooden cutting board and are generally not a cause for concern. However, if the knife marks are deep or uneven, they can create crevices where bacteria can hide. To smooth out knife marks, you can sand your cutting board with fine-grit sandpaper. Start with a coarser grit (around 120-grit) and gradually move to a finer grit (around 220-grit) to achieve a smooth finish. Be sure to sand in the direction of the wood grain and to clean and oil the board after sanding.
How do I store my wooden cutting board?
Store your wooden cutting board in a dry, well-ventilated area. Avoid storing it in a damp or humid environment, as this can promote the growth of mold and mildew. You can store your board flat on a shelf or hanging from a hook. If you’re storing it flat, make sure it’s not resting directly on a countertop, as this can trap moisture underneath. Consider using a cutting board stand or rack to allow for proper air circulation.
Is there anything else I should know about wooden cutting board maintenance?
Yes, here are a few additional tips to keep in mind:
* Avoid cutting raw meat or poultry on your wooden cutting board, as this can increase the risk of cross-contamination. If you do cut raw meat or poultry on your board, be sure to clean it thoroughly with hot, soapy water and a disinfectant.
* Don’t let your wooden cutting board sit in water for extended periods of time, as this can cause it to warp and crack.
* If you notice any signs of mold or mildew on your wooden cutting board, discard it immediately.
* Consider having separate cutting boards for different types of food to prevent cross-contamination.
* Regularly inspect your wooden cutting board for any signs of damage, such as cracks or splinters, and repair or replace it as needed.
By following these tips and the DIY cleaning and oiling method described in this article, you can keep your wooden cutting board in top condition for years to come.
Leave a Comment