
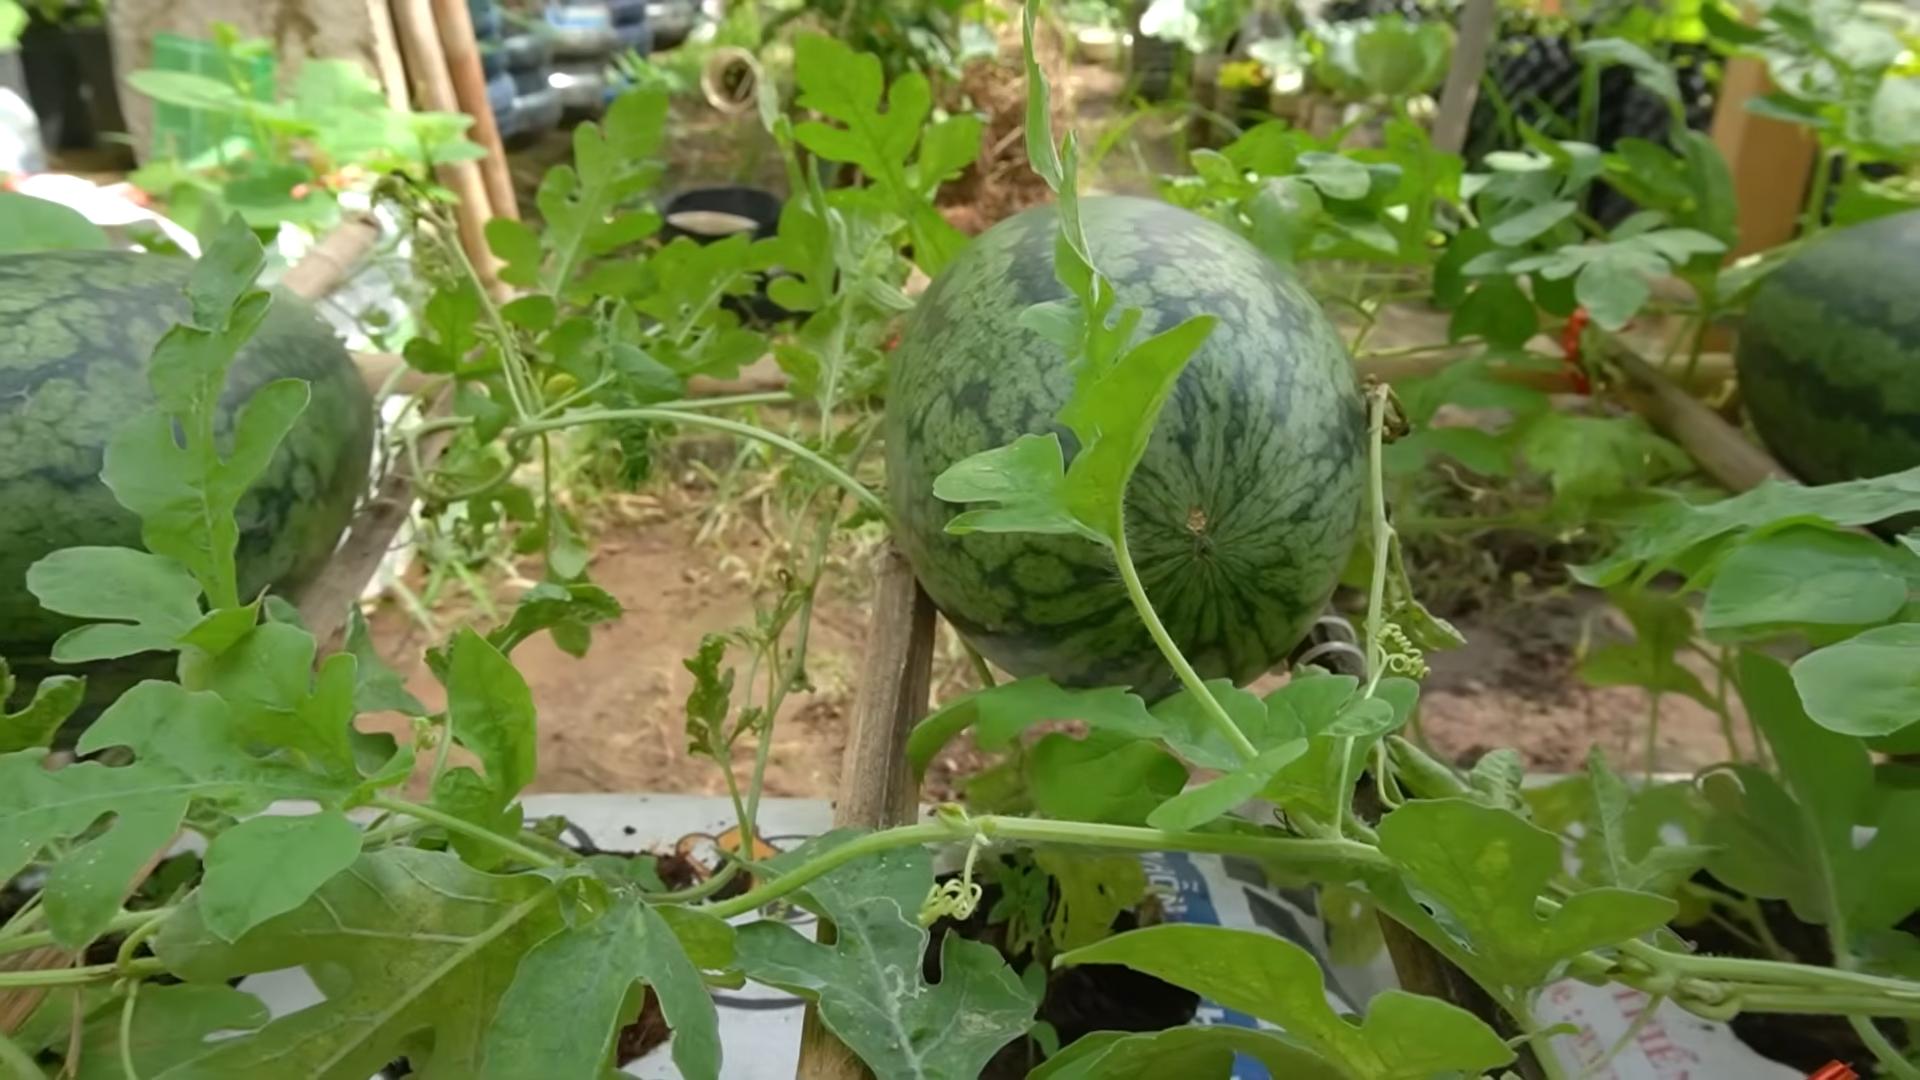
Watermelon sack growing tips – ever heard of them? Probably not! But trust me, once you discover this clever little trick, you’ll be wondering why you haven’t been doing it all along. Imagine harvesting the juiciest, most perfectly formed watermelons you’ve ever seen, all thanks to a simple, DIY solution.
For centuries, gardeners have toiled, battling pests, weather, and the sheer weight of these glorious gourds. While the exact origin of watermelon cultivation is debated, we know they were cherished in ancient Egypt, even depicted in tombs! But even the pharaohs probably didn’t have this hack. The struggle is real: watermelons, as they grow, can suffer from ground rot, pest damage, and uneven ripening. That’s where the magic of the watermelon sack comes in!
Why do you need this DIY trick? Because it’s a game-changer! It elevates your watermelon sack growing tips to a whole new level. It protects your precious fruit from soil-borne diseases and hungry critters, promotes better air circulation for even ripening, and even helps to support the weight of the melon, preventing stem breakage. I’m going to show you how to create your own watermelon support system using simple, inexpensive materials. Get ready to impress your friends and family with your watermelon-growing prowess!
DIY Watermelon Sling: Supporting Your Growing Giants!
Hey there, fellow gardeners! Ever dreamt of growing massive, juicy watermelons but worried about them cracking or rotting on the ground? I’ve got the perfect solution for you: a DIY watermelon sling! This simple project will not only protect your precious melons but also add a touch of rustic charm to your garden. Let’s get started!
Why Use a Watermelon Sling?
Before we dive into the how-to, let’s quickly cover why you might want to consider using a sling in the first place.
* Prevents Rot: Keeping the watermelon off the damp ground prevents soil-borne diseases and rot.
* Reduces Cracking: As watermelons grow, their weight can cause them to crack, especially after heavy rain. A sling provides support and distributes the weight more evenly.
* Protects from Pests: Slugs, snails, and other ground-dwelling pests can damage your ripening watermelons. A sling elevates them, making them less accessible.
* Improves Air Circulation: Better airflow around the watermelon helps it ripen evenly and reduces the risk of fungal diseases.
* Just Looks Cool!: Let’s be honest, a watermelon nestled in a handmade sling just looks fantastic!
Materials You’ll Need
Okay, time to gather our supplies. Don’t worry, you probably have most of these lying around already!
* Burlap or Strong Fabric: This will form the main body of the sling. Burlap is a great choice because it’s breathable and durable. An old canvas bag or even a sturdy piece of denim will also work. You’ll need a piece large enough to comfortably cradle your watermelon with room to spare. I usually aim for at least 3 feet by 3 feet.
* Strong Rope or Twine: Jute twine, nylon rope, or even paracord will do the trick. You’ll need enough to create the sling’s support straps and hang it securely. About 20-30 feet should be plenty.
* Scissors or Utility Knife: For cutting the fabric and rope.
* Measuring Tape or Ruler: To ensure accurate measurements.
* Sewing Machine (Optional): A sewing machine will make the sling more durable, but you can definitely hand-sew it if you prefer.
* Needle and Thread (If Hand-Sewing): Choose a strong thread that matches your fabric.
* Grommets and Grommet Tool (Optional): Grommets will reinforce the holes where the rope passes through, making the sling even stronger.
* Wooden Dowel or Branch (Optional): For added support and to help distribute the weight. A piece about 12-18 inches long should be sufficient.
Step-by-Step Instructions: Creating Your Watermelon Sling
Alright, let’s get our hands dirty! Here’s how to build your very own watermelon sling:
1. Prepare the Fabric:
* Lay your fabric flat on a clean surface.
* If using burlap, you might want to fold over the edges and sew them to prevent fraying. This step is crucial for longevity. If you’re using a more durable fabric like canvas, you might be able to skip this step.
* Cut the fabric into a square or rectangle. Remember, bigger is better! You want to ensure the sling can comfortably accommodate your watermelon as it grows.
2. Create the Sling Shape:
* This is where you decide on the shape of your sling. You can keep it as a simple square or rectangle, or you can round off the corners for a more aesthetically pleasing look.
* If you’re rounding the corners, use a marker or pen to draw a curved line on each corner, then carefully cut along the lines.
3. Reinforce the Edges (Optional but Recommended):
* Folding over the edges and sewing them creates a stronger, more durable sling.
* Fold each edge over by about an inch and iron it to create a crisp crease.
* Then, fold it over again by another inch and pin it in place.
* Sew along the folded edge, using a straight stitch on your sewing machine or a sturdy hand stitch.
4. Create the Rope Attachment Points:
* This is where the rope will attach to the sling, providing the support.
* Decide where you want the rope attachment points to be. I usually place them about 4-6 inches from each corner.
* Mark the locations with a pen or marker.
* At each marked location, create a small hole in the fabric. You can use scissors, a utility knife, or a grommet tool.
5. Install Grommets (Optional but Highly Recommended):
* Grommets will reinforce the holes and prevent the rope from tearing through the fabric.
* Follow the instructions that came with your grommet tool to install a grommet at each hole. This usually involves placing the grommet pieces on either side of the fabric and using the tool to crimp them together.
6. Attach the Rope:
* Cut four equal lengths of rope. The length will depend on how high you want to hang the sling. I usually cut them about 5-7 feet long, giving me plenty of room to adjust the height.
* Thread one end of each rope through a grommet (or hole) and tie a secure knot. A figure-eight knot or a bowline knot works well. Make sure the knot is large enough that it won’t slip through the hole.
* Repeat this process for all four corners.
7. Gather and Secure the Ropes:
* Gather the four ropes together at the top.
* Decide how high you want to hang the sling.
* Tie all four ropes together in a secure knot at the desired height. Again, a figure-eight knot or a bowline knot is a good choice.
* Leave enough rope above the knot to hang the sling from a branch, trellis, or other support structure.
Adding a Wooden Dowel for Extra Support (Optional)
If you’re planning on growing a particularly large watermelon, you might want to add a wooden dowel or branch for extra support.
1. Prepare the Dowel:
* If using a branch, make sure it’s sturdy and free of any sharp edges.
* Sand the dowel or branch to remove any splinters.
2. Position the Dowel:
* Place the dowel across the center of the sling, underneath the watermelon.
3. Secure the Dowel:
* You can secure the dowel to the sling by sewing it in place or by using small pieces of rope or twine to tie it to the fabric.
Hanging Your Watermelon Sling
Now for the fun part: hanging your sling!
1. Choose a Location:
* Select a sturdy branch, trellis, or other support structure that can handle the weight of a growing watermelon.
* Make sure the location receives plenty of sunlight.
2. Hang the Sling:
* Hang the sling from the chosen support structure, using the remaining rope above the knot.
* Make sure the sling is hanging securely and that the watermelon will be able to swing freely without hitting anything.
3. Adjust the Height:
* Adjust the height of the sling as needed to ensure the watermelon is off the ground and has plenty of room to grow.
Caring for Your Watermelon in a Sling
Once your watermelon is safely nestled in its sling, here are a few tips to keep it happy and healthy:
* Water Regularly: Watermelons need plenty of water, especially during hot weather.
* Fertilize as Needed: Use a fertilizer specifically formulated for watermelons to encourage healthy growth.
* Monitor for Pests and Diseases: Keep an eye out for any signs of pests or diseases and take action promptly.
* Adjust the Sling as Needed: As the watermelon grows, you may need to adjust the sling to provide more support.
* Enjoy the Process!: Growing watermelons is a rewarding experience. Take the time to appreciate your hard work and enjoy the delicious fruit!
And there you have it! A simple, effective, and charming way to support your growing watermelons. Happy gardening! I hope this helps you grow the biggest, juiciest watermelons you’ve ever seen! Remember to have fun with it and don’t be afraid to experiment. Every garden is different, so find what works best for you. Good luck!

Conclusion
So, there you have it! Growing watermelons in sacks might sound unconventional, but as we’ve explored, it’s a game-changer for gardeners facing space constraints, challenging soil conditions, or simply seeking a more controlled growing environment. This DIY trick isn’t just about novelty; it’s about unlocking the potential for a bountiful watermelon harvest, regardless of your garden’s limitations.
Why is this a must-try? Because it offers a multitude of benefits that traditional ground planting simply can’t match. Think about it: improved drainage, reduced risk of soilborne diseases, easier pest control, and the ability to move your watermelon plant to the sunniest spot in your yard. Plus, the concentrated growing medium allows you to tailor the nutrient supply precisely to your watermelon’s needs, resulting in sweeter, juicier fruit.
But the beauty of this method lies in its adaptability. Feel free to experiment with different sack materials. Burlap sacks offer excellent breathability, while heavy-duty plastic sacks can retain moisture more effectively in drier climates. You can also adjust the soil mix to suit your local conditions. Adding compost or aged manure will enrich the soil and provide essential nutrients. Consider incorporating slow-release fertilizer granules for sustained feeding throughout the growing season.
For those aiming for truly impressive results, try vertical gardening with your watermelon sacks. By providing a sturdy trellis or support structure, you can encourage the vines to grow upwards, maximizing space and improving air circulation. This is especially beneficial in humid climates where fungal diseases can be a concern.
Don’t be afraid to get creative with your watering techniques, too. Drip irrigation systems are ideal for delivering water directly to the roots, minimizing water waste and preventing foliage from getting wet. You can even create a simple DIY drip system using a plastic bottle with small holes punched in the cap.
Ultimately, the success of your watermelon sack growing adventure depends on your willingness to experiment and adapt. Observe your plants closely, monitor the soil moisture levels, and adjust your watering and feeding schedules as needed. Remember, every garden is unique, and what works for one gardener may not work for another.
We wholeheartedly encourage you to give this DIY trick a try. It’s a rewarding and educational experience that will deepen your connection to the natural world. And most importantly, don’t forget to share your experiences with us! We’d love to hear about your successes, challenges, and any variations you’ve discovered along the way. Post pictures of your watermelon sacks, share your tips and tricks, and let’s create a community of watermelon sack growing enthusiasts! Let’s all learn together how to maximize our watermelon yields using this innovative and accessible method. Embrace the challenge, enjoy the process, and get ready to savor the sweet taste of homegrown watermelons! This method of growing watermelons in sacks is a great way to get started.
Frequently Asked Questions (FAQ)
What type of sack is best for growing watermelons?
The best type of sack depends on your climate and personal preferences. Burlap sacks are a popular choice due to their excellent breathability, which helps prevent the soil from becoming waterlogged. However, they may dry out quickly in hot, arid climates. Heavy-duty plastic sacks retain moisture better but can also lead to root rot if drainage is poor. Consider using a plastic sack with drainage holes or lining a burlap sack with plastic to balance moisture retention and drainage. Woven polypropylene bags, often used for animal feed or grain, are also a durable and cost-effective option. Ultimately, the key is to choose a sack that is strong enough to support the weight of the soil and the growing watermelon plant and provides adequate drainage.
How big should the sack be?
The size of the sack is crucial for providing enough space for the watermelon roots to develop. A general guideline is to use a sack that is at least 24 inches in diameter and 24 inches deep. Larger sacks, such as those used for storing grain or animal feed, are even better, as they provide more room for root growth and can hold more water and nutrients. Remember that watermelons are heavy feeders, so a larger sack will give them a greater reservoir of resources to draw upon. If you are growing a smaller variety of watermelon, you might be able to get away with a slightly smaller sack, but it’s always better to err on the side of caution and provide ample space.
What kind of soil should I use in the sack?
The ideal soil mix for growing watermelons in sacks is a well-draining, nutrient-rich blend. A good starting point is a mix of equal parts garden soil, compost, and perlite or vermiculite. The garden soil provides structure and minerals, the compost adds organic matter and nutrients, and the perlite or vermiculite improves drainage and aeration. You can also add slow-release fertilizer granules to provide a steady supply of nutrients throughout the growing season. Avoid using heavy clay soil, as it can become compacted and waterlogged in a sack. If your garden soil is heavy clay, amend it with plenty of compost and perlite or vermiculite to improve its drainage.
How often should I water the watermelon in the sack?
Watering frequency depends on several factors, including the climate, the type of sack you are using, and the size of the watermelon plant. As a general rule, water deeply whenever the top inch of soil feels dry to the touch. Watermelons need consistent moisture, especially during fruit development. In hot, dry weather, you may need to water daily or even twice a day. In cooler, wetter weather, you may only need to water every few days. Use a moisture meter to check the soil moisture levels at the root zone. Avoid overwatering, as this can lead to root rot. Drip irrigation is an excellent way to deliver water directly to the roots and minimize water waste.
How do I fertilize the watermelon in the sack?
Watermelons are heavy feeders and require regular fertilization to produce large, sweet fruit. Start by incorporating slow-release fertilizer granules into the soil mix when you plant the watermelon seedling. Then, supplement with liquid fertilizer every two to three weeks throughout the growing season. Use a balanced fertilizer with a ratio of 10-10-10 or 14-14-14 during the early stages of growth, and then switch to a fertilizer with a higher phosphorus and potassium content (e.g., 5-10-10) during fruit development. You can also add compost tea or fish emulsion to provide micronutrients and beneficial microbes. Avoid over-fertilizing, as this can lead to excessive vegetative growth and reduced fruit production.
How do I support the watermelon as it grows?
As the watermelon grows, it will become heavy and may need support to prevent the vine from breaking. You can use a sling made of netting, fabric, or even an old t-shirt to support the fruit. Tie the sling to a sturdy trellis or support structure. You can also use a small wooden platform or crate to support the watermelon from below. Be sure to choose a support system that is strong enough to hold the weight of the mature watermelon. For vertical gardening, train the vines to grow up a trellis or fence, and use slings to support the fruit as it develops.
What are some common pests and diseases that affect watermelons in sacks?
Common pests that can affect watermelons include aphids, squash bugs, vine borers, and spider mites. Common diseases include powdery mildew, fusarium wilt, and anthracnose. Inspect your plants regularly for signs of pests or diseases, and take action promptly to prevent them from spreading. Use organic pest control methods, such as insecticidal soap or neem oil, to control pests. Improve air circulation and avoid overhead watering to prevent diseases. Choose disease-resistant varieties of watermelons whenever possible.
Can I grow watermelons in sacks in a small space?
Yes! One of the biggest advantages of growing watermelons in sacks is that it allows you to grow them in a small space. You can place the sacks on a patio, balcony, or even a small backyard. Vertical gardening with watermelon sacks is an excellent way to maximize space and grow watermelons in even the smallest of areas.
What varieties of watermelons are best suited for growing in sacks?
Smaller, bush-type varieties of watermelons are generally better suited for growing in sacks than larger, vining varieties. Some popular choices include Sugar Baby, Bush Sugar Baby, and Golden Midget. However, you can also grow larger varieties in sacks, provided you provide adequate support and space for the vines to grow.
How do I know when the watermelon is ripe?
There are several ways to tell when a watermelon is ripe. Look for these signs:
* The tendril closest to the watermelon stem turns brown and dry.
* The spot where the watermelon rests on the ground (the “ground spot”) turns from white to yellow.
* The watermelon sounds hollow when you thump it.
* The skin of the watermelon becomes dull and less shiny.
Once you harvest your watermelon, store it in a cool, dry place. Enjoy the fruits of your labor!

Leave a Comment