
Toothbrush cleaning hacks: Let’s be honest, when was the last time you *really* thought about cleaning your toothbrush? We use them twice (or hopefully more!) a day, every single day, to keep our pearly whites sparkling. But all that brushing leaves behind bacteria, food particles, and, well, things we’d rather not think about! It’s a bit ironic, isn’t it? We’re using something to clean our mouths that might actually need a good cleaning itself.
Throughout history, oral hygiene has been a concern, with ancient civilizations using twigs and cloths to clean their teeth. While the modern toothbrush is a relatively recent invention, the need to keep it clean is timeless. Think of it this way: your toothbrush is like a tiny, personal garden tool for your mouth. And just like any garden tool, it needs proper care to function effectively and avoid spreading unwanted “weeds” (in this case, bacteria!).
That’s where these amazing toothbrush cleaning hacks come in! I’m going to share some simple, effective, and budget-friendly DIY methods to keep your toothbrush fresh, clean, and ready to tackle plaque. Because let’s face it, nobody wants to brush their teeth with a breeding ground for germs. These tricks will not only improve your oral hygiene but also extend the life of your toothbrush, saving you money in the long run. So, grab your toothbrush, and let’s get cleaning!

DIY Toothbrush Cleaning & Sanitizing: Keep Your Smile Sparkling!
Hey everyone! Let’s talk about something super important but often overlooked: keeping our toothbrushes clean! We use them twice a day (hopefully!), and they can become breeding grounds for bacteria if we’re not careful. So, I’m going to share some of my favorite DIY methods for cleaning and sanitizing your toothbrush, keeping your mouth healthy and your smile bright.
Why Clean Your Toothbrush?
Before we dive in, let’s quickly touch on why this is so crucial. Think about it: your toothbrush goes into your mouth, removing food particles and plaque. These particles, along with the moist environment of your bathroom, create the perfect conditions for bacteria to thrive. Regularly cleaning your toothbrush helps:
* Reduce bacteria buildup: Less bacteria means a healthier mouth and reduced risk of gum disease.
* Prevent reinfection: If you’re sick, cleaning your toothbrush can help prevent you from reinfecting yourself.
* Extend the life of your toothbrush: Removing debris helps your toothbrush last longer.
Method 1: The Simple Rinse & Air Dry (Daily Habit)
This is the absolute minimum you should be doing after every single use. It’s quick, easy, and makes a big difference.
Step-by-Step Instructions:
1. Rinse Thoroughly: After brushing, rinse your toothbrush under running water for at least 30 seconds. Make sure to get all the bristles and the head of the brush. I like to use warm water, but cold water works too. The key is to be thorough!
2. Shake Off Excess Water: Give your toothbrush a good shake to remove as much excess water as possible. This helps it dry faster, which discourages bacterial growth.
3. Air Dry Upright: Store your toothbrush upright in a toothbrush holder, allowing it to air dry completely. Avoid storing it in a closed container or lying it flat, as this traps moisture and promotes bacterial growth. I prefer a holder with individual slots to prevent brushes from touching.
Method 2: Hydrogen Peroxide Soak (Weekly Deep Clean)
Hydrogen peroxide is a mild antiseptic that can effectively kill bacteria on your toothbrush. This is my go-to for a weekly deep clean.
Step-by-Step Instructions:
1. Rinse First: As always, start by rinsing your toothbrush thoroughly under running water to remove any loose debris.
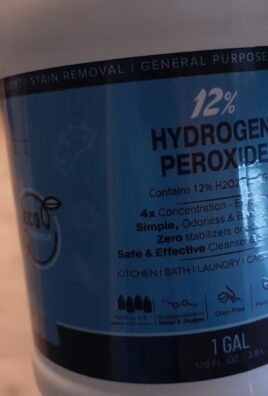
2. Prepare the Solution: Pour a small amount of 3% hydrogen peroxide (the kind you find at the drugstore) into a clean cup. You only need enough to submerge the head of your toothbrush.
3. Soak the Toothbrush: Place your toothbrush head-down in the hydrogen peroxide solution, making sure the bristles are fully submerged.
4. Soak Time: Let the toothbrush soak for at least 5 minutes, but no more than 15 minutes. Soaking for too long can damage the bristles.
5. Rinse Again: After soaking, remove the toothbrush and rinse it thoroughly under running water to remove any remaining hydrogen peroxide.
6. Air Dry Upright: Allow the toothbrush to air dry upright in a toothbrush holder.
Method 3: Mouthwash Soak (Alternative Weekly Clean)
If you don’t have hydrogen peroxide on hand, mouthwash is another great option for sanitizing your toothbrush. Just make sure it’s an antibacterial mouthwash.
Step-by-Step Instructions:
1. Rinse First: Start by rinsing your toothbrush thoroughly under running water.
2. Prepare the Solution: Pour a small amount of antibacterial mouthwash into a clean cup. Again, you only need enough to submerge the head of your toothbrush.
3. Soak the Toothbrush: Place your toothbrush head-down in the mouthwash solution, ensuring the bristles are fully submerged.
4. Soak Time: Let the toothbrush soak for at least 30 minutes.
5. Rinse Again: After soaking, remove the toothbrush and rinse it thoroughly under running water to remove any remaining mouthwash.
6. Air Dry Upright: Allow the toothbrush to air dry upright in a toothbrush holder.
Method 4: Boiling Water (Emergency Sanitization)
This method is best used sparingly, as boiling water can damage the bristles of your toothbrush over time. I only use this when someone in my household has been sick.
Step-by-Step Instructions:
1. Boil Water: Bring a small pot of water to a rolling boil.
2. Submerge the Toothbrush Head: Carefully submerge the head of your toothbrush in the boiling water for about 2-3 minutes. Be careful not to burn yourself!
3. Remove and Cool: Remove the toothbrush from the boiling water and let it cool completely.
4. Rinse Thoroughly: Rinse the toothbrush thoroughly under running water to remove any debris.
5. Air Dry Upright: Allow the toothbrush to air dry upright in a toothbrush holder.
Important Note: Avoid boiling your toothbrush too frequently, as it can weaken the bristles and make them less effective at cleaning your teeth.
Method 5: UV Sanitizers (Tech-Savvy Cleaning)
UV sanitizers are becoming increasingly popular for cleaning toothbrushes. They use ultraviolet light to kill bacteria. While they can be a bit pricier, they offer a convenient and effective way to sanitize your toothbrush.
Step-by-Step Instructions:
1. Rinse First: As with all methods, start by rinsing your toothbrush thoroughly under running water.
2. Place in Sanitizer: Place your toothbrush in the UV sanitizer according to the manufacturer’s instructions.
3. Activate Sanitizer: Turn on the UV sanitizer and let it run for the recommended time (usually a few minutes).
4. Remove and Store: Once the sanitizing cycle is complete, remove your toothbrush and store it upright in a toothbrush holder.
No
Hey everyone! Let’s talk about something super important but often overlooked: keeping our toothbrushes clean! We use them twice a day (hopefully!), and they can become breeding grounds for bacteria if we’re not careful. So, I’m going to share some of my favorite DIY methods for cleaning and sanitizing your toothbrush, keeping your mouth healthy and your smile bright.
Why Clean Your Toothbrush?
Before we dive in, let’s quickly touch on why this is so crucial. Think about it: your toothbrush goes into your mouth, removing food particles and plaque. These particles, along with the moist environment of your bathroom, create the perfect conditions for bacteria to thrive. Regularly cleaning your toothbrush helps:
* Reduce bacteria buildup: Less bacteria means a healthier mouth and reduced risk of gum disease.
* Prevent reinfection: If you’re sick, cleaning your toothbrush can help prevent you from reinfecting yourself.
* Extend the life of your toothbrush: Removing debris helps your toothbrush last longer.
Method 1: The Simple Rinse & Air Dry (Daily Habit)
This is the absolute minimum you should be doing after every single use. It’s quick, easy, and makes a big difference.
Step-by-Step Instructions:
1. Rinse Thoroughly: After brushing, rinse your toothbrush under running water for at least 30 seconds. Make sure to get all the bristles and the head of the brush. I like to use warm water, but cold water works too. The key is to be thorough!
2. Shake Off Excess Water: Give your toothbrush a good shake to remove as much excess water as possible. This helps it dry faster, which discourages bacterial growth.
3. Air Dry Upright: Store your toothbrush upright in a toothbrush holder, allowing it to air dry completely. Avoid storing it in a closed container or lying it flat, as this traps moisture and promotes bacterial growth. I prefer a holder with individual slots to prevent brushes from touching.
Method 2: Hydrogen Peroxide Soak (Weekly Deep Clean)
Hydrogen peroxide is a mild antiseptic that can effectively kill bacteria on your toothbrush. This is my go-to for a weekly deep clean.
Step-by-Step Instructions:
1. Rinse First: As always, start by rinsing your toothbrush thoroughly under running water to remove any loose debris.
2. Prepare the Solution: Pour a small amount of 3% hydrogen peroxide (the kind you find at the drugstore) into a clean cup. You only need enough to submerge the head of your toothbrush.
3. Soak the Toothbrush: Place your toothbrush head-down in the hydrogen peroxide solution, making sure the bristles are fully submerged.
4. Soak Time: Let the toothbrush soak for at least 5 minutes, but no more than 15 minutes. Soaking for too long can damage the bristles.
5. Rinse Again: After soaking, remove the toothbrush and rinse it thoroughly under running water to remove any remaining hydrogen peroxide.
6. Air Dry Upright: Allow the toothbrush to air dry upright in a toothbrush holder.
Method 3: Mouthwash Soak (Alternative Weekly Clean)
If you don’t have hydrogen peroxide on hand, mouthwash is another great option for sanitizing your toothbrush. Just make sure it’s an antibacterial mouthwash.
Step-by-Step Instructions:
1. Rinse First: Start by rinsing your toothbrush thoroughly under running water.
2. Prepare the Solution: Pour a small amount of antibacterial mouthwash into a clean cup. Again, you only need enough to submerge the head of your toothbrush.
3. Soak the Toothbrush: Place your toothbrush head-down in the mouthwash solution, ensuring the bristles are fully submerged.
4. Soak Time: Let the toothbrush soak for at least 30 minutes.
5. Rinse Again: After soaking, remove the toothbrush and rinse it thoroughly under running water to remove any remaining mouthwash.
6. Air Dry Upright: Allow the toothbrush to air dry upright in a toothbrush holder.
Method 4: Boiling Water (Emergency Sanitization)
This method is best used sparingly, as boiling water can damage the bristles of your toothbrush over time. I only use this when someone in my household has been sick.
Step-by-Step Instructions:
1. Boil Water: Bring a small pot of water to a rolling boil.
2. Submerge the Toothbrush Head: Carefully submerge the head of your toothbrush in the boiling water for about 2-3 minutes. Be careful not to burn yourself!
3. Remove and Cool: Remove the toothbrush from the boiling water and let it cool completely.
4. Rinse Thoroughly: Rinse the toothbrush thoroughly under running water to remove any debris.
5. Air Dry Upright: Allow the toothbrush to air dry upright in a toothbrush holder.
Important Note: Avoid boiling your toothbrush too frequently, as it can weaken the bristles and make them less effective at cleaning your teeth.
Method 5: UV Sanitizers (Tech-Savvy Cleaning)
UV sanitizers are becoming increasingly popular for cleaning toothbrushes. They use ultraviolet light to kill bacteria. While they can be a bit pricier, they offer a convenient and effective way to sanitize your toothbrush.
Step-by-Step Instructions:
1. Rinse First: As with all methods, start by rinsing your toothbrush thoroughly under running water.
2. Place in Sanitizer: Place your toothbrush in the UV sanitizer according to the manufacturer’s instructions.
3. Activate Sanitizer: Turn on the UV sanitizer and let it run for the recommended time (usually a few minutes).
4. Remove and Store: Once the sanitizing cycle is complete, remove your toothbrush and store it upright in a toothbrush holder.
Note: Always follow the manufacturer’s instructions for your specific UV sanitizer.
Method 6: Baking Soda Paste (Occasional Scrub)
Baking soda is a natural abrasive that can help remove stains and debris from your toothbrush. I use this method every few weeks to give my toothbrush a little extra cleaning power.
Step-by-Step Instructions:
1. Make a Paste: Mix a small amount of baking soda with a few drops of water to create a thick paste.
2. Apply to Toothbrush: Apply the baking soda paste to the bristles of your toothbrush.
3. Scrub Gently: Gently scrub the bristles with the paste for about a minute.
4. Rinse Thoroughly: Rinse the toothbrush thoroughly under running water to remove all traces of baking soda.
5. Air Dry Upright: Allow the toothbrush to air dry upright in a toothbrush holder.
Extra Tips for Toothbrush Hygiene:
* Replace Your Toothbrush Regularly: The American Dental Association recommends replacing your toothbrush every 3-4 months, or sooner if the bristles are frayed or you’ve been sick.
* Don’t Share Toothbrushes: Sharing toothbrushes can spread germs and bacteria.
* Store Toothbrushes Separately: If you have multiple toothbrushes in your household, make sure they don’t touch each other in the toothbrush holder.
* Clean Your Toothbrush Holder: Don’t forget to clean your toothbrush holder regularly to prevent bacteria buildup. I usually wash mine with soap and water every week or so.
* Consider a Toothbrush Cover (with caution): While a toothbrush cover can protect your toothbrush from airborne particles, it can also trap moisture and promote bacterial growth. If you use a cover, make sure your toothbrush is completely dry before covering it, and clean the cover regularly. I personally avoid them unless traveling.
* Travel Smart: When traveling, store your toothbrush in a breathable container to allow it to air dry.
Choosing the Right Method for You
The best toothbrush cleaning method for you will depend on your personal preferences and lifestyle. I recommend incorporating the simple rinse and air dry into your daily routine, and then choosing one or two of the other methods for a weekly deep clean.
Remember: A clean toothbrush is essential for maintaining good oral hygiene and protecting your overall health. By following these simple DIY methods, you can keep your toothbrush clean, your mouth healthy, and your smile sparkling!

Conclusion
So, there you have it! This simple yet incredibly effective DIY toothbrush cleaning trick is a game-changer for your oral hygiene routine. It’s not just about keeping your toothbrush looking clean; it’s about eliminating harmful bacteria that can compromise your health. Think about it: your toothbrush is constantly exposed to the environment in your bathroom, picking up germs and bacteria with every use. While rinsing it under water helps, it doesn’t eliminate everything. This DIY method goes the extra mile, ensuring a truly clean and sanitized toothbrush.
Why is this a must-try? Because it’s easy, affordable, and significantly improves your oral health. You likely already have the necessary ingredients in your home, making it a convenient solution. Plus, a clean toothbrush means a more effective clean for your teeth and gums, contributing to fresher breath and a brighter smile. Who wouldn’t want that?
But don’t just take our word for it! We encourage you to try this DIY toothbrush cleaning method for yourself. Experiment with different variations to find what works best for you. For example, if you prefer a more natural approach, you can substitute the hydrogen peroxide with a mixture of baking soda and water. Simply create a paste and soak your toothbrush in it for the same amount of time. Another variation involves using a denture cleaner tablet dissolved in water. This is particularly effective for removing stubborn buildup. You could also add a few drops of essential oils like tea tree or peppermint for their antibacterial properties and a refreshing scent. Just be sure to use food-grade essential oils and rinse your toothbrush thoroughly before use.
This DIY toothbrush cleaning hack is a small investment of time that yields significant returns in terms of your oral health and overall well-being.
We’re confident that you’ll be amazed by the results. Once you’ve tried it, we’d love to hear about your experience! Share your thoughts, tips, and variations in the comments below. Let’s create a community of healthy smiles and sparkling clean toothbrushes! Don’t hesitate to share this article with your friends and family so they can benefit from this simple yet powerful trick as well. Let’s all commit to better oral hygiene, one clean toothbrush at a time!
Frequently Asked Questions (FAQs)
How often should I clean my toothbrush using this DIY method?
We recommend cleaning your toothbrush using this DIY method at least once a week. However, if you’ve been sick, it’s a good idea to clean it more frequently, perhaps even daily, to prevent re-infection. Also, consider cleaning it more often if you notice any visible buildup or discoloration on the bristles. Regular cleaning will help maintain optimal hygiene and extend the life of your toothbrush. Remember, consistency is key to reaping the full benefits of this cleaning hack.
Is it safe to use hydrogen peroxide on my toothbrush?
Yes, it is generally safe to use 3% hydrogen peroxide on your toothbrush, as long as you rinse it thoroughly with water before using it to brush your teeth. Hydrogen peroxide is a mild antiseptic and disinfectant that can effectively kill bacteria. However, it’s important to use the correct concentration (3%) and avoid swallowing any of the solution. If you have sensitive gums or any concerns, you can dilute the hydrogen peroxide with an equal amount of water. Always err on the side of caution and consult with your dentist if you have any specific questions or concerns.
Can I use mouthwash instead of hydrogen peroxide?
While mouthwash can help to kill some bacteria on your toothbrush, it’s not as effective as hydrogen peroxide or other dedicated cleaning solutions. Mouthwash is designed for rinsing your mouth, not necessarily for deep cleaning a toothbrush. If you choose to use mouthwash, opt for an antibacterial variety and ensure that you soak the toothbrush for at least 30 minutes. However, for optimal cleaning, we still recommend using hydrogen peroxide or another method specifically designed for toothbrush sanitation.
Will this DIY cleaning method damage my toothbrush bristles?
When done correctly, this DIY cleaning method should not damage your toothbrush bristles. However, it’s important to avoid using harsh chemicals or abrasive cleaners, as these can weaken or break down the bristles. Also, avoid soaking your toothbrush for extended periods of time, as this can also damage the bristles. Follow the recommended soaking time and use gentle cleaning solutions to ensure that your toothbrush remains in good condition. If you notice any signs of damage, such as frayed or broken bristles, it’s time to replace your toothbrush.
How do I know when it’s time to replace my toothbrush?
The American Dental Association recommends replacing your toothbrush every three to four months, or sooner if the bristles are frayed or worn. Even if the bristles look fine, bacteria can accumulate over time, making the toothbrush less effective. Also, replace your toothbrush after you’ve been sick to prevent re-infection. Pay attention to the condition of your toothbrush and replace it regularly to maintain optimal oral hygiene.
Can I use this method on electric toothbrush heads?
Yes, you can use this DIY cleaning method on electric toothbrush heads. However, be sure to remove the toothbrush head from the handle before soaking it in the cleaning solution. Avoid submerging the entire electric toothbrush handle in water, as this can damage the internal components. Follow the same instructions as for a regular toothbrush, ensuring that you rinse the toothbrush head thoroughly before using it.
What are some other ways to keep my toothbrush clean?
In addition to this DIY cleaning method, there are several other things you can do to keep your toothbrush clean. Always rinse your toothbrush thoroughly with water after each use to remove any food particles or toothpaste residue. Store your toothbrush upright in a dry, open container to allow it to air dry. Avoid storing your toothbrush in a closed container, as this can create a moist environment that promotes bacterial growth. Don’t share your toothbrush with others, as this can spread germs and bacteria. And finally, consider using a toothbrush sanitizer to further reduce the number of bacteria on your toothbrush.
Is it necessary to clean my toothbrush if I use an antibacterial toothpaste?
Yes, it is still necessary to clean your toothbrush even if you use an antibacterial toothpaste. While antibacterial toothpaste can help to kill some bacteria in your mouth, it doesn’t eliminate all of the bacteria on your toothbrush. Cleaning your toothbrush regularly will help to remove any remaining bacteria and prevent them from multiplying. Think of it as a double defense against harmful bacteria, ensuring a cleaner and healthier mouth.
Can I use boiling water to clean my toothbrush?
While boiling water can kill bacteria, it’s not recommended for cleaning your toothbrush. The high temperature can damage the bristles and shorten the lifespan of your toothbrush. Stick to the recommended cleaning solutions and methods to avoid damaging your toothbrush.
What if I don’t have hydrogen peroxide? What else can I use?
If you don’t have hydrogen peroxide, you can use a mixture of baking soda and water, as mentioned earlier. Another option is to use a denture cleaner tablet dissolved in water. You can also use vinegar, which has antibacterial properties. Just be sure to rinse your toothbrush thoroughly after soaking it in vinegar, as it can have a strong odor. Ultimately, the best alternative will depend on your personal preferences and what you have available.
Leave a Comment