
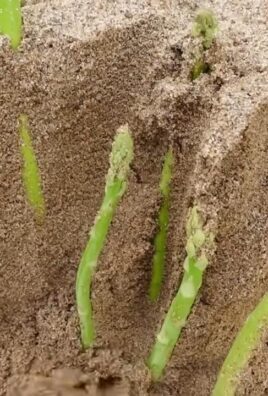
Tomato growing method: Ever dream of biting into a sun-warmed, juicy tomato fresh from your own garden? I know I have! There’s just something incredibly satisfying about nurturing a plant from a tiny seed to a bountiful harvest. But let’s be honest, sometimes growing tomatoes can feel more like a battle against pests, diseases, and unpredictable weather than a relaxing hobby.
Tomatoes have a rich history, originating in South America and gradually making their way into cuisines worldwide. From the vibrant sauces of Italy to the refreshing salads of the Mediterranean, tomatoes are a culinary staple. But achieving that perfect tomato flavor at home can be tricky. That’s where these DIY tricks and hacks come in!
I’ve compiled a collection of simple, yet effective, techniques that will transform your tomato growing method and help you yield the most delicious and abundant crop possible. Whether you’re a seasoned gardener or just starting out, these tips will empower you to overcome common challenges and unlock the secrets to tomato-growing success. Forget store-bought, bland tomatoes – get ready to enjoy the unparalleled taste of homegrown goodness. Let’s dive in and get our hands dirty!
DIY Upside-Down Tomato Planter: Bountiful Harvests from Above!
Hey there, fellow gardening enthusiasts! I’m so excited to share one of my favorite DIY projects with you: building an upside-down tomato planter. This method is not only a space-saver, perfect for balconies or small patios, but it also helps keep pests at bay and can lead to a surprisingly abundant harvest. Trust me, once you try this, you’ll be hooked!
Why Upside-Down Tomatoes?
Before we dive into the how-to, let’s quickly chat about why this method is so awesome.
* Space Saving: Ideal for small spaces like balconies, patios, or even hanging from a sturdy tree branch.
* Pest Control: Less contact with soil means fewer soil-borne pests and diseases.
* Better Air Circulation: Improved airflow around the plant reduces the risk of fungal issues.
* Easy Harvesting: Tomatoes hang down, making them super easy to pick.
* Unique and Eye-Catching: Let’s be honest, it looks pretty cool!
What You’ll Need
Okay, let’s gather our supplies. This is a relatively inexpensive project, and you probably have some of these items lying around already.
* A 5-Gallon Bucket (or similar): Plastic is best, and dark colors absorb heat better, which tomatoes love.
* A Healthy Tomato Seedling: Choose a determinate (bush) variety for best results. Cherry tomatoes and Roma tomatoes are great choices.
* Potting Mix: High-quality potting mix is crucial for healthy growth.
* Landscape Fabric (or burlap): This will help keep the soil from falling out of the hole.
* A Sharp Knife or Drill: For cutting the hole in the bucket.
* Measuring Tape or Ruler: To accurately measure the hole.
* Gloves: To protect your hands.
* Watering Can or Hose: For watering your tomato plant.
* Fertilizer (Optional): Tomato-specific fertilizer will boost growth and fruit production.
* Eye Protection: Safety first!
Step-by-Step Instructions: Building Your Upside-Down Tomato Planter
Alright, let’s get our hands dirty! Follow these steps carefully, and you’ll have your upside-down tomato planter ready in no time.
1. Prepare the Bucket:
* First, clean the bucket thoroughly with soap and water. This will remove any dirt or residue that could harm your plant.
* Next, measure the diameter of the tomato seedling’s root ball. You’ll want to cut a hole in the bottom of the bucket that’s just big enough for the root ball to fit through snugly. A 2-3 inch diameter hole is usually sufficient.
* Using your sharp knife or drill, carefully cut the hole in the center of the bottom of the bucket. Be extra cautious when using a knife! If using a drill, use a hole saw attachment for a clean, round hole.
* Smooth the edges of the hole to prevent any damage to the tomato plant’s stem.
2. Line the Hole with Landscape Fabric:
* Cut a square of landscape fabric or burlap that’s slightly larger than the hole you just cut.
* Make a small slit in the center of the fabric.
* Carefully push the fabric through the hole from the inside of the bucket, so it lines the edges of the hole. This will act as a barrier to prevent soil from falling out. You can secure it with a bit of hot glue if you want, but it’s usually not necessary.
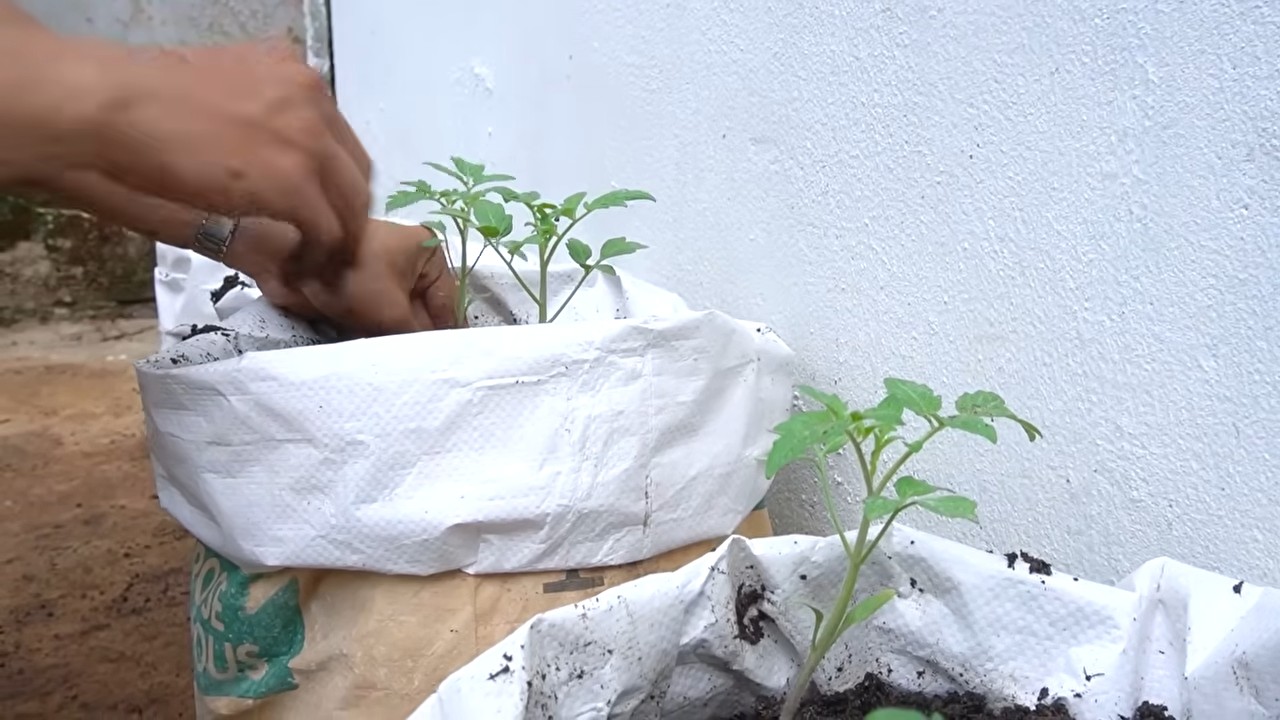
3. Plant the Tomato Seedling:
* Gently turn the bucket upside down (so the hole is facing down).
* Carefully insert the tomato seedling’s root ball through the hole. Be gentle! You don’t want to damage the plant.
* Position the plant so that the leaves are hanging down.
* Gently pack some potting mix around the root ball from the inside of the bucket to secure the plant in place.
4. Fill the Bucket with Potting Mix:
* Now, fill the rest of the bucket with high-quality potting mix. Leave a few inches of space at the top for watering.
* Gently pat down the soil to remove any air pockets.
5. Water Thoroughly:
* Water the tomato plant thoroughly until water drains out of the hole in the bottom. This will help settle the soil and ensure the roots are well-hydrated.
6. Choose a Sunny Location:
* Tomatoes need at least 6-8 hours of sunlight per day, so choose a location that gets plenty of sun.
* Make sure the location is also protected from strong winds, which can damage the plant.
7. Hang the Planter:
* This is where the handle of the bucket comes in handy! Use a sturdy hook, chain, or rope to hang the planter from a strong support, such as a tree branch, pergola, or balcony railing.
* Make sure the support is strong enough to hold the weight of the planter, especially when it’s full of soil and water.
Maintaining Your Upside-Down Tomato Plant
Now that your upside-down tomato planter is set up, it’s important to provide proper care to ensure a healthy and productive plant.
1. Watering:
* Water your tomato plant regularly, especially during hot, dry weather. Check the soil moisture by sticking your finger into the soil. If the top inch feels dry, it’s time to water.
* Water deeply, until water drains out of the hole in the bottom.
* Avoid overwatering, as this can lead to root rot.
2. Fertilizing:
* Feed your tomato plant with a tomato-specific fertilizer every 2-3 weeks. Follow the instructions on the fertilizer package.
* Fertilizing will provide the plant with the nutrients it needs to grow and produce fruit.
3. Pruning:
* Prune your tomato plant regularly to remove suckers (the small shoots that grow between the main stem and the branches).
* Pruning will help improve air circulation and encourage the plant to focus its energy on producing fruit.
4. Pest Control:
* Inspect your tomato plant regularly for pests, such as aphids, whiteflies, and tomato hornworms.
* If you find any pests, treat them with an appropriate insecticide or organic pest control method.
* The upside-down planting method helps to reduce pest problems, but it’s still important to be vigilant.
5. Support:
* As the tomato plant grows and produces fruit, it may become heavy and require additional support.
* You can use twine or plant ties to support the branches and prevent them from breaking.
Troubleshooting
Even with the best care, you might encounter some challenges along the way. Here are a few common issues and how to address them:
* Yellowing Leaves: This could be a sign of overwatering, underwatering, nutrient deficiency, or disease. Check the soil moisture, fertilize if necessary, and inspect the plant for signs of disease.
* Blossom End Rot: This is caused by a calcium deficiency. Ensure consistent watering and consider adding calcium to the soil.
* Lack of Fruit: This could be due to insufficient sunlight, poor pollination, or nutrient deficiency. Make sure the plant is getting enough sun, hand-pollinate the flowers if necessary, and fertilize regularly.
* Pests: As mentioned earlier, inspect your plant regularly for pests and treat them accordingly.
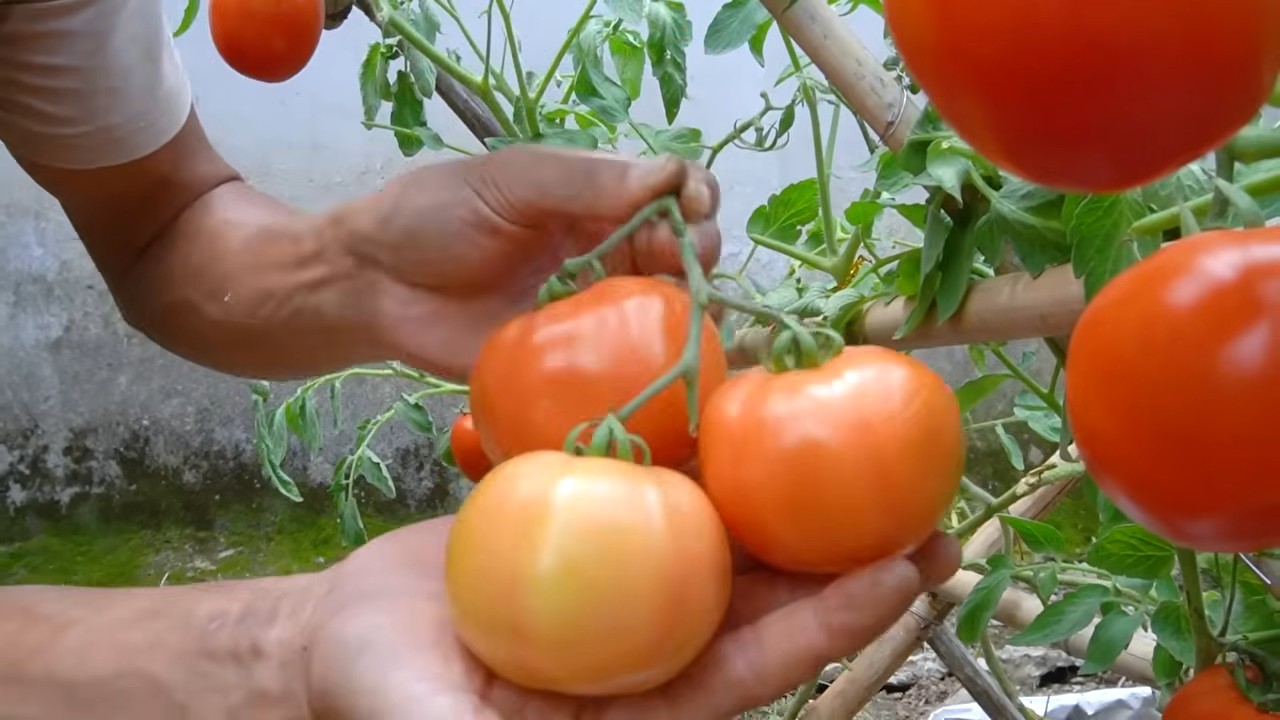
Harvesting Your Tomatoes
The best part! You’ll know your tomatoes are ready to harvest when they are fully colored and slightly soft to the touch. Gently twist the tomato from the vine. Enjoy your homegrown, delicious tomatoes!
Choosing the Right Tomato Variety
I mentioned this earlier, but it’s worth reiterating: determinate (bush) tomato varieties are generally better suited for upside-down planters. These varieties tend to be more compact and produce a large crop all at once. Indeterminate (vining) varieties can also be grown, but they may require more pruning and support. Some popular choices for upside-down planters include:
* Cherry Tomatoes: These are small, sweet, and prolific producers.
* Roma Tomatoes: These are great for making sauces and pastes.
* Patio Tomatoes: These are compact and well-suited for containers.
* Tumbling Tom Tomatoes: Bred specifically for hanging baskets and containers.
Tips for Success
Here are a few extra tips to help you get the most out of your upside-down tomato planter:
* Use a dark-colored bucket: Dark colors absorb heat better, which tomatoes love.
* Add drainage holes
Conclusion
So, there you have it! This simple yet incredibly effective DIY tomato growing method is more than just a gardening hack; it’s a pathway to a bountiful harvest of delicious, homegrown tomatoes. We’ve walked through the steps, highlighting the benefits of this approach, from improved drainage and aeration to enhanced nutrient delivery and reduced water waste. By implementing this technique, you’re not just growing tomatoes; you’re cultivating a healthier, more resilient garden ecosystem.
Think about the possibilities! Imagine biting into a sun-ripened tomato, bursting with flavor, knowing that you nurtured it from seedling to table using your own ingenuity. This method empowers you to take control of your food source, reduce your reliance on store-bought produce, and connect with the natural world in a meaningful way.
But the beauty of this DIY tomato growing method lies not only in its effectiveness but also in its adaptability. Feel free to experiment with different variations to suit your specific needs and preferences. For instance, if you live in a particularly hot climate, consider using a lighter-colored container to reflect sunlight and prevent the soil from overheating. You could also incorporate companion planting techniques, such as interplanting basil or marigolds with your tomatoes, to deter pests and attract beneficial insects.
Another exciting variation involves using different types of organic matter to enrich the soil. Compost, aged manure, and even coffee grounds can be added to the planting hole to provide essential nutrients and improve soil structure. Remember to research the specific needs of your tomato variety and adjust your approach accordingly.
Don’t be afraid to get creative and personalize this method to make it your own. The key is to understand the underlying principles – good drainage, adequate aeration, and consistent nutrient supply – and then adapt the technique to fit your unique circumstances.
We are confident that this DIY tomato growing method will revolutionize your gardening experience. It’s a simple, cost-effective, and environmentally friendly way to grow healthier, more flavorful tomatoes. But don’t just take our word for it – try it out for yourself!
We encourage you to embark on this gardening adventure and share your experiences with us. Let us know what works best for you, what challenges you encounter, and what delicious tomato recipes you create with your homegrown bounty. Your feedback will help us refine this method and inspire other gardeners to embrace the joy of growing their own food.
So, grab your gardening gloves, gather your supplies, and get ready to experience the satisfaction of growing your own thriving tomato plants. With a little effort and this simple DIY trick, you’ll be enjoying a bumper crop of juicy, flavorful tomatoes in no time. Happy gardening!
Frequently Asked Questions (FAQ)
What type of container is best for this DIY tomato growing method?
The ideal container should be large enough to accommodate the mature size of your tomato plant and have adequate drainage. A 5-gallon bucket or a large plastic pot with drainage holes is a good starting point. You can also repurpose old containers, such as plastic storage bins or even tires, as long as they are clean and have drainage holes. Consider the material of the container as well. Dark-colored containers can absorb heat, which may be beneficial in cooler climates but detrimental in hotter regions. Lighter-colored containers or those made from breathable materials like fabric pots can help regulate soil temperature.
How often should I water my tomato plants using this method?
Watering frequency depends on several factors, including the weather, the type of soil, and the size of the plant. As a general rule, water deeply and thoroughly when the top inch of soil feels dry to the touch. Avoid overwatering, as this can lead to root rot. During hot, dry weather, you may need to water daily, while during cooler, wetter periods, you may only need to water every few days. The key is to monitor the soil moisture and adjust your watering schedule accordingly. The drainage holes in the container will help prevent waterlogging.
What type of soil is best for growing tomatoes in containers?
A well-draining potting mix is essential for growing healthy tomatoes in containers. Avoid using garden soil, as it can become compacted and restrict drainage. A good potting mix should contain a blend of peat moss, perlite, and vermiculite. You can also add compost or other organic matter to improve soil fertility and drainage. Look for a potting mix specifically formulated for vegetables or tomatoes.
How much sunlight do tomato plants need?
Tomato plants need at least 6-8 hours of direct sunlight per day to thrive. Choose a location that receives plenty of sunlight throughout the day. If you live in a particularly hot climate, you may need to provide some afternoon shade to prevent the plants from overheating. If you don’t have a sunny spot, you can supplement with grow lights.
What type of fertilizer should I use for my tomato plants?
Tomatoes are heavy feeders and require regular fertilization to produce a bountiful harvest. Use a balanced fertilizer specifically formulated for tomatoes or vegetables. Look for a fertilizer with a higher phosphorus content (the middle number) to promote flowering and fruit development. Follow the instructions on the fertilizer package for application rates and frequency. You can also supplement with organic fertilizers, such as compost tea or fish emulsion.
How do I prevent pests and diseases from affecting my tomato plants?
Prevention is key when it comes to pests and diseases. Start by choosing disease-resistant tomato varieties. Inspect your plants regularly for signs of pests or diseases. Remove any affected leaves or plants immediately. You can also use organic pest control methods, such as insecticidal soap or neem oil. Companion planting, such as interplanting basil or marigolds with your tomatoes, can also help deter pests. Ensure good air circulation around your plants to prevent fungal diseases.
Can I grow different varieties of tomatoes using this method?
Yes, you can grow different varieties of tomatoes using this method. However, it’s important to choose varieties that are well-suited to container gardening. Determinate varieties, which are bushier and more compact, are generally better suited for containers than indeterminate varieties, which are vining and require staking or caging. Be sure to provide adequate support for your tomato plants, regardless of the variety.
What do I do if my tomato plant is not producing fruit?
There are several reasons why your tomato plant may not be producing fruit. One common cause is lack of pollination. Tomatoes are self-pollinating, but they may need some help from wind or insects to transfer pollen. You can gently shake the plant or use a small brush to transfer pollen from one flower to another. Other possible causes include insufficient sunlight, lack of nutrients, or extreme temperatures. Ensure that your plant is receiving adequate sunlight, fertilizer, and water.
How do I know when my tomatoes are ripe?
Tomatoes are typically ripe when they have reached their full color and are slightly soft to the touch. The exact color will depend on the variety of tomato. Gently twist the tomato off the vine. If it comes off easily, it’s ripe. If it’s difficult to remove, it’s not quite ready.
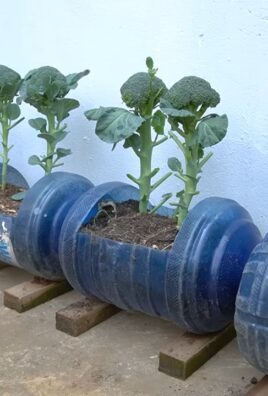
Can I use this method for other vegetables besides tomatoes?
While this method is particularly well-suited for tomatoes, it can also be adapted for other vegetables that require good drainage and aeration, such as peppers, eggplants, and cucumbers. Adjust the size of the container and the type of soil to suit the specific needs of the vegetable you are growing.
Leave a Comment