
Thyme plant indoor care might seem daunting, but trust me, bringing the fragrant charm of this herb indoors is easier than you think! Have you ever dreamt of snipping fresh thyme sprigs right from your kitchen windowsill to elevate your culinary creations? Well, dream no more! This DIY guide is your passport to a thriving indoor thyme garden.
Thyme, with its rich history dating back to ancient Egypt and Greece, wasn’t just prized for its culinary uses. It was also revered for its medicinal properties and even used in embalming rituals! Imagine, a plant so versatile it could flavor your dinner and preserve a pharaoh! Today, while we might not be embalming anyone, we can certainly appreciate thyme’s ability to enhance our lives.
But why bother with thyme plant indoor care? Because having fresh herbs at your fingertips is a game-changer! No more last-minute grocery store runs or settling for dried, flavorless substitutes. Plus, growing your own thyme is incredibly rewarding and adds a touch of greenery to your home. I’m going to share some simple yet effective tricks and hacks that will ensure your thyme plant thrives indoors, providing you with a constant supply of this aromatic herb. Let’s get started!
Growing Thriving Thyme Indoors: A DIY Guide
Okay, thyme lovers! So you want to bring the fragrant, earthy goodness of thyme indoors? Awesome! I’m here to guide you through the process. Growing thyme indoors is totally achievable, and with a little know-how, you can have a flourishing herb garden right on your windowsill. Let’s dive in!
Choosing the Right Thyme and Pot
Before we even think about planting, we need to make some crucial decisions.
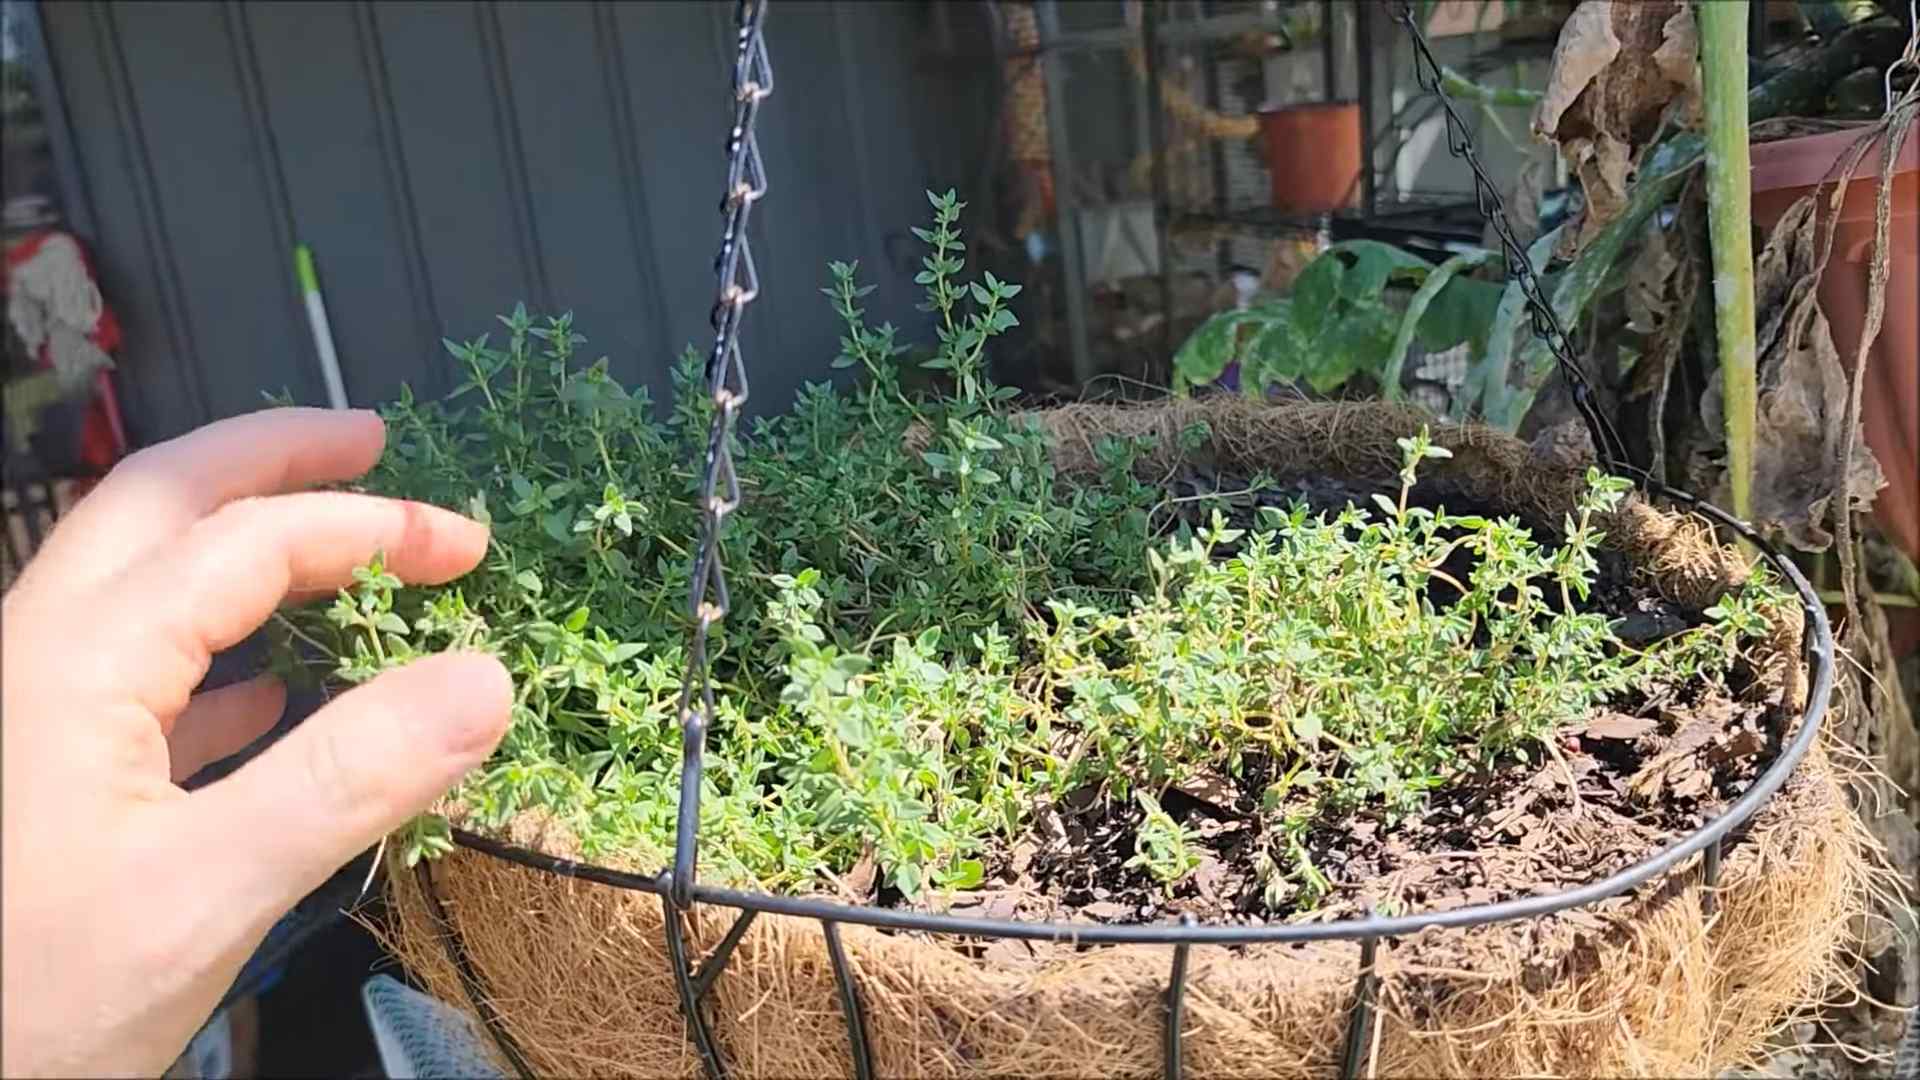
* Thyme Variety: Not all thyme is created equal! While all thyme is delicious, some varieties are better suited for indoor growing. I recommend starting with common thyme (Thymus vulgaris) or lemon thyme (Thymus citriodorus). They’re relatively easy to care for and adapt well to indoor conditions. Creeping thyme, while beautiful, can be a bit more challenging indoors due to its spreading nature.
* Pot Selection: Drainage is KEY! Thyme hates soggy roots. Choose a pot that’s at least 6 inches in diameter and has plenty of drainage holes. Terracotta pots are fantastic because they’re porous and allow the soil to dry out more quickly. Plastic pots work too, but you’ll need to be extra careful not to overwater.
* Potting Mix: Don’t just grab any old soil! Thyme needs well-draining soil. A mix of potting soil, perlite, and coarse sand is ideal. I usually go for a ratio of 2 parts potting soil, 1 part perlite, and 1 part sand. This combination ensures good drainage and aeration, which thyme absolutely loves. You can also buy a pre-made herb potting mix, which is super convenient.
Planting Your Thyme
Alright, let’s get our hands dirty!
1. Prepare the Pot: Place a layer of gravel or small stones at the bottom of your pot to further improve drainage. This is an extra step, but I find it really helps prevent root rot.
2. Add Soil: Fill the pot with your well-draining potting mix, leaving about an inch of space at the top.
3. Planting the Thyme: If you’re starting with a thyme plant from a nursery, gently loosen the roots before planting. Dig a small hole in the center of the pot and place the thyme plant in the hole. Make sure the top of the root ball is level with the soil surface. If you’re starting from seeds, sprinkle them evenly over the soil surface and lightly cover them with a thin layer of soil.
4. Water Thoroughly: After planting, water the thyme thoroughly until water drains out of the drainage holes. This helps settle the soil and gets the roots off to a good start.
Light, Water, and Air: The Thyme Trifecta
Now that your thyme is planted, it’s time to focus on providing the right environment for it to thrive.
* Light: Thyme needs at least 6-8 hours of direct sunlight per day. A south-facing window is ideal. If you don’t have enough natural light, you can supplement with a grow light. I’ve had great success using LED grow lights, which are energy-efficient and provide the right spectrum of light for plant growth.
* Watering: This is where things can get tricky. Overwatering is the biggest killer of thyme. Water only when the top inch of soil feels dry to the touch. When you do water, water thoroughly until water drains out of the drainage holes. Then, let the soil dry out again before watering again. During the winter months, when growth slows down, you’ll need to water even less frequently.
* Air Circulation: Thyme loves good air circulation. This helps prevent fungal diseases and keeps the plant healthy. Open a window occasionally or use a small fan to circulate the air around your thyme plant.
Fertilizing and Pruning
A little TLC goes a long way!
* Fertilizing: Thyme doesn’t need a lot of fertilizer. In fact, too much fertilizer can make it leggy and less flavorful. I recommend fertilizing sparingly, about once a month during the growing season (spring and summer), with a diluted liquid fertilizer. Look for a fertilizer that’s specifically formulated for herbs.
* Pruning: Pruning is essential for keeping your thyme plant bushy and productive. Regularly pinch back the tips of the stems to encourage branching. You can also harvest sprigs of thyme as needed for cooking. Don’t be afraid to prune your thyme plant fairly heavily – it will bounce back stronger than ever! I usually prune mine every few weeks to keep it compact and prevent it from getting too woody.
Dealing with Pests and Problems
Even with the best care, problems can sometimes arise.
* Pests: Thyme is relatively pest-resistant, but it can occasionally be bothered by aphids or spider mites. If you notice any pests, try spraying them off with a strong stream of water. You can also use insecticidal soap or neem oil to control pests.
* Root Rot: As I mentioned earlier, root rot is a common problem with thyme, especially if it’s overwatered. If you suspect root rot, stop watering immediately and allow the soil to dry out completely. You may also need to repot the thyme plant in fresh, well-draining soil.
* Leggy Growth: If your thyme plant is getting leggy (long, spindly stems with few leaves), it’s probably not getting enough light. Move it to a sunnier location or supplement with a grow light. Regular pruning can also help prevent leggy growth.
Harvesting Your Thyme
The best part!
* When to Harvest: You can start harvesting thyme as soon as the plant is established, usually after a few weeks. The flavor of thyme is most intense just before it flowers.
* How to Harvest: Use scissors or pruning shears to cut off sprigs of thyme. Avoid cutting off more than one-third of the plant at a time.
* Using Your Thyme: Fresh thyme is delicious in soups, stews, sauces, and roasted vegetables. You can also dry thyme for later use. To dry thyme, simply hang sprigs upside down in a cool, dry place until they are completely dry. Then, crumble the dried leaves and store them in an airtight container.
Troubleshooting Common Issues
Let’s tackle some common problems you might encounter.
* Yellowing Leaves: Yellowing leaves can indicate several issues, including overwatering, underwatering, nutrient deficiency, or pest infestation. Check the soil moisture, look for pests, and consider fertilizing if necessary.
* Drooping Stems: Drooping stems are often a sign of underwatering. Water thoroughly and see if the stems perk up.
* Lack of Flavor: If your thyme doesn’t have a strong flavor, it may not be getting enough sunlight or nutrients. Make sure it’s in a sunny location and fertilize sparingly.
Propagating Thyme
Want more thyme? It’s easy to propagate!
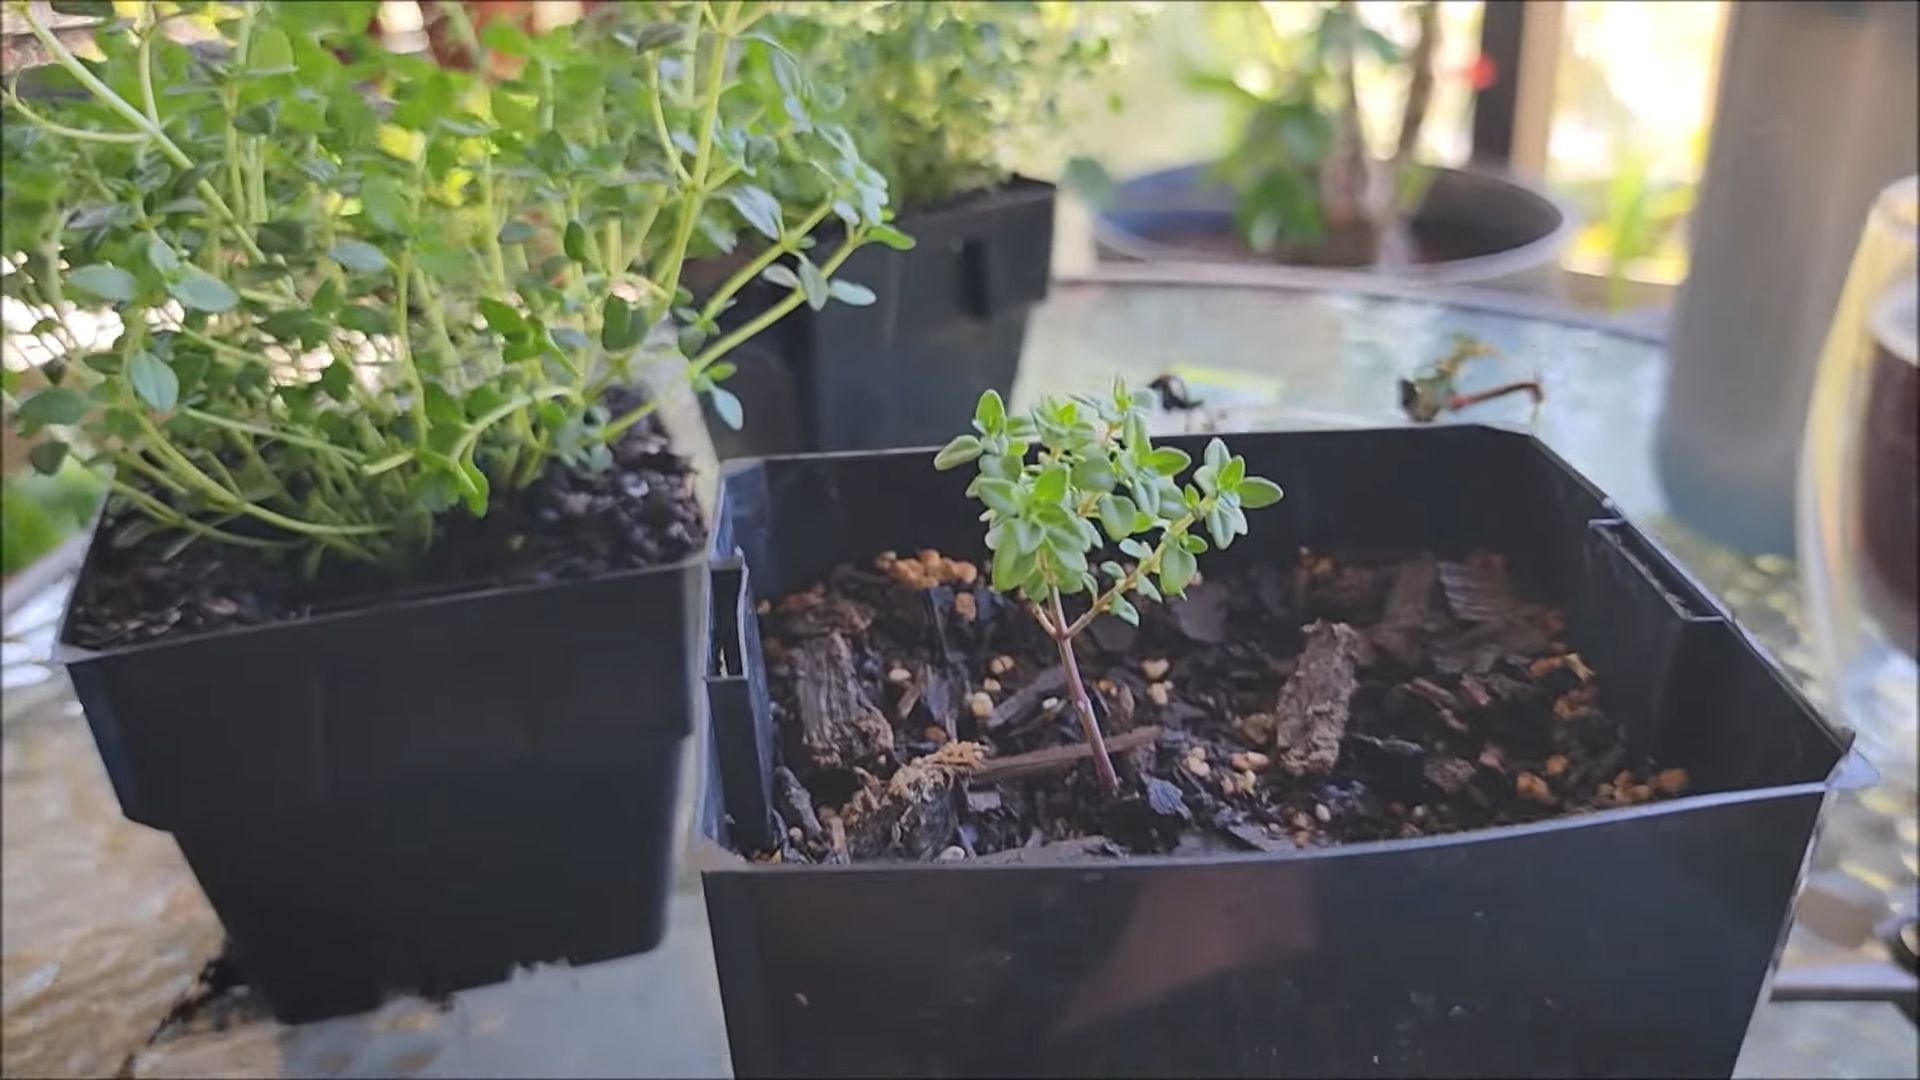
* Stem Cuttings: The easiest way to propagate thyme is through stem cuttings. Take a 4-6 inch cutting from a healthy thyme plant. Remove the lower leaves and dip the cut end in rooting hormone (optional). Plant the cutting in a small pot filled with well-draining potting mix. Keep the soil moist and place the pot in a warm, bright location. The cutting should root in a few weeks.
* Division: You can also propagate thyme by dividing a mature plant. Gently dig up the plant and separate the roots into smaller clumps. Replant the clumps in separate pots.
Enjoying Your Indoor Thyme Garden
Growing thyme indoors is a rewarding experience. Not only do you get to enjoy the fresh, fragrant aroma of thyme, but you also have a readily available supply of this versatile herb for cooking. With a little care and attention, you can have a thriving thyme garden right on your windowsill. Happy growing!
Conclusion
So, there you have it! Bringing the fresh, aromatic scent and flavor of thyme indoors is not only achievable but also incredibly rewarding. This DIY approach to thyme plant indoor care offers a sustainable and cost-effective way to enjoy this versatile herb year-round, regardless of your outdoor climate. Forget those wilted, overpriced sprigs from the grocery store – imagine stepping into your kitchen and snipping fresh thyme leaves whenever inspiration strikes.
This isn’t just about having a pretty plant on your windowsill; it’s about cultivating a connection with nature, enhancing your culinary creations, and even boosting your well-being. The simple act of tending to your thyme plant can be surprisingly therapeutic, offering a moment of calm amidst the hustle and bustle of daily life.
Why is this DIY trick a must-try? Because it empowers you to control the quality and freshness of your thyme, reduces your reliance on commercially grown herbs (often treated with pesticides), and adds a touch of green to your indoor space. Plus, it’s a fantastic learning experience, teaching you about plant care and the interconnectedness of our food systems.
But don’t stop there! Experiment with different varieties of thyme. Lemon thyme adds a citrusy zing to your dishes, while creeping thyme can be used as a fragrant ground cover in miniature indoor gardens. You can also try propagating your thyme plant from cuttings, expanding your herb collection without spending a dime. Consider using different types of containers, from terracotta pots to repurposed mason jars, to add a personal touch to your indoor garden.
We encourage you to embrace this DIY thyme plant indoor care guide and embark on your own indoor herb-growing adventure. Don’t be afraid to experiment, learn from your mistakes, and most importantly, have fun! We’re confident that you’ll be amazed at how easy and rewarding it is to grow your own thyme indoors.
Once you’ve given it a try, we’d love to hear about your experience! Share your tips, tricks, and photos in the comments below. Let’s create a community of indoor herb enthusiasts and inspire others to bring the joy of gardening indoors. What challenges did you face? What successes did you celebrate? Your insights could be invaluable to someone just starting out. So, grab your potting mix, find a sunny spot, and get ready to enjoy the delightful aroma and flavor of homegrown thyme!
Frequently Asked Questions (FAQ)
What kind of soil is best for growing thyme indoors?
Thyme thrives in well-draining soil. A mixture of potting soil, perlite, and sand is ideal. This combination ensures that the roots don’t sit in soggy soil, which can lead to root rot. Aim for a soil pH between 6.0 and 7.0. You can purchase pre-mixed succulent or cactus soil, which often has the right drainage properties for thyme. Avoid using heavy garden soil, as it tends to retain too much moisture.
How much sunlight does indoor thyme need?
Thyme needs at least six hours of direct sunlight per day to thrive indoors. A south-facing window is usually the best option. If you don’t have enough natural light, consider using a grow light to supplement. Position the grow light a few inches above the plant and keep it on for 12-14 hours per day. Insufficient light can lead to leggy growth and a lack of flavor in the leaves. Rotate the plant regularly to ensure even light exposure on all sides.
How often should I water my indoor thyme plant?
Water your thyme plant only when the top inch of soil feels dry to the touch. Overwatering is a common mistake that can lead to root rot. When you do water, water thoroughly until the water drains out of the bottom of the pot. Then, allow the soil to dry out again before watering again. During the winter months, when the plant is not actively growing, you may need to water less frequently. Always check the soil moisture before watering.
What are some common problems with indoor thyme and how can I fix them?
Common problems include root rot (due to overwatering), leggy growth (due to insufficient light), and pests like aphids or spider mites. To prevent root rot, ensure proper drainage and avoid overwatering. For leggy growth, provide more sunlight or use a grow light. If you notice pests, try spraying the plant with insecticidal soap or neem oil. You can also manually remove pests with a cotton swab dipped in rubbing alcohol. Regularly inspect your plant for signs of pests or disease.
Can I propagate thyme from cuttings?
Yes, propagating thyme from cuttings is a relatively easy way to expand your herb collection. Take a 4-6 inch cutting from a healthy stem, removing the lower leaves. Dip the cut end in rooting hormone (optional) and plant it in a small pot filled with well-draining potting mix. Keep the soil moist but not soggy, and place the pot in a warm, bright location. Roots should develop within a few weeks. Once the cutting has established roots, you can transplant it into a larger pot.
How do I harvest thyme from my indoor plant?
Harvest thyme by snipping off stems with clean scissors or pruning shears. Avoid removing more than one-third of the plant at a time, as this can stress the plant. The best time to harvest thyme is in the morning, after the dew has dried. Regular harvesting encourages bushier growth. You can use fresh thyme immediately or dry it for later use. To dry thyme, hang the stems upside down in a cool, dry place or use a dehydrator.
Does thyme need fertilizer?
Thyme doesn’t require heavy fertilization. However, you can feed it with a diluted balanced liquid fertilizer every few months during the growing season (spring and summer). Avoid over-fertilizing, as this can lead to leggy growth and a loss of flavor. A fertilizer formulated for herbs is a good choice. Always follow the instructions on the fertilizer label.
How do I keep my indoor thyme plant from getting too leggy?
Leggy growth is often caused by insufficient light. Ensure your thyme plant receives at least six hours of direct sunlight per day or supplement with a grow light. Pruning the plant regularly can also help to encourage bushier growth. Pinch back the tips of the stems to promote branching. Avoid over-fertilizing, as this can also contribute to leggy growth.
Can I grow different varieties of thyme together in the same pot?
While it’s possible to grow different varieties of thyme together, it’s generally best to keep them separate, especially if they have different growth habits. Some varieties, like creeping thyme, can be quite aggressive and may outcompete other varieties. If you do choose to grow them together, make sure to provide ample space and monitor their growth closely.
Is indoor thyme as flavorful as outdoor thyme?
Indoor thyme can be just as flavorful as outdoor thyme, provided it receives enough sunlight and is properly cared for. The intensity of the flavor can vary depending on the variety of thyme and the growing conditions. Providing adequate light and avoiding over-fertilizing will help to maximize the flavor of your indoor thyme.


Leave a Comment