
Styrofoam Bok Choy Growing Tips: Unlock the secrets to a bountiful harvest, even in the most unexpected places! Have you ever looked at a discarded styrofoam container and thought, “There has to be a better use for this?” Well, I’m here to tell you there is! We’re diving headfirst into the world of upcycled gardening, specifically focusing on how you can cultivate delicious and nutritious Bok Choy using nothing more than styrofoam and a little bit of know-how.
Bok Choy, a staple in Asian cuisine for centuries, boasts a rich history deeply intertwined with Eastern cultures. From stir-fries to soups, this leafy green is not only versatile but also packed with vitamins and minerals. But what if I told you that you didn’t need a sprawling garden to enjoy fresh, homegrown Bok Choy? That’s where our DIY magic comes in!
In today’s world, where sustainability and resourcefulness are more important than ever, finding innovative ways to reduce waste and grow our own food is crucial. Many of us are limited by space, budget, or even just the perceived complexity of gardening. That’s why these styrofoam bok choy growing tips are a game-changer. I’ll show you how to transform discarded styrofoam into a thriving mini-garden, making fresh, healthy Bok Choy accessible to everyone, regardless of their gardening experience or living situation. Get ready to roll up your sleeves and discover the joy of growing your own food in the most unexpected, eco-friendly way!
DIY Styrofoam Bok Choy Propagation: A Fun and Sustainable Project
Hey there, fellow gardening enthusiasts! Ever thought about turning discarded styrofoam into a mini bok choy nursery? It’s a surprisingly simple and rewarding project that’s both eco-friendly and a great way to expand your veggie patch. I’m going to walk you through how I do it, step-by-step. Get ready to give those styrofoam containers a new lease on life!
What You’ll Need
Before we dive in, let’s gather our supplies. This is a pretty low-cost project, which is always a win in my book!
* **Styrofoam Container(s):** Think takeout containers, packaging materials – anything clean and relatively sturdy. The thicker the better!
* **Bok Choy Stalk(s):** The base of a bok choy head after you’ve used the leaves. Don’t toss it!
* **Sharp Knife or Scissors:** For cutting the styrofoam and trimming the bok choy.
* **Potting Mix:** A good quality potting mix is essential for healthy growth.
* **Water:** Tap water is fine, but rainwater is even better if you have access to it.
* **Spray Bottle:** For misting the bok choy.
* **Small Pebbles or Gravel (Optional):** For drainage in the styrofoam container.
* **Rooting Hormone (Optional):** Can speed up root development, but not necessary.
* **Grow Lights (Optional):** If you’re propagating indoors and don’t have a sunny spot.
Preparing the Styrofoam Container
This is where we transform that styrofoam waste into a functional growing vessel.
1. **Clean the Styrofoam:** Make sure your styrofoam container is clean and free of any food residue or debris. Wash it with soap and water, then rinse thoroughly. This prevents mold and bacteria from interfering with your bok choy’s growth.
2. **Create Drainage Holes:** This is crucial! Bok choy doesn’t like soggy roots. Use your knife or scissors to carefully poke several drainage holes in the bottom of the container. I usually aim for about 4-6 holes, depending on the size of the container. Make sure they are big enough to allow water to drain freely.
3. **Add Drainage Layer (Optional):** If you’re concerned about drainage, you can add a layer of small pebbles or gravel to the bottom of the container before adding the potting mix. This helps prevent the potting mix from clogging the drainage holes.
4. **Fill with Potting Mix:** Now, fill the styrofoam container with your potting mix, leaving about an inch of space at the top. Gently pat down the soil to remove any air pockets.
Preparing the Bok Choy Stalk
This is the magic part – giving that leftover bok choy a second chance at life!
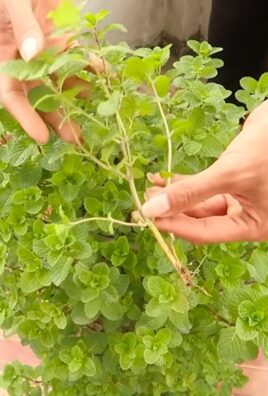
1. **Select a Healthy Stalk:** Choose a bok choy stalk that is firm and has a healthy-looking base. Avoid stalks that are slimy, discolored, or have signs of rot.
2. **Trim the Stalk:** Using your sharp knife, trim the bottom of the stalk to create a clean, flat surface. This will encourage root growth. You can also remove any outer leaves that are wilted or damaged.
3. **Apply Rooting Hormone (Optional):** If you’re using rooting hormone, dip the cut end of the stalk into the powder or liquid. This will help stimulate root development.
Planting the Bok Choy Stalk
Time to bring it all together!
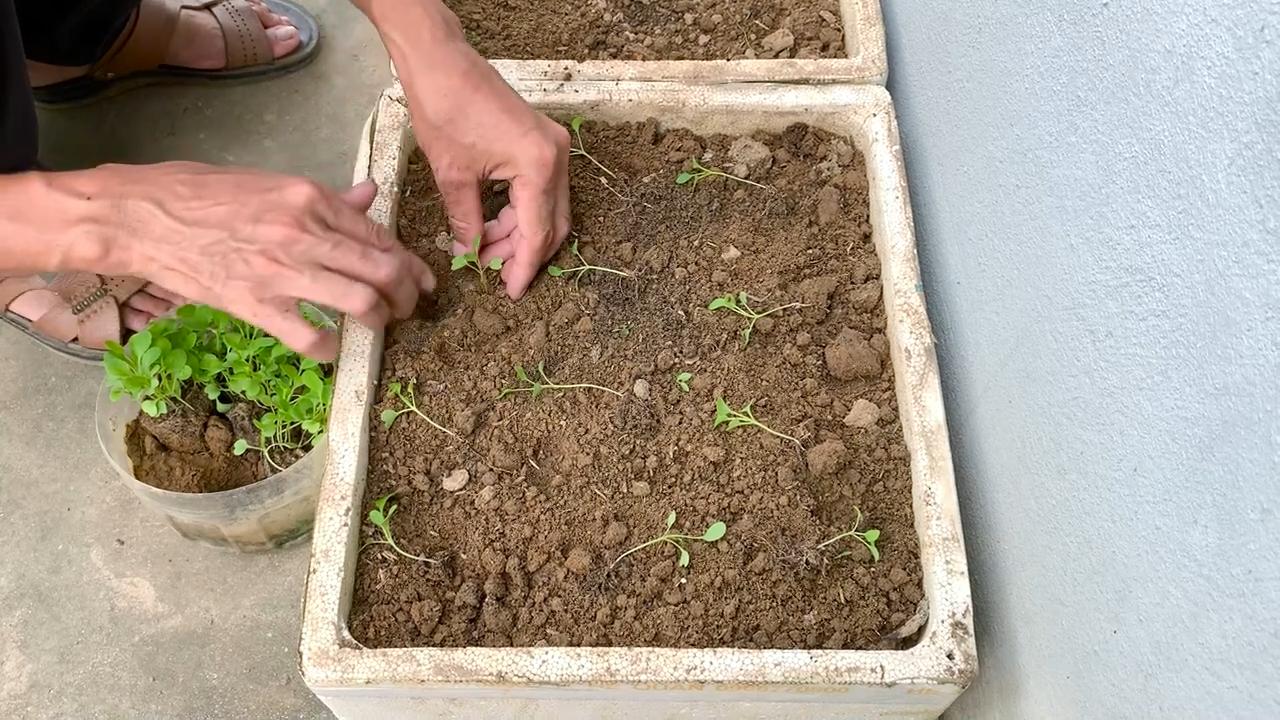
1. **Make a Hole:** Use your finger or a small tool to create a hole in the potting mix, deep enough to accommodate the bok choy stalk.
2. **Plant the Stalk:** Gently insert the bok choy stalk into the hole, making sure the cut end is buried in the soil.
3. **Firm the Soil:** Gently firm the soil around the base of the stalk to provide support.
4. **Water Thoroughly:** Water the potting mix thoroughly until water drains out of the drainage holes. This helps settle the soil and provides the bok choy with the moisture it needs to start growing.
Caring for Your Bok Choy Propagation
This is where patience comes in. It takes a little time for the roots to develop.
1. **Provide Adequate Light:** Place the styrofoam container in a location that receives bright, indirect sunlight. If you’re propagating indoors, you can use grow lights to supplement natural light. I’ve found that 12-14 hours of light per day works well.
2. **Maintain Moisture:** Keep the potting mix consistently moist, but not soggy. Water when the top inch of soil feels dry to the touch. Use a spray bottle to mist the bok choy leaves regularly to increase humidity.
3. **Monitor for Growth:** Keep an eye on your bok choy stalk. After a week or two, you should start to see new leaves emerging from the center of the stalk. This is a sign that roots are developing.
4. **Fertilize (Optional):** Once the bok choy starts to grow, you can fertilize it with a diluted liquid fertilizer every two weeks. This will provide the plant with the nutrients it needs to thrive. I usually use a balanced fertilizer, like a 10-10-10.
5. **Transplant (Optional):** Once the bok choy has developed a strong root system and several new leaves, you can transplant it into a larger pot or directly into your garden. Choose a location that receives full sun and has well-drained soil.
Troubleshooting
Even with the best intentions, things don’t always go as planned. Here are a few common issues you might encounter and how to deal with them.
* **Stalk Rotting:** If the stalk starts to rot, it’s usually a sign of overwatering or poor drainage. Remove the affected stalk and start with a fresh one, making sure to improve drainage and avoid overwatering.
* **Slow Growth:** If the bok choy is growing slowly, it may not be getting enough light or nutrients. Try moving it to a brighter location or fertilizing it with a diluted liquid fertilizer.
* **Pests:** Keep an eye out for pests like aphids or slugs. If you spot any, treat them with an appropriate insecticide or organic pest control method. I prefer using neem oil for most pests.
Harvesting Your Bok Choy
The best part!
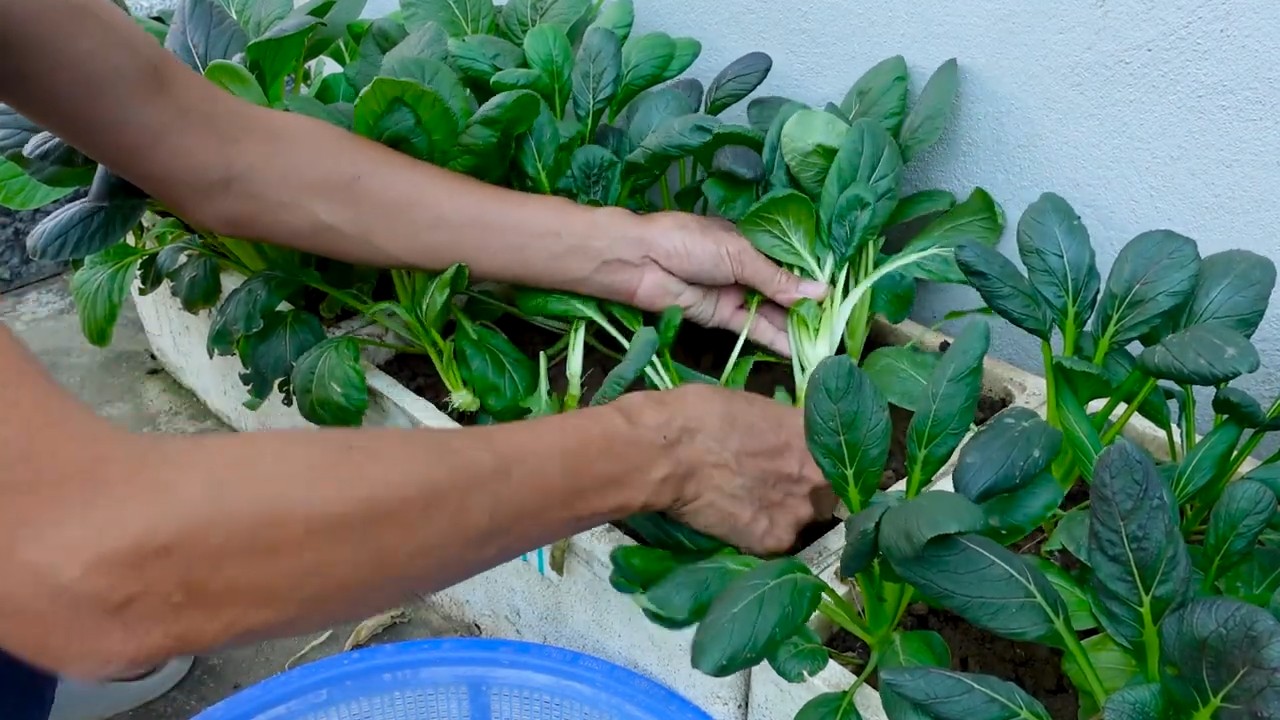
1. **Harvesting:** You can harvest your bok choy when the leaves are large enough to eat. Simply cut the outer leaves off the plant, leaving the inner leaves to continue growing. You can also harvest the entire plant at once.
2. **Enjoy!** Use your homegrown bok choy in stir-fries, soups, salads, or any other dish you like.
Advanced Tips and Tricks
Want to take your styrofoam bok choy propagation to the next level? Here are a few extra tips and tricks I’ve learned along the way.
* **Experiment with Different Styrofoam Containers:** Try using different sizes and shapes of styrofoam containers to see what works best for you. I’ve even used styrofoam cups for individual bok choy stalks.
* **Use Different Potting Mixes:** Experiment with different types of potting mixes to see which one your bok choy prefers. Some gardeners prefer using a mix of potting soil, compost, and perlite.
* **Propagate Multiple Stalks:** Propagate multiple bok choy stalks at the same time to increase your chances of success.
* **Keep a Journal:** Keep a journal of your styrofoam bok choy propagation experiments. This will help you track your progress and learn from your mistakes.
* **Share Your Success:** Share your styrofoam bok choy propagation success with your friends and family. Encourage them to try it themselves!
Why This Works: The Science Behind the Magic
Okay, so why does this seemingly crazy idea actually work? It all comes down to the bok choy’s ability to regenerate. Even after you’ve cut off the leaves, the base of the stalk still contains dormant buds and the potential for new growth. By providing the right conditions – moisture, light, and nutrients – you can encourage these buds to sprout and develop into new roots and leaves.
The styrofoam container, while unconventional, provides a lightweight and insulated environment for the bok choy to grow. The drainage holes prevent waterlogging, which is crucial for preventing root rot. And the potting mix provides the necessary nutrients for healthy growth.
The optional rooting hormone helps to speed up the root development process, but it’s not essential. Bok choy is a relatively easy plant to propagate, and it will often root on its own without any additional help.
Environmental Benefits
Besides being a fun and rewarding project, styrofoam bok choy propagation also has some environmental benefits. By reusing styrofoam containers, you’re reducing waste and preventing them from ending up in landfills. You’re also growing your own food, which reduces your reliance on commercially grown produce and the associated environmental impacts of transportation and packaging.
So, there you have it! My guide to propagating bok choy from styrofoam containers. It’s a fun, sustainable, and surprisingly
Conclusion
So, there you have it! Transforming discarded styrofoam into a thriving bok choy haven isn’t just a clever gardening hack; it’s a testament to resourcefulness and a step towards a more sustainable lifestyle. This DIY approach to growing bok choy offers a multitude of benefits, from reducing waste and saving money to providing you with fresh, organic greens right at your fingertips.
Why is this a must-try? Because it’s incredibly simple, surprisingly effective, and deeply rewarding. Imagine the satisfaction of harvesting crisp, vibrant bok choy from a container you created yourself, knowing you’ve given new life to something that would otherwise end up in a landfill. It’s a small act with a big impact, both on your garden and on the environment.
But the beauty of this method lies in its adaptability. Feel free to experiment with different sizes and shapes of styrofoam containers. Larger containers will naturally accommodate more bok choy plants, while smaller ones are perfect for compact spaces or for growing individual heads. You can also personalize your containers with paint or decorative elements to add a touch of flair to your garden.
Consider these variations to further enhance your styrofoam bok choy growing experience:
* Nutrient Boost: Supplement your soil with organic fertilizers or compost tea to provide your bok choy with an extra boost of nutrients. This will result in healthier, more robust plants and a more abundant harvest.
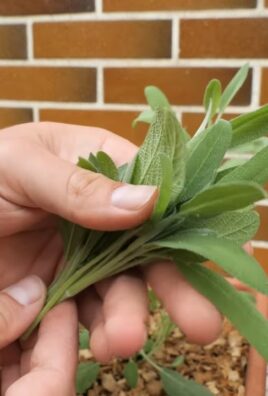
* Companion Planting: Plant companion herbs like dill or chamomile alongside your bok choy to deter pests and attract beneficial insects. This is a natural and effective way to protect your crop.
* Succession Planting: Plant new bok choy seeds every few weeks to ensure a continuous supply of fresh greens throughout the growing season. This will keep your styrofoam garden productive and your plate full.
* Hydroponic Adaptation: For a more advanced approach, explore adapting this method to a simple hydroponic system using nutrient-rich water instead of soil. This can accelerate growth and reduce the risk of soilborne diseases.
We wholeheartedly encourage you to give this DIY styrofoam bok choy growing trick a try. It’s a fun, educational, and ultimately delicious way to connect with nature and reduce your environmental footprint. Don’t be afraid to get creative and experiment with different techniques to find what works best for you.
Most importantly, we want to hear about your experience! Share your photos, tips, and stories with us in the comments section below. Let’s build a community of resourceful gardeners who are passionate about growing their own food and making a positive impact on the planet. Your insights could inspire others to embrace this simple yet powerful method of growing bok choy. Let’s cultivate a greener future, one styrofoam container at a time!
Frequently Asked Questions (FAQ)
What kind of styrofoam is best for growing bok choy?
Ideally, you should use clean, food-grade styrofoam containers. These are typically found as packaging for fruits, vegetables, or other food items. Avoid using styrofoam that has been exposed to harsh chemicals or pesticides. If you’re unsure about the safety of a particular container, it’s best to err on the side of caution and choose a different one. Make sure to thoroughly clean the styrofoam before using it to remove any residue or contaminants.
How do I prepare the styrofoam container for planting?
First, thoroughly clean the styrofoam container with soap and water to remove any dirt or debris. Next, drill drainage holes in the bottom of the container to prevent waterlogging. The number and size of the holes will depend on the size of the container, but aim for at least four to five holes that are about 1/4 inch in diameter. Finally, line the container with a layer of landscape fabric or burlap to prevent soil from washing out through the drainage holes.
What type of soil should I use for growing bok choy in styrofoam?
Use a well-draining potting mix that is rich in organic matter. A mix of compost, peat moss, and perlite is a good option. Avoid using garden soil, as it can be too heavy and compact, which can hinder drainage and root growth. You can also amend your potting mix with slow-release fertilizer to provide your bok choy with a steady supply of nutrients.
How often should I water my bok choy plants in styrofoam containers?
Water your bok choy plants regularly, especially during hot and dry weather. The soil should be kept consistently moist, but not waterlogged. Check the soil moisture by sticking your finger about an inch into the soil. If it feels dry, it’s time to water. Water deeply, until water drains out of the drainage holes. Avoid overhead watering, as this can increase the risk of fungal diseases.
How much sunlight does bok choy need?
Bok choy thrives in full sun to partial shade. Aim for at least six hours of sunlight per day. If you live in a hot climate, provide some afternoon shade to prevent the leaves from scorching. If you’re growing your bok choy indoors, use grow lights to supplement natural sunlight.
How do I protect my bok choy from pests and diseases?
Regularly inspect your bok choy plants for pests such as aphids, cabbage worms, and slugs. Handpick any pests you find or use organic pest control methods such as insecticidal soap or neem oil. To prevent diseases, ensure good air circulation around your plants and avoid overhead watering. If you notice any signs of disease, such as yellowing leaves or spots, remove the affected leaves immediately.
When is the best time to harvest bok choy?
Bok choy can be harvested at any stage of growth, depending on your preference. Baby bok choy can be harvested as early as 30 days after planting, while mature heads can be harvested in about 45-60 days. To harvest, simply cut the entire head of bok choy at the base of the plant. You can also harvest individual leaves as needed, starting with the outer leaves.
Can I grow other vegetables in styrofoam containers besides bok choy?
Yes, styrofoam containers can be used to grow a variety of other vegetables, including lettuce, spinach, kale, radishes, and herbs. Just be sure to choose a container that is appropriately sized for the plant you are growing and provide adequate drainage.
Is it safe to eat bok choy grown in styrofoam?
Yes, it is generally safe to eat bok choy grown in styrofoam, as long as you use food-grade styrofoam and take precautions to prevent contamination. Make sure to thoroughly clean the styrofoam container before using it and avoid using styrofoam that has been exposed to harsh chemicals or pesticides.
What are the benefits of growing bok choy in styrofoam containers?
Growing bok choy in styrofoam containers offers several benefits, including:
* Recycling and repurposing: It’s a great way to recycle styrofoam that would otherwise end up in a landfill.
* Cost-effective: Styrofoam containers are often free or very inexpensive.
* Lightweight and portable: Styrofoam containers are lightweight and easy to move around, making them ideal for small spaces or balconies.
* Good drainage: Styrofoam provides good drainage, which is essential for healthy plant growth.
* Insulation: Styrofoam can help insulate the soil, protecting plants from extreme temperatures.
Leave a Comment