
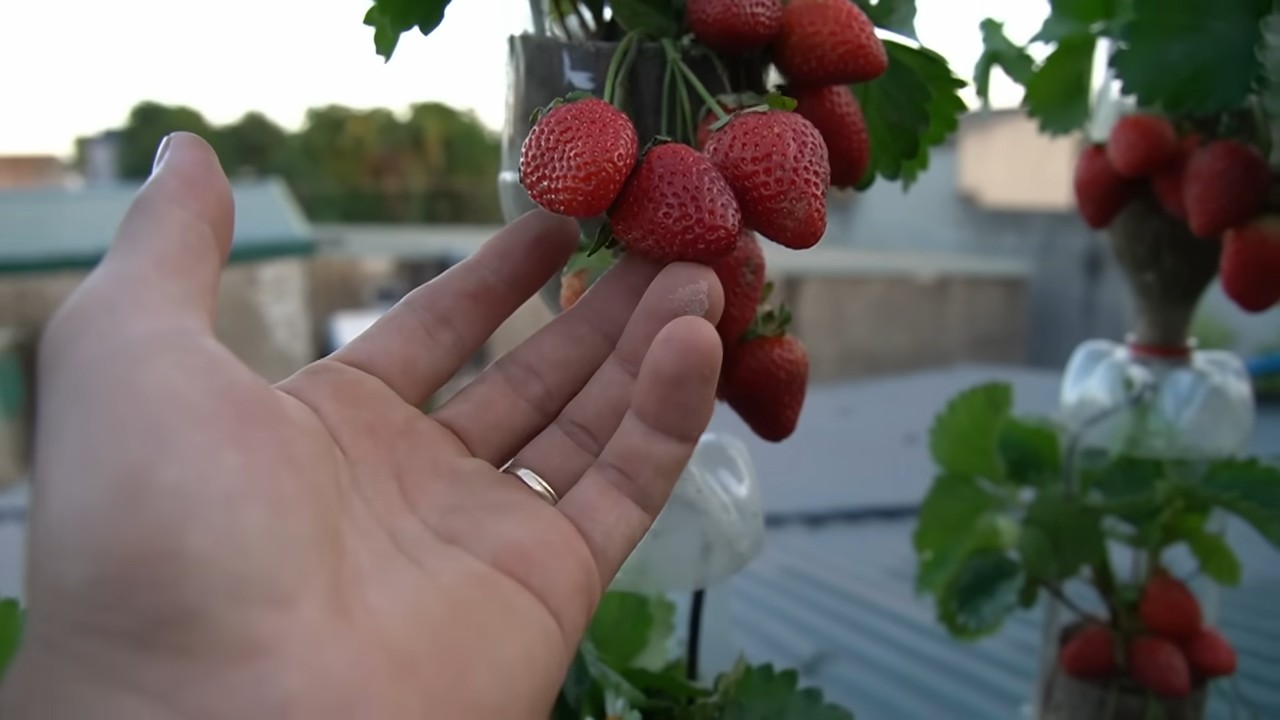
Strawberry wall DIY: Imagine stepping onto your balcony or into your garden and being greeted by a vibrant, cascading wall of juicy, red strawberries. Sounds like a dream, right? Well, it doesn’t have to be! This DIY project is not only visually stunning but also a fantastic way to maximize space and enjoy fresh, homegrown berries all season long.
Vertical gardening, the concept behind our strawberry wall, has roots stretching back centuries. Think of the Hanging Gardens of Babylon, one of the Seven Wonders of the Ancient World! While we might not be building anything quite so grand, the principle remains the same: utilizing vertical space to cultivate plants. In modern times, vertical gardening has seen a resurgence, particularly in urban areas where space is at a premium.
Why do you need this strawberry wall DIY in your life? Because it’s a game-changer! Forget bending over to weed and harvest. This elevated garden is easier on your back, keeps your precious berries away from pesky slugs and snails, and adds a unique decorative element to your outdoor space. Plus, who doesn’t love the satisfaction of growing their own food? I’m excited to share this simple, step-by-step guide that will have you enjoying delicious, homegrown strawberries in no time. Let’s get started!
Erdbeerwand selber bauen: Dein DIY-Guide für eine süße Ernte
Hallo liebe Gartenfreunde! Habt ihr auch so Lust auf frische, saftige Erdbeeren direkt aus dem eigenen Garten? Aber wenig Platz? Kein Problem! Ich zeige euch, wie ihr eine fantastische Erdbeerwand selber bauen könnt – ein echter Hingucker und super platzsparend! Diese DIY-Erdbeerwand ist nicht nur praktisch, sondern auch ein dekoratives Highlight für euren Balkon, eure Terrasse oder euren Garten. Lasst uns loslegen!
Was du für deine Erdbeerwand brauchst
Bevor wir starten, hier eine Liste mit allen Materialien und Werkzeugen, die du benötigst. So hast du alles griffbereit und kannst ohne Unterbrechung loslegen.
* Holzpaletten: Am besten eignen sich Europaletten (EPAL), da sie stabil und leicht zu bearbeiten sind. Achte darauf, dass sie unbehandelt und sauber sind. Du kannst sie oft kostenlos oder sehr günstig bekommen.
* Geotextil oder Teichfolie: Zum Auskleiden der Palettenfächer. Verhindert, dass die Erde herausrieselt und schützt das Holz vor Feuchtigkeit.
* Tacker und Klammern: Zum Befestigen des Geotextils oder der Teichfolie.
* Schleifpapier oder Schleifmaschine: Um die Paletten abzuschleifen und Splitter zu entfernen.
* Holzschutzlasur oder -farbe: Zum Schutz des Holzes vor Witterungseinflüssen. Wähle eine Lasur oder Farbe, die für den Außenbereich geeignet ist.
* Erde: Hochwertige Pflanzerde, idealerweise spezielle Erdbeererde.
* Erdbeerpflanzen: Am besten verschiedene Sorten, damit du über einen längeren Zeitraum ernten kannst.
* Handschuhe: Zum Schutz deiner Hände.
* Schere oder Cuttermesser: Zum Zuschneiden des Geotextils oder der Teichfolie.
* Maßband oder Zollstock: Zum genauen Messen.
* Bürste oder Lappen: Zum Auftragen der Holzschutzlasur oder -farbe.
* Optional: Rankgitter, um die Erdbeerpflanzen zusätzlich zu stützen.
Schritt-für-Schritt-Anleitung: So baust du deine Erdbeerwand
Jetzt geht es ans Eingemachte! Folge diesen Schritten, um deine eigene Erdbeerwand zu bauen. Keine Sorge, es ist einfacher als es aussieht!
1. Die Palette vorbereiten:
* Zuerst solltest du die Palette gründlich reinigen. Entferne groben Schmutz mit einer Bürste oder einem Besen.
* Anschließend schleifst du die Palette ab. Achte besonders auf scharfe Kanten und Splitter. Eine Schleifmaschine erleichtert die Arbeit, aber Schleifpapier tut es auch.
* Nach dem Schleifen entfernst du den Schleifstaub mit einem feuchten Lappen.
2. Die Palette schützen:
* Trage nun die Holzschutzlasur oder -farbe auf. Dies schützt das Holz vor Feuchtigkeit, UV-Strahlung und Schädlingen.
* Lass die Lasur oder Farbe gut trocknen, bevor du mit dem nächsten Schritt fortfährst. Beachte die Trocknungszeiten auf der Verpackung.
* Eventuell ist ein zweiter Anstrich sinnvoll, um einen optimalen Schutz zu gewährleisten.
3. Die Fächer auskleiden:
* Messe die Innenmaße der Palettenfächer aus.
* Schneide das Geotextil oder die Teichfolie entsprechend zu. Achte darauf, dass du genügend Material hast, um die Fächer komplett auszukleiden und einen kleinen Rand zum Befestigen zu lassen.
* Lege das Geotextil oder die Teichfolie in die Fächer und befestige es mit dem Tacker. Achte darauf, dass die Klammern gut sitzen und das Material straff ist.
* Wiederhole diesen Schritt für alle Fächer der Palette.
4. Die Erde einfüllen:
* Fülle die Fächer mit der Pflanzerde. Achte darauf, dass die Erde locker und luftig ist.
* Drücke die Erde leicht an, aber nicht zu fest.
* Lass oben einen kleinen Rand frei, damit beim Gießen keine Erde überläuft.
5. Die Erdbeeren pflanzen:
* Nimm die Erdbeerpflanzen aus ihren Töpfen.
* Lockere die Wurzeln vorsichtig auf.
* Setze die Erdbeerpflanzen in die Fächer. Achte darauf, dass die Pflanzen genügend Platz haben und die Wurzeln gut mit Erde bedeckt sind.
* Der Abstand zwischen den Pflanzen sollte etwa 20-25 cm betragen.
* Gieße die Erdbeerpflanzen nach dem Einpflanzen gründlich an.
6. Die Erdbeerwand aufstellen:
* Suche einen geeigneten Standort für deine Erdbeerwand. Erdbeeren lieben die Sonne, also wähle einen sonnigen Platz.
* Stelle die Palette aufrecht hin. Achte darauf, dass sie stabil steht und nicht umkippen kann.
* Du kannst die Palette zusätzlich mit Winkeln oder Schrauben an einer Wand oder einem Zaun befestigen, um sie noch stabiler zu machen.
7. Die Erdbeerwand pflegen:
* Gieße die Erdbeerpflanzen regelmäßig, besonders an heißen Tagen. Achte darauf, dass die Erde immer leicht feucht ist, aber nicht zu nass.
* Dünge die Erdbeerpflanzen regelmäßig mit einem speziellen Erdbeerdünger. Beachte die Anweisungen auf der Verpackung.
* Entferne regelmäßig Unkraut und abgestorbene Blätter.
* Schütze die Erdbeeren vor Schnecken. Du kannst Schneckenkorn verwenden oder die Erdbeerwand mit einem Schneckenzaun umgeben.
* Wenn die Erdbeeren reif sind, kannst du sie ernten und genießen!
Zusätzliche Tipps und Tricks für deine Erdbeerwand
Hier noch ein paar zusätzliche Tipps, die dir helfen, deine Erdbeerwand noch besser zu machen:
* Sortenwahl: Wähle verschiedene Erdbeersorten, die zu unterschiedlichen Zeiten reifen. So kannst du über einen längeren Zeitraum ernten. Es gibt immertragende Sorten, die mehrmals im Jahr Früchte tragen.
* Rankgitter: Wenn du möchtest, kannst du ein Rankgitter an der Palette befestigen. So können die Erdbeerpflanzen daran hochranken und die Früchte hängen nicht auf der Erde.
* Bewässerungssystem: Wenn du keine Zeit hast, regelmäßig zu gießen, kannst du ein automatisches Bewässerungssystem installieren.
* Dekoration: Du kannst die Erdbeerwand zusätzlich mit Blumen oder Kräutern dekorieren. Das sieht nicht nur schön aus, sondern lockt auch nützliche Insekten an.
* Winterfest machen: Im Winter solltest du die Erdbeerpflanzen vor Frost schützen. Du kannst die Palette mit Vlies abdecken oder sie an einen geschützten Ort stellen.
Häufige Fehler vermeiden
Damit deine Erdbeerwand ein voller Erfolg wird, solltest du diese häufigen Fehler vermeiden:
* Falsche Erde: Verwende keine normale Gartenerde, sondern spezielle Erdbeererde. Diese ist lockerer und enthält die richtigen Nährstoffe für Erdbeeren.
* Zu wenig Sonne: Erdbeeren brauchen viel Sonne, um gut zu wachsen und Früchte zu tragen. Stelle die Erdbeerwand an einen sonnigen Platz.
* Zu viel Wasser: Gieße die Erdbeerpflanzen regelmäßig, aber nicht zu viel. Staunässe kann zu Wurzelfäule führen.
* Kein Schutz vor Schädlingen: Schütze die Erdbeeren vor Schnecken und anderen Schädlingen.
* Keine Düngung: Dünge die Erdbeerpflanzen regelmäßig, um eine reiche Ernte zu erzielen.
Die Vorteile einer Erdbeerwand
Warum solltest du dir eine Erdbeerwand bauen? Hier sind einige Vorteile:
* Platzsparend: Ideal für kleine Balkone, Terrassen oder Gärten.
* Dekorativ: Ein echter Hingucker und eine tolle Möglichkeit, deinen Außenbereich zu verschönern.
* Frische Erdbeeren: Du hast immer frische Erdbeeren zur Hand.
* Einfach zu ernten: Die Erdbeeren hängen nicht auf der Erde und sind leicht zu ernten.
* Nachhaltig
Conclusion
So, there you have it! Creating your own strawberry wall DIY isn’t just a fun project; it’s a game-changer for anyone who loves fresh, homegrown strawberries and wants to maximize their space. We’ve walked you through the process, highlighting the benefits of this vertical gardening technique. From saving space and improving air circulation to deterring pests and creating a stunning visual display, a strawberry wall offers a multitude of advantages over traditional ground planting.
Think about it: no more bending over to harvest your berries, fewer slugs munching on your precious crop, and a vibrant green wall that adds beauty and life to your patio, balcony, or garden. It’s a win-win-win!
But the beauty of this project lies in its adaptability. Feel free to experiment with different materials for your wall. Instead of PVC pipes, consider using repurposed pallets, stacked planters, or even hanging baskets. You can also adjust the spacing between the planting holes to accommodate different strawberry varieties or even mix in other herbs and flowers for a more diverse and visually appealing wall. Imagine cascading thyme or fragrant basil intermingling with your ripening strawberries!
For those living in colder climates, consider using a movable structure or planting your strawberries in containers that can be easily brought indoors during the winter months. This will allow you to extend your growing season and enjoy fresh strawberries for a longer period. You could even add a small greenhouse cover to your strawberry wall for extra protection against frost.
Don’t be afraid to get creative with your design. Paint your PVC pipes in vibrant colors, add decorative elements like fairy lights or wind chimes, or even create a themed strawberry wall based on your favorite characters or movies. The possibilities are endless!
Ultimately, the goal is to create a strawberry wall that not only provides you with delicious, homegrown strawberries but also reflects your personal style and adds a touch of beauty to your surroundings.
We strongly encourage you to give this strawberry wall DIY a try. It’s a rewarding project that will bring you joy and fresh strawberries for years to come. And most importantly, we want to hear about your experience! Share your photos, tips, and challenges in the comments below. Let’s build a community of strawberry wall enthusiasts and inspire others to embrace this innovative gardening technique. What worked for you? What challenges did you face? What unique variations did you come up with? Your feedback is invaluable and will help others succeed in their own strawberry wall endeavors. So, grab your tools, gather your materials, and get ready to create your own stunning and productive strawberry wall! Happy gardening!
Frequently Asked Questions (FAQ)
Here are some frequently asked questions about creating a strawberry wall, designed to help you succeed with your project:
What are the best strawberry varieties to grow in a strawberry wall?
The best strawberry varieties for a strawberry wall are typically everbearing or day-neutral varieties. These types produce fruit throughout the growing season, rather than just in one large harvest. Some popular choices include:
* Albion: Known for its large, flavorful berries and disease resistance.
* Seascape: A reliable everbearing variety that produces consistently good yields.
* Tristan: A beautiful ornamental variety with pink flowers and delicious berries.
* Quinault: A hardy and productive everbearing variety that is well-suited for cooler climates.
* Ozark Beauty: A June-bearing variety that produces a large crop of berries in early summer. While not everbearing, it’s a good option if you prefer a concentrated harvest.
Consider your local climate and growing conditions when selecting your strawberry varieties. Check with your local nursery for recommendations on the best varieties for your area.
How often should I water my strawberry wall?
Watering frequency will depend on several factors, including the weather, the type of potting mix you use, and the size of your containers. As a general rule, you should water your strawberry wall whenever the top inch of soil feels dry to the touch.
During hot, dry weather, you may need to water your strawberry wall daily. In cooler, wetter weather, you may only need to water it every few days. Be sure to check the soil moisture regularly to avoid overwatering or underwatering.
When watering, water deeply and thoroughly, ensuring that the water reaches the roots of the plants. Avoid watering the foliage, as this can increase the risk of fungal diseases. Consider using a drip irrigation system or a watering can with a long spout to water your strawberry wall efficiently.
What type of potting mix should I use for my strawberry wall?
Use a high-quality, well-draining potting mix specifically formulated for containers. Avoid using garden soil, as it can become compacted and poorly drained in containers.
A good potting mix should contain a blend of peat moss, perlite, and vermiculite. These ingredients help to retain moisture, improve drainage, and provide aeration to the roots. You can also add compost to your potting mix to provide additional nutrients.
Consider using a potting mix that contains slow-release fertilizer. This will provide your strawberry plants with a steady supply of nutrients throughout the growing season.
How much sunlight do strawberry plants need?
Strawberry plants need at least 6-8 hours of direct sunlight per day to produce abundant fruit. Choose a location for your strawberry wall that receives plenty of sunlight.
If you live in a hot climate, you may need to provide some afternoon shade to protect your strawberry plants from scorching. You can do this by placing your strawberry wall in a location that receives partial shade in the afternoon or by using shade cloth.
How do I fertilize my strawberry wall?
Strawberry plants are heavy feeders and require regular fertilization to produce abundant fruit. Fertilize your strawberry wall every 2-4 weeks with a balanced fertilizer specifically formulated for strawberries or other fruiting plants.
Follow the instructions on the fertilizer label carefully. Avoid over-fertilizing, as this can damage the plants. You can also supplement with organic fertilizers like compost tea or fish emulsion.
How do I protect my strawberry wall from pests and diseases?
Monitor your strawberry wall regularly for signs of pests and diseases. Common pests that can affect strawberry plants include aphids, spider mites, and slugs. Common diseases include powdery mildew and gray mold.
To prevent pests and diseases, keep your strawberry wall clean and well-ventilated. Remove any dead or diseased leaves promptly. You can also use organic pest control methods, such as insecticidal soap or neem oil, to control pests.
To prevent fungal diseases, avoid overwatering and ensure good air circulation around the plants. You can also use a fungicide if necessary.
How do I overwinter my strawberry wall?
If you live in a cold climate, you will need to overwinter your strawberry wall to protect the plants from freezing temperatures. There are several ways to overwinter your strawberry wall:
* Move it indoors: If your strawberry wall is portable, you can move it indoors to a cool, bright location. Water sparingly during the winter months.
* Mulch heavily: If you cannot move your strawberry wall indoors, you can mulch heavily around the plants to protect the roots from freezing. Use straw, leaves, or wood chips as mulch.
* Cover with a tarp: You can also cover your strawberry wall with a tarp to protect it from snow and ice.
In the spring, remove the mulch or tarp and gradually acclimate the plants to outdoor conditions.
Can I grow other plants in my strawberry wall?
Yes, you can grow other plants in your strawberry wall, but choose companion plants that have similar growing requirements to strawberries. Good companion plants for strawberries include:
* Herbs: Basil, thyme, and mint can help to repel pests and attract beneficial insects.
* Flowers: Marigolds and nasturtiums can also help to repel pests.
* Lettuce and spinach: These leafy greens can provide ground cover and help to retain moisture.
Avoid planting aggressive or invasive plants in your strawberry wall, as they can compete with the strawberries for resources.
How long will my strawberry wall last?
With proper care, your strawberry wall can last for several years. Strawberry plants typically produce fruit for 3-5 years. After that, the plants may become less productive and need to be replaced.
To extend the life of your strawberry wall, repot the plants every 2-3 years with fresh potting mix. You can also propagate new strawberry plants from runners to replace older plants.

Leave a Comment