
Strawberry plant propagation might sound intimidating, but trust me, it’s easier than baking a pie! Imagine turning one vibrant strawberry plant into a whole patch overflowing with juicy, red berries. That’s the magic we’re unlocking today with some simple DIY tricks. For centuries, gardeners have been sharing and multiplying their favorite plants, and strawberry propagation is a time-honored tradition, passed down through generations. Think of it as plant cloning, but without the lab coats and complicated equipment!
Why should you bother with strawberry plant propagation? Well, for starters, it’s incredibly cost-effective. Instead of buying new plants every year, you can expand your strawberry patch for free! Plus, it’s a deeply satisfying experience to nurture new life from your existing plants. We all know that strawberry plants can get expensive, and sometimes they don’t survive the winter. With these DIY hacks, you’ll be able to create a backup plan and ensure you have a bountiful harvest year after year. I’m going to show you some easy-to-follow steps that will have you propagating like a pro in no time. Get ready to transform your garden and enjoy a never-ending supply of delicious strawberries!
Propagating Strawberry Plants: A DIY Guide to Multiplying Your Berry Patch
Hey there, fellow gardening enthusiasts! Are you looking to expand your strawberry patch without breaking the bank? Well, you’ve come to the right place! I’m going to walk you through the super simple process of propagating strawberry plants. It’s easier than you think, and before you know it, you’ll have a whole army of strawberry plants ready to produce delicious berries.
Understanding Strawberry Runners
Before we dive in, let’s talk about runners. Strawberry plants are clever little things. They naturally send out horizontal stems called runners (or stolons). These runners are basically baby-making machines! At various points along the runner, you’ll see little nodes developing. These nodes will eventually root and become brand new strawberry plants. Our goal is to help those nodes along and give them the best possible start.
Materials You’ll Need
Okay, gather your supplies! This is what you’ll need to successfully propagate your strawberry plants:
* Healthy Strawberry Plant: Obviously! Make sure your parent plant is thriving and relatively disease-free.
* Small Pots: 3-4 inch pots are perfect. You can use plastic or terracotta, whatever you prefer.
* Potting Mix: A good quality potting mix is essential. Avoid using garden soil, as it can be too heavy and may contain pests or diseases.
* Watering Can or Hose: For keeping your new plants hydrated.
* Scissors or Pruning Shears: To snip the runners.
* Optional: Rooting Hormone: While not strictly necessary, rooting hormone can speed up the rooting process.
* Optional: Plant Labels: To keep track of your different strawberry varieties.
* Optional: Small Rocks or Pebbles: To improve drainage in your pots.
Propagating Strawberry Plants: Step-by-Step
Alright, let’s get our hands dirty! Here’s the step-by-step guide to propagating strawberry plants from runners:
1. Prepare Your Pots: Fill your pots with potting mix, leaving about an inch of space at the top. Water the potting mix thoroughly until water drains out of the bottom. This ensures the soil is evenly moist before you plant.
2. Identify Healthy Runners: Look for healthy runners with well-developed nodes. The nodes should be plump and starting to show signs of root development (tiny white bumps). Choose runners that are closest to the parent plant, as they tend to be the strongest.
3. Position the Runner: Gently place a node on top of the potting mix in one of your prepared pots. Make sure the node is in direct contact with the soil.
4. Secure the Node: This is crucial! You need to keep the node in contact with the soil so it can root. You can use a few different methods:
* Paperclips: Bend a paperclip into a U-shape and use it to gently pin the runner to the soil.
* Hairpins: Similar to paperclips, hairpins work great for securing the runner.
* Small Rocks: Place a small rock or pebble on top of the node to hold it in place.
* Potting Staples: You can purchase small potting staples specifically designed for this purpose.
Whatever method you choose, make sure you’re not damaging the runner or the node.
5. Repeat for Multiple Runners: If you have multiple healthy runners, repeat steps 3 and 4 for each one, using a separate pot for each node. Don’t overcrowd the pots.
6. Water Gently: After securing the runners, water the pots gently to settle the soil around the nodes. Avoid overwatering, as this can lead to rot.
7. Provide Adequate Light: Place the pots in a location that receives bright, indirect sunlight. Avoid direct sunlight, especially during the hottest part of the day, as this can scorch the delicate runners.
8. Maintain Moisture: Keep the potting mix consistently moist, but not soggy. Check the soil moisture daily and water as needed.
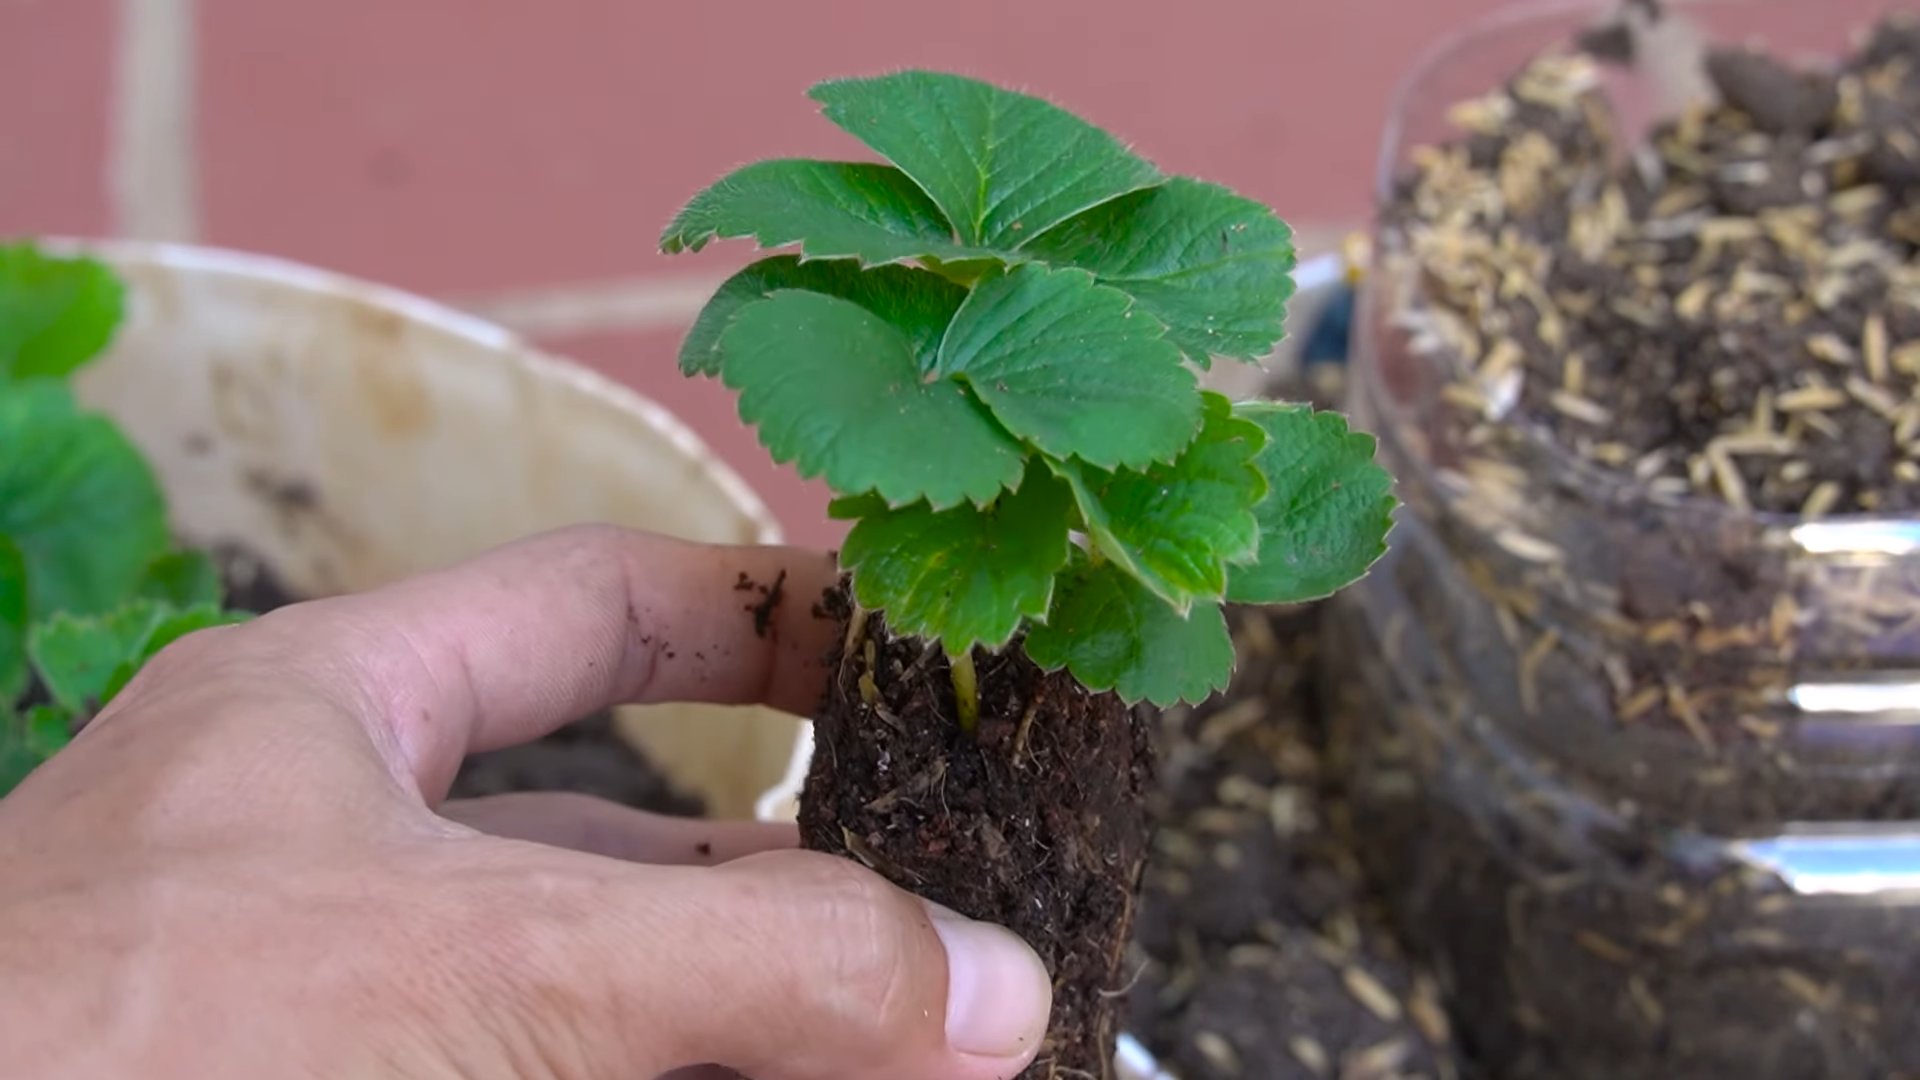
9. Wait for Rooting: Now comes the waiting game! It typically takes 2-4 weeks for the nodes to develop roots. You’ll know they’re rooting when you see new leaves emerging from the node. You can also gently tug on the runner; if it resists, it means roots have formed.
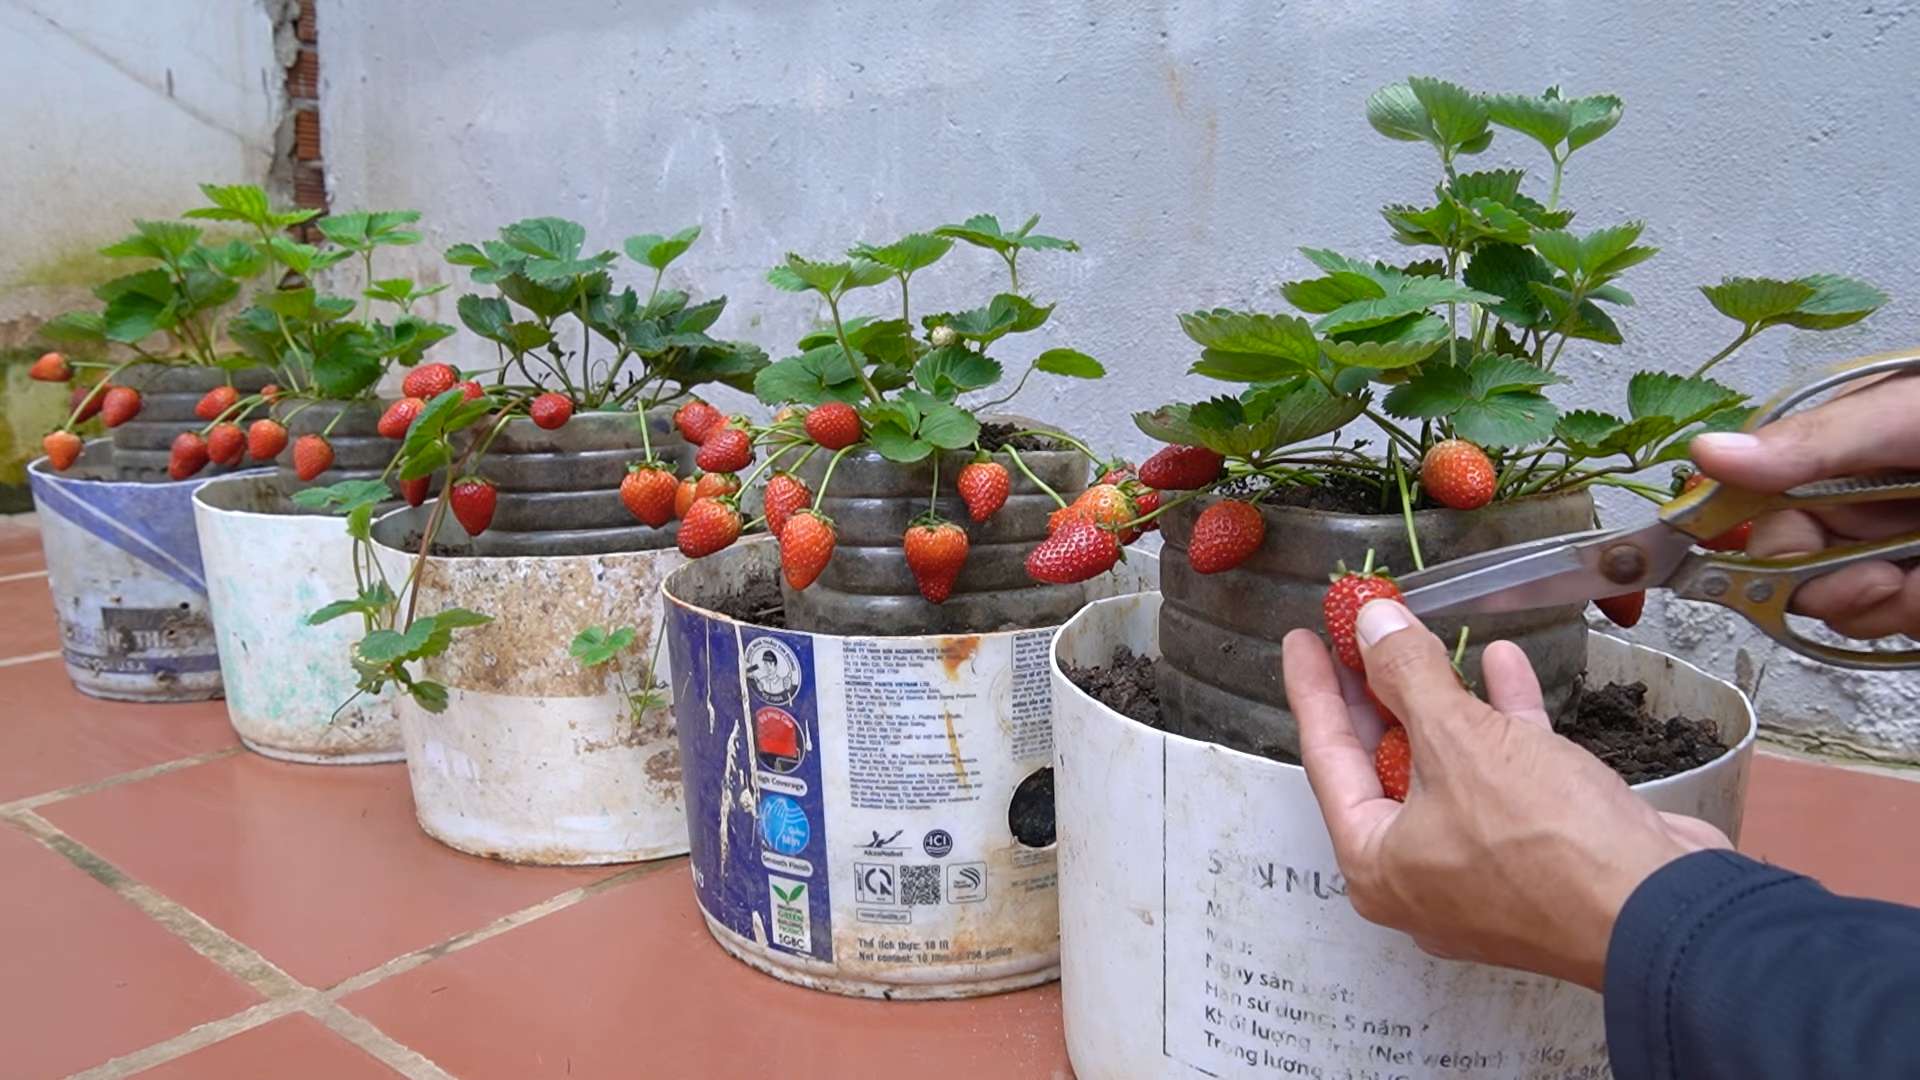
10. Sever the Runner: Once the new plant has developed a good root system (you can gently lift the pot to check), it’s time to sever the runner from the parent plant. Use your scissors or pruning shears to cut the runner between the parent plant and the new plant.
11. Care for Your New Plants: Congratulations! You now have a brand new strawberry plant! Continue to care for it as you would any other strawberry plant. Water regularly, fertilize as needed, and protect it from pests and diseases.
Hardening Off Your New Strawberry Plants
Before transplanting your new strawberry plants into the garden, it’s important to “harden them off.” This process gradually acclimates the plants to outdoor conditions, making them less susceptible to shock.
1. Gradual Exposure: Start by placing the pots outdoors in a sheltered location for a few hours each day. Gradually increase the amount of time they spend outdoors over the course of a week or two.
2. Protect from Extreme Weather: During the hardening-off process, protect the plants from extreme weather conditions, such as strong winds, heavy rain, and frost.
3. Monitor for Stress: Keep an eye on the plants for signs of stress, such as wilting or leaf burn. If you notice any stress, bring the plants back indoors and gradually reintroduce them to outdoor conditions.
Transplanting Your Strawberry Plants
Once your new strawberry plants are hardened off, they’re ready to be transplanted into the garden!
1. Choose a Sunny Location: Strawberry plants need at least 6-8 hours of sunlight per day. Choose a location in your garden that receives plenty of sun.
2. Prepare the Soil: Strawberry plants prefer well-drained soil that is rich in organic matter. Amend the soil with compost or other organic matter before planting.
3. Dig a Hole: Dig a hole that is slightly larger than the root ball of the strawberry plant.
4. Remove the Plant from the Pot: Gently remove the strawberry plant from its pot. If the roots are pot-bound, gently loosen them before planting.
5. Plant the Strawberry Plant: Place the strawberry plant in the hole, making sure the crown of the plant (where the stems meet the roots) is at soil level.
6. Fill the Hole: Fill the hole with soil and gently firm it around the plant.
7. Water Thoroughly: Water the strawberry plant thoroughly after planting.
8. Mulch: Apply a layer of mulch around the strawberry plant to help retain moisture, suppress weeds, and regulate soil temperature. Straw is a popular choice for mulching strawberry plants, hence the name!
Tips for Success
Here are a few extra tips to help you successfully propagate your strawberry plants:
* Choose the Right Time: The best time to propagate strawberry plants is in the spring or early summer, when the plants are actively growing.
* Use Sharp Tools: Use sharp scissors or pruning shears to avoid damaging the runners.
* Be Patient: Rooting can take time, so be patient and don’t give up!
* Label Your Plants: If you’re propagating different varieties of strawberries, be sure to label your plants so you can keep track of them.
* Prevent Disease: Use clean pots and potting mix to prevent the spread of disease.
* Fertilize Regularly: Fertilize your new strawberry plants regularly with a balanced fertilizer.
* Watch for Pests: Keep an eye out for pests, such as aphids and spider mites, and take action to control them if necessary.
Troubleshooting
Sometimes, things don’t go exactly as planned. Here are a few common problems you might encounter when propagating strawberry plants and how to fix them:
* Runners Not Rooting: If your runners aren’t rooting, make sure they’re in direct contact with the soil and that the soil is consistently moist. You can also try using rooting hormone to speed up the process.
* Runners Rotting: If your runners are rotting, you’re likely overwatering them. Reduce the amount of water you’re giving them and make sure the soil is well-drained.
* Plants Wilting: If your plants are wilting, they may not be getting enough water or they may be getting too much sun. Adjust the watering and light levels as needed.
* Pests and Diseases: Keep an eye out for pests and diseases and take action to control them if necessary.
Enjoy Your New Strawberry Plants!
That’s it! You’ve successfully propagated your own strawberry plants. Now you can enjoy the fruits (literally!) of your labor. With a little care
Conclusion
So, there you have it! Mastering strawberry plant propagation is not only achievable but also incredibly rewarding. Imagine a garden overflowing with juicy, sun-ripened strawberries, all thanks to your own efforts. This simple DIY trick transforms a single strawberry plant into a thriving patch, multiplying your harvest and saving you money in the long run. It’s a sustainable and satisfying way to expand your garden and enjoy fresh, homegrown berries for years to come.
But why is this a must-try? Beyond the obvious benefit of more strawberries, propagating your own plants allows you to select the healthiest and most productive specimens. You’re essentially cloning the best traits, ensuring a consistently high-quality yield. Plus, it’s a fantastic learning experience, connecting you more deeply with the natural world and the cycle of growth.
Don’t be afraid to experiment with variations! For example, try propagating different varieties of strawberries to create a diverse and flavorful collection. Some gardeners have success using rooting hormone to encourage faster root development, although it’s not strictly necessary. You can also adjust the timing of propagation based on your local climate. In warmer regions, you might be able to propagate throughout the year, while cooler climates may require focusing on spring and early summer. Consider using different potting mixes to see which one works best for your plants. Some prefer a mix with more perlite for better drainage, while others find a peat-based mix more suitable.
The key to successful strawberry plant propagation lies in patience and observation. Keep a close eye on your runners, ensuring they have adequate moisture and sunlight. Don’t be discouraged if some runners don’t take root; it’s all part of the learning process. The more you practice, the better you’ll become at identifying the ideal conditions for propagation.
We wholeheartedly encourage you to give this DIY trick a try. It’s a simple, cost-effective, and incredibly satisfying way to expand your strawberry patch and enjoy the fruits (literally!) of your labor. Once you’ve successfully propagated your own strawberry plants, we’d love to hear about your experience! Share your tips, tricks, and any challenges you encountered in the comments below. Let’s build a community of strawberry-loving gardeners and learn from each other’s successes. Happy propagating!
Frequently Asked Questions (FAQ)
What is the best time of year to propagate strawberry plants?
The ideal time for strawberry plant propagation is typically in the spring or early summer, after the plants have finished fruiting. This is when they naturally produce runners, which are the stems that develop new plantlets. Propagating during this period gives the new plants ample time to establish themselves before the colder months arrive. However, in regions with mild climates, propagation can be successful at other times of the year as well. The key is to ensure the parent plant is healthy and actively producing runners. Avoid propagating during periods of extreme heat or drought, as this can stress the plants and reduce the success rate.
How long does it take for strawberry runners to root?
The time it takes for strawberry runners to root can vary depending on several factors, including temperature, humidity, and the specific variety of strawberry. Generally, you can expect to see roots developing within 2 to 4 weeks. It’s important to keep the soil consistently moist during this period to encourage root growth. You can gently tug on the runner to check for resistance, which indicates that roots have formed. Once the roots are well-established, you can sever the runner from the parent plant.
What type of soil is best for propagating strawberry plants?
A well-draining and nutrient-rich soil is essential for successful strawberry plant propagation. A good option is a mix of equal parts potting soil, peat moss (or coconut coir), and perlite. The potting soil provides essential nutrients, the peat moss (or coconut coir) helps retain moisture, and the perlite improves drainage. Avoid using heavy clay soils, as they can become waterlogged and hinder root development. You can also add a slow-release fertilizer to the soil mix to provide a steady supply of nutrients to the developing plants.
Can I propagate strawberry plants in water?
While it’s possible to root strawberry runners in water, it’s generally not the preferred method. Rooting in water can lead to weaker roots that are less able to adapt to soil. However, if you choose to propagate in water, use a clean container and change the water every few days to prevent algae growth. Once the roots are about an inch long, carefully transplant the runner into a pot filled with well-draining soil.
How do I care for newly propagated strawberry plants?
Newly propagated strawberry plants require consistent care to ensure their survival and growth. Keep the soil consistently moist, but not waterlogged. Provide them with plenty of sunlight, ideally at least 6 hours per day. Protect them from extreme temperatures and strong winds. Fertilize them regularly with a balanced fertilizer, following the instructions on the fertilizer package. Remove any flowers that develop during the first few weeks to encourage the plants to focus on root development. Monitor the plants for pests and diseases, and take appropriate action if necessary.
What if the runners don’t develop roots?
If the runners are not developing roots, there could be several reasons. First, ensure that the soil is consistently moist but not waterlogged. Second, check that the runners are receiving adequate sunlight. Third, make sure the parent plant is healthy and not stressed. Fourth, consider using a rooting hormone to encourage root development. Finally, be patient; sometimes it takes longer for roots to develop. If the runners still don’t develop roots after several weeks, it may be necessary to try again with different runners.
How do I know when the new strawberry plant is ready to be transplanted?
The new strawberry plant is ready to be transplanted when it has developed a healthy root system and several new leaves. This typically takes about 4 to 6 weeks after the runner has rooted. Gently tug on the plant to check for resistance, which indicates that the roots are well-established. Before transplanting, harden off the plant by gradually exposing it to outdoor conditions for a few hours each day. This will help it acclimate to its new environment and reduce transplant shock.
Can I propagate everbearing strawberry varieties?
Yes, you can propagate everbearing strawberry varieties using the same method as June-bearing varieties. However, keep in mind that everbearing varieties may produce fewer runners than June-bearing varieties. This is because they focus more energy on producing fruit throughout the growing season. Therefore, you may need to be more selective when choosing runners to propagate. Choose the healthiest and most vigorous runners for the best results.
What are some common mistakes to avoid when propagating strawberry plants?
Some common mistakes to avoid when propagating strawberry plants include:
* Overwatering or underwatering the runners.
* Using a soil mix that is too heavy or poorly draining.
* Not providing adequate sunlight.
* Transplanting the new plants too soon.
* Ignoring pests and diseases.
* Propagating from unhealthy or stressed parent plants.
By avoiding these mistakes, you can increase your chances of success and enjoy a bountiful harvest of homegrown strawberries.

Leave a Comment