
Patio Summer Squash Growing can feel like a distant dream if you’re short on space, right? I get it! You crave that fresh-from-the-garden flavor, but envision sprawling vines taking over your entire balcony. But guess what? It doesn’t have to be that way! This article is your ultimate guide to unlocking the secrets of successful patio summer squash growing, even if you only have a tiny outdoor area.
For centuries, squash has been a staple crop in many cultures, providing sustenance and playing a vital role in traditional diets. From the ancient civilizations of the Americas to modern-day gardens, the versatility and nutritional value of squash have been celebrated. Now, you can join this rich history, even in a compact setting!
Let’s face it, store-bought summer squash just doesn’t compare to the vibrant taste and satisfying crunch of homegrown produce. Plus, with rising food costs and concerns about pesticides, growing your own food is becoming increasingly appealing. But many people are intimidated by the perceived space requirements. That’s where these DIY tricks and hacks come in. I’m going to show you how to maximize your yield, choose the right varieties, and troubleshoot common problems, all while keeping your patio looking beautiful and manageable. So, get ready to transform your small space into a thriving patio summer squash growing haven!
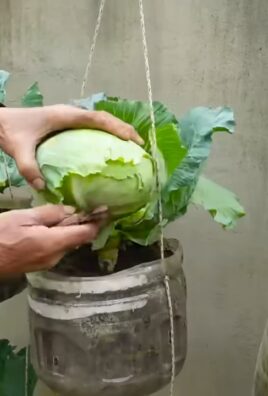
Growing Summer Squash in Containers: A Patio Gardener’s Guide
Hey there, fellow garden enthusiasts! I’m so excited to share my secrets for growing delicious summer squash right on your patio. Forget sprawling vines taking over your yard – we’re going container gardening! This method is perfect for small spaces, balconies, or anyone who wants to keep their squash contained and manageable. Get ready for a bountiful harvest of zucchini, yellow squash, or whatever variety tickles your fancy!
Choosing the Right Squash Variety
Not all summer squash are created equal when it comes to container gardening. Some varieties are bushier and more compact, making them ideal for pots. Here’s what I look for:
* Bush Varieties: These are your best bet! Look for varieties specifically labeled as “bush” or “compact.” They’ll stay smaller and won’t send out long, rambling vines.
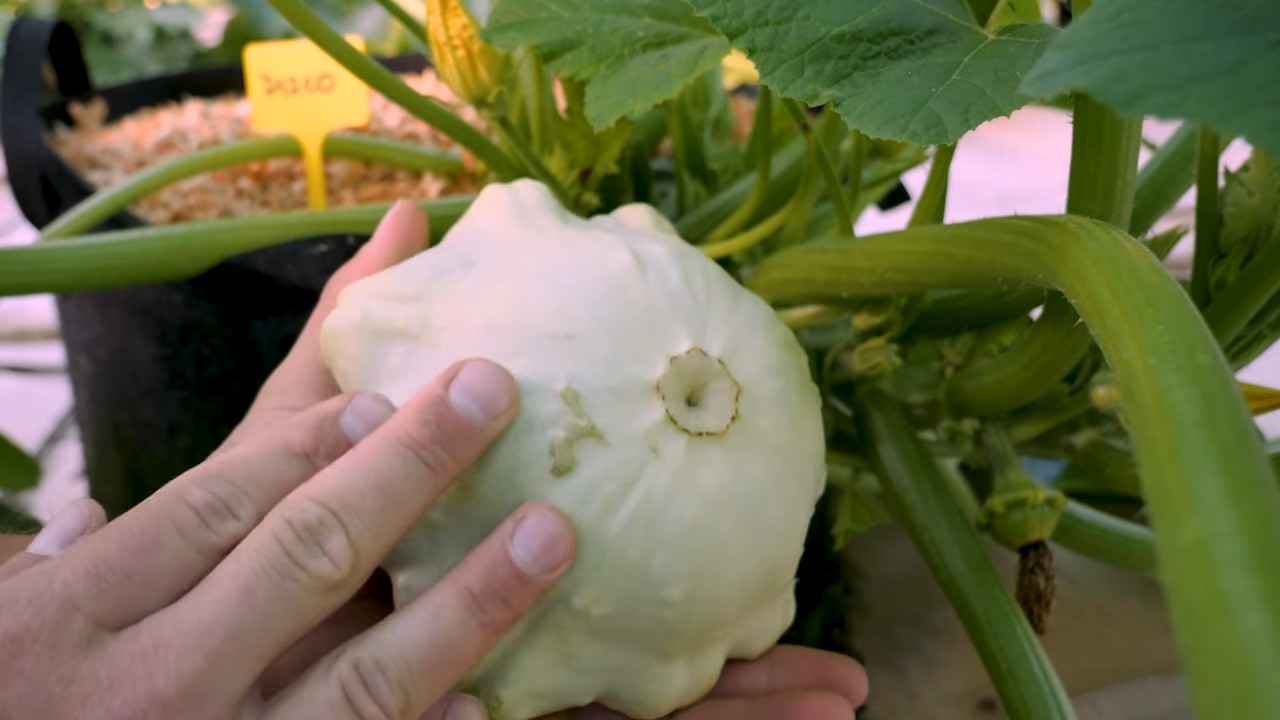
* Popular Choices: Some of my favorites include ‘Spacemiser’ zucchini, ‘Patio Star’ zucchini, ‘Eight Ball’ zucchini (round and adorable!), and ‘Sunburst’ patty pan squash. Yellow crookneck squash can also work, but choose a more compact variety if possible.
* Avoid Vining Types: Steer clear of vining squash like butternut or spaghetti squash. They need a lot of space to spread out and won’t thrive in a container.
Gathering Your Supplies
Before we get our hands dirty, let’s make sure we have everything we need. This is my go-to list:
* Large Container: This is crucial! Squash plants need plenty of room for their roots to grow. I recommend a container that’s at least 24 inches in diameter and 12 inches deep. A half-barrel planter works great!
* High-Quality Potting Mix: Don’t use garden soil! It’s too heavy and compacts easily in containers. Choose a lightweight, well-draining potting mix specifically formulated for containers.
* Slow-Release Fertilizer: This will provide your squash plants with a steady supply of nutrients throughout the growing season. I like to use an organic slow-release fertilizer.
* Watering Can or Hose: Consistent watering is key to healthy squash plants.
* Trowel or Shovel: For planting and transplanting.
* Mulch (Optional): Mulch helps retain moisture, suppress weeds, and regulate soil temperature. Straw, wood chips, or shredded bark work well.
* Plant Markers: To keep track of what you’ve planted.
* Seeds or Seedlings: Choose your favorite summer squash variety! I often start with seedlings for a head start, but seeds work just as well.
* Gardening Gloves: To keep your hands clean and protected.
Planting Your Summer Squash
Now for the fun part! Let’s get those squash plants in their new home.
Starting from Seeds:
1. Fill the Container: Fill your container with potting mix, leaving about 2-3 inches of space at the top.
2. Sow the Seeds: Make a small hole about 1 inch deep. Place 2-3 seeds in each hole. This ensures at least one seed will germinate.
3. Cover and Water: Gently cover the seeds with potting mix and water thoroughly.
4. Keep Moist: Keep the soil consistently moist, but not soggy. You can cover the container with plastic wrap to help retain moisture until the seeds germinate.
5. Thin Seedlings: Once the seedlings emerge (usually in 7-10 days), thin them to one strong seedling per container. Choose the healthiest-looking seedling and snip off the others at the soil line.
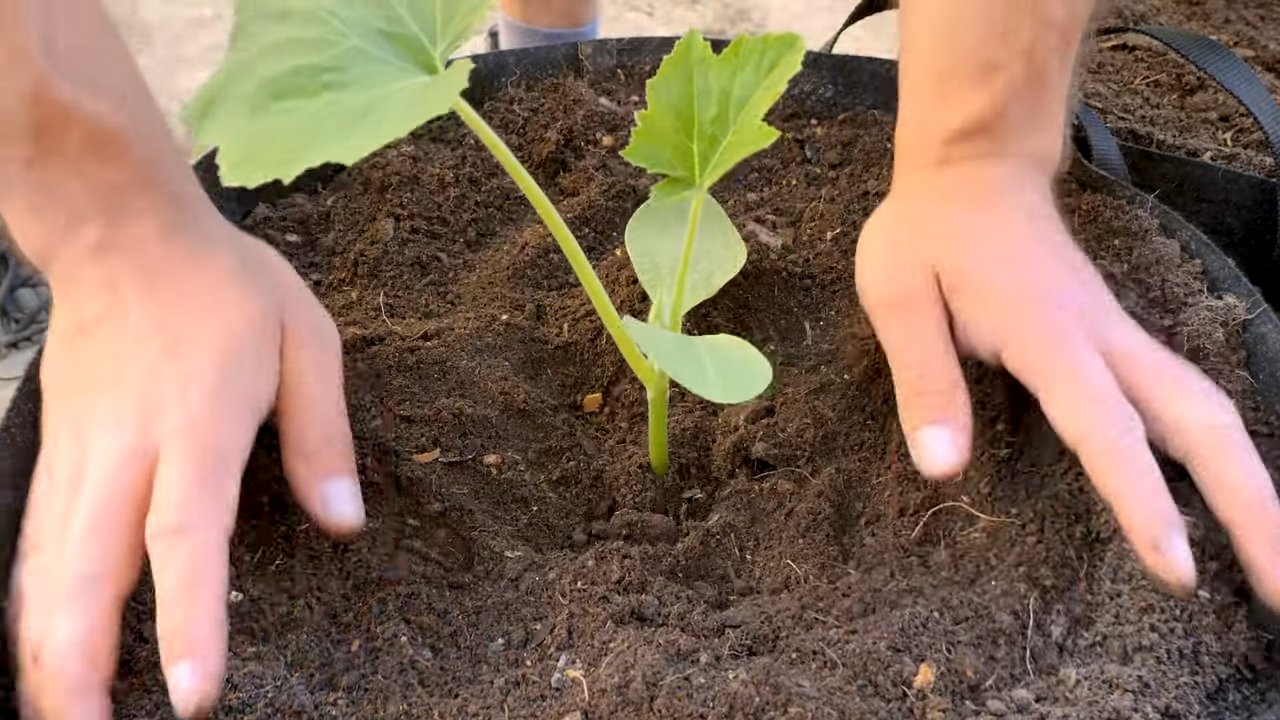
Transplanting Seedlings:
1. Prepare the Container: Fill your container with potting mix, leaving about 2-3 inches of space at the top.
2. Dig a Hole: Dig a hole in the center of the container that’s slightly larger than the root ball of the seedling.
3. Remove the Seedling: Gently remove the seedling from its nursery pot. Loosen the roots slightly if they’re tightly packed.
4. Place the Seedling: Place the seedling in the hole, making sure the top of the root ball is level with the surrounding soil.
5. Fill and Water: Fill in the hole with potting mix and water thoroughly.
Caring for Your Container Squash
Once your squash plants are settled in, it’s time to provide them with the care they need to thrive.
Watering:
1. Water Deeply: Water your squash plants deeply whenever the top inch of soil feels dry to the touch.
2. Avoid Overwatering: Overwatering can lead to root rot, so make sure the container has good drainage.
3. Water in the Morning: Water in the morning to allow the foliage to dry before nightfall, which helps prevent fungal diseases.
4. Consider Self-Watering Containers: If you tend to forget to water, a self-watering container can be a lifesaver.
Fertilizing:
1. Slow-Release Fertilizer: Incorporate a slow-release fertilizer into the potting mix at planting time. This will provide a steady supply of nutrients for several weeks.
2. Liquid Fertilizer: Supplement with a liquid fertilizer every 2-3 weeks, especially during the flowering and fruiting stages. I like to use a balanced fertilizer or one that’s slightly higher in phosphorus (the middle number on the fertilizer label).
3. Follow Instructions: Always follow the instructions on the fertilizer label to avoid over-fertilizing.
Sunlight:
1. Full Sun: Summer squash needs at least 6-8 hours of direct sunlight per day to produce a good harvest.
2. Choose a Sunny Spot: Place your container in the sunniest spot on your patio or balcony.
3. Rotate the Container: Rotate the container occasionally to ensure all sides of the plant receive equal sunlight.
Pollination:
1. Bees and Other Pollinators: Squash plants rely on bees and other pollinators to transfer pollen from the male flowers to the female flowers.
2. Hand-Pollination: If you’re not seeing a lot of bee activity, you may need to hand-pollinate your squash flowers.
3. How to Hand-Pollinate: Identify the male and female flowers. Male flowers have a long, thin stem, while female flowers have a small, immature squash fruit at the base. Use a small paintbrush or cotton swab to collect pollen from the male flower and transfer it to the stigma (the sticky part) of the female flower. Do this in the morning when the flowers are open.
Pest and Disease Control:
1. Common Pests: Squash plants can be susceptible to pests like squash bugs, squash vine borers, and aphids.
2. Inspect Regularly: Inspect your plants regularly for signs of pests or diseases.
3. Organic Pest Control: Use organic pest control methods like insecticidal soap, neem oil, or hand-picking pests off the plants.
4. Good Air Circulation: Ensure good air circulation around your plants to help prevent fungal diseases.
5. Remove Diseased Leaves: Remove any diseased leaves promptly to prevent the spread of disease.
Harvesting Your Summer Squash
The moment we’ve all been waiting for! Harvesting your homegrown squash is incredibly rewarding.
1. Harvest Early and Often: Summer squash is best harvested when it’s young and tender.
2. Size Matters: Zucchini and yellow squash are typically harvested when they’re 6-8 inches long. Patty pan squash can be harvested when they’re 3-4 inches in diameter.
3. Use a Sharp Knife: Use a sharp knife or pruning shears to cut the squash from the plant.
4. Don’t Let Them Get Too Big: If you let the squash get too big, they’ll become tough and seedy.
5. Regular Harvesting Encourages Production: Harvesting regularly encourages the plant to produce more fruit.
Troubleshooting Common Problems
Even with the best care, you might encounter a few challenges along the way. Here are some common problems and how to address them:
* Yellowing Leaves: This could be a sign of overwatering, underwatering, nutrient deficiency, or pest infestation. Check the soil moisture, fertilize if needed, and inspect for pests.
* Powdery Mildew: This fungal disease appears as a white, powdery coating on the leaves. Improve air circulation, water in the morning, and apply a fungicide if necessary.
* Blossom End Rot: This is caused by a calcium deficiency and results in a dark, sunken spot on the blossom end of the fruit. Ensure consistent watering and add calcium to the soil.
* Lack of Fruit Production: This could be due to poor pollination, lack of sunlight, or nutrient
Conclusion
So, there you have it! Transforming your patio into a thriving summer squash haven is not only achievable, but incredibly rewarding. We’ve walked you through the simple steps, highlighted the benefits, and hopefully, inspired you to embrace this green thumb adventure. But why is this DIY patio summer squash growing trick a must-try?
Firstly, it’s about accessibility. No sprawling garden? No problem! This method democratizes gardening, bringing the joy of fresh, homegrown produce to anyone with a sunny patio, balcony, or even a well-lit deck. Imagine stepping outside and harvesting your own zucchini for a delicious summer salad or grilling up some pattypan squash for a flavorful side dish. The convenience is unparalleled.
Secondly, it’s about control. You dictate the soil quality, the watering schedule, and the pest management. This allows you to cultivate healthier, more flavorful squash, free from the harsh chemicals often found in commercially grown produce. You know exactly what’s going into your food, providing peace of mind and a superior culinary experience.
Thirdly, it’s about sustainability. Growing your own food, even on a small scale, reduces your carbon footprint. You’re cutting down on transportation costs, supporting local ecosystems (by providing a habitat for pollinators), and reducing your reliance on industrial agriculture. It’s a small act with a big impact.
But the beauty of this DIY approach lies in its adaptability. Feel free to experiment with different varieties of summer squash. Try growing yellow crookneck, cousa squash, or even tromboncino squash in larger containers. Consider companion planting. Marigolds can deter pests, while basil can enhance the flavor of your squash. Get creative with your container choices. Upcycled buckets, repurposed planters, or even grow bags can all work beautifully. Just ensure they have adequate drainage.
And don’t be afraid to tweak the watering schedule based on your local climate. Hotter, drier regions may require more frequent watering, while cooler, more humid areas may need less. Observe your plants closely and adjust accordingly. The key is to provide consistent moisture without waterlogging the soil.
We encourage you to embark on this patio summer squash growing journey. It’s a fun, educational, and ultimately delicious experience. And most importantly, we want to hear about your successes (and even your challenges!). Share your photos, tips, and stories with us in the comments below. Let’s build a community of patio gardeners, sharing our knowledge and inspiring others to grow their own food.
So, grab your seeds, prepare your containers, and get ready to enjoy the bounty of your own patio garden. Happy growing!
Frequently Asked Questions (FAQ)
What is the best type of container to use for growing summer squash on a patio?
The ideal container for patio summer squash growing should be large enough to accommodate the plant’s root system and provide adequate drainage. A minimum of 20 gallons is recommended, but larger is always better. Consider using plastic pots, terracotta pots, grow bags, or even repurposed containers like large buckets or tubs. Ensure that the container has drainage holes to prevent waterlogging, which can lead to root rot. Dark-colored containers can heat up quickly in the sun, so opt for lighter colors or consider wrapping them in reflective material to keep the soil cool.
How often should I water my patio summer squash plants?
Watering frequency depends on several factors, including the weather, the size of the container, and the type of soil. Generally, you should water your summer squash plants deeply whenever the top inch of soil feels dry to the touch. During hot, dry weather, this may mean watering daily or even twice a day. In cooler, more humid weather, you may only need to water every few days. Avoid overwatering, as this can lead to root rot. A good rule of thumb is to water until you see water draining from the drainage holes.
What kind of soil is best for growing summer squash in containers?
Summer squash thrives in well-draining, nutrient-rich soil. A good potting mix specifically formulated for vegetables is ideal. You can also create your own mix by combining equal parts of compost, peat moss (or coconut coir), and perlite or vermiculite. Compost provides essential nutrients, peat moss or coconut coir helps retain moisture, and perlite or vermiculite improves drainage. Avoid using garden soil in containers, as it can become compacted and poorly drained.
How much sunlight do patio summer squash plants need?
Summer squash requires at least 6-8 hours of direct sunlight per day to thrive. Choose a location on your patio that receives ample sunlight throughout the day. If your patio is shaded for part of the day, try to position your plants so that they receive morning sun, which is less intense than afternoon sun. If you don’t have enough natural sunlight, you can supplement with grow lights.
What are some common pests and diseases that affect summer squash, and how can I prevent them?
Common pests that affect summer squash include squash bugs, squash vine borers, aphids, and cucumber beetles. Diseases include powdery mildew, downy mildew, and blossom-end rot. To prevent pests and diseases, practice good garden hygiene. Remove any dead or diseased leaves promptly. Use insecticidal soap or neem oil to control pests. Ensure good air circulation around your plants to prevent fungal diseases. Avoid overhead watering, which can promote the spread of diseases. Blossom-end rot is caused by calcium deficiency, so ensure that your soil is rich in calcium or supplement with a calcium-rich fertilizer.
When should I harvest my patio summer squash?
Harvest time depends on the variety of summer squash you are growing. Generally, summer squash is ready to harvest when it is young and tender. Zucchini should be harvested when it is 6-8 inches long, while yellow squash should be harvested when it is 4-6 inches long. Pattypan squash should be harvested when it is 3-4 inches in diameter. Use a sharp knife or pruners to cut the squash from the plant, leaving a short stem attached.
Can I grow different varieties of summer squash in the same container?
While it’s technically possible to grow different varieties of summer squash in the same large container, it’s generally not recommended. Different varieties may have different growth habits and nutrient requirements, which can make it difficult to provide optimal conditions for all plants. Additionally, cross-pollination can occur, which may affect the flavor and appearance of the fruit. It’s best to grow each variety in its own separate container.
How can I encourage more female flowers on my summer squash plants?
Female flowers are the ones that produce fruit, so encouraging more of them is essential for a good harvest. To encourage more female flowers, ensure that your plants are receiving adequate sunlight, water, and nutrients. Avoid over-fertilizing with nitrogen, as this can promote vegetative growth at the expense of flower production. You can also try pinching off the tips of the vines to encourage branching and more flower production.
What should I do if my summer squash plants are not producing fruit?
There are several reasons why your summer squash plants may not be producing fruit. One common reason is lack of pollination. Summer squash relies on bees and other pollinators to transfer pollen from the male flowers to the female flowers. If you are not seeing many bees in your garden, you can try hand-pollinating the flowers yourself. Another reason could be nutrient deficiencies. Ensure that your plants are receiving adequate phosphorus and potassium, which are essential for flower and fruit production. Stressful conditions, such as extreme heat or drought, can also inhibit fruit production.
Can I save seeds from my patio summer squash to plant next year?
Yes, you can save seeds from your patio summer squash, but keep in mind that the resulting plants may not be true to type if cross-pollination has occurred. To save seeds, allow a few fruits to mature fully on the plant. Once the fruits are ripe, scoop out the seeds and rinse them thoroughly. Spread the seeds out on a paper towel to dry completely. Store the dried seeds in an airtight container in a cool, dark place.
Leave a Comment