
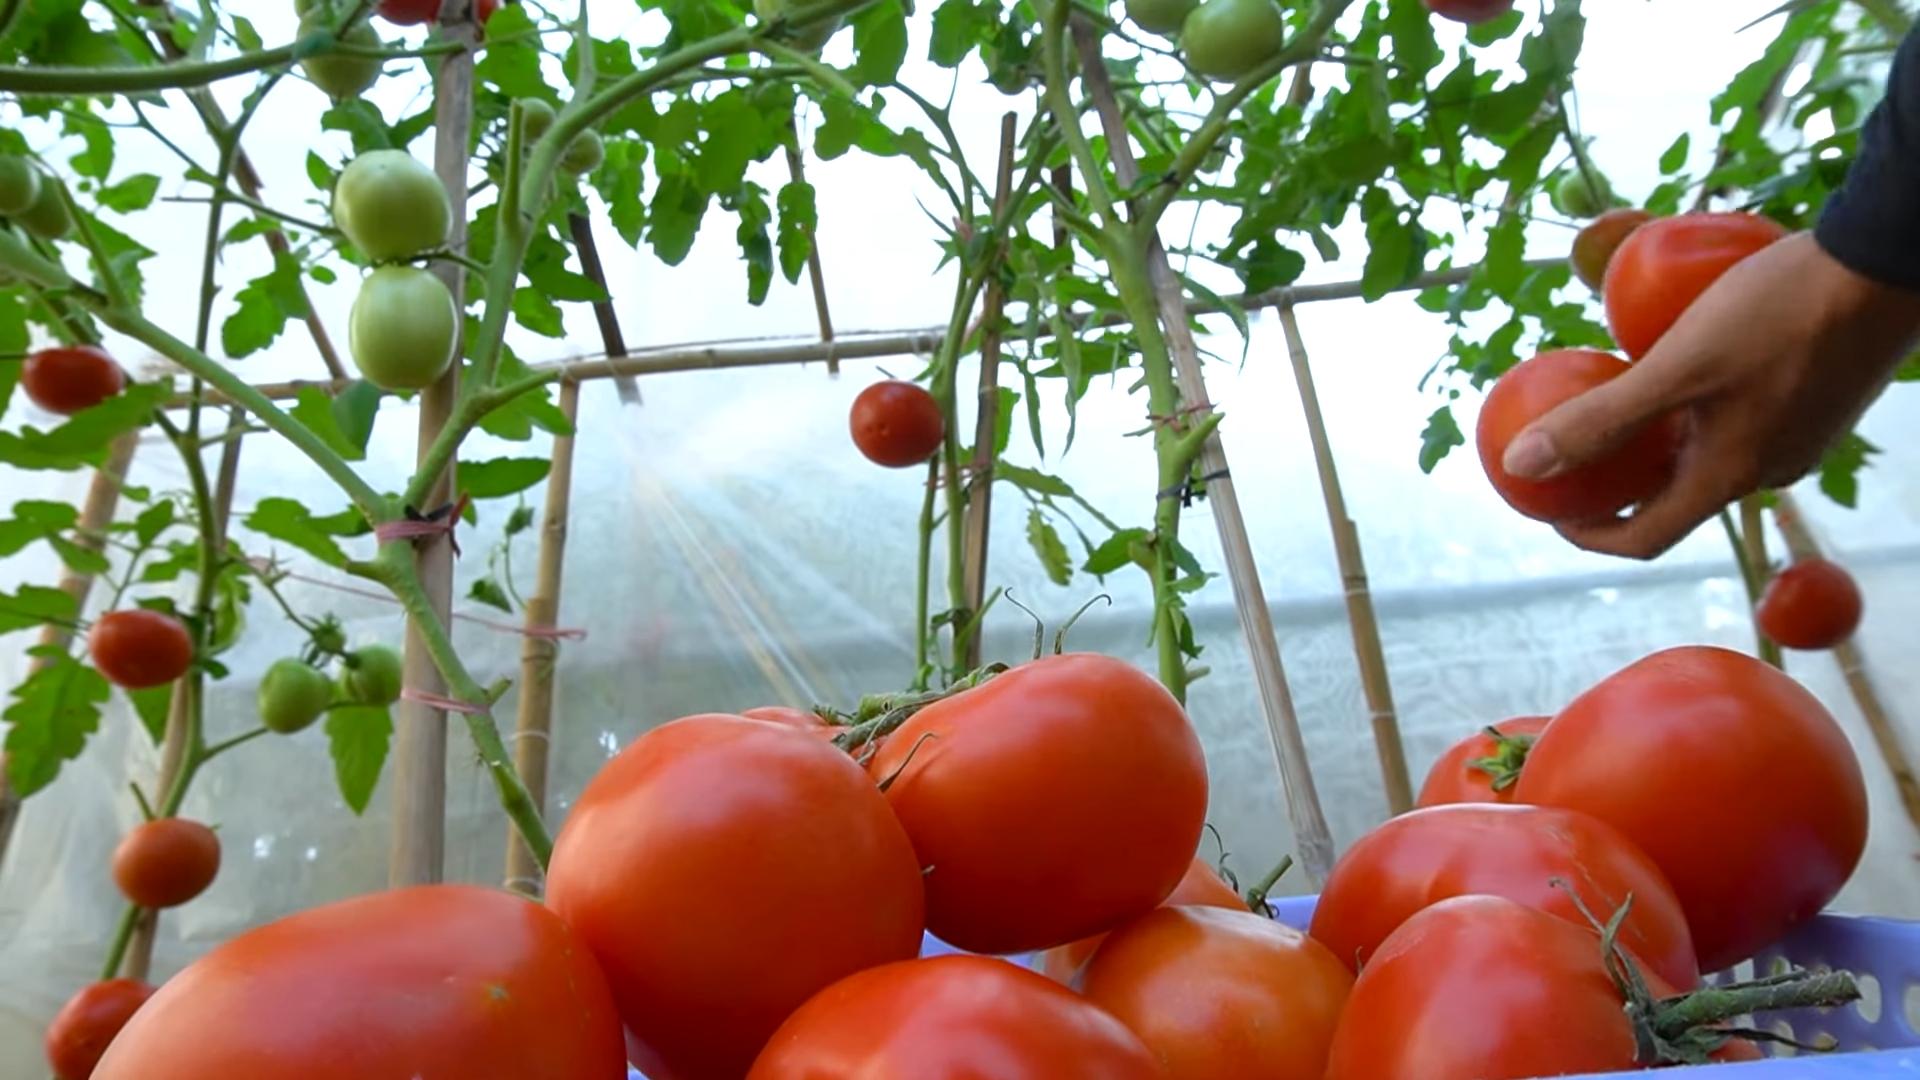
Never Ending Tomato Harvest: Imagine baskets overflowing with juicy, sun-ripened tomatoes all season long! Sounds like a dream, right? Well, it doesn’t have to be! For centuries, gardeners have sought the secret to bountiful harvests, and while there’s no magic wand, I’m here to share some incredible DIY tricks and hacks that can significantly boost your tomato yield and keep those delicious fruits coming.
From ancient Incan agricultural terraces to modern-day urban gardens, the tomato has held a special place in our hearts (and our stomachs!). But let’s face it, sometimes getting a truly impressive never ending tomato harvest feels like an uphill battle. Pests, diseases, and unpredictable weather can all conspire against us.
That’s where these DIY solutions come in. I’m going to show you simple, cost-effective techniques that anyone can use, regardless of their gardening experience. We’ll cover everything from soil preparation and pruning secrets to clever watering strategies and natural pest control methods. Why spend a fortune on expensive fertilizers and treatments when you can harness the power of nature and a little bit of elbow grease? Get ready to transform your tomato patch into a thriving, fruit-producing machine!
Never-Ending Tomato Harvest: My DIY Guide to Tomato Propagation from Suckers
Hey fellow gardeners! Are you tired of your tomato plants petering out halfway through the season? Do you dream of a never-ending supply of juicy, homegrown tomatoes? Well, you’re in the right place! I’m going to share my favorite DIY trick for propagating tomato plants from suckers. It’s super easy, incredibly rewarding, and will give you a second (or even third!) tomato harvest. Trust me, once you try this, you’ll be hooked!
What are Tomato Suckers and Why Should You Propagate Them?
Before we dive in, let’s quickly cover what tomato suckers are. These are the little shoots that grow in the “armpit” of the plant, where a branch meets the main stem. Many gardeners prune them off to encourage the main plant to focus its energy on fruit production. But guess what? Instead of tossing them in the compost, we can turn them into entirely new tomato plants!
Why propagate suckers? Here’s why I think it’s awesome:
* Free Plants: Seriously, who doesn’t love free plants? You’re already pruning your tomatoes, so you’re essentially getting new plants for the cost of a little potting soil.
* Extended Harvest: By propagating suckers, you can stagger your planting times and extend your tomato harvest well into the fall. Imagine enjoying fresh tomatoes long after everyone else’s plants have given up!
* Genetic Clones: You’re creating clones of your best-performing tomato plants. If you have a variety you absolutely love, this is a great way to ensure you have more of them.
* Easy and Fast: This method is incredibly simple and the suckers root quickly. You’ll be amazed at how easy it is to create new tomato plants.
* Space Saving: If you don’t have a lot of space for starting seeds indoors, propagating suckers is a great alternative.
Materials You’ll Need
Okay, let’s gather our supplies. You probably already have most of these on hand:
* Tomato Suckers: Obviously! Choose healthy-looking suckers that are about 4-6 inches long.
* Sharp Pruning Shears or Knife: Make sure they’re clean to prevent disease.
* Rooting Hormone (Optional): This can speed up the rooting process, but it’s not essential. I use it sometimes, sometimes I don’t, and I still get great results.
* Small Pots or Containers: I like to use 3-4 inch pots. You can also use recycled yogurt containers or plastic cups – just make sure they have drainage holes.
* Potting Mix: Use a good quality potting mix that drains well.
* Water: For watering your new plants.
* Spray Bottle (Optional): For misting the cuttings.
* Clear Plastic Bag or Humidity Dome (Optional): To create a humid environment for rooting.
Step-by-Step Instructions: Propagating Tomato Suckers
Alright, let’s get our hands dirty! Here’s my step-by-step guide to propagating tomato suckers:
1. Choose Your Suckers Wisely:
* Inspect your tomato plants and identify healthy suckers. Look for ones that are about 4-6 inches long and have several leaves.
* Avoid suckers that are yellowing, wilting, or showing signs of disease.
* Ideally, choose suckers from the lower part of the plant, as they tend to root more easily.
2. Carefully Remove the Suckers:
* Using your clean pruning shears or knife, carefully cut the sucker from the main plant.
* Make the cut close to the stem, but be careful not to damage the main plant.
* I like to make a clean, angled cut to help prevent disease.
3. Prepare the Suckers for Rooting:
* Remove the lower leaves from the sucker, leaving only the top few leaves. This will help prevent the leaves from rotting in the soil and encourage root growth.
* If the remaining leaves are very large, you can cut them in half to reduce water loss.
4. Apply Rooting Hormone (Optional):
* If you’re using rooting hormone, dip the cut end of the sucker into the hormone powder or liquid.
* Tap off any excess hormone.
* I find that rooting hormone gives the suckers a little boost, but they’ll usually root just fine without it.
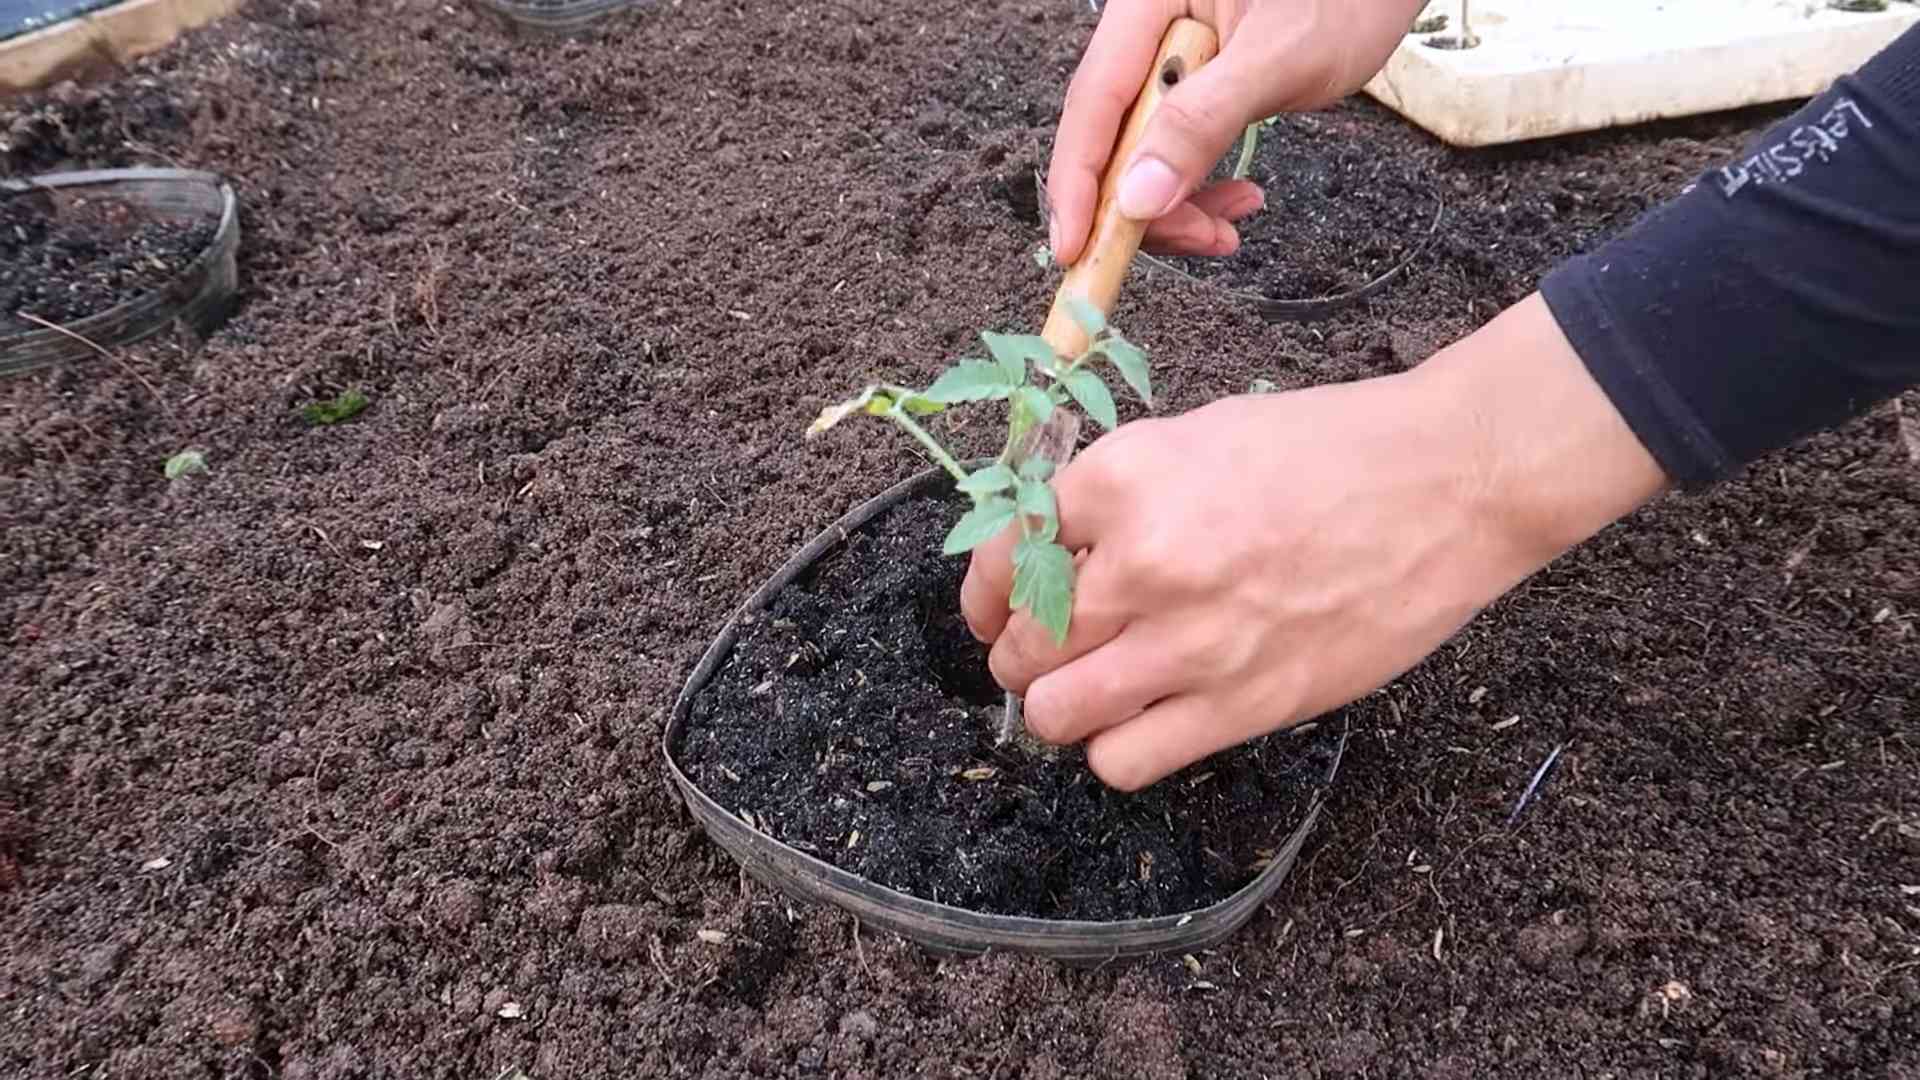
5. Plant the Suckers in Pots:
* Fill your small pots or containers with potting mix.
* Make a hole in the center of the potting mix with your finger or a pencil.
* Gently insert the cut end of the sucker into the hole, making sure the lowest node (where the leaves were removed) is buried in the soil.
* Gently firm the soil around the sucker to secure it in place.
6. Water Thoroughly:
* Water the newly planted suckers thoroughly until the water drains out of the bottom of the pot.
* This will help settle the soil and provide the suckers with the moisture they need to start rooting.
7. Create a Humid Environment (Optional):
* To help the suckers root faster, you can create a humid environment by placing a clear plastic bag over the pot or using a humidity dome.
* Make sure the bag or dome doesn’t touch the leaves of the sucker.
* Remove the bag or dome for a few hours each day to allow for air circulation and prevent mold growth.
8. Place in a Bright, Indirect Light Location:
* Place the pots in a location that receives bright, indirect light. Avoid direct sunlight, which can scorch the leaves.
* A windowsill or a spot under a grow light works well.
9. Keep the Soil Moist:
* Keep the soil consistently moist, but not soggy.
* Check the soil moisture daily and water when the top inch of soil feels dry to the touch.
* I like to use a spray bottle to mist the leaves occasionally, which helps keep them hydrated.
10. Wait for Roots to Develop:
* It usually takes about 1-2 weeks for the suckers to develop roots.
* You can gently tug on the sucker to check for roots. If it resists being pulled out of the soil, it has likely rooted.
* You can also look for new growth on the sucker, which is a sign that it’s developing roots.
11. Transplant to Larger Pots or the Garden:
* Once the suckers have developed a good root system, you can transplant them to larger pots or directly into the garden.
* If transplanting to the garden, choose a sunny location with well-drained soil.
* Harden off the plants by gradually exposing them to outdoor conditions for a few hours each day for a week before transplanting.
Troubleshooting Tips
Sometimes, things don’t go exactly as planned. Here are a few common issues you might encounter and how to fix them:
* Suckers Wilting: This is usually due to lack of humidity. Make sure you’re providing a humid environment and keeping the soil moist.
* Suckers Rotting: This is usually caused by overwatering or poor drainage. Make sure your pots have drainage holes and avoid overwatering.
* Suckers Not Rooting: This could be due to a number of factors, including poor quality suckers, lack of light, or improper watering. Try using rooting hormone, providing more light, and ensuring the soil is consistently moist.
* Fungus Gnats: These little pests can be annoying. Let the top of the soil dry out slightly between waterings to discourage them. You can also use sticky traps to catch them.
Timing is Everything
The best time to propagate tomato suckers is during the growing season, when the plants are actively growing. I usually start propagating suckers in late spring or early summer, when my tomato plants are producing lots of new growth. You can continue propagating suckers throughout the summer and even into the early fall, depending on your climate.
Choosing the Right Suckers
Not all suckers are created equal! Here are a few tips for choosing the best suckers for propagation:
* Size Matters: Aim for suckers that are about 4-6 inches long. Smaller suckers may not have enough energy to root, while larger suckers may be more difficult to handle.
* Healthy Appearance: Choose suckers that are green, healthy, and free from pests or diseases. Avoid suckers that are yellowing, wilting, or have spots on the leaves.
* Location on the Plant: Suckers from the lower part of the plant tend to root more easily than suck
Conclusion
So, there you have it! The secret to a potentially never-ending tomato harvest is within your reach. This isn’t just another gardening tip; it’s a game-changer that can transform your tomato-growing experience from a seasonal endeavor to a continuous supply of delicious, homegrown fruit. We’ve explored a simple yet incredibly effective method of propagating tomato suckers, turning what would normally be discarded into thriving new plants.
Why is this a must-try? Because it’s efficient, cost-effective, and environmentally friendly. Instead of relying solely on seeds or store-bought seedlings, you’re essentially cloning your best-performing tomato plants, ensuring you get more of what you love. Imagine the satisfaction of harvesting tomatoes well into the late season, or even extending your growing season indoors with these propagated plants.
But the beauty of this DIY trick lies in its adaptability. Feel free to experiment with different rooting mediums. While we’ve highlighted water propagation, you can also try rooting hormone and directly planting the suckers in a well-draining potting mix. Some gardeners even have success with placing the suckers directly into the soil where they want the new plant to grow, keeping the soil consistently moist. The key is to find what works best for your climate and growing conditions.
Consider the variety of tomatoes you’re propagating. This method works exceptionally well for indeterminate tomato varieties, which naturally produce more suckers. However, you can also try it with determinate varieties, although you might need to be more selective in choosing which suckers to propagate.
Don’t be afraid to get creative with your setup. If you’re short on space, consider using smaller containers or even hanging baskets for your propagated tomato plants. You can also experiment with different fertilizers to see which ones promote the healthiest growth.
We wholeheartedly encourage you to give this never-ending tomato harvest trick a try. It’s a rewarding experience that will not only provide you with an abundance of tomatoes but also deepen your connection with the natural world. The process is simple enough for beginners, yet offers enough flexibility for experienced gardeners to refine and customize.
Once you’ve tried it, we’d love to hear about your experience! Share your successes, challenges, and any variations you’ve discovered in the comments below. Let’s build a community of tomato enthusiasts who are passionate about maximizing their harvest and enjoying the fruits (literally!) of their labor. Your insights could help other gardeners achieve their tomato-growing dreams. So, grab your pruning shears, select those healthy suckers, and get ready for a never-ending supply of delicious, homegrown tomatoes! Let us know how this **never-ending tomato harvest** method works for you!
Frequently Asked Questions (FAQ)
What exactly is a tomato sucker, and how do I identify it?
A tomato sucker is a shoot that grows in the “armpit” of the tomato plant, where a branch meets the main stem. It emerges at a 45-degree angle. They often look like miniature tomato plants themselves. Identifying them early is crucial. If left unchecked, suckers will draw energy away from fruit production, leading to smaller tomatoes and a less abundant harvest. Look for these small shoots developing between the main stem and the branches.
How long does it take for tomato suckers to root using the water propagation method?
Generally, you should see roots emerging from the tomato suckers within 7-14 days when using the water propagation method. The exact timeframe can vary depending on factors such as the temperature, humidity, and the specific tomato variety. Ensure the water is changed every few days to keep it fresh and oxygenated, which promotes faster root development. Once the roots are about an inch or two long, they are ready to be transplanted into soil.
Can I use any type of water for propagating tomato suckers?
While tap water can be used, it’s best to use filtered or dechlorinated water. Tap water often contains chlorine and other chemicals that can inhibit root growth. If you’re using tap water, let it sit out in an open container for 24 hours to allow the chlorine to dissipate. Rainwater is also an excellent option, as it’s naturally free of chemicals and rich in nutrients.
What type of soil is best for planting the rooted tomato suckers?
A well-draining potting mix is ideal for planting rooted tomato suckers. Look for a mix that contains ingredients like peat moss, perlite, and vermiculite. These components help to retain moisture while also providing adequate drainage, preventing the roots from becoming waterlogged. You can also amend your existing garden soil with compost or other organic matter to improve its drainage and fertility.
How often should I water the newly planted tomato suckers?
Newly planted tomato suckers need consistent moisture to establish their roots. Water them thoroughly after planting and then keep the soil consistently moist, but not soggy, for the first week or two. Check the soil moisture daily by sticking your finger about an inch into the soil. If it feels dry, it’s time to water. As the plants mature, you can gradually reduce the frequency of watering, allowing the soil to dry out slightly between waterings.
Do I need to fertilize the propagated tomato plants?
Yes, fertilizing is essential for healthy growth and abundant fruit production. Start fertilizing the propagated tomato plants about two weeks after transplanting them into soil. Use a balanced fertilizer specifically formulated for tomatoes, following the instructions on the label. You can also use organic fertilizers like compost tea or fish emulsion. Avoid over-fertilizing, as this can lead to excessive foliage growth at the expense of fruit production.
Can I propagate tomato suckers from any tomato variety?
While this method works best with indeterminate tomato varieties, you can propagate suckers from determinate varieties as well. Indeterminate varieties tend to produce more suckers, making them ideal for this propagation technique. However, determinate varieties can still be propagated, although you might need to be more selective in choosing which suckers to use.
What if the tomato suckers don’t develop roots in water?
If the tomato suckers don’t develop roots in water after a couple of weeks, there could be several reasons. First, ensure the water is being changed regularly. Stagnant water can inhibit root growth. Second, check the temperature. Rooting is more successful in warmer temperatures. Third, consider using a rooting hormone. Dip the cut end of the sucker in rooting hormone before placing it in water. Finally, make sure the sucker is healthy and free from disease.
Can I grow these propagated tomato plants indoors?
Yes, you can grow propagated tomato plants indoors, especially if you live in a region with a short growing season. However, you’ll need to provide them with adequate light. Place them near a sunny window or use grow lights to supplement natural light. You’ll also need to pollinate the flowers manually, as there won’t be any bees or other pollinators indoors. Gently shake the plants or use a small brush to transfer pollen from one flower to another.
How do I prevent diseases and pests from affecting my propagated tomato plants?
Prevention is key when it comes to diseases and pests. Start by using a high-quality potting mix and providing good air circulation. Avoid overwatering, as this can create a favorable environment for fungal diseases. Inspect your plants regularly for signs of pests or diseases. If you spot any problems, address them promptly with appropriate treatments, such as insecticidal soap or fungicide. Consider using companion planting to deter pests and attract beneficial insects. Marigolds, basil, and garlic are all excellent companion plants for tomatoes.

Leave a Comment