
Natural cleaner DIY projects are not just a trend; they’re a return to a simpler, healthier way of living! For generations, our grandparents relied on the power of nature to keep their homes sparkling clean. Think about it – before the age of harsh chemicals and complicated formulas, they used ingredients like vinegar, baking soda, and lemon juice to tackle everything from stubborn stains to lingering odors. These time-tested methods are not only effective but also incredibly gentle on our planet and our families.
I’m so excited to share some of my favorite DIY natural cleaner recipes and hacks with you. In today’s world, where we’re constantly bombarded with synthetic chemicals, creating your own natural cleaners is a fantastic way to reduce your exposure to potentially harmful substances. Plus, it’s incredibly satisfying to know exactly what’s going into the products you use every day. Not only are these recipes budget-friendly, but they also empower you to take control of your home’s cleanliness in a safe and sustainable way. Ready to ditch the chemicals and embrace the power of natural cleaner DIY? Let’s get started!
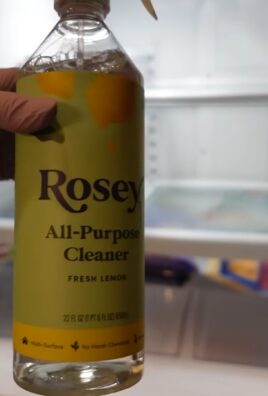
DIY All-Purpose Natural Cleaner: Ditch the Chemicals!
Hey there, fellow DIY enthusiasts! I’m so excited to share my go-to recipe for an all-purpose natural cleaner. I’ve been using this for years, and it’s seriously replaced almost every commercial cleaner in my house. It’s effective, smells amazing (you can customize the scent!), and most importantly, it’s safe for my family and pets. Plus, it’s super budget-friendly! Let’s get started!
What You’ll Need: The Ingredients and Supplies
Before we dive into the mixing, let’s gather everything we need. This makes the process smooth and efficient.
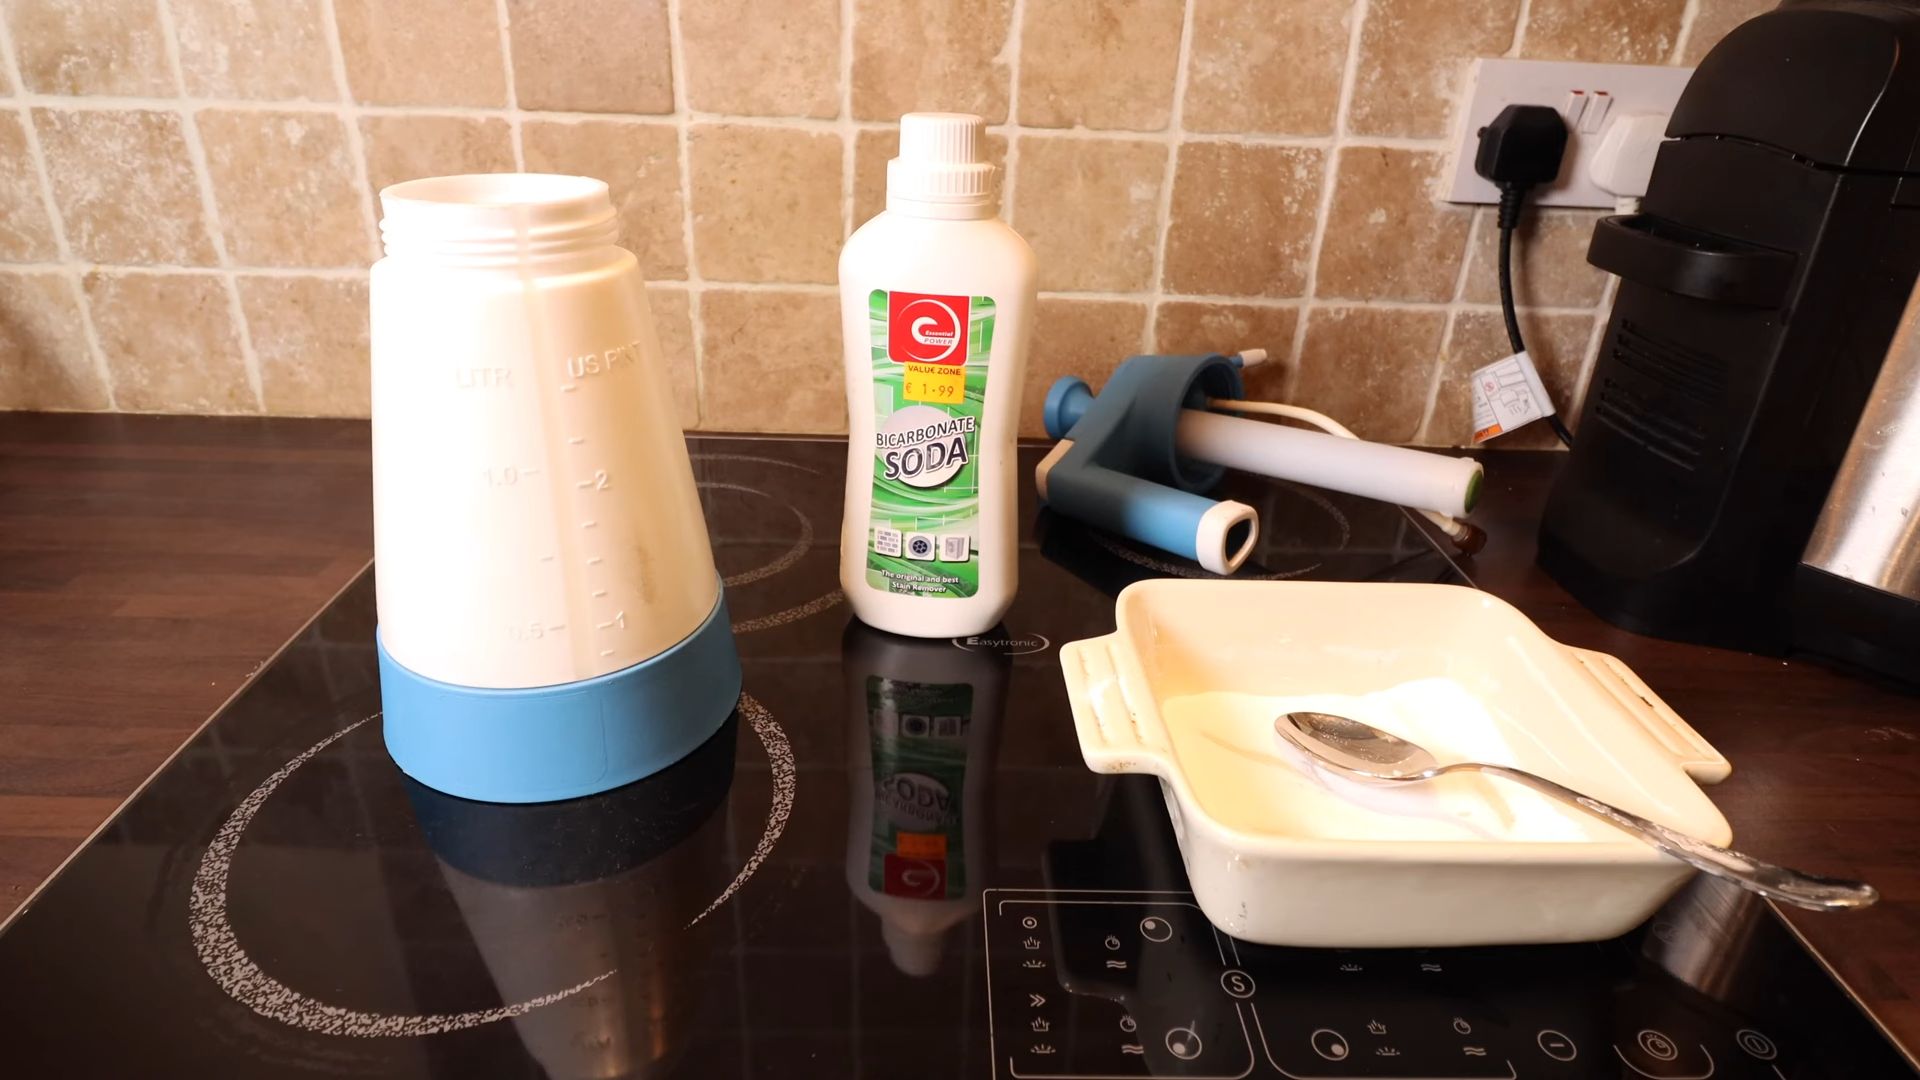
* **White Vinegar:** This is the workhorse of our cleaner. It’s a natural disinfectant and deodorizer. Don’t worry about the smell; it dissipates quickly!
* **Water:** Distilled water is best to prevent mineral buildup, but tap water works fine too.
* **Essential Oils:** This is where you get to customize the scent! I love using lemon, lavender, tea tree, or eucalyptus. You can even mix and match!
* **Spray Bottle:** A clean, empty spray bottle is essential. I prefer a dark-colored bottle to protect the essential oils from light, but any spray bottle will do.
* **Measuring Cup or Spoons:** For accurate measurements.
* **Funnel (Optional):** Makes pouring liquids into the spray bottle easier.
The Recipe: Mixing Your Natural Cleaner
Okay, let’s get to the fun part – mixing our cleaner! This recipe is simple and easily scalable, so you can adjust it to fit your spray bottle size.
1. **Prepare Your Spray Bottle:** Make sure your spray bottle is clean and dry. Any residue from previous cleaners could react with our ingredients.
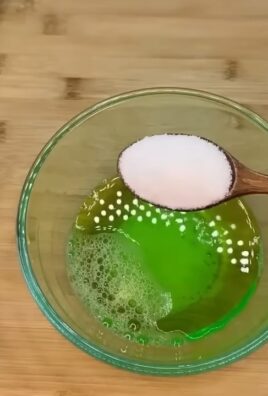
2. **Add White Vinegar:** Pour 1 cup of white vinegar into the spray bottle. Vinegar is a powerful cleaning agent, but it can be harsh on some surfaces, so we’re diluting it with water.
3. **Add Water:** Add 1 cup of water to the spray bottle. This dilutes the vinegar and makes the cleaner safe for most surfaces.
4. **Add Essential Oils:** This is where you get to personalize your cleaner! Add 15-20 drops of your favorite essential oils. Remember, some essential oils have antibacterial and antiviral properties, so choose wisely! Here are some of my favorite combinations:
* **Lemon & Tea Tree:** A classic combination for disinfecting and a fresh, clean scent.
* **Lavender & Eucalyptus:** Calming and refreshing, perfect for bathrooms.
* **Orange & Clove:** A warm and spicy scent, great for the kitchen.
* **Peppermint & Rosemary:** Invigorating and energizing, ideal for cleaning in the morning.
5. **Shake Well:** Secure the spray nozzle onto the bottle and shake vigorously to combine all the ingredients. The essential oils will disperse throughout the vinegar and water.
6. **Label Your Bottle:** This is important! Label your spray bottle with the name of the cleaner and the date you made it. This will help you keep track of what’s inside and when you need to make a new batch.
Using Your Natural Cleaner: Tips and Tricks
Now that you have your all-purpose natural cleaner, let’s talk about how to use it effectively.
1. **Test on a Small Area:** Before using the cleaner on a large surface, test it on a small, inconspicuous area to ensure it doesn’t damage or discolor the material. This is especially important for delicate surfaces like wood or painted walls.
2. **Spray and Wipe:** Spray the cleaner onto the surface you want to clean and let it sit for a few seconds. Then, wipe it clean with a clean cloth or sponge.
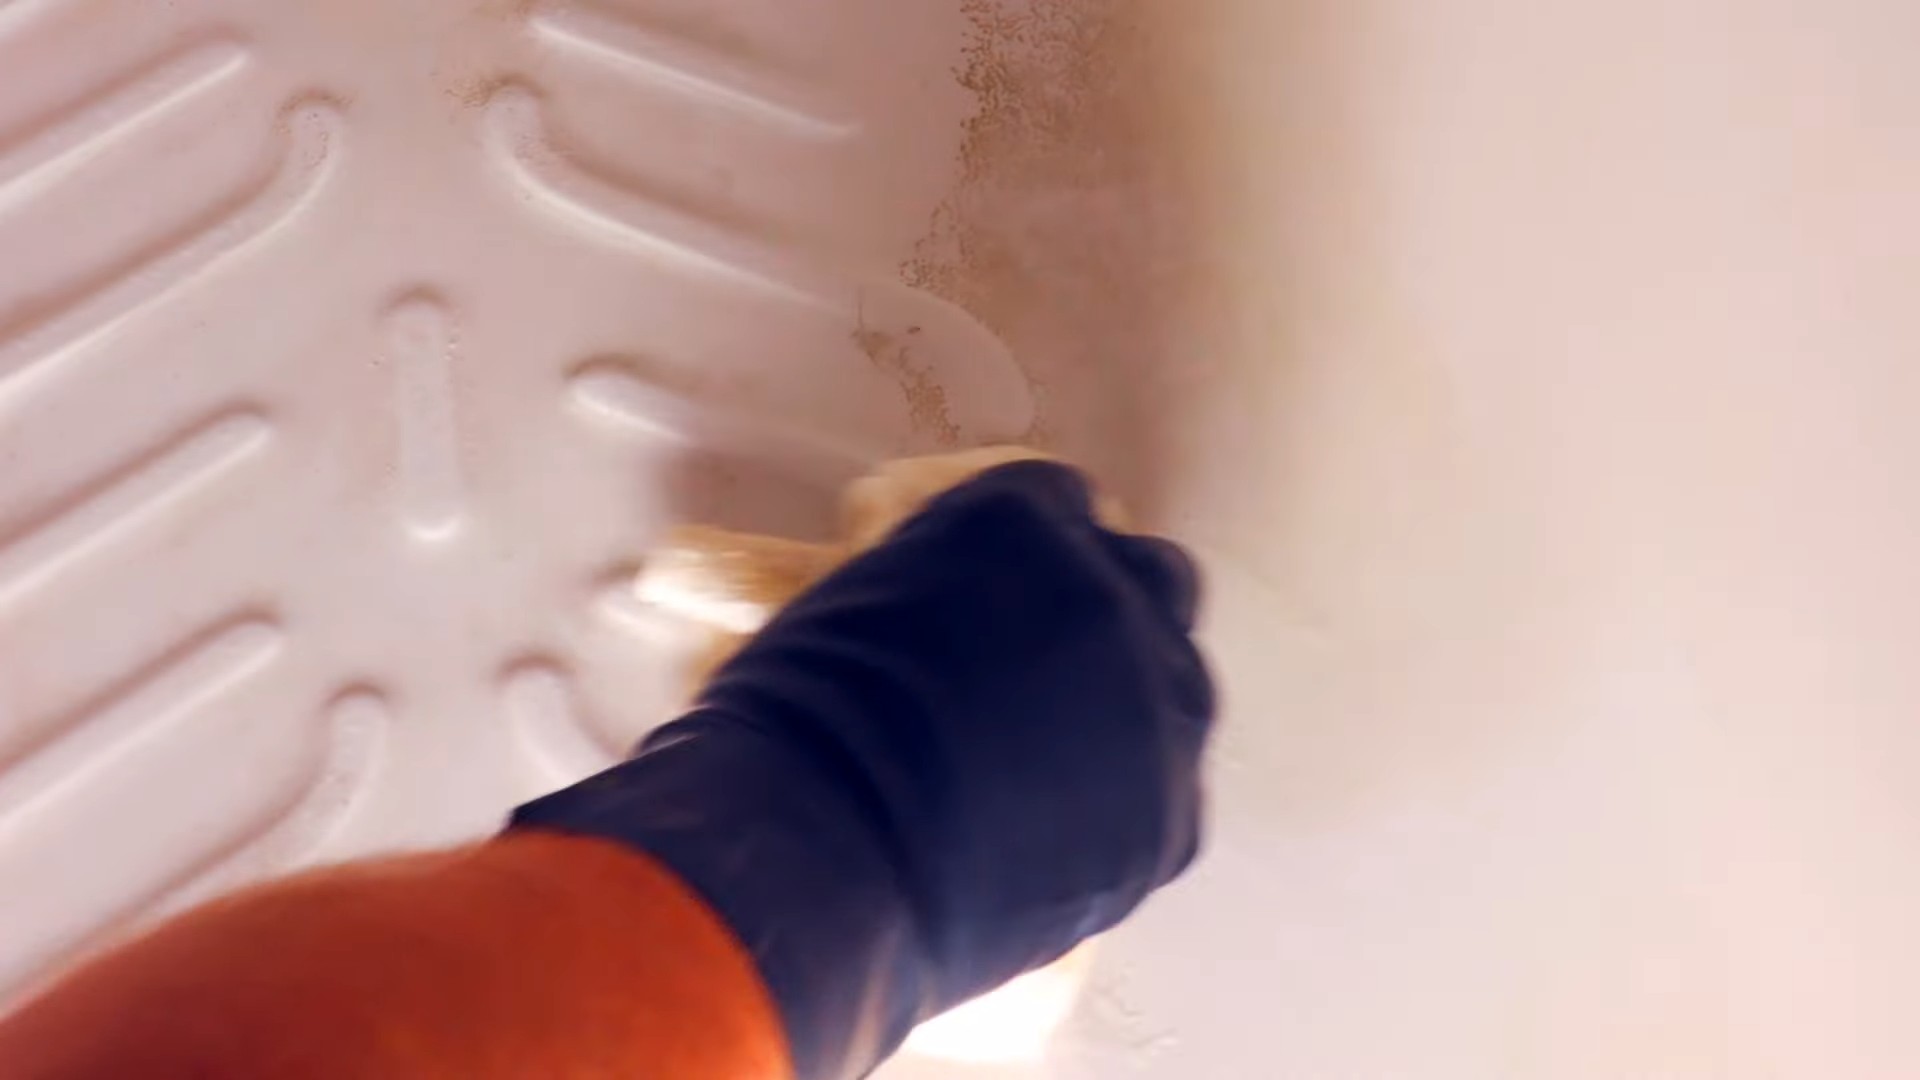
3. **Tackle Tough Stains:** For tough stains, let the cleaner sit for a few minutes before wiping. You can also use a scrub brush or sponge to help loosen the stain.
4. **Use on Multiple Surfaces:** This cleaner is safe for most surfaces, including countertops, sinks, toilets, floors, and appliances. However, avoid using it on marble or granite, as the vinegar can etch these surfaces.
5. **Freshen the Air:** You can also use this cleaner as an air freshener! Simply spray it into the air to eliminate odors and create a fresh, clean scent.
Troubleshooting: Common Issues and Solutions
Sometimes, things don’t go exactly as planned. Here are some common issues you might encounter and how to fix them:
* **Vinegar Smell is Too Strong:** If the vinegar smell is too strong, you can add more essential oils or dilute the cleaner with more water. The vinegar smell will dissipate as it dries.
* **Cleaner Leaves Streaks:** If the cleaner leaves streaks, try using a microfiber cloth to wipe the surface. You can also try diluting the cleaner with more water.
* **Essential Oils Separate:** Essential oils can separate from the water and vinegar over time. Simply shake the bottle well before each use to re-emulsify the ingredients.
* **Spray Bottle Clogs:** If your spray bottle clogs, try cleaning the nozzle with a pin or needle. You can also try using a different spray bottle.
Essential Oil Blends: My Favorite Recipes
I love experimenting with different essential oil blends to create unique scents and cleaning properties. Here are a few of my favorite recipes:
* **The “Kitchen Zinger”:** 10 drops Lemon, 5 drops Rosemary, 5 drops Grapefruit. This blend is fantastic for cutting through grease and leaving a bright, citrusy scent in your kitchen.
* **The “Bathroom Bliss”:** 8 drops Lavender, 7 drops Tea Tree, 5 drops Eucalyptus. This blend is perfect for disinfecting and creating a spa-like atmosphere in your bathroom.
* **The “All-Purpose Powerhouse”:** 7 drops Orange, 6 drops Cinnamon, 7 drops Clove. This blend is warm, spicy, and has excellent antibacterial properties.
* **The “Gentle Giant”:** 10 drops Chamomile, 5 drops Lavender, 5 drops Bergamot. This blend is gentle enough for sensitive surfaces and leaves a calming, relaxing scent.
Safety First: Precautions to Take
While this cleaner is natural, it’s still important to take some precautions:
* **Keep Out of Reach of Children and Pets:** Although the ingredients are natural, they can still be harmful if ingested. Store the cleaner in a safe place out of reach of children and pets.
* **Avoid Contact with Eyes:** Avoid getting the cleaner in your eyes. If contact occurs, rinse thoroughly with water.
* **Do Not Mix with Bleach:** Never mix this cleaner with bleach, as it can create harmful fumes.
* **Use in a Well-Ventilated Area:** Use the cleaner in a well-ventilated area to avoid inhaling the fumes.
Beyond the Basics: Advanced Cleaning Tips
Want to take your natural cleaning game to the next level? Here are some advanced tips:
* **Infused Vinegar:** Infuse your vinegar with citrus peels or herbs for an extra boost of cleaning power and scent. Simply add the peels or herbs to a jar of vinegar and let it sit for a few weeks before straining and using.
* **Baking Soda Boost:** For extra scrubbing power, sprinkle baking soda on the surface before spraying with the cleaner. The baking soda will act as a gentle abrasive to help remove stubborn stains.
* **Castile Soap Addition:** Add a tablespoon of castile soap to the recipe for extra cleaning power. Castile soap is a natural, plant-based soap that’s gentle and effective.
* **DIY Cleaning Wipes:** Soak reusable cloths in the cleaner and store them in an airtight container for convenient cleaning wipes.
Why I Love This Cleaner: The Benefits
I’m seriously passionate about this cleaner because it’s not just effective, it’s also good for you, your family, and the environment. Here’s why I love it:
* **Natural and Non-Toxic:** It’s made with natural ingredients that are safe for your family and pets. You don’t have to worry about harsh chemicals or toxic fumes.
* **Environmentally Friendly:** It’s biodegradable and doesn’t contribute to pollution. You’re reducing your carbon footprint by making your own cleaner.
* **Cost-Effective:** It’s much cheaper than buying commercial cleaners. You can save a lot of money by making your own cleaner.
* **Customizable:** You can customize the scent and cleaning properties to suit your needs. You can create a cleaner that’s perfect for your home.
* **Effective:** It’s just as effective as commercial cleaners. You don’t have to sacrifice cleaning power to use a natural cleaner.
Storage: Keeping Your Cleaner Fresh
Proper storage is key to maintaining the effectiveness of your natural cleaner.
* **Dark, Cool Place:** Store your cleaner in a dark, cool place away from direct sunlight. Sunlight can degrade the essential oils and reduce their effectiveness.
* **Airtight Container:** Make sure the spray bottle is tightly sealed to prevent evaporation and contamination.
* **
Conclusion
So, there you have it! This simple, effective, and surprisingly powerful natural cleaner DIY is more than just a recipe; it’s a game-changer for your home cleaning routine. We’ve walked you through the process, highlighted the benefits, and hopefully, convinced you that ditching harsh chemicals for a homemade solution is not only good for your health and the environment but also incredibly cost-effective.
Why is this a must-try? Because it’s a trifecta of awesome: it’s safe, it’s sustainable, and it works! You’re eliminating exposure to potentially harmful chemicals that can irritate your skin, lungs, and even contribute to long-term health problems. You’re reducing your reliance on single-use plastic bottles that clog up landfills and pollute our oceans. And most importantly, you’re getting a sparkling clean home without sacrificing effectiveness. This isn’t some watered-down, weak substitute; this natural cleaner cuts through grease, grime, and everyday messes with surprising ease.
But the beauty of this DIY approach is its adaptability. Feel free to experiment with different essential oils to create your signature scent. Love the invigorating smell of citrus? Add a few drops of lemon, orange, or grapefruit essential oil. Prefer something more calming and relaxing? Lavender or chamomile might be your go-to. You can even tailor the scent to the season – think cinnamon and clove for fall, or peppermint and pine for winter.
Beyond scent, you can also adjust the recipe to suit specific cleaning needs. For tougher stains, try adding a tablespoon of washing soda (sodium carbonate) to the mix. For extra disinfecting power, a splash of white vinegar can do the trick (just be mindful of using it on certain surfaces like marble or granite). And if you’re cleaning delicate surfaces, you can dilute the solution further with more water.
We truly believe that once you try this natural cleaner DIY, you’ll never go back to store-bought alternatives. It’s empowering to know exactly what’s going into your cleaning products and to have control over the ingredients. It’s also incredibly satisfying to create something yourself that’s both useful and beneficial.
So, what are you waiting for? Gather your ingredients, mix up a batch, and experience the difference for yourself. We’re confident that you’ll be amazed by the results. And more importantly, we want to hear about your experience! Share your tips, variations, and before-and-after photos in the comments below. Let’s build a community of conscious cleaners who are passionate about creating a healthier home and a healthier planet, one DIY cleaner at a time. We can’t wait to see what you create!
Frequently Asked Questions (FAQ)
What exactly makes this cleaner “natural”?
The term “natural” in this context refers to the ingredients used. Our natural cleaner DIY recipe relies on ingredients derived from natural sources, such as vinegar, baking soda, essential oils, and water. These ingredients are generally considered safer and less harmful to the environment and human health compared to the synthetic chemicals found in many commercial cleaning products. However, it’s important to note that even natural ingredients can cause reactions in some individuals, so it’s always wise to test a small area first. We avoid harsh chemicals like bleach, ammonia, and synthetic fragrances, which can be irritating and potentially toxic.
Is this natural cleaner as effective as store-bought cleaners?
In many cases, yes! While it might not have the same aggressive cleaning power as some industrial-strength cleaners, this natural cleaner DIY is surprisingly effective for everyday cleaning tasks. Vinegar is a natural disinfectant and degreaser, baking soda is a mild abrasive and deodorizer, and essential oils can add antibacterial and antifungal properties. For tough stains or heavily soiled areas, you might need to let the cleaner sit for a few minutes before wiping it away, or you might need to use a bit more elbow grease. However, for most surfaces and messes, this natural cleaner performs admirably. The key is to use the right concentration and application method for the specific cleaning task.
Can I use this natural cleaner on all surfaces?
Not necessarily. While this cleaner is generally safe for most surfaces, there are a few exceptions. Avoid using vinegar-based cleaners on marble, granite, or other natural stone surfaces, as the acidity can etch and damage them. Also, be cautious when using it on waxed wood floors, as it can strip the wax. Always test the cleaner on an inconspicuous area first to ensure it doesn’t cause any discoloration or damage. For delicate surfaces, you can dilute the cleaner with more water. When in doubt, consult the manufacturer’s instructions for the surface you’re cleaning.
How long does this natural cleaner last?
Because this cleaner doesn’t contain any preservatives, it’s best to use it within a few weeks. The exact shelf life will depend on the ingredients you use and how you store it. To maximize its lifespan, store it in a clean, airtight container in a cool, dark place. You might notice a slight change in color or scent over time, but this doesn’t necessarily mean it’s gone bad. If you notice any mold or unusual odors, discard the cleaner immediately. It’s always a good idea to make smaller batches to ensure you use it up before it expires.
What essential oils are best to use in this natural cleaner?
The best essential oils to use are those with antibacterial, antiviral, and antifungal properties, as well as those with pleasant scents. Some popular choices include:
* **Lemon:** A natural degreaser and disinfectant with a bright, uplifting scent.
* **Tea Tree:** A powerful antibacterial and antifungal oil, great for disinfecting surfaces.
* **Lavender:** Known for its calming scent, lavender also has antibacterial properties.
* **Eucalyptus:** A strong disinfectant with a refreshing scent, good for cleaning bathrooms.
* **Peppermint:** A natural insect repellent with a invigorating scent.
Feel free to experiment with different combinations to find your favorite scent. Just be sure to use pure, high-quality essential oils for the best results. Also, be mindful of using essential oils around pets, as some can be toxic to animals. Always research the safety of essential oils before using them around your furry friends.
Is this natural cleaner safe to use around children and pets?
Generally, yes, this natural cleaner DIY is safer than commercial cleaners that contain harsh chemicals. However, it’s still important to take precautions. Keep the cleaner out of reach of children and pets, and never leave it unattended. While the ingredients are natural, they can still cause irritation if ingested or come into contact with skin or eyes. If you have pets, be mindful of the essential oils you use, as some can be toxic to animals. Always research the safety of essential oils before using them
So, there you have it! This simple, effective, and surprisingly powerful natural cleaner DIY is more than just a recipe; it’s a game-changer for your home cleaning routine. We’ve walked you through the process, highlighted the benefits, and hopefully, convinced you that ditching harsh chemicals for a homemade solution is not only good for your health and the environment but also incredibly cost-effective.
Why is this a must-try? Because it’s a trifecta of awesome: it’s safe, it’s sustainable, and it works! You’re eliminating exposure to potentially harmful chemicals that can irritate your skin, lungs, and even contribute to long-term health problems. You’re reducing your reliance on single-use plastic bottles that clog up landfills and pollute our oceans. And most importantly, you’re getting a sparkling clean home without sacrificing effectiveness. This isn’t some watered-down, weak substitute; this natural cleaner cuts through grease, grime, and everyday messes with surprising ease.
But the beauty of this DIY approach is its adaptability. Feel free to experiment with different essential oils to create your signature scent. Love the invigorating smell of citrus? Add a few drops of lemon, orange, or grapefruit essential oil. Prefer something more calming and relaxing? Lavender or chamomile might be your go-to. You can even tailor the scent to the season – think cinnamon and clove for fall, or peppermint and pine for winter.
Beyond scent, you can also adjust the recipe to suit specific cleaning needs. For tougher stains, try adding a tablespoon of washing soda (sodium carbonate) to the mix. For extra disinfecting power, a splash of white vinegar can do the trick (just be mindful of using it on certain surfaces like marble or granite). And if you’re cleaning delicate surfaces, you can dilute the solution further with more water.
We truly believe that once you try this natural cleaner DIY, you’ll never go back to store-bought alternatives. It’s empowering to know exactly what’s going into your cleaning products and to have control over the ingredients. It’s also incredibly satisfying to create something yourself that’s both useful and beneficial.
So, what are you waiting for? Gather your ingredients, mix up a batch, and experience the difference for yourself. We’re confident that you’ll be amazed by the results. And more importantly, we want to hear about your experience! Share your tips, variations, and before-and-after photos in the comments below. Let’s build a community of conscious cleaners who are passionate about creating a healthier home and a healthier planet, one DIY cleaner at a time. We can’t wait to see what you create!
Frequently Asked Questions (FAQ)
What exactly makes this cleaner “natural”?
The term “natural” in this context refers to the ingredients used. Our natural cleaner DIY recipe relies on ingredients derived from natural sources, such as vinegar, baking soda, essential oils, and water. These ingredients are generally considered safer and less harmful to the environment and human health compared to the synthetic chemicals found in many commercial cleaning products. However, it’s important to note that even natural ingredients can cause reactions in some individuals, so it’s always wise to test a small area first. We avoid harsh chemicals like bleach, ammonia, and synthetic fragrances, which can be irritating and potentially toxic.
Is this natural cleaner as effective as store-bought cleaners?
In many cases, yes! While it might not have the same aggressive cleaning power as some industrial-strength cleaners, this natural cleaner DIY is surprisingly effective for everyday cleaning tasks. Vinegar is a natural disinfectant and degreaser, baking soda is a mild abrasive and deodorizer, and essential oils can add antibacterial and antifungal properties. For tough stains or heavily soiled areas, you might need to let the cleaner sit for a few minutes before wiping it away, or you might need to use a bit more elbow grease. However, for most surfaces and messes, this natural cleaner performs admirably. The key is to use the right concentration and application method for the specific cleaning task.
Can I use this natural cleaner on all surfaces?
Not necessarily. While this cleaner is generally safe for most surfaces, there are a few exceptions. Avoid using vinegar-based cleaners on marble, granite, or other natural stone surfaces, as the acidity can etch and damage them. Also, be cautious when using it on waxed wood floors, as it can strip the wax. Always test the cleaner on an inconspicuous area first to ensure it doesn’t cause any discoloration or damage. For delicate surfaces, you can dilute the cleaner with more water. When in doubt, consult the manufacturer’s instructions for the surface you’re cleaning.
How long does this natural cleaner last?
Because this cleaner doesn’t contain any preservatives, it’s best to use it within a few weeks. The exact shelf life will depend on the ingredients you use and how you store it. To maximize its lifespan, store it in a clean, airtight container in a cool, dark place. You might notice a slight change in color or scent over time, but this doesn’t necessarily mean it’s gone bad. If you notice any mold or unusual odors, discard the cleaner immediately. It’s always a good idea to make smaller batches to ensure you use it up before it expires.
What essential oils are best to use in this natural cleaner?
The best essential oils to use are those with antibacterial, antiviral, and antifungal properties, as well as those with pleasant scents. Some popular choices include:
* **Lemon:** A natural degreaser and disinfectant with a bright, uplifting scent.
* **Tea Tree:** A powerful antibacterial and antifungal oil, great for disinfecting surfaces.
* **Lavender:** Known for its calming scent, lavender also has antibacterial properties.
* **Eucalyptus:** A strong disinfectant with a refreshing scent, good for cleaning bathrooms.
* **Peppermint:** A natural insect repellent with a invigorating scent.
Feel free to experiment with different combinations to find your favorite scent. Just be sure to use pure, high-quality essential oils for the best results. Also, be mindful of using essential oils around pets, as some can be toxic to animals. Always research the safety of essential oils before using them around your furry friends.
Is this natural cleaner safe to use around children and pets?
Generally, yes, this natural cleaner DIY is safer than commercial cleaners that contain harsh chemicals. However, it’s still important to take precautions. Keep the cleaner out of reach of children and pets, and never leave it unattended. While the ingredients are natural, they can still cause irritation if ingested or come into contact with skin or eyes. If you have pets, be mindful of the essential oils you use, as some can be toxic to animals. Always research the safety of essential oils before using them around your furry friends. If you’re concerned about potential allergies or sensitivities, test the cleaner on a small area first.
Can I use this natural cleaner in a spray bottle?
Absolutely! In fact, using a spray bottle is the most convenient way to apply this cleaner. Just make sure to use a clean, empty spray bottle that hasn’t been used for any other cleaning products. Label the bottle clearly so you don’t accidentally mix it up with something else. When spraying, avoid spraying directly into your eyes or face. And as always, keep the spray bottle out of reach of children and pets. A dark-colored spray bottle can also help protect the essential oils from light degradation, potentially extending the cleaner’s shelf life.
What if I don’t have all the ingredients on hand?
Don’t worry! You can still make a basic version of this cleaner with just vinegar and water. The ratio is typically 1:1, but you can adjust it to suit your needs. While it won’t have the same cleaning power as the full recipe, it’s still a great option for light cleaning and disinfecting. You can also substitute lemon juice for vinegar in a pinch. And if you don’t have essential oils, that’s okay too! The cleaner will still be effective without them. The essential oils primarily add fragrance and some additional antibacterial properties.
How can I make this cleaner more eco-friendly?
There are several ways to make this cleaner even more eco-friendly:
* **Use recycled or repurposed containers:** Instead of buying new spray bottles, reuse old ones from other cleaning products or household items.
* **Buy ingredients in bulk:** This reduces packaging waste and can save you money in the long run.
* **Compost your citrus peels:** If you’re using citrus essential oils, compost the peels instead of throwing them away.
* **Use reusable cleaning cloths:** Ditch the paper towels and opt for reusable microfiber cloths or old t-shirts.
* **Source ingredients locally:** Support local businesses and reduce your carbon footprint by buying ingredients from local farmers markets or co-ops.
By making small changes to your cleaning routine, you can significantly reduce your environmental impact.
Leave a Comment