
Microwave cleaning with lemon – sounds too good to be true, right? I know, I thought so too! But trust me, this simple DIY trick will revolutionize your kitchen cleaning routine. Forget harsh chemicals and endless scrubbing; we’re harnessing the power of nature to banish splatters and odors from your microwave in minutes.
For generations, lemons have been celebrated not just for their zesty flavor, but also for their incredible cleaning properties. From ancient remedies to modern cleaning solutions, this citrus fruit has been a go-to for tackling grime and freshening up spaces. Think about it – your grandmother probably used lemon juice to brighten her whites! This microwave cleaning hack builds on that legacy, offering a natural and effective way to maintain a sparkling clean kitchen.
Let’s face it, cleaning the microwave is one of those chores we all dread. Burnt-on food, lingering smells, and the sheer awkwardness of reaching into that small space make it a task we often put off. But a dirty microwave isn’t just unsightly; it can also affect the taste of your food and even harbor bacteria. That’s why this microwave cleaning with lemon trick is so essential. It’s quick, easy, and uses ingredients you probably already have on hand. I’m excited to share this game-changing DIY method with you, so you can say goodbye to microwave messes and hello to a fresh, clean kitchen!
DIY Microwave Cleaning with Lemon: A Zesty Fresh Start!
Hey there, fellow DIY enthusiasts! Are you tired of staring into your microwave and seeing a Jackson Pollock painting of splattered sauces and mysterious food remnants? I know I am! Cleaning the microwave is one of those chores I always put off, but it doesn’t have to be a dreaded task. Today, I’m going to share my favorite, super-easy, and all-natural method for cleaning your microwave using just a lemon and a few other household staples. Get ready to say goodbye to grime and hello to a sparkling clean microwave with a fresh, citrusy scent!
What You’ll Need
Before we dive in, let’s gather our supplies. This is a pretty simple project, so you probably already have everything you need:
* 1 Lemon
* 1 Microwave-safe bowl
* 1 Cup of water
* A clean sponge or cloth
* Optional: A few drops of your favorite essential oil (lemon, of course, works great!)
Why Lemon? The Magic Behind the Method
You might be wondering, “Why lemon?” Well, lemons are little powerhouses of cleaning goodness! Here’s why they work so well:
* Citric Acid: The citric acid in lemons is a natural degreaser and disinfectant. It helps to break down grease and grime, making it easier to wipe away.
* Steam Power: When heated, the lemon-infused water creates steam that loosens dried-on food particles.
* Odor Neutralizer: Lemons have a wonderful, fresh scent that helps to neutralize unpleasant odors in your microwave.
* Natural and Safe: Unlike harsh chemical cleaners, lemons are a natural and safe option for cleaning your microwave, especially if you’re concerned about food safety.
Step-by-Step Instructions: Let’s Get Cleaning!
Alright, let’s get down to business! Follow these simple steps to transform your microwave from a grimy mess to a sparkling clean appliance.
1. Prepare the Lemon Solution:
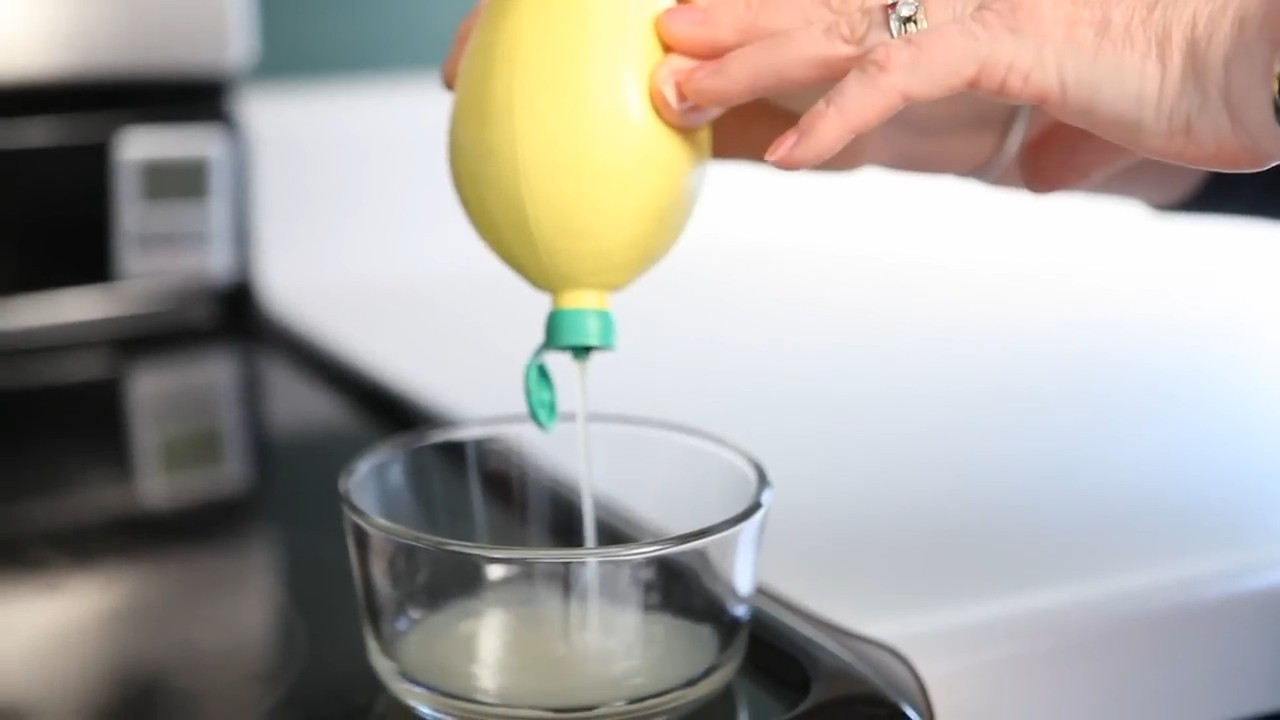
* First, grab your lemon and cut it in half.
* Squeeze the juice from both halves of the lemon into your microwave-safe bowl.
* After squeezing, toss the lemon halves into the bowl as well. Don’t throw them away! They’ll add extra cleaning power.
* Pour one cup of water into the bowl, mixing it with the lemon juice and lemon halves.
* Optional: Add a few drops of your favorite essential oil for an extra boost of fragrance. I personally love adding a few drops of lemon essential oil to really amplify the citrusy scent.
2. Microwave the Solution:
* Place the bowl with the lemon solution into your microwave.
* Microwave on high for 3-5 minutes. The goal is to bring the solution to a boil and create plenty of steam. The exact time will depend on the power of your microwave, so keep an eye on it.
* Important: Don’t open the microwave door immediately after the timer goes off! Let the steam work its magic for another 5-10 minutes. This allows the steam to fully saturate the inside of the microwave and loosen all the grime.
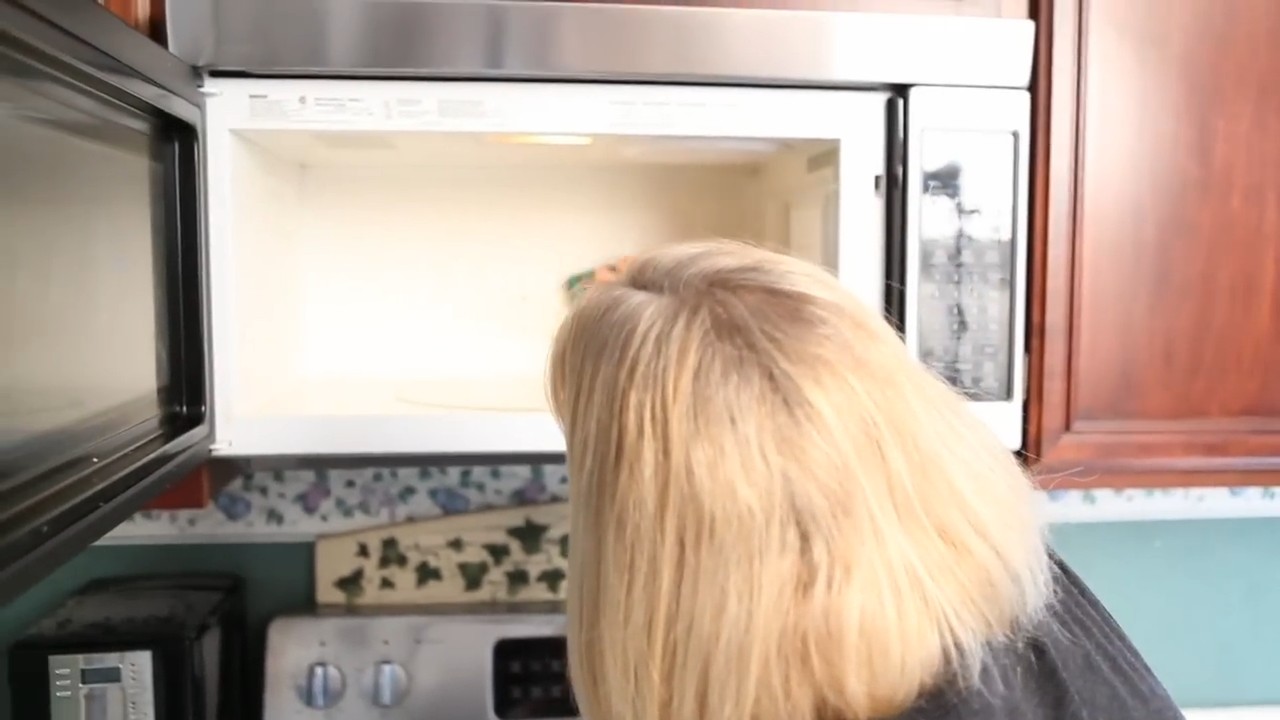
3. Wipe Down the Interior:
* Carefully remove the bowl from the microwave. Be cautious, as the bowl and the water will be hot! Use oven mitts or a towel to protect your hands.
* Now, take your clean sponge or cloth and wipe down the interior of the microwave. You’ll be amazed at how easily the grime comes off! The steam from the lemon solution will have loosened everything, making it a breeze to clean.
* Pay special attention to any stubborn spots or splatters. You may need to scrub a little harder in these areas, but the lemon solution should have done most of the work.
* Don’t forget to wipe down the top, bottom, sides, and door of the microwave.
4. Clean the Turntable and Roller Ring:
* Remove the turntable and roller ring from the microwave.
* Wash them in warm, soapy water. You can use dish soap or a mild all-purpose cleaner.
* Rinse them thoroughly and dry them with a clean towel.
* Once they’re dry, place them back into the microwave.
5. Final Touches:
* Give the exterior of the microwave a quick wipe down with a damp cloth to remove any drips or splatters.
* If you want to add an extra touch of freshness, you can leave the door of the microwave open for a few minutes to allow it to air out completely.
Tackling Stubborn Stains: A Few Extra Tips
Sometimes, you might encounter some really stubborn stains that just won’t budge with the basic lemon steam cleaning method. Don’t worry, I’ve got a few extra tricks up my sleeve!
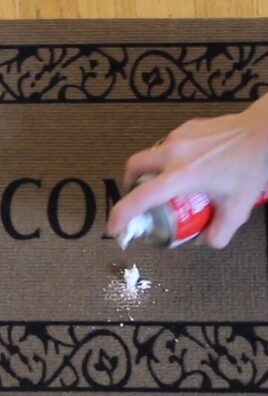
* Baking Soda Paste: For really tough stains, try making a paste of baking soda and water. Apply the paste to the stain, let it sit for a few minutes, and then scrub with a sponge or cloth. Baking soda is a mild abrasive that can help to lift stubborn grime.
* Vinegar Power: If you’re not a fan of the lemon scent, or if you just want to try something different, you can use vinegar instead. Mix equal parts water and white vinegar in a microwave-safe bowl and microwave as described above. Vinegar is another natural cleaner and disinfectant that works wonders on grease and grime.
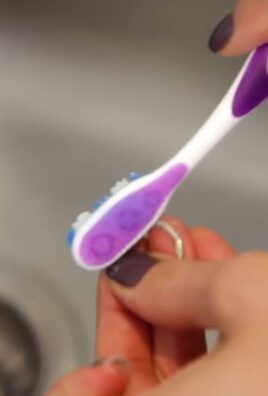
* Magic Eraser: For those extra-stubborn spots, a magic eraser can be your best friend. Just be sure to test it in an inconspicuous area first to make sure it doesn’t damage the surface of your microwave.
Maintaining a Clean Microwave: Prevention is Key!
Now that your microwave is sparkling clean, let’s talk about how to keep it that way! Here are a few tips to help you maintain a clean microwave and prevent future messes:
* Cover Your Food: Always cover your food when microwaving to prevent splatters. You can use a microwave-safe lid, plastic wrap, or even a paper towel.
* Wipe Up Spills Immediately: Don’t let spills and splatters sit and harden. Wipe them up as soon as they happen to prevent them from becoming stubborn stains.
* Regular Cleaning: Make it a habit to clean your microwave regularly, even if it doesn’t look particularly dirty. A quick wipe-down once a week can go a long way in preventing grime buildup.
* Ventilation: Make sure your microwave is properly ventilated to prevent moisture buildup, which can lead to mold and mildew.
Safety First! Important Precautions
Before you start cleaning your microwave, it’s important to keep a few safety precautions in mind:
* Unplug the Microwave: For extra safety, unplug the microwave before you start cleaning it. This will prevent any accidental shocks.
* Use Oven Mitts: Always use oven mitts or a towel when handling hot bowls or containers from the microwave.
* Avoid Abrasive Cleaners: Don’t use abrasive cleaners or scouring pads on the interior of your microwave, as they can scratch the surface.
* Read the Manual: Consult your microwave’s manual for specific cleaning instructions and recommendations.
Enjoy Your Sparkling Clean Microwave!
And there you have it! A simple, natural, and effective way to clean your microwave using just a lemon and a few other household items. I hope you found this guide helpful. Now, go forth and conquer that microwave grime! You’ll be amazed at how much better your food tastes when it’s heated in a clean and fresh-smelling microwave. Happy cleaning!
Conclusion
So, there you have it! This simple, all-natural microwave cleaning with lemon trick is a game-changer for anyone who wants a sparkling clean microwave without harsh chemicals or endless scrubbing. It’s quick, easy, and uses ingredients you likely already have in your kitchen. Why spend money on expensive, potentially harmful cleaning products when you can harness the power of lemon and steam?
This method isn’t just about cleanliness; it’s about creating a healthier and more pleasant cooking environment. A clean microwave means better-tasting reheated leftovers and a kitchen that feels fresh and inviting. Plus, the subtle citrus scent left behind is a delightful bonus!
Why is this a must-try? Because it’s effective, eco-friendly, and incredibly budget-friendly. It tackles splatters, dried-on food, and lingering odors with minimal effort. You’ll be amazed at how easily grime wipes away after just a few minutes of steaming.
Looking for variations? Try adding a few drops of your favorite essential oil to the lemon water for an extra boost of fragrance. Lavender, eucalyptus, or even a citrus blend can create a truly spa-like experience while you clean. You can also experiment with different types of citrus. While lemon is a classic choice, lime or orange can also work well, each imparting its unique scent. For tougher stains, add a tablespoon of white vinegar to the lemon water for extra cleaning power.
Don’t just take our word for it – give this microwave cleaning with lemon trick a try! We’re confident you’ll be impressed with the results. It’s a small change that can make a big difference in your kitchen routine.
We encourage you to share your experience with us! Did you try a variation? Did you find it particularly effective on a specific type of stain? Let us know in the comments below. We love hearing from our readers and learning from your experiences. Together, we can make kitchen cleaning a little less of a chore and a lot more enjoyable. So go ahead, grab a lemon, and get ready to say goodbye to microwave messes! You’ll be amazed at how easy it is to achieve a sparkling clean microwave with this simple, natural method.
Frequently Asked Questions (FAQ)
Q: How often should I clean my microwave using this method?
A: The frequency depends on how often you use your microwave and how prone it is to splatters. As a general guideline, cleaning it once a week is a good starting point. If you notice frequent splatters or lingering odors, you might want to clean it more often, perhaps every few days. Conversely, if you rarely use your microwave, you can probably get away with cleaning it every other week. Regular cleaning prevents buildup and makes the task much easier in the long run.
Q: Can I use bottled lemon juice instead of a fresh lemon?
A: While fresh lemon is ideal for its natural oils and fragrance, bottled lemon juice can be used as a substitute. However, keep in mind that bottled lemon juice may not be as potent as fresh lemon juice, so you might need to use a slightly larger quantity. Aim for about ¼ cup of bottled lemon juice mixed with ¾ cup of water. The results might not be quite as impressive as with fresh lemon, but it’s still a viable option if you don’t have a fresh lemon on hand.
Q: What if I don’t have a microwave-safe bowl?
A: If you don’t have a microwave-safe bowl, you can use a microwave-safe glass measuring cup or even a large, microwave-safe mug. The key is to ensure that the container is specifically labeled as microwave-safe to prevent it from cracking or shattering during the heating process. Avoid using plastic containers that are not specifically designed for microwave use, as they can melt or leach harmful chemicals into your food and the microwave.
Q: How long should I microwave the lemon water?
A: The recommended time is typically 3-5 minutes, but it can vary depending on the power of your microwave. The goal is to heat the lemon water until it boils and creates steam inside the microwave. Start with 3 minutes and check if the water is boiling vigorously. If not, add another minute or two until you achieve a good amount of steam. Be careful when removing the bowl, as it will be hot.
Q: What if the stains are really stubborn and don’t wipe away easily?
A: For stubborn stains, let the steam sit inside the microwave for a longer period, perhaps 5-10 minutes, after microwaving the lemon water. This will allow the steam to further loosen the grime. You can also add a tablespoon of white vinegar to the lemon water for extra cleaning power. When wiping, use a slightly abrasive sponge or a microfiber cloth with a textured surface to gently scrub away the stubborn stains. Avoid using harsh scouring pads, as they can scratch the interior of your microwave.
Q: Will this method work on all types of microwaves?
A: Yes, this method is generally safe and effective for cleaning all types of microwaves, including countertop models, over-the-range microwaves, and convection microwaves. However, always refer to your microwave’s user manual for specific cleaning instructions and recommendations. If you have any concerns about using this method on your particular microwave model, it’s best to consult the manufacturer’s guidelines.
Q: Can I use this method to clean the outside of my microwave?
A: While this method primarily focuses on cleaning the interior of the microwave, you can certainly use the lemon-infused water to clean the exterior as well. After microwaving the lemon water, carefully dip a clean cloth into the water (make sure it’s not too hot) and wipe down the exterior surfaces of the microwave, including the door, control panel, and sides. The lemon water will help to remove grease, fingerprints, and other grime. Be sure to dry the exterior thoroughly with a clean, dry cloth.
Q: What are the benefits of using lemon for cleaning?
A: Lemon is a natural cleaning agent with several benefits. It contains citric acid, which helps to break down grease and grime. It also has antibacterial and antiseptic properties, making it effective at killing germs and bacteria. Additionally, lemon has a pleasant, refreshing scent that can help to deodorize your microwave and leave it smelling clean and fresh. Using lemon is an eco-friendly and non-toxic alternative to harsh chemical cleaners.
Q: Is it safe to use this method around children and pets?
A: Yes, this method is generally safe to use around children and pets, as it uses natural ingredients and doesn’t involve harsh chemicals. However, it’s always a good idea to exercise caution when using any cleaning method, especially around young children and pets. Ensure that the microwave is unplugged and cooled down before allowing children or pets to be near it. Keep the lemon water out of reach of children and pets to prevent accidental ingestion.
Q: What if I don’t like the smell of lemon?
A: If you don’t like the smell of lemon, you can try using other citrus fruits, such as lime or orange, as a substitute. Each citrus fruit has its unique scent, so you can choose one that you find more appealing. Alternatively, you can add a few drops of your favorite essential oil to the water for a different fragrance. Lavender, eucalyptus, or tea tree oil are all good options. Just be sure to use essential oils that are safe for use around food.

Leave a Comment