
Malabar Spinach Summer Growth can be a game-changer for your garden this year! Imagine harvesting vibrant, leafy greens right from your backyard, even when the summer heat is at its peak. Forget those wilted, sad-looking spinach bunches from the grocery store. I’m going to share some simple, yet effective DIY tricks to help you cultivate a thriving Malabar spinach patch all summer long.
Malabar spinach, also known as Basella alba, isn’t actually a true spinach, but a climbing vine with similar-tasting leaves. It has a rich history in Asian and African cuisines, where it’s prized for its heat tolerance and nutritional value. For centuries, it has been a staple in these regions, offering a reliable source of vitamins and minerals even during the hottest months.
Why do you need these DIY tricks? Because growing Malabar spinach successfully in the summer requires a little know-how. The intense sun and high temperatures can be challenging, but with the right techniques, you can overcome these hurdles and enjoy a bountiful harvest. I’ll guide you through everything from choosing the perfect location to providing the right support for your climbing vines. Get ready to unlock the secrets to maximizing your Malabar Spinach Summer Growth and enjoy fresh, delicious greens all season long!
Boosting Your Malabar Spinach Growth This Summer: A DIY Guide
Hey fellow gardeners! Malabar spinach, also known as Ceylon spinach or vine spinach, is a fantastic leafy green to grow, especially during the hot summer months. It thrives in the heat and humidity, unlike regular spinach which tends to bolt. But sometimes, even with the right conditions, it needs a little boost to really take off. I’ve experimented with a few DIY methods over the years, and I’m excited to share my favorite tips and tricks to help you maximize your Malabar spinach growth this summer. Let’s get started!
Understanding Malabar Spinach Needs
Before we dive into the DIY hacks, let’s quickly recap what Malabar spinach needs to flourish. This will help you understand why these techniques work and how to tailor them to your specific garden.
* Sunlight: Malabar spinach loves sunshine! Aim for at least 6 hours of direct sunlight per day.
* Soil: Well-draining soil rich in organic matter is key. It prefers a slightly acidic to neutral pH (around 6.5 to 7.0).
* Water: Consistent moisture is crucial, especially during hot weather. Don’t let the soil dry out completely.
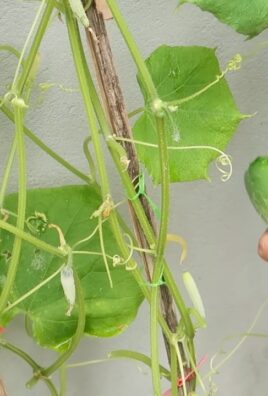
* Support: As a vining plant, Malabar spinach needs a trellis, fence, or other support structure to climb.
* Nutrients: While not a heavy feeder, Malabar spinach benefits from regular fertilization, especially with nitrogen-rich fertilizers.
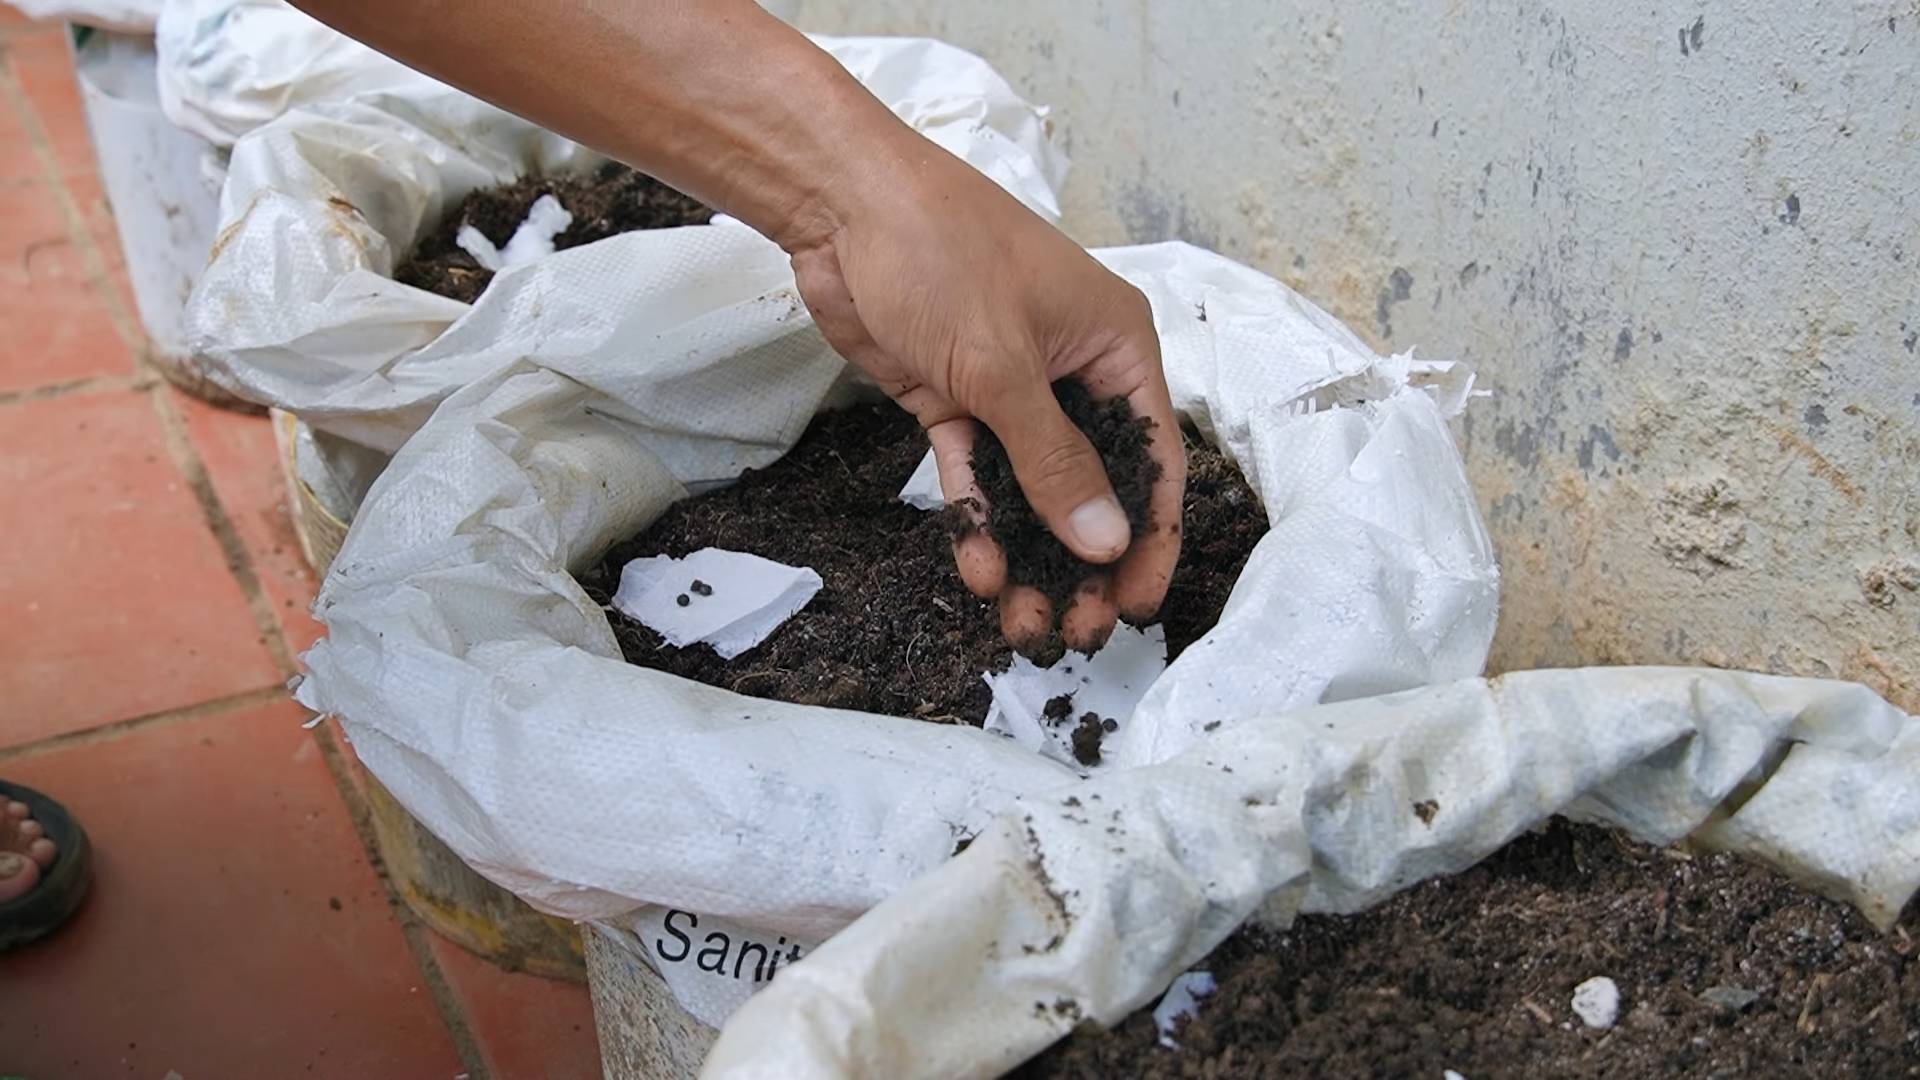
DIY Hack #1: Supercharged Compost Tea
Compost tea is a fantastic way to deliver a concentrated dose of nutrients directly to your Malabar spinach plants. It’s easy to make, inexpensive, and packed with beneficial microbes that improve soil health.
What you’ll need:
* A 5-gallon bucket
* Aerate compost (about 2 gallons)
* Unchlorinated water (4 gallons) – let tap water sit out for 24 hours to dechlorinate
* An aquarium air pump and air stone (optional, but highly recommended for aeration)
* A burlap sack or old pillowcase
* Molasses (unsulphured) – about 1 tablespoon (optional, to feed the microbes)
Step-by-step instructions:
1. Prepare the compost bag: Place the compost inside the burlap sack or pillowcase. This will prevent large particles from clogging your sprayer later.
2. Fill the bucket: Pour the unchlorinated water into the 5-gallon bucket.
3. Add the compost bag: Submerge the bag of compost into the water. Make sure it’s fully immersed.
4. Add molasses (optional): If you’re using molasses, add it to the water. This will provide food for the beneficial microbes and help them multiply.
5. Aerate the tea: If you have an aquarium air pump and air stone, place the air stone at the bottom of the bucket. This will provide oxygen to the microbes and help them thrive. If you don’t have an air pump, stir the mixture vigorously several times a day.
6. Brew the tea: Let the compost tea brew for 24-48 hours. The longer it brews, the more beneficial microbes will be present. The tea should have a slightly earthy smell.
7. Strain the tea: Remove the compost bag from the bucket and let it drain. You can squeeze the bag gently to extract as much liquid as possible.
8. Dilute the tea: Dilute the compost tea with water to a ratio of 1:10 (1 part compost tea to 10 parts water). This will prevent burning the plants.
9. Apply the tea: Use a watering can or sprayer to apply the diluted compost tea to the base of your Malabar spinach plants. You can also use it as a foliar spray, but avoid spraying during the hottest part of the day.
10. Repeat: Apply compost tea every 2-3 weeks throughout the growing season.
DIY Hack #2: Eggshell Calcium Boost
Malabar spinach, like many leafy greens, benefits from calcium. Eggshells are a readily available and free source of calcium carbonate. This hack not only provides calcium but also helps improve soil structure.
What you’ll need:
* Eggshells (as many as you can collect!)
* A blender or food processor
* A baking sheet
* An oven (optional)
* Vinegar (optional)
Step-by-step instructions:
1. Collect and clean eggshells: Rinse the eggshells thoroughly after using them. Remove any remaining egg white or yolk.
2. Dry the eggshells: Spread the eggshells on a baking sheet and let them air dry completely. You can also dry them in a low oven (200°F or 93°C) for about 10-15 minutes to speed up the process. Drying the eggshells makes them easier to grind.
3. Grind the eggshells: Once the eggshells are dry, grind them into a fine powder using a blender or food processor. The finer the powder, the easier it will be for the plants to absorb the calcium.
4. Apply to the soil: Sprinkle the eggshell powder around the base of your Malabar spinach plants. Gently work it into the soil.
5. Make eggshell vinegar (optional): For a faster-acting calcium boost, you can make eggshell vinegar. Place the ground eggshell powder in a jar and cover it with vinegar (white vinegar or apple cider vinegar works well). Let it sit for several weeks, stirring occasionally. The vinegar will dissolve the calcium carbonate, creating a calcium-rich solution. Dilute the eggshell vinegar with water to a ratio of 1:10 before applying it to your plants.
6. Repeat: Apply eggshell powder or eggshell vinegar every 4-6 weeks throughout the growing season.
DIY Hack #3: Banana Peel Potassium Power
Potassium is another essential nutrient for plant growth, promoting strong stems, healthy leaves, and overall vigor. Banana peels are a rich source of potassium and can be used in several ways to benefit your Malabar spinach.
What you’ll need:
* Banana peels (as many as you can collect!)
* A knife or scissors
* A bucket or jar
* Water
Step-by-step instructions:
1. Collect banana peels: Save your banana peels after eating the fruit.
2. Chop the banana peels: Chop the banana peels into small pieces. This will help them decompose faster and release their nutrients more quickly.
3. Make banana peel tea: Place the chopped banana peels in a bucket or jar and cover them with water. Let them soak for 2-3 days. The water will turn brown as the potassium leaches out of the peels.
4. Dilute the tea: Dilute the banana peel tea with water to a ratio of 1:5 (1 part banana peel tea to 5 parts water).
5. Apply the tea: Use a watering can to apply the diluted banana peel tea to the base of your Malabar spinach plants.
6. Bury banana peels: You can also bury banana peels directly in the soil near your Malabar spinach plants. The peels will decompose over time, releasing potassium and other nutrients into the soil.
7. Dry and grind banana peels: Another option is to dry the banana peels in the sun or in a low oven. Once they are dry, grind them into a powder using a blender or food processor. Sprinkle the banana peel powder around the base of your plants and work it into the soil.
8. Repeat: Apply banana peel tea or banana peel powder every 2-4 weeks throughout the growing season.
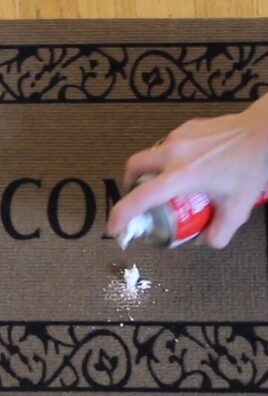
DIY Hack #4: Epsom Salt Magnesium Boost
Magnesium is essential for chlorophyll production, which is vital for photosynthesis. A magnesium deficiency can lead to yellowing leaves and stunted growth. Epsom salt (magnesium sulfate) is a readily available and inexpensive source of magnesium.
What you’ll need:
* Epsom salt
* Water
* A watering can or sprayer
Step-by-step instructions:
1. Dissolve the Epsom salt: Dissolve 1 tablespoon of Epsom salt in 1 gallon of water.
2. Apply to the plants: Use a watering can or sprayer to apply the Epsom salt solution to the leaves and soil around your Malabar spinach plants.
3. Repeat: Apply Epsom salt every 2-4 weeks throughout the growing season. Be careful not to overdo it, as too much magnesium can be harmful.
DIY Hack #5: Companion Planting for Success
Companion planting involves growing different plants together to benefit each other. Certain plants can help deter pests, attract beneficial insects, or improve soil health.
Good companions for Malabar spinach:
* Marigolds: These flowers deter nematodes and other soil pests.
* Basil:
Conclusion
So, there you have it! Mastering the art of maximizing your Malabar Spinach summer growth is not just about planting a seed and hoping for the best. It’s about understanding the plant’s needs, providing the right environment, and employing simple yet effective DIY tricks to give it that extra boost. This isn’t just gardening; it’s a rewarding experience that connects you with nature and provides you with a delicious and nutritious harvest.
Why is this DIY approach a must-try? Because it empowers you to take control of your garden’s success. Instead of relying solely on commercial fertilizers or pre-packaged solutions, you’re using readily available resources and techniques to create a thriving environment for your Malabar Spinach. This not only saves you money but also reduces your reliance on potentially harmful chemicals, promoting a healthier and more sustainable garden.
Think of the possibilities! You can experiment with different types of organic matter to enrich your soil, tailoring the nutrient profile to your Malabar Spinach’s specific needs. Perhaps you’ll discover that adding coffee grounds provides an extra nitrogen boost, or that incorporating eggshells helps to prevent blossom-end rot. The beauty of this DIY approach is that it encourages experimentation and allows you to fine-tune your gardening practices based on your own observations and experiences.
Beyond the basic techniques, consider these variations to further enhance your Malabar Spinach summer growth:
* **Vertical Gardening:** Malabar Spinach is a vine, so providing a trellis or support structure is crucial. Get creative with your supports! Use bamboo poles, repurposed fencing, or even build a simple A-frame structure. Vertical gardening not only maximizes space but also improves air circulation, reducing the risk of fungal diseases.
* **Companion Planting:** Plant your Malabar Spinach alongside beneficial companion plants like basil, marigolds, or nasturtiums. These plants can help to deter pests, attract pollinators, and even improve the soil quality.
* **Succession Planting:** To ensure a continuous harvest throughout the summer, plant new Malabar Spinach seeds every few weeks. This will prevent you from being overwhelmed with a single large harvest and ensure a steady supply of fresh greens.
* Watering Techniques: While Malabar Spinach loves moisture, avoid overwatering. Water deeply but infrequently, allowing the soil to dry out slightly between waterings. Consider using a soaker hose or drip irrigation to deliver water directly to the roots, minimizing water loss and reducing the risk of foliar diseases.
* Sunlight Management: While Malabar Spinach thrives in full sun, it can benefit from some afternoon shade in particularly hot climates. Observe your plants closely and adjust their location or provide temporary shade if they show signs of heat stress.
We are confident that by implementing these DIY tricks, you’ll be amazed at the abundance of your Malabar Spinach harvest. The satisfaction of growing your own food, knowing that it’s healthy, delicious, and produced with your own hands, is truly unparalleled.
So, what are you waiting for? Grab your seeds, gather your supplies, and get ready to embark on a rewarding gardening adventure. We encourage you to try these DIY tricks and share your experiences with us. Let us know what works best for you, what challenges you encounter, and any tips or tricks you discover along the way. Together, we can create a community of passionate gardeners who are dedicated to maximizing their Malabar Spinach summer growth and enjoying the fruits (or rather, the leaves) of their labor. Share your photos and stories on social media using #MalabarSpinachDIY and let’s inspire others to join the fun!
Frequently Asked Questions (FAQ)
What exactly is Malabar Spinach and why should I grow it?
Malabar Spinach (Basella alba or Basella rubra) isn’t actually spinach, but a leafy green vine that thrives in warm weather. It’s a fantastic alternative to traditional spinach, especially during the summer months when spinach tends to bolt (go to seed). It’s heat-tolerant, easy to grow, and packed with nutrients like vitamins A and C, iron, and calcium. Plus, it has a mild, slightly citrusy flavor that’s delicious in salads, stir-fries, soups, and stews. Growing your own ensures you have access to fresh, organic greens right in your backyard.
How do I start Malabar Spinach from seed?
Starting Malabar Spinach from seed requires a little patience. The seeds have a hard outer coating, so scarification (lightly scratching the seed coat) or soaking them in warm water for 24 hours before planting can significantly improve germination rates. Sow the seeds about ½ inch deep in well-draining soil, either directly in your garden or in seed trays. Keep the soil consistently moist but not waterlogged. Germination can take anywhere from 10 to 21 days, depending on the temperature and moisture levels. Once the seedlings are large enough to handle, transplant them to their final location, spacing them about 12-18 inches apart.
What kind of soil does Malabar Spinach need?
Malabar Spinach prefers well-draining soil that is rich in organic matter. Amend your soil with compost, aged manure, or other organic materials before planting to improve its fertility and drainage. A slightly acidic to neutral soil pH (around 6.0 to 7.0) is ideal. You can test your soil pH using a home testing kit or by sending a sample to your local agricultural extension office. If your soil is heavy clay, consider adding sand or perlite to improve drainage.
How much sunlight does Malabar Spinach need?
Malabar Spinach thrives in full sun, which means at least 6-8 hours of direct sunlight per day. However, in extremely hot climates, it can benefit from some afternoon shade to prevent the leaves from scorching. Observe your plants closely and adjust their location or provide temporary shade if necessary. If you’re growing Malabar Spinach indoors, make sure to provide it with plenty of bright, indirect light.
How often should I water my Malabar Spinach?
Malabar Spinach loves moisture, but it’s important to avoid overwatering, which can lead to root rot. Water deeply but infrequently, allowing the soil to dry out slightly between waterings. Check the soil moisture by sticking your finger about an inch deep into the soil. If it feels dry, it’s time to water. During hot, dry weather, you may need to water more frequently. Consider using a soaker hose or drip irrigation to deliver water directly to the roots, minimizing water loss and reducing the risk of foliar diseases.
What are some common pests and diseases that affect Malabar Spinach?
Malabar Spinach is generally resistant to pests and diseases, but it can occasionally be affected by aphids, spider mites, or fungal diseases like leaf spot. To prevent pest infestations, inspect your plants regularly and remove any pests by hand or with a strong spray of water. Encourage beneficial insects like ladybugs and lacewings, which prey on aphids and other pests. To prevent fungal diseases, ensure good air circulation around your plants and avoid overhead watering. If you notice signs of disease, remove the affected leaves and treat the plants with an organic fungicide.
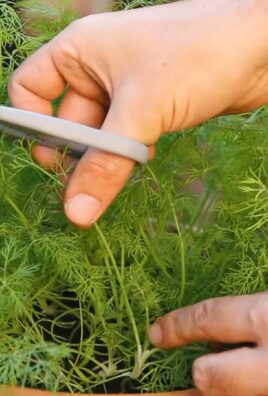
How do I harvest Malabar Spinach?
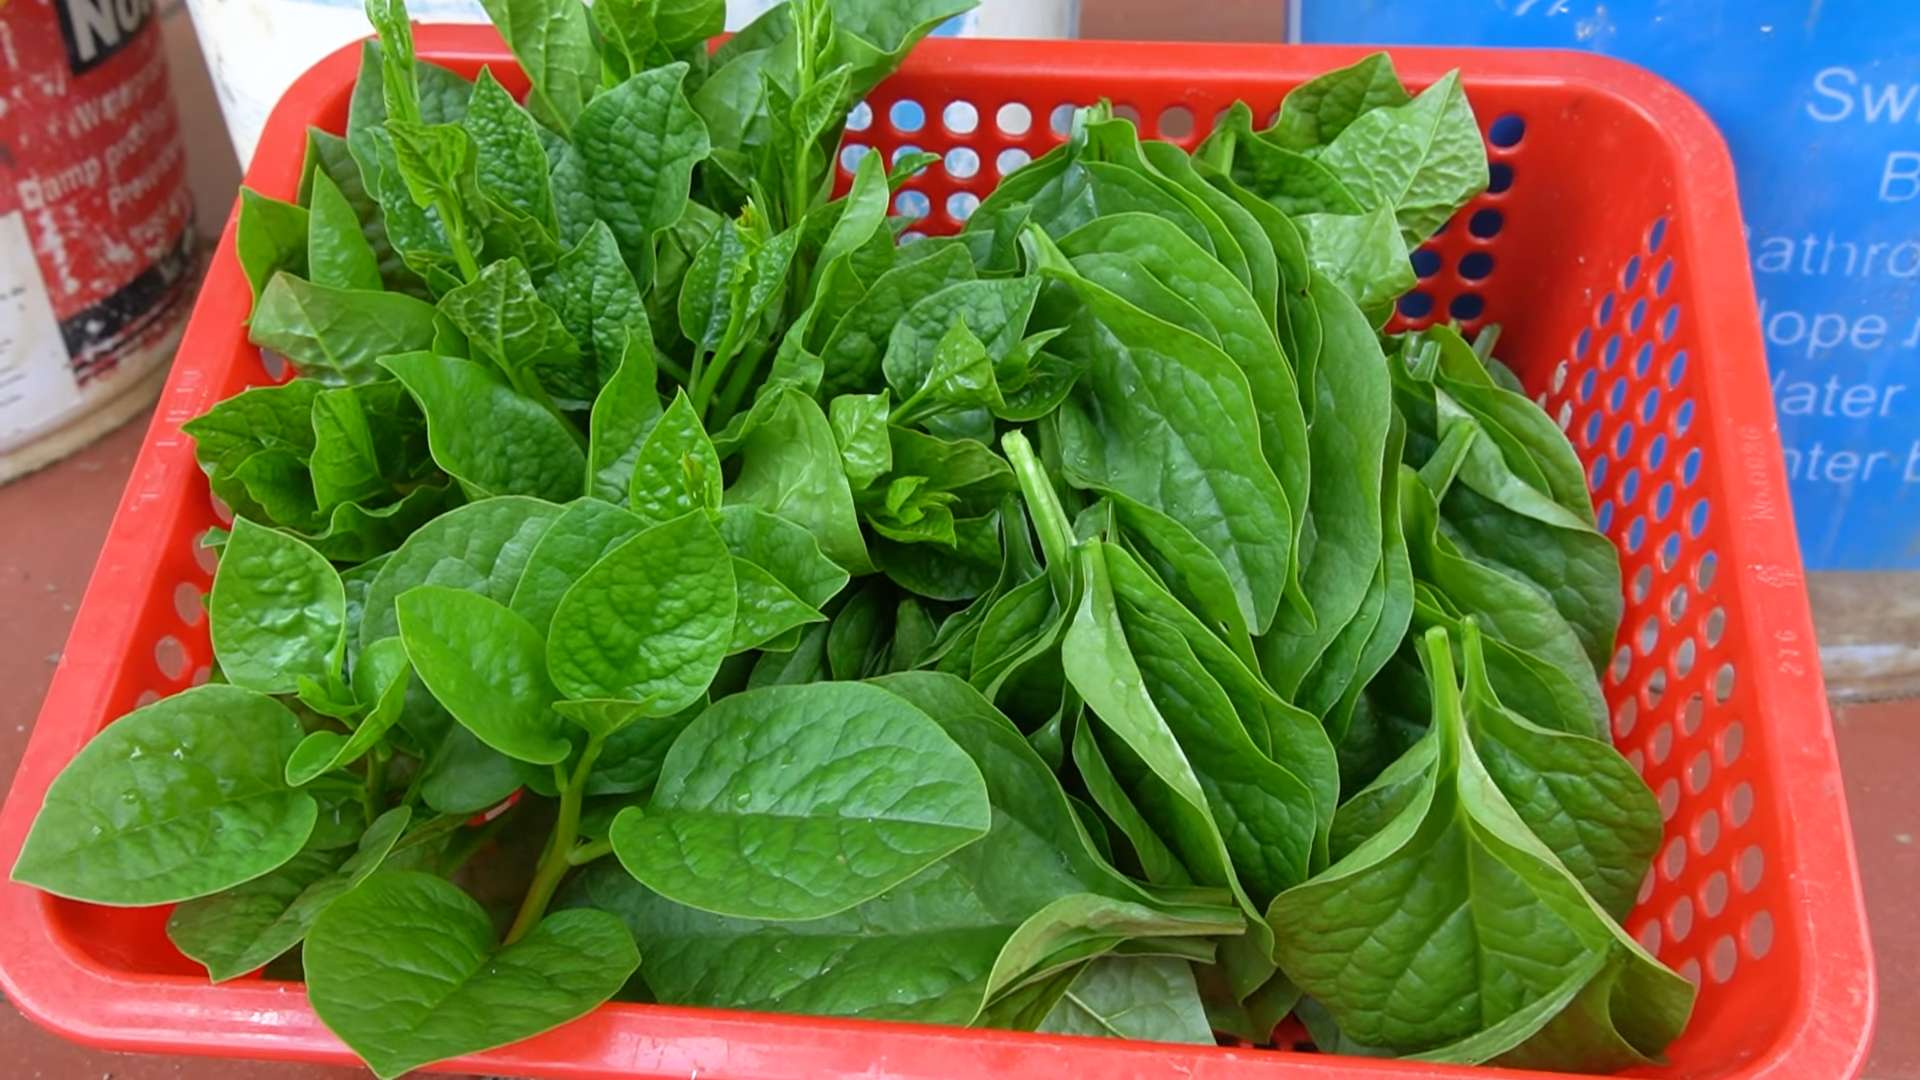
You can start harvesting Malabar Spinach leaves as soon as the plants are established and have reached a reasonable size. Simply snip off the leaves or stems as needed, leaving at least a few leaves on the plant to continue growing. Regular harvesting encourages the plant to produce more leaves. The younger leaves are more tender and have a milder flavor than the older leaves. You can also harvest the entire vine by cutting it back to a few inches above the ground. The plant will quickly regrow and produce new shoots.
Can I eat Malabar Spinach raw?
Yes, you can eat Malabar Spinach raw, especially the young, tender leaves. They have a mild, slightly citrusy flavor that’s delicious in salads. However, some people find that the older leaves can be a bit mucilaginous (slimy) when eaten raw. If you prefer, you can cook the leaves to reduce the mucilage.
How do I store Malabar Spinach?
Store Malabar Spinach in the refrigerator in a plastic bag or container. It will keep for several days. To prolong its shelf life, you can wrap the leaves in a damp paper towel before storing them. You can also freeze Malabar Spinach for longer storage. Blanch the leaves in boiling water for a minute or two, then plunge them into ice water to stop the cooking process. Drain the leaves well and store them in freezer bags or containers.
Can I grow Malabar Spinach in containers?
Yes, Malabar Spinach grows well in containers, making it a great option for gardeners with limited space. Choose a large container (at least 12 inches in diameter) with good drainage holes. Fill the container with a well-draining potting mix that is rich in organic matter. Provide a trellis or support structure for the vine to climb on. Water regularly and fertilize every few weeks with a balanced organic fertilizer.
Leave a Comment