
Indoor Pea Gardening: Imagine plucking fresh, sweet peas right from your windowsill, even in the dead of winter! Sounds like a dream, right? Well, it doesn’t have to be! For centuries, humans have cultivated peas, with evidence suggesting their cultivation dates back to the Neolithic era. From ancient civilizations to modern-day homesteaders, the allure of these little green gems has endured. But what if you don’t have a sprawling garden? That’s where the magic of indoor pea gardening comes in!
I know what you’re thinking: “Gardening indoors? With peas? Is that even possible?” Absolutely! And it’s easier than you might think. In today’s fast-paced world, many of us lack the space or time for traditional outdoor gardens. But that doesn’t mean we have to miss out on the joy of growing our own food. This DIY guide will equip you with simple, effective tricks and hacks to successfully grow delicious peas indoors, bringing a touch of nature and fresh produce right into your home.
So, ditch the store-bought veggies and get ready to embark on a rewarding journey of indoor pea gardening. I’m here to show you how to create a thriving indoor pea patch, regardless of your experience level. Let’s get our hands dirty (figuratively, of course – we’re indoors!) and unlock the secrets to a bountiful harvest!
Grow Your Own Delicious Peas Indoors: A Beginner’s Guide
Hey there, fellow gardening enthusiasts! Ever dreamt of enjoying fresh, sweet peas even when the weather outside is frightful? Well, dream no more! I’m going to walk you through the surprisingly simple process of growing peas indoors. It’s a rewarding experience, and trust me, nothing beats the taste of homegrown peas, especially when you’ve nurtured them from tiny seeds to plump pods yourself.
What You’ll Need: The Essential Supplies
Before we dive in, let’s gather our supplies. This is crucial for a smooth and successful pea-growing journey. Don’t worry, you probably have a lot of this stuff already!
* Pea Seeds: Choose a variety suitable for indoor growing. Bush peas or dwarf varieties are your best bet. I personally love ‘Little Marvel’ and ‘Tom Thumb’ for their compact size and delicious flavor. You can find these at most garden centers or online.
* Containers: You’ll need containers that are at least 6-8 inches deep and wide. Peas have relatively shallow roots, but they still need room to grow. I recommend using plastic pots with drainage holes. Terra cotta pots are also great, but they tend to dry out faster, so you’ll need to water more frequently.
* Potting Mix: Use a high-quality, well-draining potting mix. Avoid using garden soil, as it can compact and not provide adequate drainage. A mix specifically formulated for vegetables is ideal.
* Support Structure (Optional but Recommended): While bush peas are compact, they still benefit from some support. You can use small trellises, bamboo stakes, or even just some twigs stuck into the soil. This will help keep the plants upright and prevent them from sprawling.
* Grow Lights (Highly Recommended): Peas need plenty of light to thrive. If you don’t have a sunny south-facing window, you’ll definitely need grow lights. Fluorescent or LED grow lights work well.
* Watering Can or Spray Bottle: For gentle watering.
* Spray Bottle with Water: For misting the seedlings.
* Small Shovel or Trowel: For planting the seeds.
Getting Started: Planting Your Pea Seeds
Now for the fun part – planting! This is where the magic begins.
1. Soaking the Seeds (Optional but Recommended): Soaking your pea seeds in water for 12-24 hours before planting can significantly improve germination rates. Just place the seeds in a bowl of water and let them sit. You’ll notice they plump up as they absorb water.
2. Preparing the Containers: Fill your containers with potting mix, leaving about an inch of space at the top. Gently pat down the soil to remove any air pockets.
3. Planting the Seeds: Sow the pea seeds about 1 inch deep and 1-2 inches apart. I usually plant 3-4 seeds per container to ensure good germination.
4. Watering: Gently water the soil until it’s evenly moist but not soggy. Be careful not to overwater, as this can lead to seed rot.
5. Placement: Place the containers in a warm location (around 65-70°F or 18-21°C) with plenty of light. If you’re using grow lights, position them a few inches above the soil surface.
6. Germination: Keep the soil consistently moist. You should see seedlings emerge in about 7-14 days.
Nurturing Your Peas: Care and Maintenance
Once your pea seedlings have emerged, it’s time to provide them with the care they need to flourish.
1. Light: Peas need at least 6-8 hours of direct sunlight per day. If you’re using grow lights, keep them on for 12-16 hours per day. Rotate the containers regularly to ensure even light exposure.
2. Watering: Water your peas regularly, keeping the soil consistently moist but not soggy. Check the soil moisture by sticking your finger into the soil. If the top inch feels dry, it’s time to water. Avoid overwatering, as this can lead to root rot.
3. Fertilizing: Peas are relatively light feeders, but they still benefit from occasional fertilization. Use a balanced liquid fertilizer diluted to half strength every 2-3 weeks.
4. Support: As your pea plants grow, they’ll need some support. Install your chosen support structure (trellis, stakes, etc.) early on to prevent the plants from sprawling. Gently guide the vines onto the support as they grow.
5. Air Circulation: Good air circulation is important for preventing fungal diseases. Make sure your plants have plenty of space around them and avoid overcrowding. You can also use a small fan to improve air circulation.
6. Pest Control: Keep an eye out for pests like aphids and spider mites. If you spot any pests, you can try spraying them with insecticidal soap or neem oil.
Harvesting Your Bounty: Enjoying Your Homegrown Peas
The moment you’ve been waiting for – harvesting! This is the most rewarding part of the whole process.
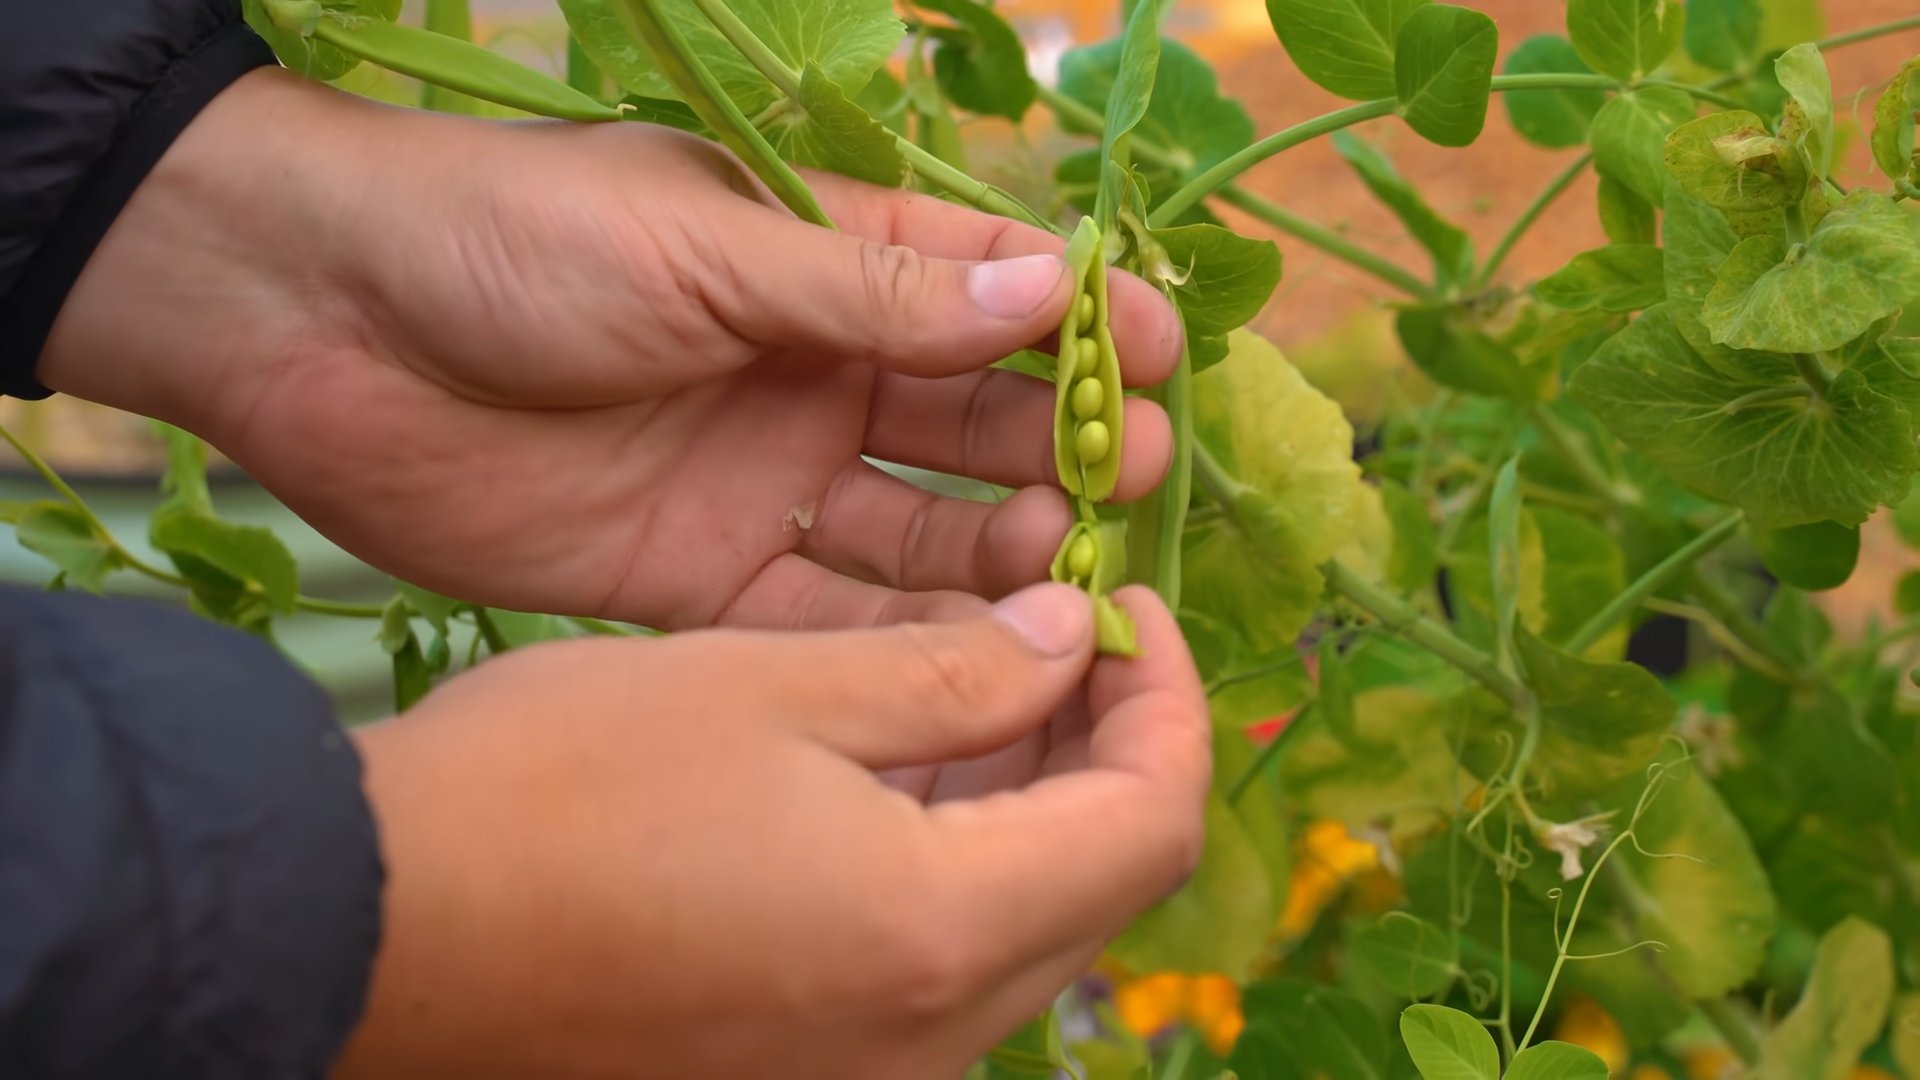
1. Timing: Peas are typically ready to harvest about 60-70 days after planting. The pods should be plump and filled with peas.
2. Harvesting Technique: Gently snap the pea pods off the vine. Avoid pulling on the vine, as this can damage the plant.
3. Frequency: Harvest your peas regularly to encourage continued production. The more you harvest, the more peas your plants will produce.
4. Enjoying Your Peas: Freshly harvested peas are best enjoyed immediately. You can eat them raw, steamed, boiled, or stir-fried. They’re also delicious in salads, soups, and stews.
Troubleshooting: Common Problems and Solutions
Even with the best care, you might encounter some problems along the way. Here are some common issues and how to address them:
* Poor Germination: If your pea seeds aren’t germinating, make sure the soil is warm enough and consistently moist. You can also try scarifying the seeds (gently scratching the surface) before planting to improve water absorption.
* Yellowing Leaves: Yellowing leaves can be a sign of overwatering, underwatering, or nutrient deficiency. Check the soil moisture and adjust your watering accordingly. You can also try fertilizing with a balanced fertilizer.
* Leggy Growth: Leggy growth (tall, spindly plants) is usually caused by insufficient light. Make sure your plants are getting enough sunlight or grow light.
* Powdery Mildew: Powdery mildew is a fungal disease that can affect peas. It appears as a white, powdery coating on the leaves. To prevent powdery mildew, ensure good air circulation and avoid overhead watering. If you see signs of powdery mildew, you can try spraying the plants with a fungicide.
* Aphids: Aphids are small, sap-sucking insects that can infest pea plants. They can cause stunted growth and yellowing leaves. To control aphids, you can try spraying them with insecticidal soap or neem oil.
Choosing the Right Pea Variety for Indoor Growing
Selecting the right pea variety is crucial for indoor success. Here’s a breakdown of some excellent choices:
* ‘Little Marvel’: This is a classic bush pea variety that’s perfect for containers. It produces sweet, flavorful peas in abundance.
* ‘Tom Thumb’: As the name suggests, ‘Tom Thumb’ is a very compact pea variety, making it ideal for small spaces. It produces small, but delicious, peas.
* ‘Sugar Ann’: This is a snap pea variety that produces edible pods. It’s a great choice if you enjoy eating the entire pod.
* ‘Oregon Sugar Pod II’: Another excellent snap pea variety with high yields and disease resistance.
* ‘Snowbird’: A snow pea variety that produces flat, edible pods. It’s a good choice for stir-fries and salads.
Important Note: Always check the seed packet for specific growing instructions, as different varieties may have slightly different requirements.
Optimizing Your Indoor Pea Garden for Maximum Yield
Want to maximize your pea harvest? Here are a few extra tips:
* Succession Planting: Plant new seeds every 2-3 weeks to ensure a continuous harvest throughout the growing season.
* Pinching: Pinching off the growing tips of the plants can encourage bushier growth and more pea production.
* Pollination: Peas are self-pollinating, but you can help them along by gently shaking the plants or using a small brush to transfer pollen from one flower to another.
* Companion Planting: Plant peas alongside other beneficial plants, such as carrots, radishes, and cucumbers. These plants can help improve soil health and deter pests.
* Record Keeping: Keep track of your planting dates, watering schedule, and fertilization schedule. This will help you learn what works best for your indoor

Conclusion
So, there you have it! Transforming your living space into a miniature, edible landscape with indoor pea gardening is not only achievable but incredibly rewarding. We’ve walked through the simple steps, highlighted the key considerations, and hopefully, inspired you to embrace this green thumb adventure, even if you’ve never gardened before.
Why is this DIY trick a must-try? Because it brings the joy of fresh, homegrown produce directly into your home, regardless of the season or your outdoor space limitations. Imagine the satisfaction of snipping sweet, crisp pea shoots for your salad or enjoying a handful of plump, juicy peas straight from the vine, all nurtured by your own hand. Beyond the delicious harvest, indoor pea gardening offers a therapeutic connection to nature, a visual delight, and a sustainable way to supplement your diet. It’s a project that’s both educational and engaging, especially for families with children, teaching them about the life cycle of plants and the importance of healthy eating.
But the beauty of indoor pea gardening lies in its adaptability. Feel free to experiment with different pea varieties. Dwarf varieties like ‘Little Marvel’ or ‘Tom Thumb’ are particularly well-suited for indoor containers, but don’t be afraid to try others and see what thrives best in your environment. Consider using different types of supports for your peas to climb. A simple trellis made from bamboo skewers and twine works wonders, but you could also repurpose an old ladder or create a decorative climbing structure.
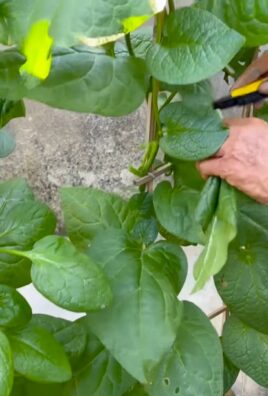
For a unique twist, try growing pea shoots specifically for their tender greens. Harvest them regularly by snipping the top few inches of the plant, encouraging continued growth and a steady supply of fresh greens for salads, stir-fries, or even as a garnish. You can also experiment with companion planting. Consider adding herbs like mint or basil to your pea containers, which can help deter pests and enhance the flavor of your peas.
Ultimately, the success of your indoor pea garden depends on your willingness to experiment and adapt. Pay close attention to your plants, observe their growth patterns, and adjust your watering and lighting accordingly. Don’t be discouraged if you encounter challenges along the way. Gardening is a learning process, and every setback is an opportunity to gain valuable experience.
We wholeheartedly encourage you to give this DIY trick a try. It’s a simple, affordable, and incredibly rewarding way to bring the beauty and bounty of nature into your home. And most importantly, we want to hear about your experience! Share your photos, tips, and challenges in the comments below. Let’s create a community of indoor pea gardeners, sharing our knowledge and inspiring each other to grow our own food, one pea at a time. Happy gardening!
Frequently Asked Questions (FAQ)
What are the best pea varieties for indoor gardening?
Dwarf or bush pea varieties are generally the best choice for indoor gardening because they don’t require as much vertical space as climbing varieties. Some excellent options include ‘Little Marvel,’ ‘Tom Thumb,’ ‘Sugar Ann’ (a bush snap pea), and ‘Alaska.’ These varieties tend to be compact and produce well in containers. However, if you have ample vertical space and a sturdy trellis, you can certainly try climbing varieties like ‘Sugar Snap’ or ‘Oregon Sugar Pod,’ but be prepared to provide adequate support. Consider the size of your container and the amount of light available when selecting your pea variety.
How much light do indoor pea plants need?
Pea plants need at least 6-8 hours of direct sunlight per day to thrive. If you don’t have a sunny windowsill, you’ll need to supplement with artificial lighting. Grow lights, particularly LED grow lights, are an excellent option. Position the grow lights a few inches above the plants and keep them on for 12-16 hours per day. Insufficient light can lead to leggy growth, reduced flowering, and poor pea production. Observe your plants closely; if they are stretching towards the light, it’s a sign that they need more illumination.
What type of soil is best for indoor pea gardening?
Pea plants prefer well-draining soil that is rich in organic matter. A good potting mix specifically formulated for vegetables is ideal. Avoid using garden soil, as it can be too heavy and may contain pests or diseases. You can also amend your potting mix with compost or aged manure to improve its fertility and drainage. Ensure that your container has drainage holes to prevent waterlogging, which can lead to root rot.
How often should I water my indoor pea plants?
Water your pea plants regularly, keeping the soil consistently moist but not waterlogged. Check the soil moisture level daily by sticking your finger about an inch into the soil. If it feels dry, it’s time to water. Water deeply, allowing the excess water to drain out of the bottom of the container. Avoid overhead watering, as this can promote fungal diseases. During warmer months or when the plants are actively growing, you may need to water more frequently.
Do I need to fertilize my indoor pea plants?
Pea plants are relatively light feeders, but they will benefit from occasional fertilization. Use a balanced liquid fertilizer diluted to half strength every 2-3 weeks. Look for a fertilizer with a higher phosphorus content, as this promotes root development and flowering. Avoid over-fertilizing, as this can lead to excessive foliage growth at the expense of pea production. You can also amend the soil with compost or worm castings to provide a slow-release source of nutrients.
How do I support my indoor pea plants?
Pea plants, especially climbing varieties, need support to grow properly. You can use a variety of structures, such as trellises, stakes, or netting. A simple trellis made from bamboo skewers and twine is an easy and affordable option. Position the support structure close to the plants and gently guide the tendrils to attach. As the plants grow, continue to train them to climb the support. Providing adequate support will help prevent the plants from sprawling and becoming tangled.
How long does it take for indoor pea plants to produce peas?
The time it takes for indoor pea plants to produce peas depends on the variety and growing conditions. Generally, you can expect to harvest peas about 60-70 days after planting. Pea shoots can be harvested much sooner, typically within 2-3 weeks. Keep an eye on the pea pods; they are ready to harvest when they are plump and filled with peas. Harvest regularly to encourage continued production.
What are some common pests and diseases that affect indoor pea plants?
Common pests that can affect indoor pea plants include aphids, spider mites, and whiteflies. Regularly inspect your plants for signs of infestation and take action promptly. You can control these pests by spraying the plants with insecticidal soap or neem oil. Fungal diseases, such as powdery mildew, can also be a problem, especially in humid conditions. Ensure good air circulation around the plants and avoid overhead watering to prevent fungal diseases. If you notice signs of disease, remove the affected leaves and treat the plants with a fungicide.
Can I grow peas indoors year-round?
Yes, you can grow peas indoors year-round, provided you have adequate light and temperature control. Pea plants prefer cooler temperatures, ideally between 60-70°F (15-21°C). Avoid placing them near heat sources, such as radiators or vents. With proper care and attention, you can enjoy a continuous harvest of fresh peas throughout the year.
How do I harvest pea shoots?
Harvesting pea shoots is a great way to enjoy the tender greens of your pea plants before the peas are ready. Simply snip off the top few inches of the plant, just above a leaf node. This will encourage the plant to branch out and produce more shoots. You can harvest pea shoots multiple times throughout the growing season. They are delicious in salads, stir-fries, or as a garnish.

Leave a Comment