
Indoor Mint Growing Tips: Unlock the secrets to a fragrant and thriving indoor garden! Have you ever craved the fresh, invigorating scent of mint wafting through your home, or wished you could snip a few leaves for a refreshing mojito without running to the store? Well, you’re in the right place! For centuries, mint has been cherished not only for its culinary uses but also for its medicinal properties and symbolic significance, representing hospitality and warmth in many cultures.
But let’s face it, sometimes growing mint indoors can feel like a battle against the odds. Yellowing leaves, leggy stems, and a general lack of vibrancy can be incredibly frustrating. That’s where these indoor mint growing tips come in! I’m going to share my tried-and-true DIY tricks and hacks that will transform your mint-growing experience.
This isn’t just about having a pretty plant; it’s about creating a sustainable source of fresh herbs right at your fingertips. Imagine the convenience of adding a sprig of homegrown mint to your tea, salads, or desserts whenever you please. Plus, growing your own mint is a fantastic way to reduce your reliance on store-bought herbs, saving you money and minimizing your environmental impact. So, get ready to dive into the world of indoor mint cultivation and discover how easy it can be to cultivate a flourishing mint plant indoors!
Growing Mint Indoors: A Beginner’s Guide to Fresh Flavor All Year Round
Hey there, fellow herb enthusiasts! Are you dreaming of fresh mint for your mojitos, teas, and culinary creations, even when the snow is falling outside? Well, you’re in the right place! Growing mint indoors is surprisingly easy, and I’m here to walk you through every step, from choosing the right pot to harvesting your fragrant bounty. Let’s get started!
Choosing the Right Mint Variety
First things first, let’s talk mint varieties. While all mints share that characteristic refreshing flavor, they each have their own unique nuances. Here are a few popular choices that thrive indoors:
* Peppermint: The classic choice, known for its strong, cool flavor. Perfect for teas and desserts.
* Spearmint: A milder, sweeter option, ideal for mojitos and savory dishes.
* Chocolate Mint: Yes, you read that right! This variety has a subtle chocolate aroma and flavor, making it a fun addition to desserts and drinks.
* Apple Mint: A fruity and slightly fuzzy variety, great for adding a refreshing twist to salads and beverages.
I personally love having both peppermint and spearmint on hand, but feel free to experiment and find your favorites!
Essential Supplies for Indoor Mint Growing
Before we dive into the planting process, let’s gather our supplies. You’ll need:
* A Pot with Drainage: This is crucial! Mint needs well-draining soil to prevent root rot. Choose a pot that’s at least 6 inches in diameter and has drainage holes at the bottom. Terracotta pots are a great option because they allow the soil to breathe.
* High-Quality Potting Mix: Don’t use garden soil! It’s too heavy and doesn’t drain well. Opt for a lightweight, well-draining potting mix specifically formulated for herbs or vegetables.
* Mint Seeds or Cuttings: You can start mint from seeds, but it’s much faster and easier to propagate from cuttings. Ask a friend for a cutting from their mint plant, or purchase one from a local nursery.
* Watering Can or Spray Bottle: For gentle watering.
* Grow Light (Optional but Recommended): If you don’t have a sunny windowsill, a grow light will ensure your mint gets enough light.
* Fertilizer (Optional): A balanced liquid fertilizer can help boost growth, but it’s not essential.
Planting Your Mint: Seeds vs. Cuttings
You have two main options for starting your indoor mint garden: seeds or cuttings. I highly recommend cuttings for beginners because they’re much easier and faster.
Starting from Cuttings:
This is my preferred method!
1. Take a Cutting: Choose a healthy stem from an existing mint plant. The cutting should be about 4-6 inches long and have several leaves. Remove the leaves from the bottom inch or two of the stem.
2. Rooting in Water: Place the cutting in a glass of water, making sure the bottom nodes (where the leaves were removed) are submerged. Place the glass in a bright, indirect light location.
3. Wait for Roots: Change the water every few days. You should see roots starting to emerge within a week or two.
4. Planting: Once the roots are about an inch long, it’s time to plant! Fill your pot with potting mix, leaving about an inch of space at the top. Gently create a small hole in the center of the pot and carefully place the rooted cutting inside.
5. Water Thoroughly: Water the soil until it’s evenly moist but not soggy.
Starting from Seeds:
This method requires a bit more patience.
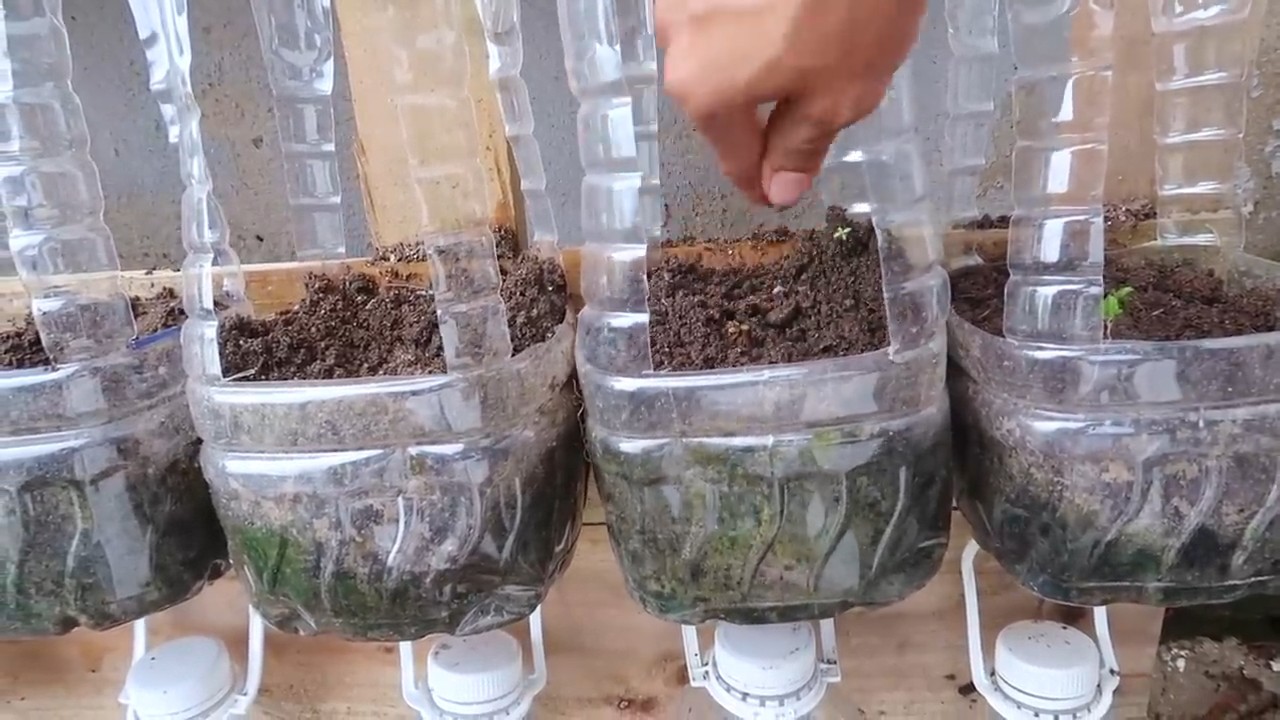
1. Sowing Seeds: Fill your pot with potting mix. Sprinkle the mint seeds evenly over the surface of the soil. Mint seeds are tiny, so don’t bury them too deep. Gently press them into the soil.
2. Watering: Mist the soil with a spray bottle to keep it moist.
3. Creating a Humid Environment: Cover the pot with plastic wrap or a clear plastic bag to create a humid environment. This will help the seeds germinate.
4. Germination: Place the pot in a warm, bright location. The seeds should germinate in about 10-14 days.
5. Removing the Cover: Once the seedlings emerge, remove the plastic wrap or bag.
6. Thinning: Once the seedlings have a few sets of true leaves, thin them out, leaving only the strongest plants.
Caring for Your Indoor Mint Plant
Now that your mint is planted, it’s time to provide it with the care it needs to thrive.
Light:
Mint needs plenty of light to grow well. Aim for at least 6 hours of direct sunlight per day. If you don’t have a sunny windowsill, use a grow light. Place the light about 6-12 inches above the plant. I’ve found that LED grow lights work really well and don’t generate too much heat.
Watering:
Keep the soil consistently moist but not soggy. Water when the top inch of soil feels dry to the touch. Be careful not to overwater, as this can lead to root rot. Make sure your pot has good drainage! I usually water my mint every 2-3 days, but this will vary depending on the temperature and humidity in your home.
Temperature:
Mint prefers temperatures between 65°F and 75°F (18°C and 24°C). Avoid placing your plant near drafts or heat sources.
Humidity:
Mint enjoys humidity, but it’s not essential. If your home is particularly dry, you can increase the humidity by placing a tray of water near the plant or using a humidifier. Misting the leaves with water can also help.
Fertilizing (Optional):
If you want to give your mint a boost, you can fertilize it every few weeks with a balanced liquid fertilizer. Follow the instructions on the fertilizer label. I personally don’t fertilize my mint very often, as it tends to grow quite vigorously on its own.
Pruning:
Pruning is essential for keeping your mint plant healthy and productive. Regularly pinch off the top leaves to encourage bushier growth. This will also prevent the plant from becoming leggy.
Harvesting Your Mint
The best part! You can start harvesting your mint as soon as the plant is a few inches tall.
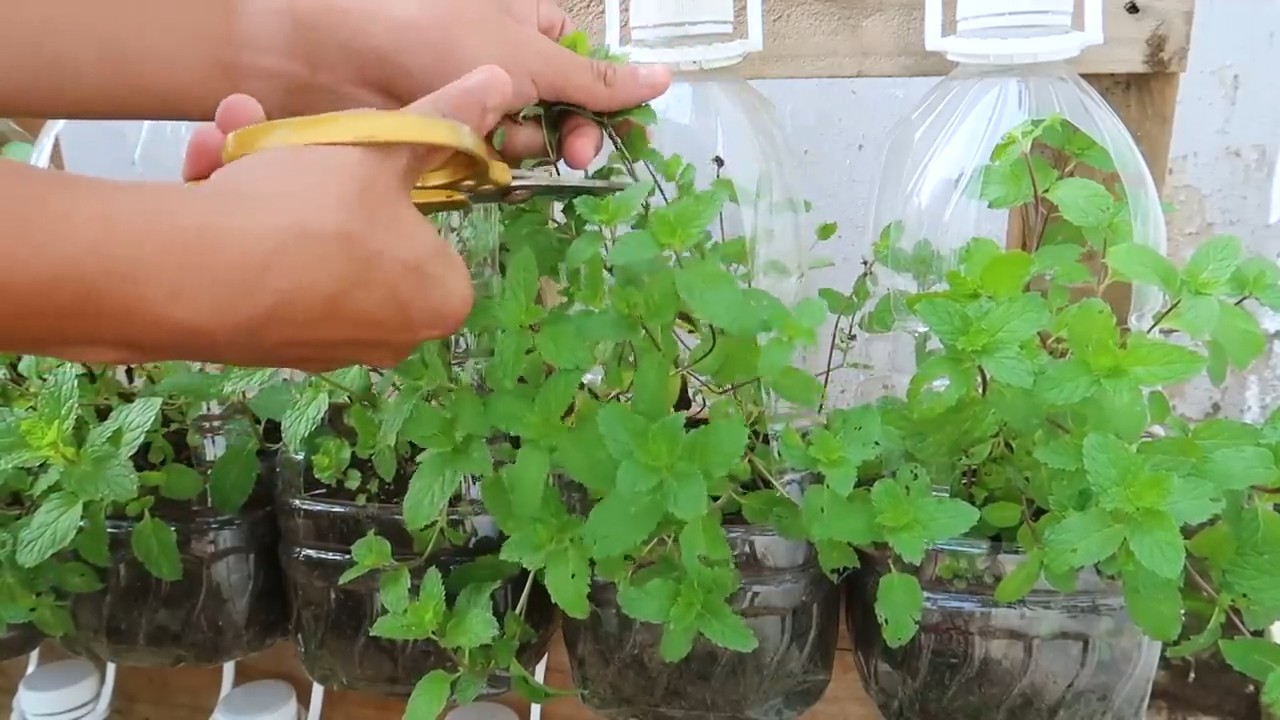
1. When to Harvest: Harvest mint in the morning, after the dew has dried. This is when the leaves are at their most flavorful.
2. How to Harvest: Use scissors or your fingers to pinch off the leaves or stems. Don’t remove more than one-third of the plant at a time.
3. Encouraging Growth: Pinching off the top leaves encourages the plant to branch out and produce more leaves.
4. Using Your Harvest: Use your fresh mint immediately, or store it in the refrigerator for a few days. You can also dry or freeze mint for longer-term storage.
Dealing with Common Problems
Even with the best care, you might encounter a few problems with your indoor mint plant. Here are some common issues and how to address them:
* Yellowing Leaves: This can be caused by overwatering, underwatering, or lack of nutrients. Check the soil moisture and adjust your watering accordingly. If the soil is dry, water thoroughly. If the soil is soggy, allow it to dry out before watering again. You can also try fertilizing the plant with a balanced liquid fertilizer.
* Leggy Growth: This is usually caused by insufficient light. Move your plant to a brighter location or use a grow light. Prune the plant to encourage bushier growth.
* Pests: Mint can be susceptible to pests like aphids, spider mites, and whiteflies. Inspect your plant regularly for signs of infestation. If you find pests, you can try washing them off with a strong stream of water or using an insecticidal soap.
* Root Rot: This is caused by overwatering and poor drainage. Make sure your pot has drainage holes and that you’re not overwatering the plant. If you suspect root rot, you can try repotting the plant in fresh potting mix.
Propagating Mint
Mint is incredibly easy to propagate, which means you can easily create new plants from cuttings. This is a great way to expand your mint collection or share your mint with friends.
1. Take a Cutting: Choose a healthy stem from an existing mint plant. The cutting should be about 4-6 inches long and have several leaves. Remove the leaves from the bottom inch or two of the stem.
2. Rooting in Water: Place the cutting in a glass of water, making sure the bottom nodes (where the leaves were removed) are submerged. Place the glass in a bright, indirect light location.
3. Wait for Roots: Change the water
Conclusion
So, there you have it! Mastering the art of indoor mint growing is not only achievable but also incredibly rewarding. We’ve explored the simple yet effective techniques that will transform your windowsill into a thriving herb garden, providing you with a constant supply of fresh, fragrant mint for all your culinary and beverage needs.
Why is this DIY approach a must-try? Because it empowers you to control the quality and freshness of your mint, eliminating the need for store-bought options that can often be wilted or lacking in flavor. Imagine the satisfaction of snipping off a few sprigs of your own homegrown mint to garnish a refreshing mojito, infuse a pot of tea, or add a burst of flavor to your favorite dishes. The possibilities are endless!
Beyond the immediate benefits of fresh mint, this DIY project offers a therapeutic and engaging hobby. Nurturing your mint plant, observing its growth, and enjoying its delightful aroma can be a calming and fulfilling experience. It’s a small connection to nature that you can cultivate right in your own home, regardless of your outdoor space.
Looking for variations? Consider experimenting with different varieties of mint, such as peppermint, spearmint, chocolate mint, or even orange mint. Each variety offers a unique flavor profile that can add a new dimension to your culinary creations. You can also explore different container options, from simple terracotta pots to stylish self-watering planters, to find what works best for your space and aesthetic. Another fun variation is to propagate your mint cuttings to create even more plants! This is a great way to expand your indoor garden and share the joy of fresh mint with friends and family.
Don’t be intimidated by the prospect of growing mint indoors. With the right knowledge and a little bit of care, you can easily achieve success. Remember to provide your mint plant with plenty of sunlight, well-draining soil, and regular watering. Keep an eye out for any signs of pests or diseases, and address them promptly.
We wholeheartedly encourage you to embark on this DIY adventure and discover the joys of indoor mint growing. It’s a simple, affordable, and incredibly rewarding way to enhance your culinary experiences and bring a touch of nature into your home.
Now, we want to hear from you! Have you tried growing mint indoors before? What challenges did you face, and what successes did you achieve? Share your experiences, tips, and tricks in the comments below. We’re eager to learn from your insights and build a community of passionate indoor gardeners. Let’s cultivate a thriving online garden together!
Frequently Asked Questions (FAQ)
Why is my indoor mint plant not thriving?
There are several reasons why your indoor mint plant might not be thriving. The most common culprits are insufficient sunlight, improper watering, and poor soil drainage. Mint requires at least 6 hours of sunlight per day to flourish. If your plant isn’t getting enough natural light, consider supplementing with a grow light. Overwatering can lead to root rot, while underwatering can cause the leaves to wilt and dry out. Ensure that the soil is well-draining and that you’re only watering when the top inch of soil feels dry to the touch. Also, make sure your pot has drainage holes. Nutrient deficiencies can also play a role. Consider using a balanced liquid fertilizer diluted to half strength every few weeks during the growing season.
What type of soil is best for growing mint indoors?
Mint thrives in well-draining soil that is rich in organic matter. A good potting mix for indoor mint growing is a blend of equal parts potting soil, perlite, and compost. The potting soil provides a base for the plant to grow in, the perlite improves drainage, and the compost adds essential nutrients. Avoid using garden soil, as it can be too heavy and may contain pests or diseases. You can also add a small amount of slow-release fertilizer to the soil mix to provide a steady supply of nutrients.
How often should I water my indoor mint plant?
The frequency of watering depends on several factors, including the size of the pot, the type of soil, the amount of sunlight, and the temperature. As a general rule, water your mint plant when the top inch of soil feels dry to the touch. Avoid overwatering, as this can lead to root rot. When you water, water thoroughly until water drains out of the drainage holes. During the warmer months, you may need to water more frequently than during the cooler months. Check the soil moisture regularly and adjust your watering schedule accordingly.
How much sunlight does indoor mint need?
Mint requires at least 6 hours of sunlight per day to thrive. Place your mint plant in a sunny location, such as a south-facing window. If you don’t have a sunny window, you can supplement with a grow light. Position the grow light about 6-12 inches above the plant and leave it on for 12-16 hours per day. Insufficient sunlight can cause the leaves to become pale and leggy.
How do I propagate mint from cuttings?
Propagating mint from cuttings is a simple and effective way to create new plants. To propagate mint, take a 4-6 inch cutting from a healthy stem, just below a leaf node. Remove the leaves from the bottom inch of the cutting. Place the cutting in a glass of water, making sure that the bottom node is submerged. Change the water every few days. Within a week or two, roots will begin to form. Once the roots are about an inch long, you can transplant the cutting into a pot filled with well-draining soil. Keep the soil moist until the plant is established.
What are common pests and diseases that affect indoor mint plants?
Common pests that can affect indoor mint plants include aphids, spider mites, and whiteflies. These pests can suck the sap from the leaves, causing them to become yellow and distorted. To control these pests, you can spray the plant with insecticidal soap or neem oil. Root rot is a common disease that can affect mint plants, especially if they are overwatered. To prevent root rot, ensure that the soil is well-draining and avoid overwatering. Powdery mildew can also affect mint plants, especially in humid conditions. To prevent powdery mildew, provide good air circulation and avoid wetting the leaves when watering.
Can I grow different varieties of mint together in the same pot?
While it’s technically possible to grow different varieties of mint together in the same pot, it’s generally not recommended. Mint is a vigorous grower and can quickly spread and take over the pot. Different varieties of mint can also cross-pollinate, which can result in unexpected flavor combinations. If you want to grow multiple varieties of mint, it’s best to plant them in separate pots. This will allow you to control their growth and prevent them from cross-pollinating.
How do I harvest mint leaves?
To harvest mint leaves, simply snip off the stems just above a leaf node. This will encourage the plant to produce new growth. You can harvest mint leaves at any time, but they are most flavorful when harvested in the morning. Avoid harvesting more than one-third of the plant at a time, as this can stress the plant. Freshly harvested mint leaves can be used immediately or stored in the refrigerator for a few days.
How do I store fresh mint leaves?
There are several ways to store fresh mint leaves. One method is to wrap the leaves in a damp paper towel and store them in a plastic bag in the refrigerator. This will help to keep them fresh for a few days. Another method is to freeze the leaves. To freeze mint leaves, wash and dry them thoroughly. Then, place them in a single layer on a baking sheet and freeze for a few hours. Once the leaves are frozen, transfer them to a freezer bag or container. Frozen mint leaves can be stored for several months. You can also dry mint leaves by hanging them upside down in a cool, dry place. Once the leaves are dry, store them in an airtight container.
Is indoor mint growing organic?
Yes, indoor mint growing can easily be organic. By using organic potting soil, organic fertilizers, and natural pest control methods, you can ensure that your mint is grown without the use of synthetic chemicals. This is a great way to enjoy fresh, flavorful mint while also protecting the environment.

Leave a Comment