
Homemade Garlic
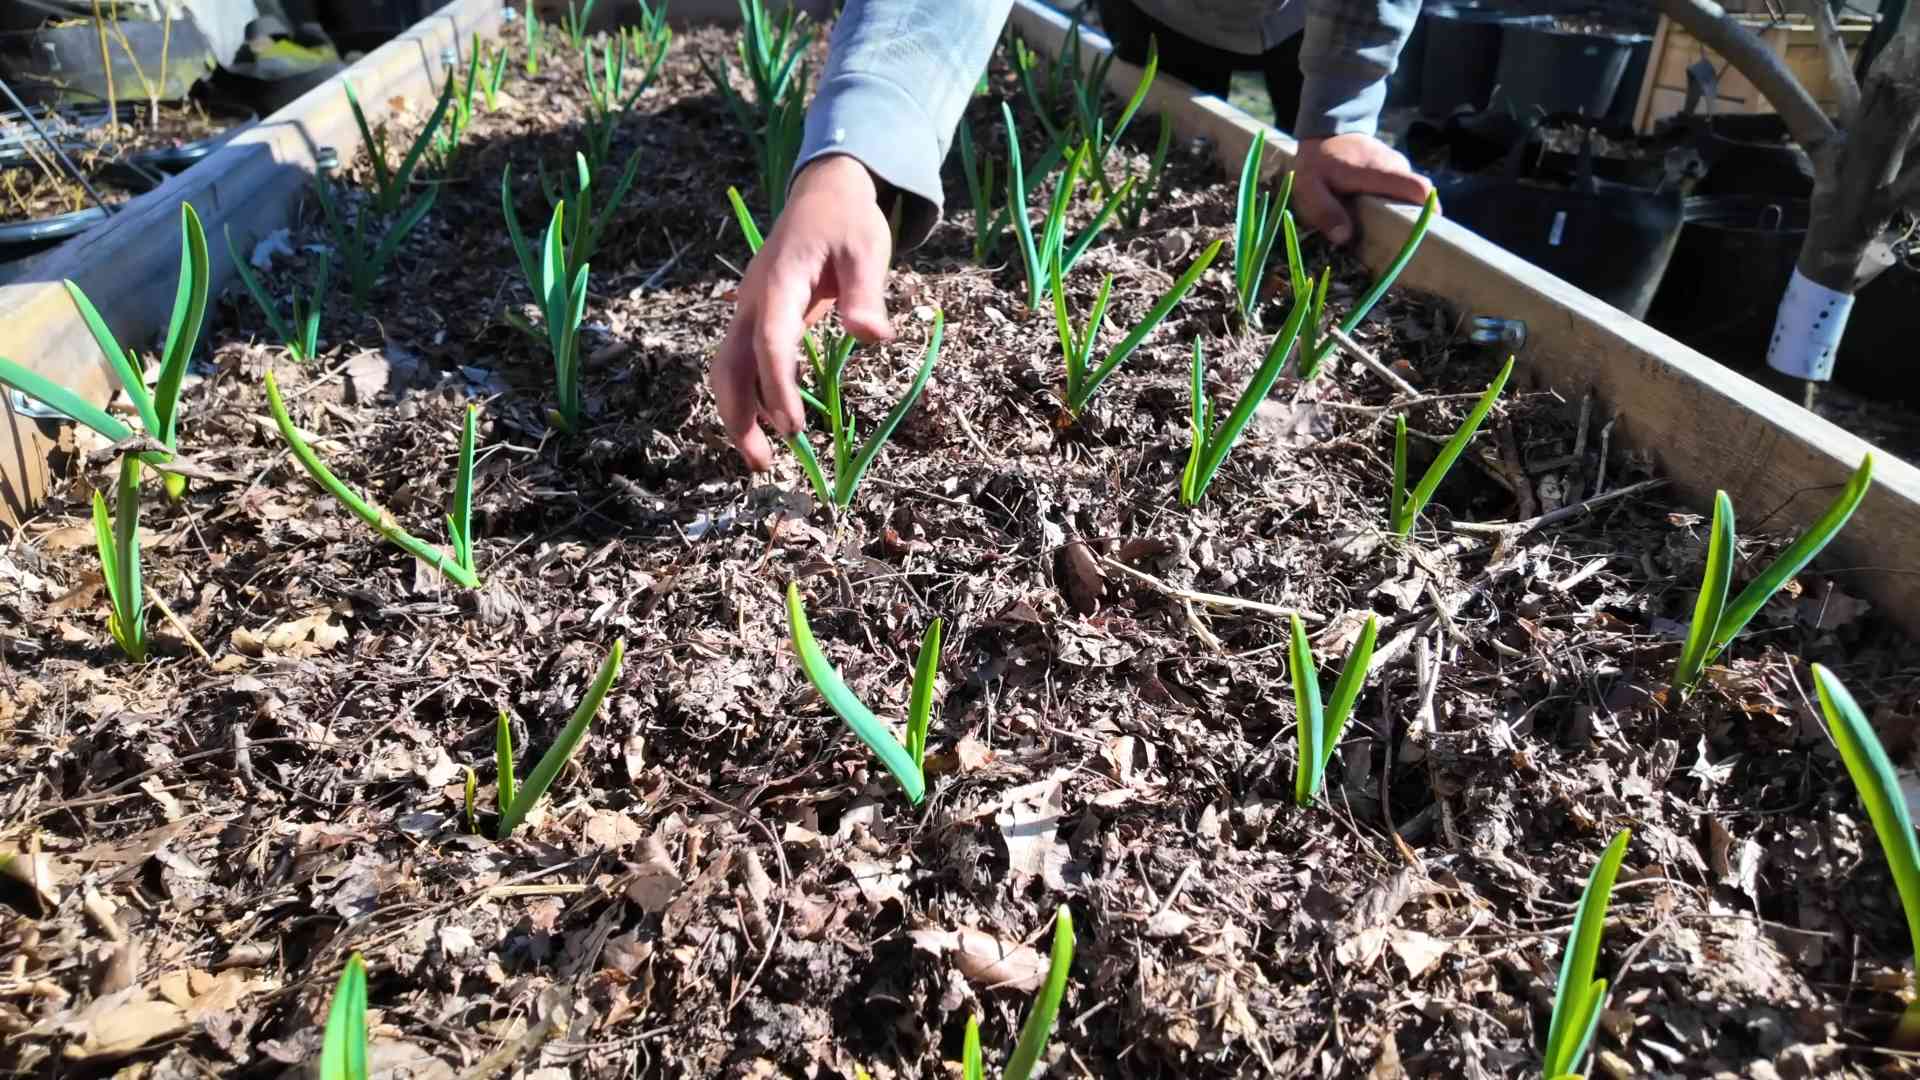
Have you ever wished you could have the freshest, most flavorful garlic imaginable, readily available right in your own backyard? Well, you’re in luck! This article is all about unlocking the secrets of Homemade Garlic, guiding you through the simple yet rewarding process of growing your own pungent bulbs. From planting to harvest, I’ll share my tried-and-true tips and tricks to ensure a bountiful crop of this culinary staple.
Growing your own garlic isn’t just about saving a few bucks at the grocery store; it’s a connection to a rich agricultural history. For centuries, garlic has been cultivated across the globe, prized not only for its intense flavor but also for its purported medicinal properties. Ancient civilizations recognized its value, using it in cooking, medicine, and even religious ceremonies. Now, you can tap into this ancient tradition and experience the satisfaction of nurturing your own Homemade Garlic from seed to harvest.
Why Grow Your Own?
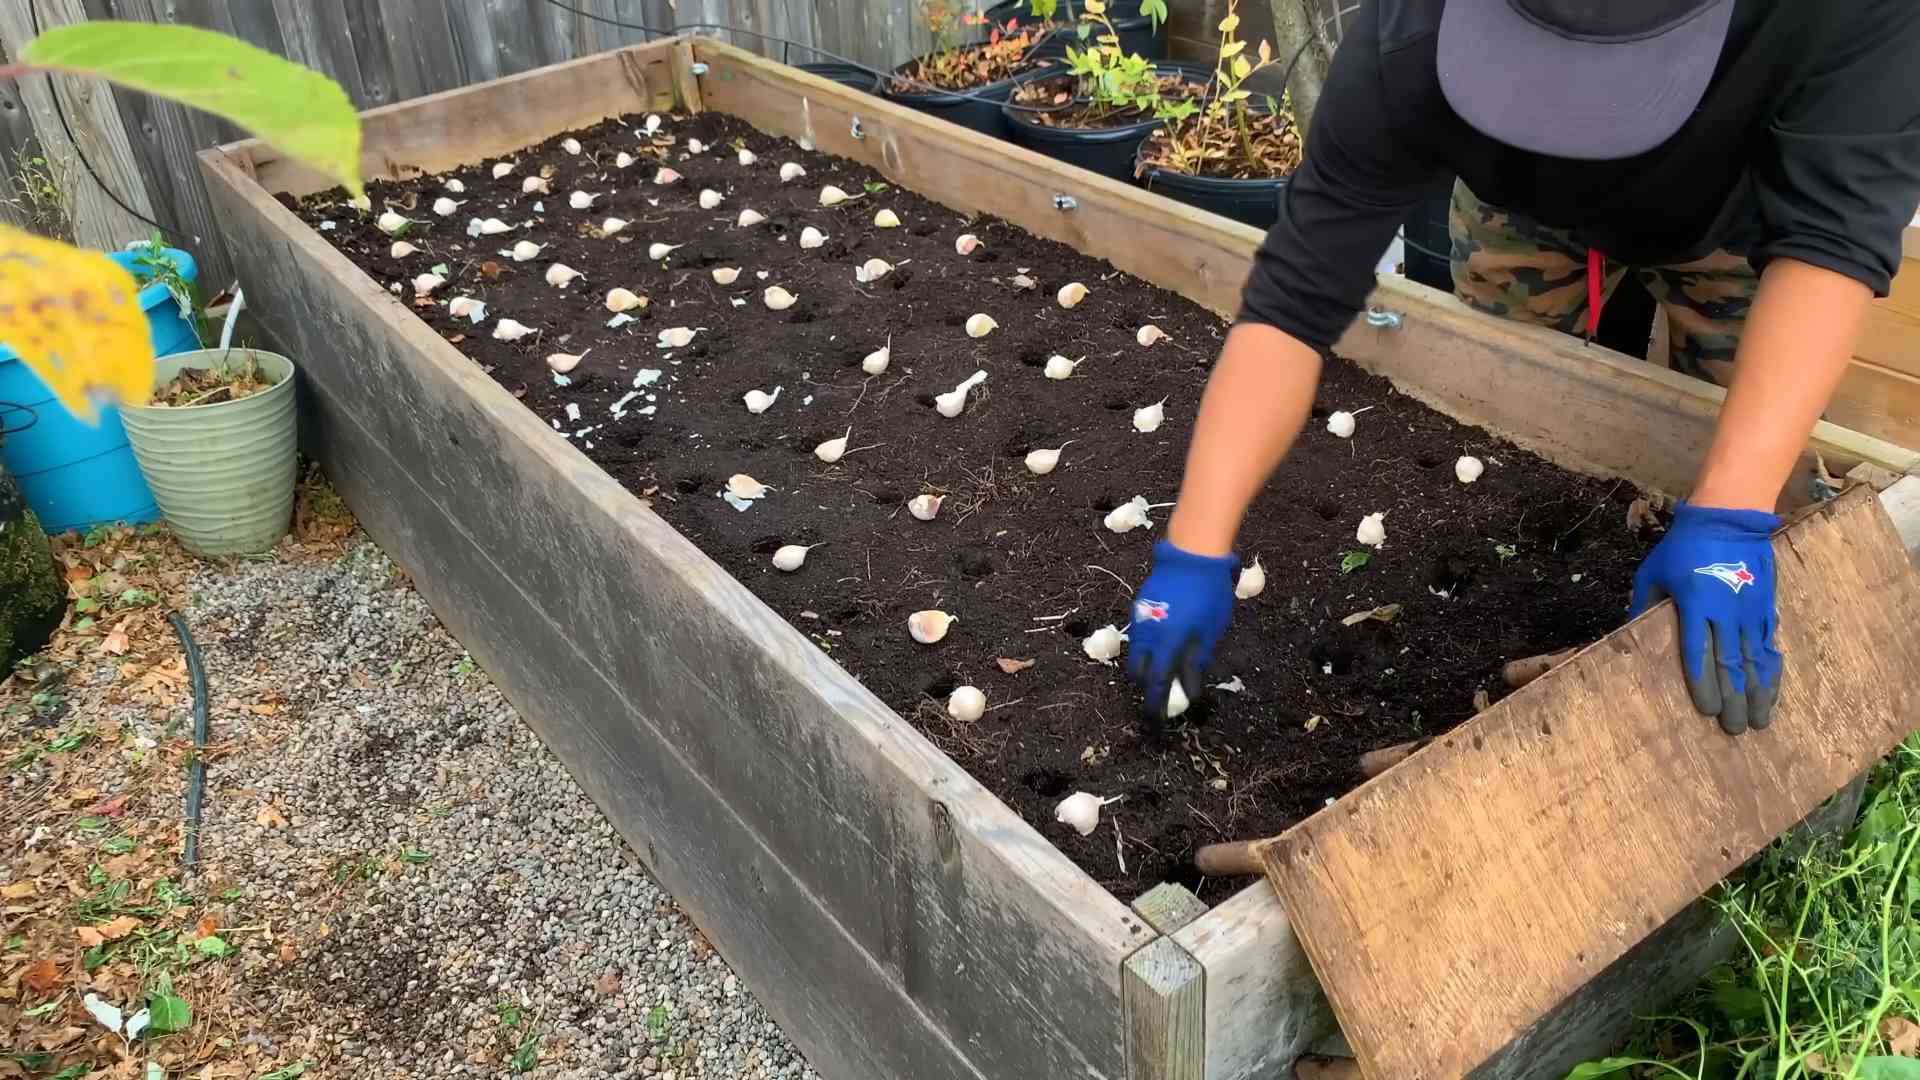
Beyond the historical significance, there are compelling reasons to embark on this simple gardening adventure. Imagine the incredible taste difference between freshly harvested garlic cloves and those you buy from the supermarket – it’s truly night and day! Plus, you’ll have complete control over the quality and growing process, ensuring your garlic is free from pesticides and other potentially harmful chemicals. This means healthier food for you and your family, and a deeper appreciation for the food you consume.
So, whether you’re a seasoned gardener or a complete beginner, get ready to discover the joys of cultivating your own Homemade Garlic. Let’s dive into the practical steps and helpful hints that will transform your garden into a fragrant haven of delicious, homegrown goodness!
Making Your Own Amazing Garlic Powder: A Step-by-Step Guide
I love garlic. Seriously, I could eat it with everything. But buying pre-made garlic powder can be expensive, and honestly, the quality isn’t always the best. That’s why I decided to make my own, and let me tell you, it’s so easy and the flavor is incredible! This guide will walk you through the entire process, from selecting the perfect garlic to storing your finished powder.
Phase 1: Garlic Selection and Preparation
- Choose your garlic wisely: Select firm, plump bulbs with dry, papery skins. Avoid any bulbs that show signs of bruising, sprouting, or soft spots. The fresher the garlic, the better the flavor of your powder will be. I usually buy a whole bunch at the farmer’s market – they’re always so much better than the supermarket ones!
- Clean your garlic: Gently wipe away any loose dirt or debris from the outside of the garlic bulbs. A soft brush can be helpful for this. No need to wash them thoroughly at this stage – we’ll do that later.
- Separate the cloves: Carefully separate the individual cloves from the bulb. You can gently squeeze the bulb to loosen the cloves, or use a knife to carefully pry them apart. Be careful not to damage the cloves themselves.
- Peel the cloves: This is where things get a little tedious, but it’s worth it! There are a few ways to peel garlic cloves. You can use a knife to carefully slice off the top and bottom of each clove, then gently squeeze the clove from the skin. Alternatively, you can place the cloves in a bowl, cover them with another bowl, and shake vigorously. The skins will mostly come off. I find the shaking method works best for me, but it can be a bit messy!
- Wash and rinse: Now, thoroughly wash the peeled garlic cloves under cold running water to remove any remaining bits of skin or debris. Make sure to rinse them well.
Phase 2: Drying the Garlic
- Choose your drying method: You have several options for drying your garlic cloves. You can air dry them, use a dehydrator, or even use your oven. I’ll detail each method below.
- Air drying (the slowest method): This is the most traditional method. Spread the peeled garlic cloves in a single layer on a clean, dry surface, such as a baking sheet or a wire rack. Make sure there’s good air circulation around the cloves. This method can take several days to a week, depending on the humidity and temperature. Turn the cloves occasionally to ensure even drying.
- Dehydrator drying (the fastest and most consistent method): If you have a food dehydrator, this is the easiest and most consistent method. Follow the manufacturer’s instructions for drying garlic. Generally, you’ll spread the cloves in a single layer on the dehydrator trays and dry them at a low temperature (around 135-145°F or 57-63°C) until they are completely dry and brittle. This usually takes 6-8 hours.
- Oven drying (a good compromise): Preheat your oven to the lowest setting, ideally around 170°F (77°C). Spread the garlic cloves in a single layer on a baking sheet lined with parchment paper. Leave the oven door slightly ajar to allow moisture to escape. This method takes several hours, and you’ll need to monitor the garlic closely to prevent burning. Check every 30 minutes or so.
Phase 3: Processing into Powder
- Check for dryness: Once your garlic cloves are completely dry, they should be brittle and easily crumble. If they’re still slightly soft or pliable, continue drying them until they reach the desired consistency.
- Grind the garlic: You can use a spice grinder, a mortar and pestle, a food processor, or even a blender to grind the dried garlic cloves into a powder. If using a food processor or blender, pulse the garlic in short bursts to avoid overheating and creating a paste. For a finer powder, you might need to sift it through a fine-mesh sieve after grinding.
- Store your garlic powder: Once you’ve ground your garlic powder, store it in an airtight container in a cool, dark, and dry place. This will help to preserve its flavor and aroma for several months. A glass jar with a tight-fitting lid is ideal.
Phase 4: Troubleshooting and Tips
- Garlic turning brown: Some browning is normal during the drying process, but excessive browning indicates that the garlic may have been exposed to too much heat. Try lowering the temperature if using an oven or dehydrator.
- Garlic not drying properly: Ensure good air circulation during the drying process. If using an oven, leave the door slightly ajar. If air drying, make sure the cloves aren’t overcrowded.
- Powder too coarse: If your powder isn’t fine enough, you can grind it again or sift it through a fine-mesh sieve.
- Powder clumping: If your powder is clumping, it may be due to moisture. Make sure your storage container is airtight and the environment is dry.
- Experiment with different garlic varieties: Different varieties of garlic have slightly different flavor profiles. Experiment with different types to find your favorite!
And there you have it! Your very own homemade garlic powder. Enjoy the superior flavor and the satisfaction of knowing exactly what’s in your spice rack. It’s a fantastic addition to any dish, and it’s a great gift to give to friends and family who appreciate good food.
Conclusion
This homemade garlic recipe is a game-changer for anyone who appreciates the pungent power of fresh garlic. Forget the bland, sometimes-weak flavor of store-bought garlic; this method unlocks a depth of flavor and aroma that will elevate all your culinary creations. By simply fermenting garlic, you’re not just preserving it; you’re transforming it into a culinary powerhouse. The fermentation process mellows the harshness, creating a more complex, subtly sweet, and intensely savory flavor profile that’s incredibly versatile. This DIY trick is a must-try because it’s incredibly simple, requires minimal ingredients, and yields a product far superior to anything you can buy. The resulting fermented garlic cloves are perfect for adding a unique punch to everything from pasta sauces and soups to roasted vegetables and even salad dressings. The possibilities are truly endless!
Beyond the basic recipe, there are countless ways to experiment and personalize your homemade garlic. Try adding different herbs and spices during the fermentation process, such as chili flakes for a spicy kick, or a sprig of rosemary for an earthy aroma. Experiment with different types of garlic – elephant garlic, for example, will yield a milder, sweeter flavor. You can also adjust the fermentation time to achieve your preferred level of tanginess and softness. A shorter fermentation will result in a crisper garlic with a less intense flavor, while a longer fermentation will produce a softer, more pungent garlic. Don’t be afraid to get creative and discover your perfect fermented garlic profile!
We strongly encourage you to try this simple yet transformative homemade garlic recipe. It’s a rewarding experience that will not only enhance your cooking but also provide a sense of accomplishment. The process is incredibly satisfying, and the results are undeniably delicious. Share your experience with us! Post your photos and feedback on social media using #HomemadeGarlic and tag us – we can’t wait to see your culinary creations featuring this amazing ingredient. This simple DIY project will elevate your cooking and impress your friends and family. So, gather your ingredients, follow the steps, and prepare to be amazed by the incredible flavor of your homemade fermented garlic. It’s a culinary adventure waiting to happen!
Frequently Asked Questions
What are the benefits of making homemade garlic?
Making your own fermented garlic offers several key advantages. Firstly, you have complete control over the ingredients, ensuring no unwanted additives or preservatives. Secondly, the flavor is significantly superior to store-bought garlic; the fermentation process develops a richer, more complex, and nuanced taste. Thirdly, it’s a cost-effective method, especially if you frequently use garlic in your cooking. Finally, the process is surprisingly simple and requires minimal effort, making it accessible to even novice cooks.
How long does homemade garlic last?
Properly fermented garlic, stored in an airtight container in the refrigerator, can last for several months. The fermentation process itself acts as a natural preservative, extending its shelf life considerably. You’ll notice a change in texture and flavor over time, but it remains safe and delicious for a significant period.
Can I use any type of garlic for this recipe?
While the recipe uses standard garlic, you can experiment with different varieties. Elephant garlic, for example, will produce a milder, sweeter flavor profile. However, ensure the garlic is fresh and firm to achieve the best results. Avoid using garlic that shows signs of sprouting or damage.
What if my garlic doesn’t ferment properly?
Several factors can affect fermentation. Ensure your garlic is completely submerged in the brine, and the container is airtight. Room temperature plays a crucial role; a consistently warm environment (around 70-75°F) is ideal. If fermentation is slow or doesn’t occur, check the salt concentration and ensure the garlic is properly submerged. If problems persist, try again with a fresh batch, paying close attention to these factors.
Can I use this fermented garlic in all my recipes?
Absolutely! The versatility of fermented garlic is one of its greatest strengths. It can be used in a wide range of dishes, from savory sauces and soups to roasted vegetables and even salad dressings. Its unique flavor profile adds a depth and complexity that elevates any recipe. Experiment and discover your favorite ways to incorporate it into your culinary creations.
What happens if I leave the garlic to ferment for too long?
While longer fermentation times can result in a more intense flavor, excessively long fermentation can lead to overly soft or mushy garlic. The ideal fermentation time depends on your preference for texture and flavor intensity. Start with the recommended time and adjust based on your taste. If the garlic becomes too soft, you can still use it, but it might not be suitable for all applications.
Is it safe to eat fermented garlic?
Yes, when made correctly, fermented garlic is perfectly safe to eat. The fermentation process actually enhances its safety by creating an acidic environment that inhibits the growth of harmful bacteria. However, always ensure your garlic is fresh and properly fermented to minimize any risk.
Are there any health benefits to eating fermented garlic?
Fermented garlic, like other fermented foods, is often associated with various health benefits. The fermentation process increases the bioavailability of certain nutrients and may enhance gut health. However, it’s important to note that these are potential benefits, and more research is needed to confirm their extent. Always consult with a healthcare professional before making significant dietary changes.


Leave a Comment