
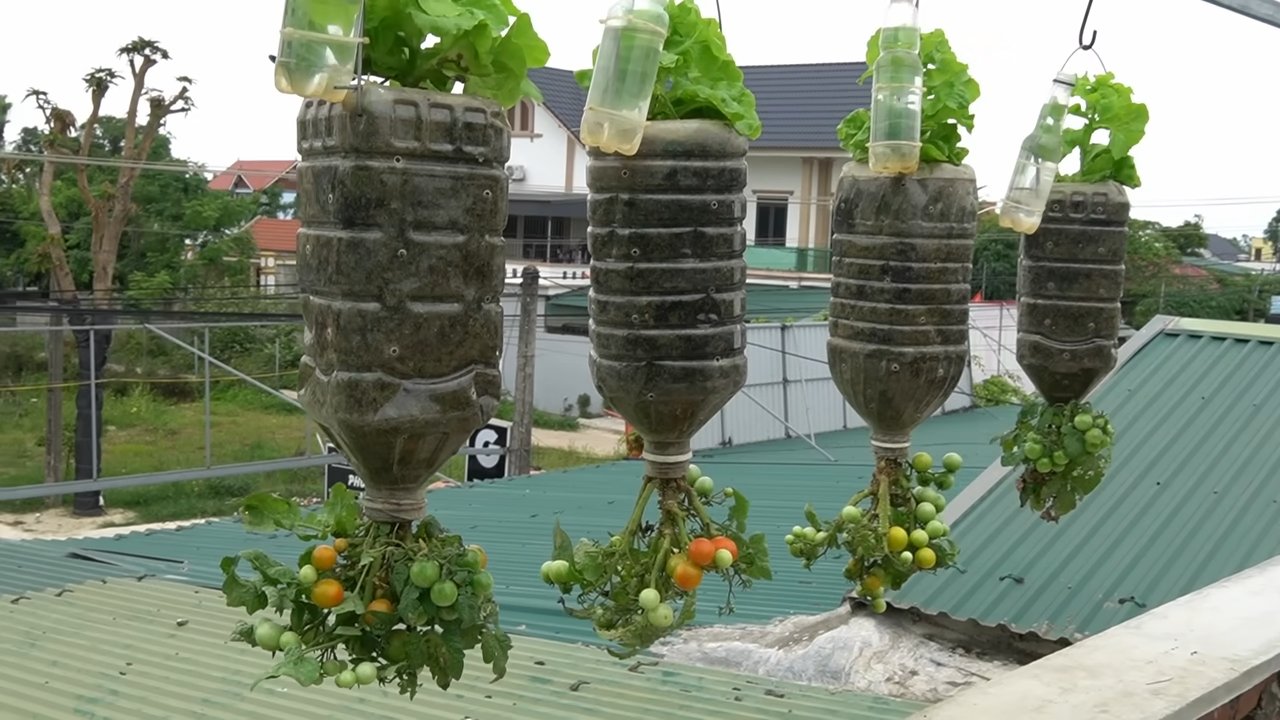
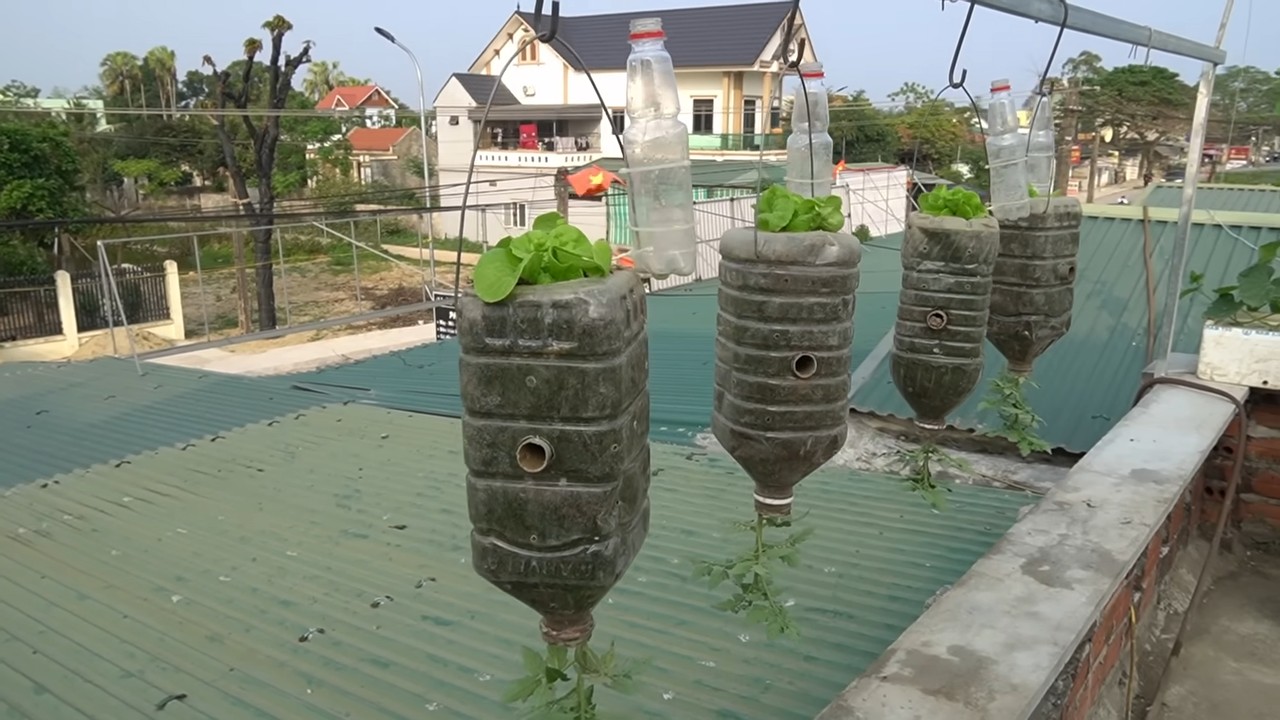
Hanging gardens for lettuce tomatoes? Yes, you read that right! Forget sprawling plots and back-breaking weeding – we’re taking your gardening game vertical! Imagine plump, juicy tomatoes and crisp, vibrant lettuce cascading down from hanging baskets, transforming your balcony, patio, or even a sunny window into a lush, edible oasis.
The concept of vertical gardening isn’t new. Think of the legendary Hanging Gardens of Babylon, one of the Seven Wonders of the Ancient World, a testament to human ingenuity and our enduring desire to cultivate beauty and sustenance, even in challenging environments. While we might not be building multi-tiered wonders, we can certainly draw inspiration from that rich history and adapt it to our modern lives.
Why should you embrace this DIY trick? Well, space is often a premium, especially for apartment dwellers or those with small yards. Hanging gardens for lettuce tomatoes offer a fantastic solution, maximizing your growing area without sacrificing precious ground space. Plus, they’re incredibly accessible, making gardening easier for everyone, regardless of physical limitations. No more bending and kneeling! And let’s be honest, they look absolutely stunning, adding a touch of whimsical charm to any space. I’m excited to show you how to create your own thriving hanging garden, bringing fresh, homegrown goodness right to your fingertips!
DIY Hängegarten für Salat und Tomaten: Dein eigener vertikaler Garten
Hallo Gartenfreunde! Ich zeige euch heute, wie ihr einen fantastischen Hängegarten für Salat und Tomaten selber bauen könnt. Das ist nicht nur platzsparend, sondern sieht auch noch super aus und bringt frisches Grün direkt vor eure Haustür oder auf den Balkon. Lasst uns loslegen!
Was du brauchst: Die Materialliste
Bevor wir starten, hier eine Liste aller Materialien und Werkzeuge, die du für dieses Projekt benötigst. Keine Sorge, vieles davon hast du vielleicht schon zu Hause!
* Pflanzgefäße: Mehrere stabile Pflanzgefäße aus Kunststoff oder Terrakotta. Die Größe hängt davon ab, wie viele Pflanzen du unterbringen möchtest. Ich empfehle Töpfe mit einem Durchmesser von mindestens 20 cm für Tomaten und etwas kleinere für Salat.
* Stabile Kette oder Seil: Zum Aufhängen der Töpfe. Achte darauf, dass das Material wetterfest und stark genug ist, um das Gewicht der bepflanzten Töpfe zu tragen. Ich persönlich bevorzuge verzinkte Ketten, da sie sehr robust sind.
* S-Haken oder Karabinerhaken: Zum einfachen Einhängen der Töpfe in die Kette.
* Bohrmaschine mit passendem Bohrer: Zum Bohren von Löchern in die Töpfe für die Aufhängung.
* Pflanzerde: Hochwertige Pflanzerde, idealerweise speziell für Gemüse.
* Drainagematerial: Blähton oder Kies, um Staunässe zu vermeiden.
* Jungpflanzen: Salat- und Tomatenpflanzen deiner Wahl. Du kannst natürlich auch Samen verwenden, aber Jungpflanzen sind einfacher und schneller.
* Gießkanne oder Schlauch: Zum Bewässern deiner Pflanzen.
* Handschuhe: Zum Schutz deiner Hände beim Pflanzen.
* Maßband oder Zollstock: Zum Ausmessen der Abstände.
* Optional: Dünger für Gemüse, um das Wachstum zu fördern.
Schritt-für-Schritt Anleitung: So baust du deinen Hängegarten
Jetzt geht’s ans Eingemachte! Folge diesen Schritten, um deinen eigenen Hängegarten zu bauen.
1. Vorbereitung der Pflanzgefäße
1. Löcher bohren: Zuerst bohren wir Löcher in die Pflanzgefäße. Je nachdem, wie du die Töpfe aufhängen möchtest, benötigst du entweder drei oder vier Löcher am oberen Rand jedes Topfes. Achte darauf, dass die Löcher groß genug sind, um die Kette oder das Seil hindurchzufädeln. Ich empfehle, die Löcher etwa 2-3 cm unterhalb des Randes zu bohren.
2. Drainage vorbereiten: Fülle eine Schicht Blähton oder Kies auf den Boden jedes Topfes. Das sorgt für eine gute Drainage und verhindert Staunässe, was besonders wichtig für Tomaten ist. Eine Schicht von etwa 3-5 cm ist ideal.
2. Aufhängung vorbereiten
1. Kette/Seil zuschneiden: Schneide die Kette oder das Seil in die gewünschte Länge. Bedenke dabei, dass die Länge der Kette/des Seils bestimmt, wie tief die Töpfe hängen werden. Ich empfehle, die Kette/das Seil etwas länger zu lassen, damit du später noch Anpassungen vornehmen kannst.
2. S-Haken/Karabiner anbringen: Befestige die S-Haken oder Karabinerhaken an den Enden der Kette/des Seils. Diese Haken werden später verwendet, um die Töpfe einzuhängen.
3. Bepflanzung der Töpfe
1. Erde einfüllen: Fülle die Töpfe mit Pflanzerde. Lass oben etwa 2-3 cm Platz, damit du beim Gießen nicht alles überschwemmst.
2. Pflanzen einsetzen: Setze die Salat- und Tomatenpflanzen in die Töpfe. Achte darauf, dass die Wurzelballen gut mit Erde bedeckt sind. Bei Tomaten kannst du die Pflanzen etwas tiefer setzen, da sie dann zusätzliche Wurzeln bilden und stabiler wachsen.
3. Angießen: Gieße die Pflanzen nach dem Einsetzen gründlich an. Das hilft ihnen, sich in der neuen Erde zu etablieren.
4. Aufhängen des Hängegartens
1. Töpfe einhängen: Hänge die Töpfe mit den S-Haken oder Karabinern an die Kette/das Seil. Achte darauf, dass die Töpfe gleichmäßig verteilt sind und nicht zu eng aneinander hängen.
2. Positionierung: Wähle einen sonnigen Standort für deinen Hängegarten. Tomaten brauchen mindestens 6 Stunden Sonne pro Tag, Salat etwas weniger.
3. Befestigung: Befestige die Kette/das Seil an einem stabilen Haken oder einer Stange. Achte darauf, dass die Befestigung das Gewicht der bepflanzten Töpfe tragen kann.
Zusätzliche Tipps und Tricks für deinen Hängegarten
Hier sind noch ein paar Tipps, die dir helfen werden, deinen Hängegarten optimal zu pflegen und das Beste aus ihm herauszuholen.
* Bewässerung: Hängegärten trocknen schneller aus als normale Gärten, da sie der Sonne und dem Wind stärker ausgesetzt sind. Überprüfe die Erde regelmäßig und gieße, wenn sie sich trocken anfühlt. An heißen Tagen kann es notwendig sein, täglich zu gießen.
* Düngung: Gemüse braucht Nährstoffe, um gut zu wachsen. Dünge deine Pflanzen regelmäßig mit einem speziellen Gemüsedünger. Befolge dabei die Anweisungen auf der Verpackung.
* Schutz vor Schädlingen: Kontrolliere deine Pflanzen regelmäßig auf Schädlinge wie Blattläuse oder Schnecken. Bei Bedarf kannst du natürliche Schädlingsbekämpfungsmittel verwenden.
* Tomaten ausgeizen: Bei Tomaten solltest du regelmäßig die Seitentriebe (Geiztriebe) entfernen. Das fördert das Wachstum der Haupttriebe und sorgt für eine bessere Ernte.
* Salat ernten: Salat kannst du nach Bedarf ernten. Schneide einfach die äußeren Blätter ab, die inneren Blätter wachsen weiter.
* Rotation: Um den Boden nicht einseitig auszulaugen, solltest du die Pflanzen in den Töpfen von Saison zu Saison wechseln.
Häufige Fehler und wie du sie vermeidest
Auch beim Bau eines Hängegartens können Fehler passieren. Hier sind einige häufige Fehler und wie du sie vermeiden kannst:
* Falsche Topfgröße: Verwende keine zu kleinen Töpfe. Tomaten brauchen ausreichend Platz für ihre Wurzeln.
* Schlechte Drainage: Achte auf eine gute Drainage, um Staunässe zu vermeiden.
* Falscher Standort: Wähle einen sonnigen Standort für deinen Hängegarten.
* Überwässerung: Gieße nicht zu viel. Die Erde sollte feucht, aber nicht nass sein.
* Unterdüngung: Dünge deine Pflanzen regelmäßig, um ein gesundes Wachstum zu fördern.
Warum ein Hängegarten eine tolle Idee ist
Ein Hängegarten ist nicht nur platzsparend, sondern bietet auch viele weitere Vorteile:
* Platzsparend: Ideal für Balkone, Terrassen oder kleine Gärten.
* Dekorativ: Ein echter Hingucker und verschönert jeden Außenbereich.
* Frische Kräuter und Gemüse: Immer frische Zutaten für deine Küche griffbereit.
* Weniger Unkraut: Da die Pflanzen in Töpfen wachsen, hast du weniger mit Unkraut zu kämpfen.
* Bessere Belüftung: Die Pflanzen sind besser belüftet, was das Risiko von Krankheiten reduziert.
Fazit: Dein eigener Hängegarten ist einfacher als du denkst!
Ich hoffe, diese Anleitung hat dir geholfen, deinen eigenen Hängegarten zu bauen. Es ist wirklich einfacher, als es aussieht, und das Ergebnis ist einfach fantastisch. Viel Spaß beim Gärtnern und genieße deine frischen Salat und Tomaten! Wenn du noch Fragen hast, schreib sie einfach in die Kommentare. Ich helfe gerne weiter!
Conclusion
So, there you have it! Transforming your space with a DIY hanging garden for lettuce and tomatoes is not just a project; it’s an investment in fresh, flavorful food, a beautiful aesthetic, and a sustainable lifestyle. We’ve walked you through the process, highlighting the ease and affordability of creating your own vertical oasis. But why is this DIY trick a must-try?
Firstly, consider the unparalleled freshness. Imagine stepping outside your door and harvesting ripe, sun-warmed tomatoes and crisp lettuce leaves just moments before they grace your plate. The taste difference compared to store-bought produce is simply remarkable. Secondly, think about the space-saving benefits. Whether you have a sprawling backyard or a tiny balcony, a hanging garden allows you to maximize your growing potential without sacrificing precious ground space. This is especially crucial for urban dwellers who crave a connection to nature but are limited by their surroundings.
Thirdly, a hanging garden is a visually stunning addition to any home. The cascading greenery and vibrant colors of ripening fruits and vegetables create a living work of art that will impress your guests and bring joy to your everyday life. It’s a conversation starter, a source of pride, and a testament to your resourcefulness and creativity.
But the benefits don’t stop there. Gardening, in general, is a therapeutic activity that can reduce stress, improve your mood, and connect you with the natural world. A hanging garden makes this accessible and convenient, allowing you to reap the mental and emotional rewards of gardening even with a busy schedule.
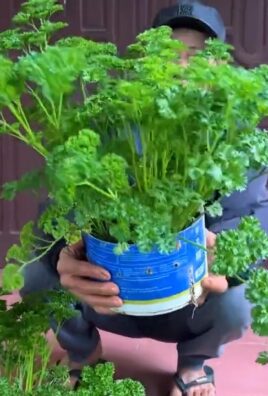
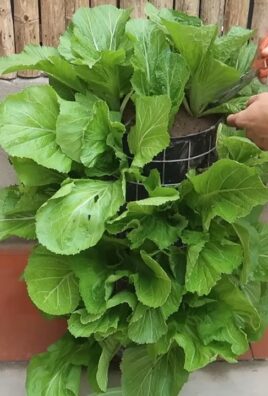
Looking for variations? Absolutely! Consider experimenting with different types of containers. While we’ve focused on using readily available materials like plastic bottles or repurposed buckets, you could also explore using hanging baskets, macrame planters, or even repurposed fabric bags. The possibilities are endless!
For lettuce, try different varieties like romaine, butterhead, or loose-leaf. For tomatoes, cherry tomatoes and grape tomatoes are particularly well-suited for hanging gardens due to their compact size and prolific yields. You can also add herbs like basil, oregano, and thyme to your hanging garden for a fragrant and flavorful addition.
Don’t be afraid to get creative with your design. Arrange your containers in different patterns and heights to create a visually appealing display. Add decorative elements like colorful stones, painted pots, or whimsical garden ornaments to personalize your space.
This DIY hanging garden for lettuce and tomatoes is more than just a gardening project; it’s a lifestyle choice. It’s a commitment to fresh, healthy food, sustainable living, and a beautiful, vibrant home.
We wholeheartedly encourage you to try this DIY trick and experience the joy of growing your own food. Don’t be intimidated by the process; it’s easier than you think! And once you’ve created your own hanging garden, we’d love to hear about your experience. Share your photos, tips, and challenges with us in the comments below. Let’s inspire each other to create a world filled with fresh, homegrown goodness! We are confident that you will find that creating a hanging garden for lettuce and tomatoes is a rewarding experience.
FAQ
What are the best types of lettuce and tomatoes to grow in a hanging garden?
For lettuce, loose-leaf varieties like Black Seeded Simpson, Salad Bowl, and Red Sails are excellent choices because they are easy to harvest a few leaves at a time without disturbing the entire plant. Butterhead varieties like Buttercrunch also work well. For tomatoes, determinate or bush varieties are generally better suited for hanging gardens than indeterminate or vining varieties, which can become too large and unwieldy. Cherry tomatoes like Sungold, Sweet Million, and Black Cherry are popular choices, as are grape tomatoes like Juliet and Santa. These varieties are compact, produce abundant fruit, and are relatively easy to manage in a hanging container.
How much sunlight do lettuce and tomatoes need in a hanging garden?
Lettuce thrives in partial shade to full sun, requiring at least 4-6 hours of sunlight per day. Tomatoes, on the other hand, need at least 6-8 hours of direct sunlight per day to produce abundant fruit. When choosing a location for your hanging garden, consider the amount of sunlight it receives throughout the day. If you live in a hot climate, providing some afternoon shade for your lettuce can help prevent it from bolting (going to seed).
What type of soil should I use for my hanging garden?
Use a high-quality potting mix that is lightweight, well-draining, and rich in organic matter. Avoid using garden soil, as it can be too heavy and compact for containers. Look for a potting mix that contains ingredients like peat moss, perlite, vermiculite, and compost. You can also add slow-release fertilizer to the potting mix to provide your plants with a steady supply of nutrients.
How often should I water my hanging garden?
Hanging gardens tend to dry out more quickly than in-ground gardens, so it’s important to water them regularly. Check the soil moisture daily by sticking your finger into the soil. If the top inch of soil feels dry, it’s time to water. Water thoroughly until water drains out of the bottom of the container. Avoid overwatering, as this can lead to root rot. The frequency of watering will depend on factors like the weather, the size of the container, and the type of plants you are growing.
How do I fertilize my hanging garden?
Lettuce and tomatoes are heavy feeders and require regular fertilization to thrive. You can use a liquid fertilizer or a slow-release fertilizer. For liquid fertilizer, follow the instructions on the label and apply it every 2-4 weeks. For slow-release fertilizer, mix it into the potting mix at planting time. Choose a fertilizer that is specifically formulated for vegetables and that contains a balanced ratio of nitrogen, phosphorus, and potassium.
How do I prevent pests and diseases in my hanging garden?
Regularly inspect your plants for signs of pests and diseases. Common pests that affect lettuce and tomatoes include aphids, whiteflies, and spider mites. You can control these pests by spraying your plants with insecticidal soap or neem oil. Common diseases that affect lettuce and tomatoes include powdery mildew, blight, and blossom end rot. You can prevent these diseases by providing good air circulation, avoiding overhead watering, and using disease-resistant varieties.
How do I harvest lettuce and tomatoes from my hanging garden?
Harvest lettuce by cutting off individual leaves or the entire head of lettuce when it reaches the desired size. Harvest tomatoes when they are fully ripe and have reached their mature color. Gently twist the tomato off the vine, being careful not to damage the plant.
Can I grow other vegetables in a hanging garden?
Yes, you can grow a variety of other vegetables in a hanging garden, including herbs, strawberries, peppers, and cucumbers. Choose varieties that are compact and well-suited for container gardening.
What if I don’t have a sunny balcony or patio?
If you don’t have a sunny outdoor space, you can still grow lettuce and some herbs indoors using grow lights. Tomatoes, however, require a significant amount of sunlight and are more challenging to grow indoors without supplemental lighting.
How do I overwinter my hanging garden?
Lettuce is a cool-season crop and can tolerate light frosts. In mild climates, you may be able to overwinter your lettuce plants by providing them with some protection from the cold. Tomatoes are warm-season crops and will not survive freezing temperatures. If you want to save your tomato plants for the following year, you can try taking cuttings and rooting them indoors.

Leave a Comment