
Hanging Bottle Carrot Gardening: Imagine a world where fresh, vibrant carrots dangle gracefully from your balcony, patio, or even your kitchen window! Sounds like something out of a fairytale, right? Well, it doesn’t have to be! This DIY guide unlocks the secrets to growing your own delicious carrots in repurposed plastic bottles, transforming your space into a miniature, edible oasis.
For centuries, humans have cultivated carrots in the earth, but the idea of vertical gardening, particularly using recycled materials, is a relatively modern innovation. It speaks to our growing awareness of sustainability and our desire to connect with nature, even in the most urban environments. Think about it – our grandparents might have had sprawling gardens, but today, many of us live in apartments or smaller homes with limited outdoor space. That’s where this ingenious hack comes in!
Why should you embrace hanging bottle carrot gardening? Because it’s a game-changer! It’s perfect for small spaces, it’s incredibly budget-friendly (hello, recycling!), and it’s a fantastic way to teach kids about gardening and where their food comes from. Plus, let’s be honest, it’s just plain cool! No more back-breaking digging or battling with soil pests. With this simple DIY project, you can enjoy a continuous harvest of sweet, homegrown carrots, adding a touch of green and a whole lot of flavor to your life. I’m excited to show you how easy it is to get started!
DIY Hänge-Karotten-Garten aus Plastikflaschen: Eine Schritt-für-Schritt-Anleitung
Hallo liebe Gartenfreunde! Habt ihr wenig Platz, aber trotzdem Lust auf frische, selbst angebaute Karotten? Dann habe ich hier genau das Richtige für euch: Einen hängenden Karotten-Garten aus recycelten Plastikflaschen! Das ist nicht nur super platzsparend, sondern auch eine tolle Möglichkeit, Plastikmüll zu reduzieren und eurem Balkon oder Garten einen grünen Touch zu verleihen. Lasst uns loslegen!
Was ihr braucht:
* Plastikflaschen: Am besten eignen sich große PET-Flaschen (z.B. 1,5 oder 2 Liter). Je mehr, desto mehr Karotten könnt ihr anbauen!
* Bohrmaschine oder scharfes Messer: Zum Bohren von Löchern für die Aufhängung und die Entwässerung.
* Starkes Seil oder Draht: Zum Aufhängen der Flaschen.
* Erde: Hochwertige Pflanzerde ist wichtig für das Wachstum der Karotten.
* Karottensamen: Wählt eine Sorte, die für den Anbau in Töpfen geeignet ist (z.B. kurze, runde Sorten).
* Gießkanne oder Sprühflasche: Zum Bewässern der Karotten.
* Optional: Schere, Markierstift, Handschuhe, kleine Steine oder Tonscherben für die Drainage.
Vorbereitung der Flaschen
1. Reinigung: Zuerst müsst ihr die Plastikflaschen gründlich reinigen. Entfernt alle Etiketten und spült sie mit warmem Wasser und Spülmittel aus. Achtet darauf, dass keine Spülmittelreste zurückbleiben. Lasst die Flaschen gut trocknen.
2. Löcher bohren: Jetzt kommen wir zum Bohren der Löcher.
* Entwässerungslöcher: Bohrt am Boden jeder Flasche mehrere kleine Löcher (ca. 5-8 mm Durchmesser). Diese Löcher sind wichtig, damit überschüssiges Wasser ablaufen kann und die Karotten nicht faulen.
* Aufhängungslöcher: Bohrt am oberen Rand der Flasche (unterhalb des Flaschenhalses) zwei Löcher gegenüberliegend. Diese Löcher dienen zur Befestigung des Seils oder Drahts zum Aufhängen. Achtet darauf, dass die Löcher groß genug sind, um das Seil oder den Draht hindurchzufädeln.
3. Optional: Flaschen zuschneiden: Ihr könnt die Flaschen auch zuschneiden, um den Zugang zur Erde zu erleichtern. Schneidet dazu den oberen Teil der Flasche (den Flaschenhals) ab. Achtet darauf, dass die Schnittkanten glatt sind, um Verletzungen zu vermeiden. Ihr könnt die Kanten mit Klebeband abkleben, um sie zu entschärfen. Ich persönlich lasse die Flaschen meistens ganz, da sie so stabiler sind.
Die richtige Erde und Drainage
1. Drainage vorbereiten: Um Staunässe zu vermeiden, solltet ihr eine Drainageschicht am Boden der Flaschen anlegen. Füllt dazu eine Schicht von ca. 2-3 cm mit kleinen Steinen oder Tonscherben in jede Flasche.
2. Erde einfüllen: Füllt die Flaschen mit hochwertiger Pflanzerde. Achtet darauf, dass die Erde locker und luftig ist, damit die Karottenwurzeln gut wachsen können. Lasst oben ca. 2-3 cm Platz, damit ihr beim Gießen nicht gleich alles überschwemmt.
Aussaat der Karottensamen
1. Samen aussäen: Verteilt die Karottensamen gleichmäßig auf der Erde. Achtet darauf, dass die Samen nicht zu dicht beieinander liegen, da die Karotten sonst nicht genug Platz zum Wachsen haben. Ich säe meistens 3-4 Samen pro Flasche.
2. Samen bedecken: Bedeckt die Samen mit einer dünnen Schicht Erde (ca. 0,5 cm). Drückt die Erde leicht an.
3. Bewässern: Gießt die Erde vorsichtig mit einer Gießkanne oder Sprühflasche an. Die Erde sollte feucht, aber nicht nass sein.
Aufhängen und Pflege
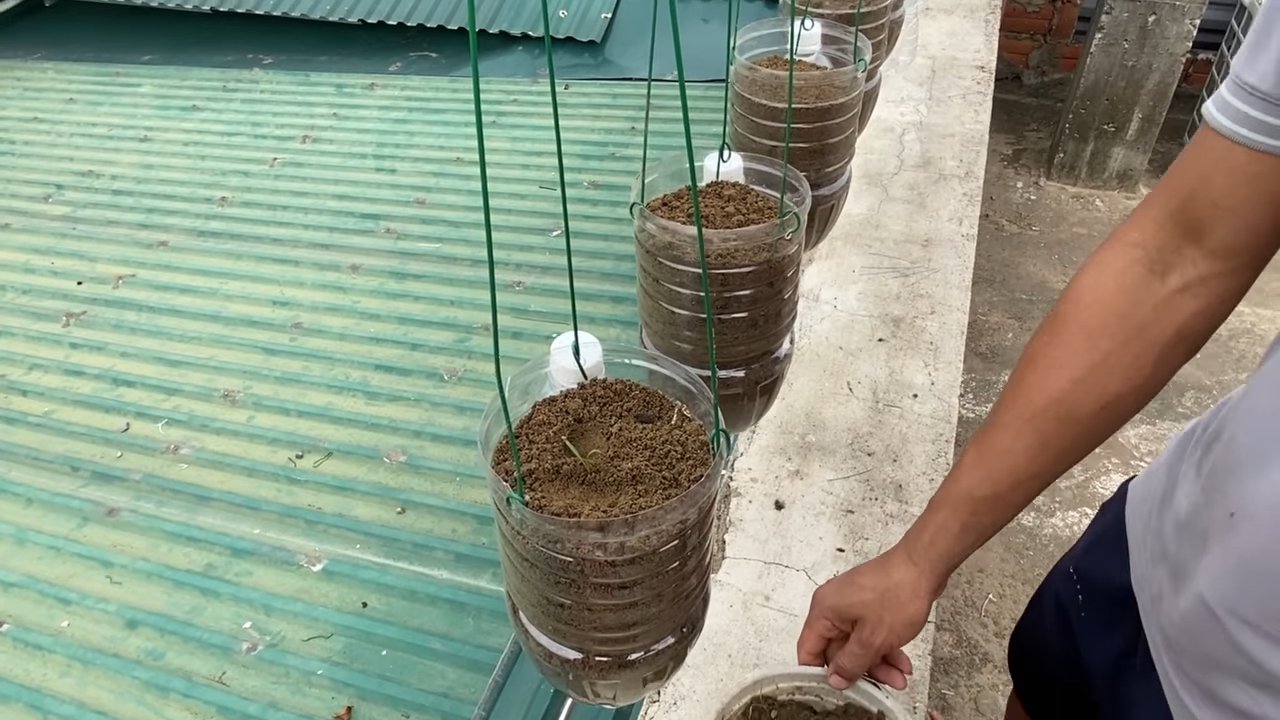
1. Seil oder Draht befestigen: Fädelt das Seil oder den Draht durch die Aufhängungslöcher. Knotet das Seil oder den Draht fest, sodass die Flaschen sicher hängen. Achtet darauf, dass die Flaschen nicht zu eng nebeneinander hängen, damit die Pflanzen genügend Licht bekommen.
2. Aufhängen: Sucht euch einen sonnigen Platz für euren hängenden Karotten-Garten. Karotten brauchen mindestens 6 Stunden Sonne pro Tag, um gut zu wachsen. Hängt die Flaschen an einem stabilen Haken, einer Stange oder einem Geländer auf.
3. Bewässerung: Gießt die Karotten regelmäßig. Die Erde sollte immer leicht feucht sein. Vermeidet Staunässe. An heißen Tagen müsst ihr möglicherweise täglich gießen.
4. Düngen: Düngt die Karotten alle 2-3 Wochen mit einem organischen Flüssigdünger. Achtet darauf, dass der Dünger für Gemüse geeignet ist.
5. Ausdünnen: Wenn die Karottenpflanzen ca. 5-7 cm groß sind, solltet ihr sie ausdünnen. Entfernt die schwächsten Pflanzen, sodass nur noch 1-2 Pflanzen pro Flasche übrig bleiben.
Geduld und Ernte
1. Geduld haben: Karotten brauchen Zeit zum Wachsen. Je nach Sorte dauert es ca. 60-80 Tage, bis ihr eure eigenen Karotten ernten könnt.
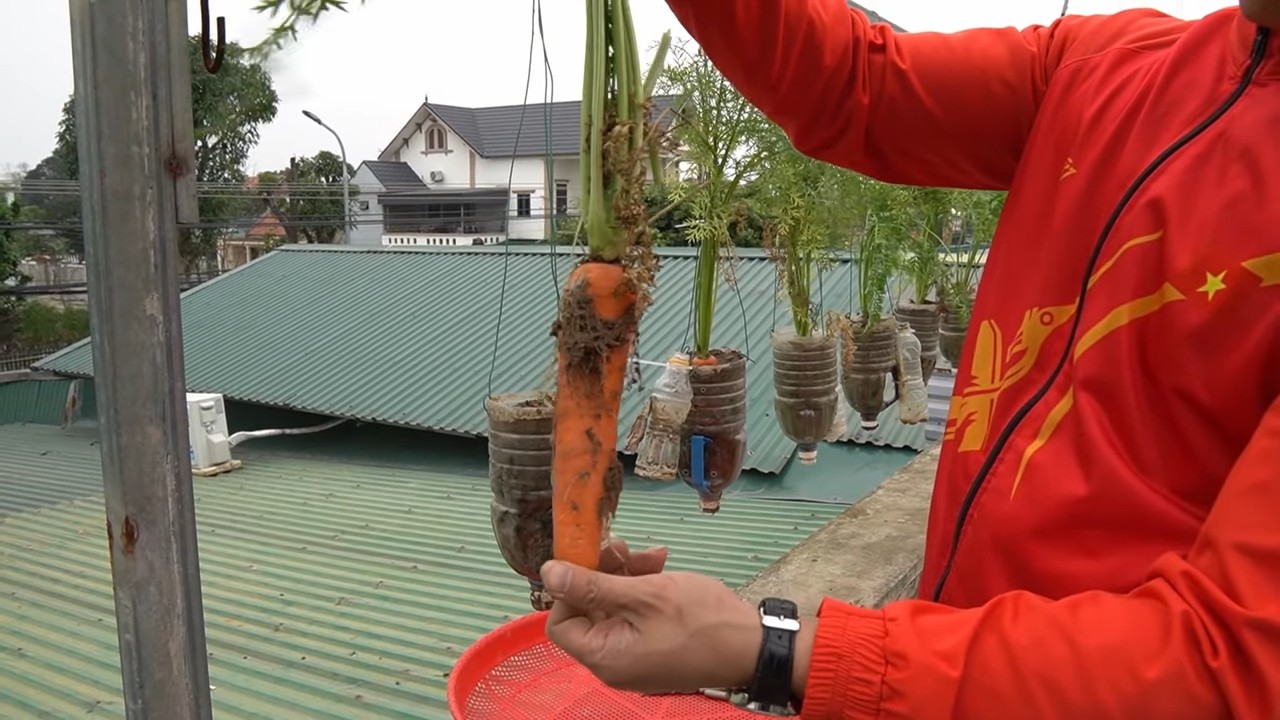
2. Erntezeitpunkt erkennen: Ihr könnt den Erntezeitpunkt erkennen, wenn die Karotten aus der Erde herausragen und die typische Karottenfarbe haben.
3. Ernten: Zieht die Karotten vorsichtig aus der Erde. Wenn die Erde zu trocken ist, könnt ihr sie vorher etwas anfeuchten, um das Herausziehen zu erleichtern.
Zusätzliche Tipps und Tricks
* Sortenwahl: Wählt kurze, runde Karottensorten, die für den Anbau in Töpfen geeignet sind. Diese Sorten brauchen weniger Platz und wachsen besser in den Flaschen.
* Schädlinge: Achtet auf Schädlinge wie Karottenfliegen oder Blattläuse. Bei Befall könnt ihr natürliche Schädlingsbekämpfungsmittel verwenden.
* Sonnenschutz: An sehr heißen Tagen könnt ihr die Flaschen mit einem Sonnensegel oder einem Tuch beschatten, um die Pflanzen vor Verbrennungen zu schützen.
* Kreativität: Bemalt die Flaschen mit bunten Farben oder Mustern, um euren hängenden Karotten-Garten noch individueller zu gestalten.
* Upcycling: Verwendet verschiedene Arten von Plastikflaschen, um einen abwechslungsreichen Look zu erzielen.
* Kombination: Kombiniert den Karotten-Garten mit anderen Kräutern oder Gemüsesorten, die wenig Platz benötigen, wie z.B. Radieschen oder Salat.
Häufige Probleme und Lösungen
* Gelbe Blätter: Gelbe Blätter können ein Zeichen für Nährstoffmangel sein. Düngt die Pflanzen mit einem geeigneten Dünger.
* Verwelkte Blätter: Verwelkte Blätter können ein Zeichen für Wassermangel sein. Gießt die Pflanzen regelmäßig.
* Kleine Karotten: Kleine Karotten können ein Zeichen für zu wenig Platz oder Nährstoffmangel sein. Dünnt die Pflanzen aus und düngt sie regelmäßig.
* Faule Karotten: Faule Karotten können ein Zeichen für Staunässe sein. Achtet auf eine gute Drainage und vermeidet Überwässerung.
Ich hoffe, diese Anleitung hilft euch dabei, euren eigenen hängenden Karotten-Garten zu gestalten. Viel Spaß beim Gärtnern und eine reiche Ernte! Lasst es euch schmecken!
Conclusion
So, there you have it! Transforming discarded plastic bottles into a vertical carrot garden is more than just a quirky DIY project; it’s a sustainable, space-saving, and surprisingly effective way to cultivate fresh, delicious carrots right at home. We’ve explored the simple steps, from preparing your bottles and soil to planting and nurturing your miniature carrot patch. But why is this method a must-try?
Firstly, it’s incredibly accessible. You likely already have the primary ingredient – plastic bottles – readily available, reducing waste and giving them a new lease on life. Secondly, it’s perfect for urban dwellers or anyone with limited garden space. Vertical gardening maximizes your yield without demanding a sprawling plot of land. Imagine fresh, vibrant carrots gracing your balcony, patio, or even a sunny windowsill!
Beyond the practical benefits, this project is also incredibly rewarding. Watching those tiny carrot seeds sprout and grow into vibrant orange roots is a truly satisfying experience. It’s a fantastic way to connect with nature, even in the heart of the city.
Ready to take your carrot gardening to the next level? Consider these variations:
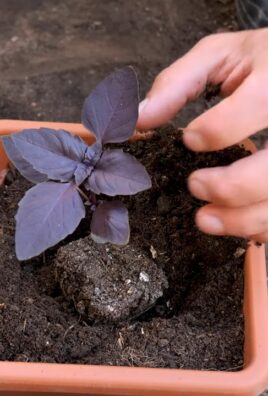
* Herb Garden Hybrid: Interplant your carrots with herbs like basil or rosemary. These companion plants can help deter pests and enhance the flavor of your carrots.
* Tiered Tower: Create a multi-tiered structure using multiple bottles stacked vertically. This maximizes space and creates a visually stunning display.
* Colored Bottles: Experiment with different colored bottles to see if it affects the growth of your carrots. Some believe that certain colors can influence plant development.
* Different Carrot Varieties: Don’t limit yourself to standard orange carrots! Try growing rainbow carrots, Nantes carrots, or even baby carrots for a diverse and colorful harvest.
* Automated Watering System: For a truly hands-off approach, consider setting up a simple drip irrigation system to automatically water your hanging bottle garden.
This hanging bottle carrot gardening method is not just a trend; it’s a testament to the power of creativity and resourcefulness. It’s a way to reduce waste, grow your own food, and beautify your surroundings, all in one fell swoop.
We wholeheartedly encourage you to give this DIY trick a try. It’s a fun, educational, and ultimately delicious project that the whole family can enjoy. Once you’ve created your own hanging bottle carrot garden, we’d love to hear about your experience! Share your photos, tips, and any variations you’ve tried in the comments below. Let’s inspire each other to embrace sustainable gardening practices and cultivate a greener, more delicious world, one carrot at a time. Happy gardening!
FAQ
What type of plastic bottles are best for this project?
Ideally, you should use PET (polyethylene terephthalate) plastic bottles, which are commonly used for water and soda. These bottles are lightweight, durable, and readily available. Avoid using bottles that have contained harsh chemicals or cleaning products, as these could contaminate your soil and affect the growth of your carrots. Make sure to thoroughly clean the bottles with soap and water before using them. The size of the bottle will determine the size of the carrot you can grow. Smaller bottles are great for baby carrots, while larger bottles can accommodate longer varieties.
What kind of soil should I use for growing carrots in bottles?
Carrots need loose, well-draining soil to thrive. A mixture of potting soil, compost, and perlite or vermiculite is ideal. The potting soil provides essential nutrients, the compost adds organic matter and improves drainage, and the perlite or vermiculite helps to aerate the soil and prevent compaction. Avoid using heavy clay soil, as it can restrict root growth and lead to misshapen carrots. You can also purchase specialized carrot-growing mixes at your local garden center.
How often should I water my hanging bottle carrot garden?
The frequency of watering will depend on the climate, the size of the bottles, and the type of soil you’re using. Generally, you should water your carrots when the top inch of soil feels dry to the touch. Avoid overwatering, as this can lead to root rot. Ensure that the bottles have adequate drainage holes to prevent water from accumulating at the bottom. During hot, dry weather, you may need to water your carrots daily. In cooler, more humid conditions, you may only need to water them every few days.
How much sunlight do carrots need to grow in bottles?
Carrots need at least 6 hours of direct sunlight per day to grow properly. Place your hanging bottle garden in a sunny location where it will receive ample sunlight. If you don’t have a sunny spot, you can supplement with grow lights. Rotate the bottles regularly to ensure that all sides of the plants receive equal sunlight. Insufficient sunlight can result in stunted growth and pale, underdeveloped carrots.
How do I prevent pests from attacking my carrot plants?
Several pests can attack carrot plants, including aphids, carrot rust flies, and nematodes. To prevent pest infestations, start by using healthy, disease-free seeds. Companion planting with herbs like basil, rosemary, or marigolds can help deter pests. Regularly inspect your plants for signs of pests and take action immediately if you spot any. You can use organic pest control methods, such as insecticidal soap or neem oil, to control infestations. Crop rotation can also help prevent soilborne pests from building up in your garden.
How long does it take for carrots to grow in bottles?
The time it takes for carrots to mature will depend on the variety you’re growing and the growing conditions. Generally, carrots take between 60 and 80 days to mature. Baby carrots can be harvested earlier, typically around 50 days. Check the seed packet for specific information on the maturity time for your chosen variety. You can tell when carrots are ready to harvest by gently pulling back the soil around the top of the carrot to check its size.
Can I grow other vegetables in hanging bottles besides carrots?
Yes, you can grow a variety of other vegetables in hanging bottles, including lettuce, spinach, herbs, strawberries, and even small tomatoes. Choose vegetables that have shallow root systems and don’t require a lot of space. Ensure that the bottles are large enough to accommodate the root systems of the plants you’re growing. Use a well-draining potting mix and provide adequate sunlight and water.
How do I harvest carrots from hanging bottles?
Harvesting carrots from hanging bottles is relatively easy. Gently loosen the soil around the carrot and pull it out by the greens. If the carrot is difficult to pull, you may need to use a small trowel to loosen the soil further. Be careful not to damage the carrot while harvesting. After harvesting, wash the carrots thoroughly and store them in the refrigerator.
What do I do with the bottles after I harvest the carrots?
After you harvest the carrots, you can reuse the bottles for another planting season. Simply clean the bottles thoroughly with soap and water and refill them with fresh potting mix. Alternatively, you can recycle the bottles or use them for other DIY projects. If the bottles are damaged or worn out, dispose of them properly.
Is hanging bottle carrot gardening a good way to teach kids about gardening?
Absolutely! Hanging bottle carrot gardening is a fantastic way to introduce children to the joys of gardening. It’s a simple, hands-on project that allows them to learn about plant growth, sustainability, and healthy eating. They can participate in every step of the process, from preparing the bottles to planting the seeds to harvesting the carrots. It’s a fun and educational activity that can foster a lifelong love of gardening.
Leave a Comment