
Growing thyme indoors can feel like a secret superpower for any home cook or gardening enthusiast! Imagine having fresh, fragrant thyme readily available, no matter the season, right at your fingertips. Forget those sad, wilted sprigs from the grocery store – we’re talking vibrant, flavorful thyme that elevates every dish.
Thyme, with its rich history stretching back to ancient Egypt where it was used for embalming, and Greece where it symbolized courage, has always been valued for its potent properties. Today, we appreciate it not only for its culinary uses but also for its potential health benefits and delightful aroma. But let’s be honest, sometimes life gets in the way, and maintaining an outdoor herb garden just isn’t feasible. That’s where the magic of indoor gardening comes in!
I’ve found that growing thyme indoors is surprisingly easy and incredibly rewarding. This DIY guide will walk you through simple, effective tricks and hacks to ensure your thyme thrives inside your home. Whether you’re a seasoned gardener or a complete beginner, I’m here to show you how to cultivate a flourishing thyme plant, adding a touch of green and a burst of flavor to your everyday life. Let’s get started and unlock the secrets to a thriving indoor thyme garden!
Growing Thyme Indoors: A Beginner’s Guide
Hey there, fellow plant enthusiasts! Ever dreamt of having fresh, fragrant thyme right at your fingertips, ready to spice up your culinary creations? Well, dream no more! Growing thyme indoors is surprisingly easy and rewarding. I’m going to walk you through everything you need to know to cultivate your own thriving thyme patch inside your home.
Choosing the Right Thyme Variety
First things first, let’s talk thyme varieties. While most thyme will grow indoors, some are better suited than others. Here are a few of my favorites:
* English Thyme (Thymus vulgaris): This is your classic, all-purpose thyme. It has a strong, earthy flavor and is perfect for cooking. It’s also relatively compact, making it a great choice for indoor containers.
* Lemon Thyme (Thymus citriodorus): As the name suggests, this thyme has a delightful lemony aroma and flavor. It’s fantastic in teas, desserts, and even savory dishes. Plus, its variegated leaves add a touch of visual interest.
* Creeping Thyme (Thymus serpyllum): While often used as a ground cover outdoors, creeping thyme can also thrive indoors, especially in hanging baskets or containers where it can cascade over the edges. It has a milder flavor than English thyme.
Gathering Your Supplies
Before we dive into the planting process, let’s make sure you have everything you need. Here’s a checklist:
* Thyme Seeds or Seedlings: You can start thyme from seeds, but buying seedlings from a local nursery or garden center will give you a head start.
* Potting Mix: Use a well-draining potting mix specifically formulated for herbs or vegetables. Avoid using garden soil, as it can become compacted and doesn’t drain well in containers.
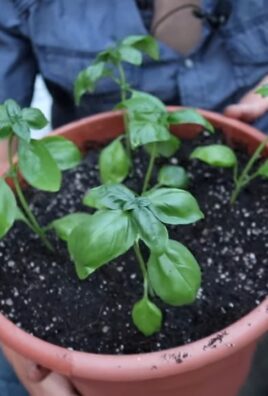
* Container: Choose a pot that’s at least 6 inches in diameter and has drainage holes. Thyme prefers to be slightly root-bound, so don’t go too big. Terracotta pots are a great option because they allow the soil to breathe.
* Grow Lights (Optional): While thyme loves sunlight, it can be challenging to provide enough natural light indoors, especially during the winter months. Grow lights can supplement natural light and ensure your thyme gets the energy it needs to thrive.
* Watering Can or Spray Bottle: For gentle watering.
* Small Trowel or Spoon: For planting and transplanting.
* Pebbles or Gravel (Optional): To improve drainage.
Planting Your Thyme
Alright, let’s get our hands dirty! Here’s how to plant your thyme:
1. Prepare the Pot: If you’re using a new pot, give it a good rinse. Place a layer of pebbles or gravel at the bottom of the pot to improve drainage (this is optional, but I highly recommend it).
2. Fill with Potting Mix: Fill the pot with potting mix, leaving about an inch of space at the top.
3. Plant the Thyme:
* From Seeds: Sprinkle the thyme seeds evenly over the surface of the soil. Gently press them into the soil, but don’t bury them too deep. Cover with a very thin layer of potting mix.
* From Seedlings: Gently remove the thyme seedling from its nursery pot. Loosen the roots slightly with your fingers. Dig a small hole in the potting mix and place the seedling in the hole. Make sure the top of the root ball is level with the surrounding soil.
4. Water Gently: Water the thyme thoroughly, but be careful not to overwater. The soil should be moist but not soggy.
5. Place in a Sunny Location: Place the pot in a sunny location that receives at least 6 hours of direct sunlight per day. A south-facing window is ideal. If you don’t have enough natural light, supplement with grow lights.
Caring for Your Indoor Thyme
Now that your thyme is planted, it’s time to learn how to care for it. Here are some tips to keep your thyme happy and healthy:
* Watering: Thyme is drought-tolerant and prefers to be slightly dry. Water only when the top inch of soil feels dry to the touch. Overwatering can lead to root rot, so be careful not to overdo it. When you do water, water thoroughly until water drains out of the drainage holes.
* Light: As mentioned earlier, thyme needs plenty of sunlight. If you’re not getting enough natural light, use grow lights to supplement. Position the grow lights about 6-12 inches above the plants.
* Fertilizing: Thyme doesn’t need a lot of fertilizer. In fact, too much fertilizer can make it leggy and less flavorful. Fertilize sparingly, using a balanced liquid fertilizer diluted to half strength. Fertilize every 2-3 months during the growing season (spring and summer).
* Pruning: Pruning is essential for keeping your thyme compact and bushy. Regularly pinch back the tips of the stems to encourage branching. You can also harvest sprigs of thyme as needed for cooking.
* Temperature: Thyme prefers temperatures between 60-70°F (15-21°C). Avoid placing it near drafts or sources of extreme heat or cold.
* Humidity: Thyme prefers low humidity. Avoid placing it in a humid bathroom or kitchen.
* Pest Control: Thyme is relatively pest-resistant, but it can occasionally be affected by aphids or spider mites. If you notice any pests, treat them with insecticidal soap or neem oil.
Harvesting Your Thyme
One of the best parts of growing your own thyme is being able to harvest it whenever you need it! Here’s how to harvest your thyme:
1. Wait Until the Plant is Established: Don’t start harvesting until the plant is at least 4-6 inches tall.
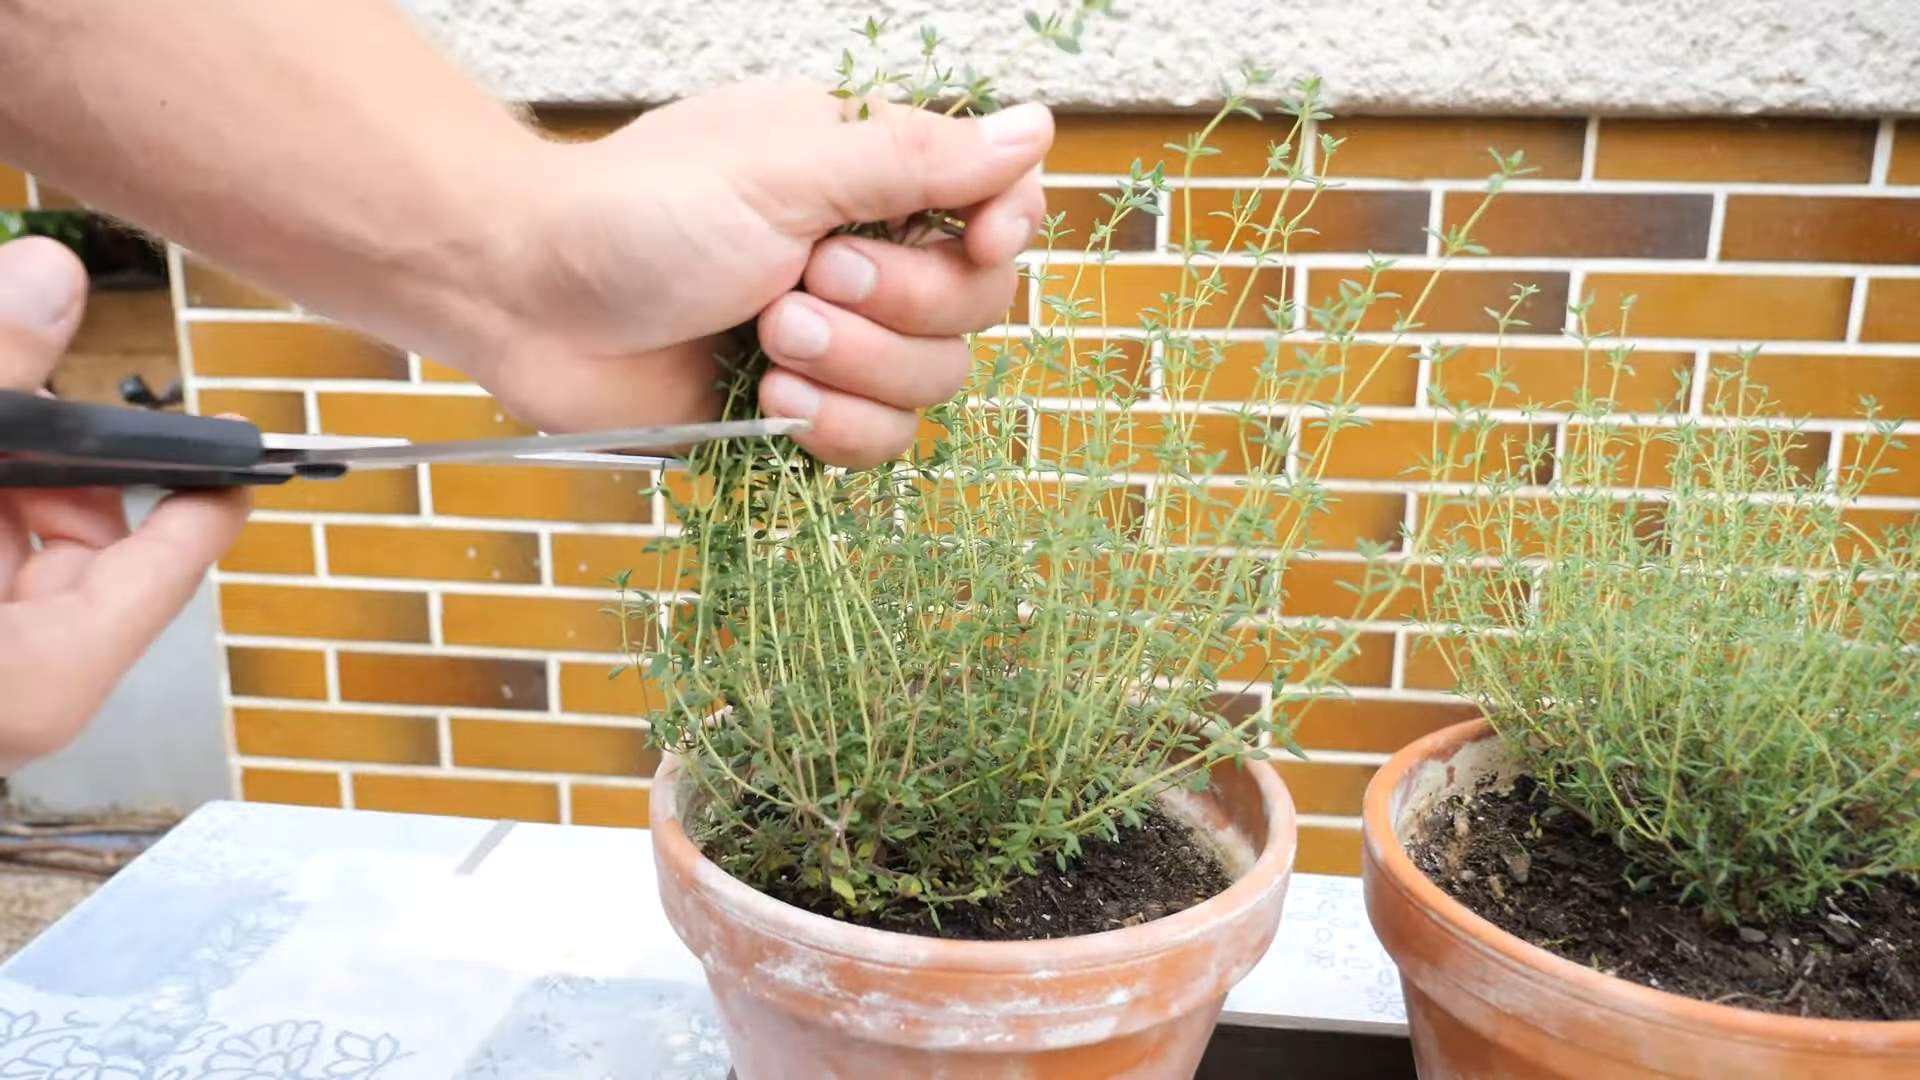
2. Use Sharp Scissors or Pruners: Use sharp scissors or pruners to cut sprigs of thyme.
3. Cut Above a Leaf Node: Cut the sprigs above a leaf node (the point where leaves grow from the stem). This will encourage the plant to branch out and produce more leaves.
4. Harvest Regularly: Regular harvesting will keep your thyme plant healthy and productive.
5. Drying Thyme: If you have more thyme than you can use fresh, you can dry it for later use. To dry thyme, tie the sprigs together and hang them upside down in a cool, dry place. You can also dry thyme in a dehydrator or oven.
Troubleshooting Common Problems
Even with the best care, you might encounter some problems when growing thyme indoors. Here are some common issues and how to fix them:
* Yellowing Leaves: Yellowing leaves can be a sign of overwatering, underwatering, or nutrient deficiency. Check the soil moisture and adjust your watering accordingly. If the soil is dry, water thoroughly. If the soil is soggy, let it dry out before watering again. If the yellowing persists, try fertilizing with a balanced liquid fertilizer.
* Leggy Growth: Leggy growth (long, spindly stems with few leaves) is usually caused by insufficient light. Move your thyme to a sunnier location or supplement with grow lights.
* Root Rot: Root rot is caused by overwatering and poor drainage. Make sure your pot has drainage holes and that you’re not overwatering. If you suspect root rot, repot the thyme in fresh potting mix.
* Pests: As mentioned earlier, thyme can occasionally be affected by aphids or spider mites. Treat them with insecticidal soap or neem oil.
Propagating Thyme
Want to expand your thyme collection? Propagating thyme is easy! Here are two methods you can use:
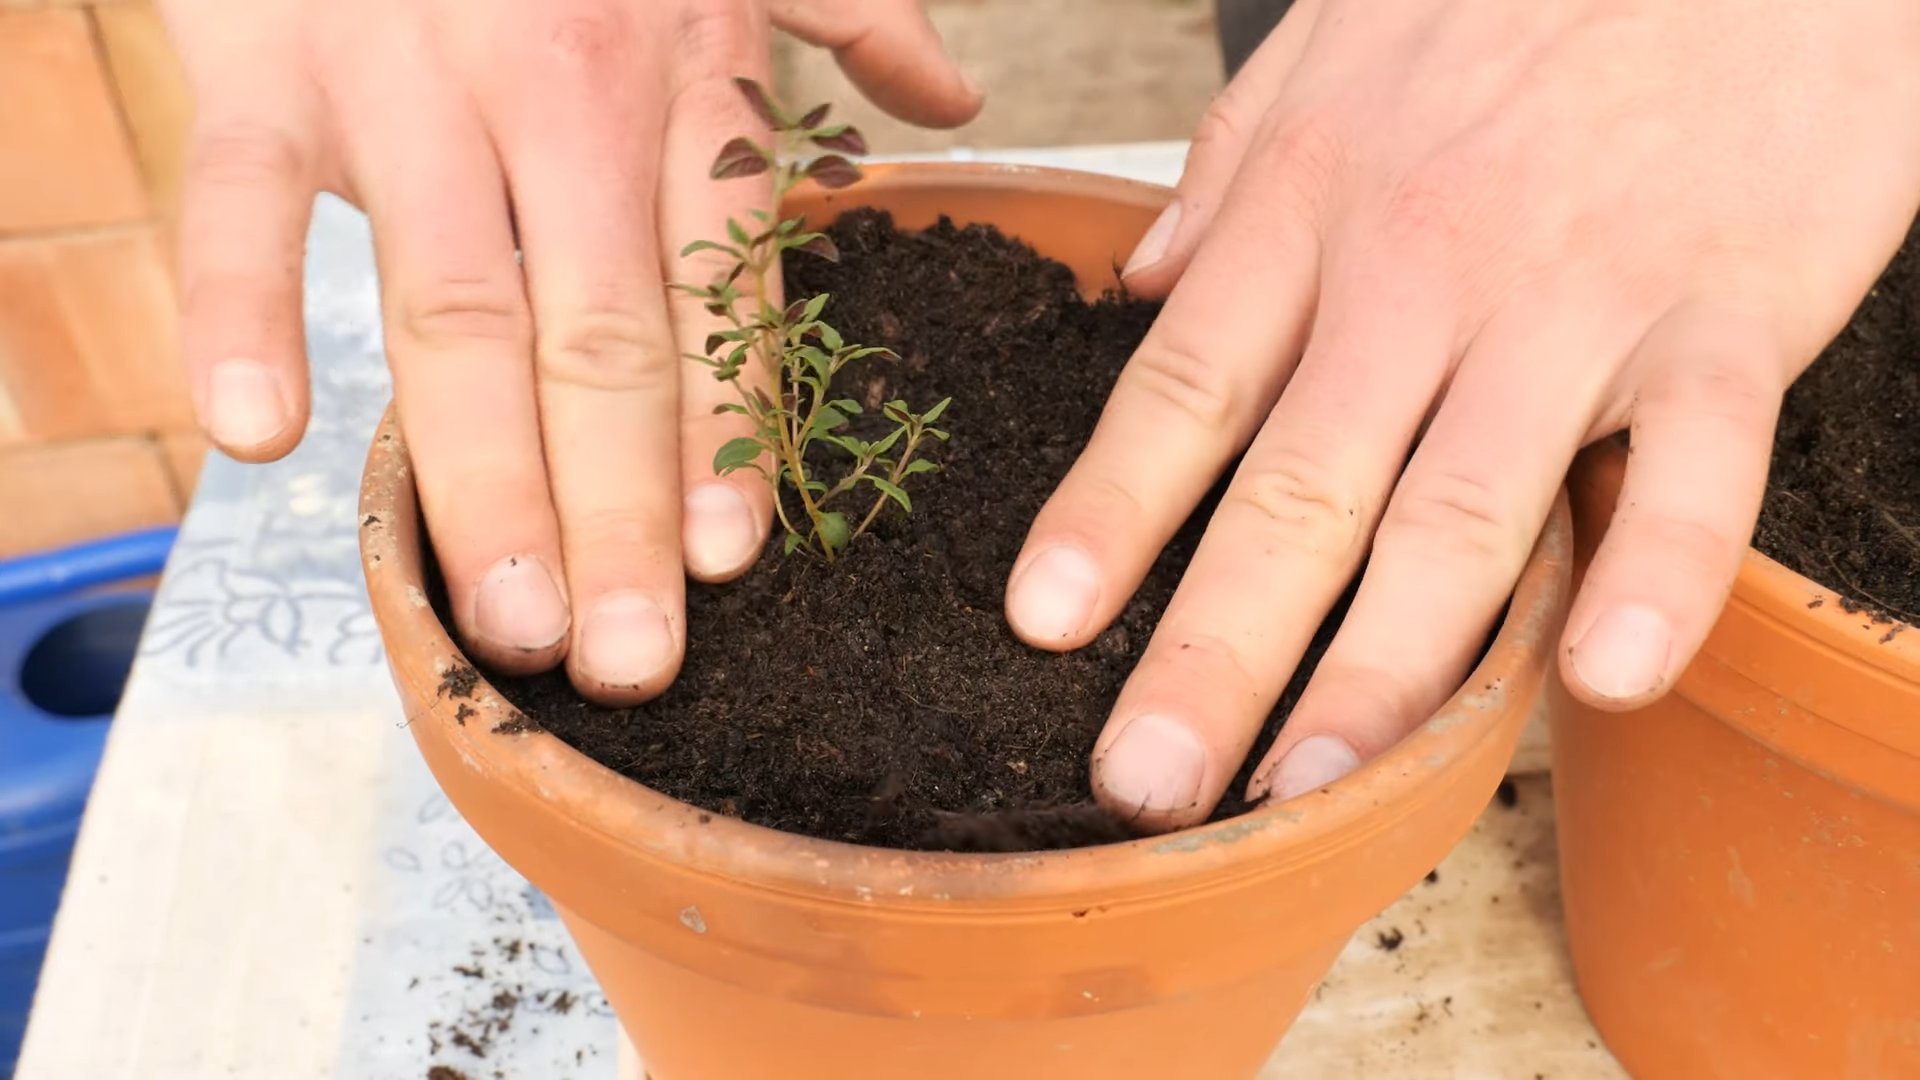
* Stem Cuttings: Take a 4-6 inch stem cutting from a healthy thyme plant. Remove the lower leaves and dip the cut end in rooting hormone (optional). Plant the cutting in a small pot filled with moist potting mix. Cover the pot with a plastic bag to create a humid environment. Place the pot in a warm, bright location, but out of direct sunlight. After a few weeks, the cutting should develop roots.
* Division: If your thyme plant has become large and crowded, you can divide it into smaller plants. Gently remove the plant from its pot and carefully separate the roots into two or more sections. Plant each section in its own pot.
Enjoying Your Homegrown Thyme
Now that you’ve successfully grown your own thyme indoors, it’s time to enjoy the fruits (or rather, herbs) of your labor! Use your fresh thyme to flavor soups, stews, sauces, meats, vegetables, and more. You can also use it to make herbal teas or infuse oils and vinegars. The possibilities are endless!
Growing thyme indoors is a rewarding experience that will add flavor and fragrance to your home. With a little
Conclusion
So, there you have it! Growing thyme indoors is not only achievable but also incredibly rewarding. Imagine having fresh, fragrant thyme readily available to elevate your culinary creations, no matter the season. Forget those sad, wilted bunches from the grocery store – with a little effort, you can cultivate a thriving thyme plant right in your own home.
This DIY trick is a must-try for several compelling reasons. First and foremost, it grants you access to the freshest possible thyme, bursting with flavor and aroma that far surpasses anything you can buy pre-packaged. Secondly, it’s a sustainable and eco-friendly way to enjoy this versatile herb, reducing your reliance on commercially grown and transported produce. Thirdly, it’s surprisingly easy and affordable, requiring minimal investment in terms of time, money, and resources. Finally, it’s incredibly satisfying to nurture a plant from a tiny seedling or cutting to a flourishing herb, adding a touch of green to your indoor space and a sense of accomplishment to your gardening endeavors.
But the beauty of growing thyme indoors lies not only in its practicality but also in its versatility. Feel free to experiment with different varieties of thyme, such as lemon thyme for a citrusy twist, creeping thyme for a ground cover effect in a larger pot, or woolly thyme for its unique texture. You can also explore different potting mixes, containers, and lighting arrangements to find what works best for your specific environment and preferences. Consider using a self-watering pot for added convenience or adding a layer of pebbles to the bottom of your pot to improve drainage. You can even propagate your thyme plant by taking cuttings and starting new plants, expanding your indoor herb garden and sharing the bounty with friends and family.
Don’t be afraid to get creative and personalize your thyme-growing experience. The possibilities are endless!
We wholeheartedly encourage you to give this DIY trick a try. It’s a simple yet impactful way to enhance your cooking, beautify your home, and connect with nature. And once you’ve experienced the joy of harvesting your own fresh thyme, we’re confident you’ll be hooked.
So, grab a pot, some soil, and a thyme plant (or seeds), and embark on your indoor herb-growing adventure today. We’re eager to hear about your experiences! Share your tips, tricks, and photos in the comments below. Let’s create a community of indoor thyme enthusiasts and inspire others to discover the joys of growing their own herbs. Happy growing!
Frequently Asked Questions (FAQs)
What is the best type of thyme to grow indoors?
While many varieties of thyme can be grown indoors, some are better suited than others. Common thyme (Thymus vulgaris) is a popular choice due to its robust flavor and adaptability. Lemon thyme (Thymus citriodorus) is another excellent option, offering a delightful citrusy aroma and flavor. Creeping thyme (Thymus serpyllum) can also be grown indoors, although it may require a larger pot to accommodate its spreading habit. Ultimately, the best type of thyme to grow indoors depends on your personal preferences and the space you have available. Experiment with different varieties to discover your favorites.
How much sunlight does indoor thyme need?
Thyme thrives in bright, sunny conditions. Ideally, your indoor thyme plant should receive at least six to eight hours of direct sunlight per day. Place your plant near a south-facing window for optimal sun exposure. If you don’t have access to sufficient natural light, you can supplement with a grow light. Position the grow light a few inches above the plant and keep it on for 12-14 hours per day. Insufficient sunlight can lead to leggy growth and reduced flavor.
What type of soil is best for growing thyme indoors?
Thyme prefers well-draining soil that is slightly alkaline. A mixture of potting soil, perlite, and sand is ideal. The perlite and sand improve drainage, preventing the soil from becoming waterlogged. Avoid using heavy clay soil, as it can retain too much moisture and lead to root rot. You can also add a small amount of lime to the soil to increase its alkalinity.
How often should I water my indoor thyme plant?
Water your thyme plant thoroughly when the top inch of soil feels dry to the touch. Avoid overwatering, as thyme is susceptible to root rot. Allow the soil to dry out slightly between waterings. During the winter months, when growth slows down, you may need to water less frequently. Ensure that your pot has drainage holes to prevent water from accumulating at the bottom.
How do I fertilize my indoor thyme plant?
Thyme is not a heavy feeder and does not require frequent fertilization. Fertilize your plant sparingly, using a diluted liquid fertilizer every two to three months during the growing season (spring and summer). Avoid over-fertilizing, as this can lead to leggy growth and reduced flavor. A balanced fertilizer with equal parts nitrogen, phosphorus, and potassium is suitable.
How do I prune my indoor thyme plant?
Pruning is essential for maintaining the shape and health of your thyme plant. Prune regularly to encourage bushier growth and prevent the plant from becoming leggy. Trim back the stems by about one-third, focusing on removing any dead or yellowing leaves. You can also harvest sprigs of thyme for culinary use, which will naturally prune the plant.
How do I propagate thyme from cuttings?
Propagating thyme from cuttings is a simple and effective way to create new plants. Take cuttings from healthy stems, about 4-6 inches long. Remove the lower leaves and dip the cut end in rooting hormone. Plant the cuttings in a pot filled with moist potting mix. Cover the pot with a plastic bag to create a humid environment. Keep the soil moist and place the pot in a warm, bright location. Roots should develop within a few weeks.
What are some common problems when growing thyme indoors?
Some common problems when growing thyme indoors include root rot, leggy growth, and pest infestations. Root rot is caused by overwatering and can be prevented by using well-draining soil and allowing the soil to dry out slightly between waterings. Leggy growth is caused by insufficient sunlight and can be corrected by providing more light. Pest infestations, such as aphids and spider mites, can be treated with insecticidal soap or neem oil.
Can I use my indoor thyme for cooking?
Absolutely! One of the biggest benefits of growing thyme indoors is having fresh herbs readily available for cooking. Simply snip off sprigs of thyme as needed and add them to your favorite dishes. Thyme is a versatile herb that pairs well with a wide variety of foods, including meats, vegetables, soups, and sauces.
How do I store fresh thyme?
To store fresh thyme, wrap the sprigs in a damp paper towel and place them in a plastic bag in the refrigerator. This will help to keep them fresh for up to a week. You can also dry thyme by hanging the sprigs upside down in a cool, dry place. Once dried, store the thyme in an airtight container.
Leave a Comment