
Growing Thyme at Home is easier than you might think, and I’m here to show you how! Imagine stepping outside your door and snipping fresh, fragrant thyme to add to your favorite dishes. No more expensive trips to the grocery store for a few sprigs – you’ll have an endless supply right at your fingertips.
Thyme, with its rich history dating back to ancient Egypt where it was used for embalming, and later in ancient Greece as incense, has always been valued for its medicinal and aromatic properties. Beyond its historical significance, thyme is a culinary powerhouse, enhancing everything from roasted vegetables to hearty stews. But why rely on store-bought herbs when you can cultivate your own thriving thyme patch?
In today’s busy world, we’re all looking for ways to simplify our lives and connect with nature. Growing Thyme at Home offers a fantastic opportunity to do just that. Not only will you save money and reduce your carbon footprint, but you’ll also experience the joy and satisfaction of nurturing your own little garden. Plus, fresh thyme tastes infinitely better than the dried stuff! This DIY guide will provide you with simple, effective tricks and hacks to ensure your thyme thrives, even if you don’t have a green thumb. Let’s get started and unlock the secrets to a bountiful thyme harvest!

Growing Thyme at Home: Your Comprehensive DIY Guide
Hey garden friends! I love having fresh herbs right outside my door. And thyme is at the top of the list! It’s not only super versatile in the kitchen but also low-maintenance and smells absolutely wonderful. In this article, I’ll show you how you can easily grow your own thyme, whether in the garden, on the balcony, or even indoors. Let’s get started!
The Basics: What You Need for Growing Thyme
Before we begin, let’s make sure we have everything we need. Here is a list of the things you’ll need:
- Thyme seeds or thyme plants: You can either start with seeds or buy small plants directly from a garden center. Plants are, of course, faster, but seeds are cheaper and give you more control over the variety.
- Seed-starting mix or herb soil: Thyme doesn’t like it too nutrient-rich, so special herb soil or seed-starting mix is ideal. Regular potting soil can contain too much fertilizer.
- Pots or planter boxes: Make sure the pots have drainage holes so excess water can run off.
- Watering can or spray bottle: For watering the plants.
- (Optional) Seed trays or a mini-greenhouse: If you’re starting with seeds, these are helpful to promote germination.
- (Optional) Garden shears: For harvesting and trimming the thyme.
- A sunny location: Thyme loves the sun!
Growing Thyme from Seed: Step by Step
If you’ve decided to grow from seed, here is a detailed guide:
- Prepare the seed trays: Fill your seed trays or pots with seed-starting mix. Press the soil down lightly, but not too firmly.
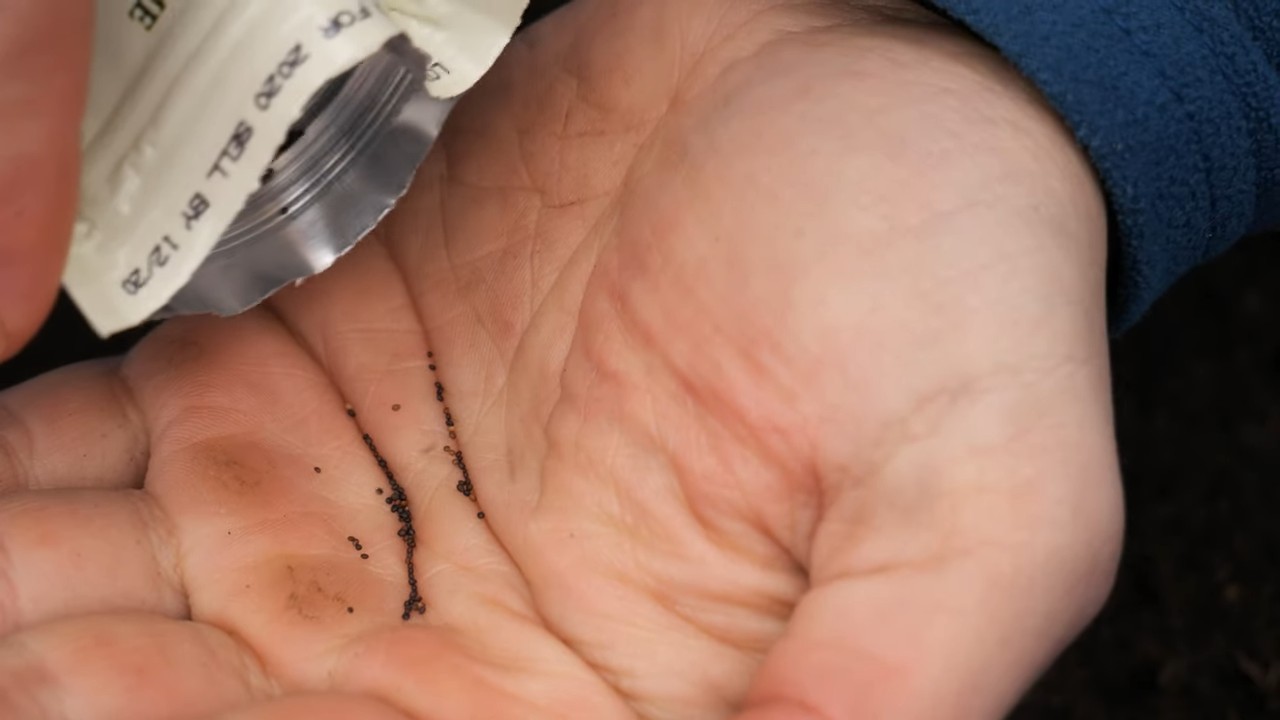
- Sow the seeds: Thyme seeds are very small. Sprinkle them evenly over the soil. You can also cover them lightly with a bit of soil, but not too deep, as thyme needs light to germinate.
- Water: Gently moisten the soil with a spray bottle. The soil should be damp, but not wet.
- Cover (optional): Cover the seed trays with a lid or plastic wrap to increase humidity. This promotes germination. Place them in a warm, bright place, but not in direct sun.
- Germination: The seeds usually germinate within 10-20 days. Ventilate the seed trays regularly to prevent mold. Once the seeds have germinated, you can remove the cover.
- Pricking out (thinning): When the seedlings are large enough (about 5-7 cm / 2-3 inches high), you can prick them out. This means you carefully take them out of the seed trays and plant them in separate pots. Be careful not to damage the roots.
- Hardening off: Before you plant the young thyme plants outdoors, you should harden them off. This means placing them outside for a few hours a day for a few days to get them used to the sun and temperatures.
Planting Thyme Plants: Here’s How
If you’ve already bought thyme plants, planting them is super easy:
- Prepare the pots or bed: Fill your pots or planter boxes with herb soil. If you are planting the thyme in a garden bed, loosen the soil and remove weeds.
- Planting: Dig a hole large enough for the root ball of the thyme plant. Place the plant inside and fill the hole with soil. Press the soil down lightly.
- Watering: Water the plants thoroughly after planting.
The Right Care: How to Keep Your Thyme Happy
Thyme is relatively low-maintenance, but there are a few things you should keep in mind:
- Location: Thyme loves the sun! Place it in a sunny spot that gets at least 6 hours of sun per day.
- Watering: Thyme likes it dry. Only water it when the soil feels dry. You should definitely avoid waterlogging, as it can lead to root rot.
- Fertilizing: Thyme doesn’t need much fertilizer. A light feeding in the spring with an organic herb fertilizer is sufficient.
- Pruning: Regular pruning encourages growth and prevents the thyme from becoming woody. It’s best to cut it back after flowering. You can also regularly harvest individual sprigs.
- Overwintering: Thyme is hardy, but in very cold regions, it can be beneficial to cover it with brushwood or fleece. If you have it in a pot, you can also move it to a cool, bright place.
Harvesting Thyme: When and How
You can harvest thyme all year round. However, it tastes best just before flowering.
- Harvest time: It’s best to harvest thyme in the morning after the dew has dried. That’s when the essential oils are most concentrated.
- Harvesting method: Cut the sprigs with garden shears. You can either harvest individual sprigs or give the thyme a more extensive trim. Be sure not to harvest too much at once, so the plant can continue to grow.
- Use: Fresh thyme is, of course, the best. But you can also dry it to make it last longer. Tie the sprigs into small bundles and hang them in a dry, airy place.
Drying Thyme: How to Preserve the Flavor
If you have more thyme than you can use immediately, drying is a great way to preserve it. Here are two methods:
Air Drying
- Form bundles: Tie small bundles of thyme sprigs together with kitchen twine.
- Hang: Hang the bundles upside down in a dry, dark, and well-ventilated place. Avoid direct sunlight, as this can break down the essential oils.
- Drying time: Drying usually takes 1-3 weeks, depending on the humidity. The thyme is dry when the leaves are brittle and fall off easily.
- Storage: Strip the dried leaves from the stems and store them in an airtight container in a cool, dark place.
Oven Drying
- Preparation: Place the thyme sprigs in a single layer on a baking sheet lined with parchment paper.
- Drying: Set the oven to the lowest setting (approx. 50°C / 120°F) and leave the door slightly ajar so moisture can escape.
- Drying time: Drying usually takes 2-4 hours. Check regularly to see if the thyme is dry.
- Storage: Strip the dried leaves from the stems and store them in an airtight container in a cool, dark place.
Common Problems and Solutions
Even when growing thyme, problems can occur. Here are a few common problems and how you can solve them:
Root rot: Root rot is caused by waterlogging.
Yellow leaves: Yellow leaves can be a sign of overwatering or a nutrient deficiency. Reduce watering and fertilize the thyme if necessary.
Conclusion
So, there you have it! Growing thyme at home isn’t just a whimsical dream for those with sprawling gardens; it’s an achievable reality for anyone, anywhere, with a little sunlight and a dash of determination. We’ve walked through the simple steps, debunked common myths, and armed you with the knowledge to cultivate your own fragrant patch of this culinary and medicinal marvel.
But why should you bother? Why dedicate precious windowsill space or a corner of your balcony to this humble herb? The answer is multifaceted. Firstly, the flavor of freshly harvested thyme is simply unparalleled. It’s brighter, more vibrant, and infinitely more satisfying than anything you can find dried on a supermarket shelf. Imagine the aroma infusing your kitchen as you snip a few sprigs to season your roasted chicken, sprinkle over grilled vegetables, or steep into a soothing herbal tea.
Beyond the culinary benefits, growing thyme at home offers a connection to nature, a therapeutic activity that can ease stress and bring a sense of accomplishment. Watching your tiny seedlings sprout and flourish is a deeply rewarding experience, a reminder of the simple beauty and resilience of the natural world. Plus, you’ll have a constant supply of fresh thyme for all your cooking needs, saving you money and reducing your reliance on store-bought herbs.
And don’t think you’re limited to just one type of thyme! Experiment with different varieties to discover your favorites. Lemon thyme adds a citrusy zing to dishes, while creeping thyme makes a beautiful and fragrant ground cover. Silver thyme offers a variegated foliage that adds visual interest to your herb garden. The possibilities are endless!
Ready to embark on your thyme-growing adventure? We encourage you to give it a try. Start small, with a single pot or a small patch in your garden. Follow the tips we’ve shared, and don’t be afraid to experiment and learn as you go. Remember, even experienced gardeners face challenges, so don’t get discouraged if things don’t go perfectly at first. The key is to keep learning, keep experimenting, and keep enjoying the process.
We’re confident that you’ll be amazed at how easy and rewarding it is to grow your own thyme at home. And once you’ve harvested your first batch, we’d love to hear about your experience! Share your photos, tips, and recipes with us in the comments below. Let’s create a community of thyme-loving gardeners and inspire others to discover the joy of growing their own herbs. Happy growing!
Frequently Asked Questions (FAQ)
Q: What kind of soil is best for growing thyme?
A: Thyme thrives in well-draining soil that is slightly alkaline. A mix of potting soil, sand, and perlite is ideal. Avoid heavy clay soils, as they can retain too much moisture and lead to root rot. If you’re planting thyme in the ground, amend the soil with compost and sand to improve drainage. A pH between 6.0 and 8.0 is optimal. You can test your soil’s pH with a simple soil testing kit available at most garden centers.
Q: How much sunlight does thyme need?
A: Thyme needs at least six hours of direct sunlight per day to thrive. If you’re growing thyme indoors, place it near a sunny window or supplement with a grow light. Insufficient sunlight can lead to leggy growth and reduced flavor. If your thyme is not getting enough sunlight, you may notice that the stems are long and thin, and the leaves are pale and sparse.
Q: How often should I water my thyme plant?
A: Thyme is drought-tolerant and prefers to be on the drier side. Water thoroughly when the soil is dry to the touch, but avoid overwatering. Overwatering can lead to root rot, which is a common problem with thyme. Allow the soil to dry out completely between waterings. During the winter months, you’ll need to water even less frequently.
Q: How do I harvest thyme?
A: You can harvest thyme at any time, but the flavor is most intense just before the plant flowers. Use sharp scissors or pruning shears to snip off stems, leaving at least 2 inches of growth on the plant. Regular harvesting encourages bushier growth. You can use fresh thyme immediately or dry it for later use. To dry thyme, hang the stems upside down in a cool, dry place or use a dehydrator.
Q: How do I propagate thyme?
A: Thyme can be propagated easily from stem cuttings. Take a 4-6 inch cutting from a healthy plant, remove the lower leaves, and dip the cut end in rooting hormone. Plant the cutting in a pot filled with well-draining potting mix and keep it moist until roots develop. You can also propagate thyme by division, separating a mature plant into smaller clumps and replanting them.
Q: My thyme plant is turning yellow. What’s wrong?
A: Yellowing leaves on thyme can be caused by several factors, including overwatering, underwatering, nutrient deficiencies, or pests. Check the soil moisture to ensure that you’re not overwatering or underwatering. If the soil is consistently wet, reduce your watering frequency. If the soil is dry, water thoroughly. You can also fertilize your thyme plant with a balanced fertilizer to address any nutrient deficiencies. Inspect the plant for pests, such as aphids or spider mites, and treat accordingly.
Q: Can I grow thyme indoors?
A: Yes, thyme can be grown successfully indoors, provided it receives enough sunlight and well-draining soil. Choose a pot with drainage holes and use a potting mix specifically formulated for herbs. Place the pot near a sunny window or supplement with a grow light. Water regularly, allowing the soil to dry out between waterings.
Q: How do I prune thyme?
A: Pruning thyme is essential for maintaining its shape and encouraging bushier growth. Prune thyme in the spring after the last frost, removing any dead or woody stems. You can also prune thyme lightly throughout the growing season to maintain its shape and encourage new growth. Avoid pruning too heavily, as this can weaken the plant.
Q: What are some common uses for thyme?
A: Thyme is a versatile herb with a wide range of culinary and medicinal uses. It’s commonly used to season meats, poultry, vegetables, and soups. Thyme is also a key ingredient in many herbal teas and remedies. It has antiseptic, antibacterial, and antifungal properties and can be used to treat coughs, colds, and sore throats. Thyme oil is also used in aromatherapy to relieve stress and anxiety.
Q: What are some different varieties of thyme I can grow?
A: There are many different varieties of thyme to choose from, each with its own unique flavor and aroma. Some popular varieties include:
* Common thyme (Thymus vulgaris): The most common variety, with a strong, earthy flavor.
* Lemon thyme (Thymus citriodorus): Has a citrusy aroma and flavor.
* Creeping thyme (Thymus serpyllum): A low-growing variety that makes a beautiful ground cover.
* Silver thyme (Thymus argenteus): Has variegated foliage with silver edges.
* Woolly thyme (Thymus pseudolanuginosus): Has soft, fuzzy leaves.
Experiment with different varieties to find your favorites!
Q: Is growing thyme at home organically possible?
A: Absolutely! Growing thyme organically is not only possible but also highly recommended. Avoid using synthetic fertilizers and pesticides. Instead, amend your soil with compost and other organic matter to provide nutrients. Use natural pest control methods, such as introducing beneficial insects or using insecticidal soap. By growing thyme organically, you can ensure that you’re consuming a healthy and flavorful herb that is free from harmful chemicals.

Leave a Comment