
Growing Sweet Potatoes Soil Free might sound like something out of a sci-fi movie, but trust me, it’s a real and surprisingly simple way to cultivate these delicious root vegetables! Forget back-breaking digging and endless weeding – we’re diving into the world of hydroponics and container gardening to bring you a revolutionary approach to sweet potato cultivation.
For centuries, sweet potatoes have been a staple food in many cultures, particularly in South America and Asia. Their versatility and nutritional value have made them a beloved ingredient in countless dishes. Traditionally, growing them involved mounds of soil and a whole lot of space. But what if I told you that you could enjoy the same homegrown goodness, even if you’re short on space or dealing with less-than-ideal soil conditions?
That’s where this DIY guide comes in! Many gardeners struggle with poor soil quality, limited garden space, or even pests that wreak havoc on their sweet potato crops. Growing Sweet Potatoes Soil Free eliminates these common challenges, offering a cleaner, more controlled environment for your plants to thrive. Plus, it’s a fantastic way to get your hands dirty (well, not *too* dirty!) and learn a new skill. So, are you ready to ditch the dirt and discover the magic of soil-free sweet potato gardening? Let’s get started!
Growing Sweet Potatoes Without Soil: A Fun DIY Hydroponic Adventure!
Hey there, fellow plant enthusiasts! Ever thought about growing sweet potatoes without getting your hands dirty? Well, buckle up because I’m about to show you how to cultivate these delicious tubers using a super cool hydroponic method. It’s easier than you think, and the results are incredibly rewarding!
What You’ll Need
Before we dive in, let’s gather our supplies. This is a crucial step, so make sure you have everything on hand before starting. Trust me, it’ll save you a lot of running around later!
* Sweet Potato Slips: These are the sprouts that grow from a sweet potato. You can either buy them online or, even better, grow your own (I’ll show you how!).
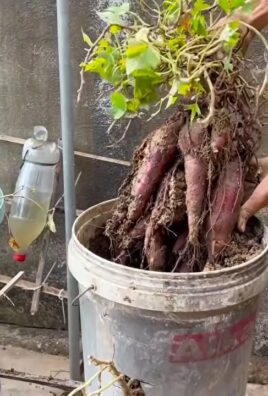
* A Large Container: Think a plastic storage bin, a large bucket, or even a repurposed container. The bigger, the better, as sweet potato roots need room to spread.
* Net Pots: These are small, mesh pots that will hold your sweet potato slips. They allow the roots to grow down into the nutrient solution.
* Hydroponic Nutrients: Specifically, a nutrient solution formulated for leafy greens or root vegetables. I recommend a balanced formula with all the essential micronutrients.
* Air Pump and Air Stone: These are essential for oxygenating the nutrient solution. Sweet potato roots need oxygen to thrive.
* Grow Lights (Optional but Recommended): If you don’t have a sunny spot, grow lights will provide the necessary light for your sweet potatoes to grow.
* pH Meter and pH Up/Down Solutions: Maintaining the correct pH is crucial for nutrient absorption.
* Rockwool Cubes or Coco Coir: These will be used to support the sweet potato slips in the net pots.
* Water: Clean, dechlorinated water is a must.
* Measuring Cups and Spoons: For accurately measuring the nutrient solution.
* Drill (Optional): If your container doesn’t have pre-made holes for the net pots.
* Safety Glasses and Gloves: Always protect yourself when working with tools and chemicals.
Growing Your Own Sweet Potato Slips (Highly Recommended!)
Okay, so you *could* buy sweet potato slips, but where’s the fun in that? Growing your own is super easy and gives you a head start on the whole process.
1. Choose a Healthy Sweet Potato: Look for one that’s firm, free of blemishes, and preferably organic.
2. Prepare the Sweet Potato: There are two main methods:
* Water Method: Suspend the sweet potato in a jar or glass of water, with the bottom half submerged. You can use toothpicks to hold it in place.
* Soil Method: Bury the sweet potato halfway in a pot of moist potting soil.
3. Provide Warmth and Light: Place the sweet potato in a warm, sunny location.
4. Wait Patiently: It can take a few weeks for slips to start growing. Keep the water level consistent (for the water method) and the soil moist (for the soil method).
5. Harvest the Slips: Once the slips are about 6-8 inches long, gently twist them off the sweet potato. Place them in a glass of water to encourage root growth.
Setting Up Your Hydroponic System
Now for the exciting part! Let’s get our hydroponic system up and running.
1. Prepare the Container: If your container doesn’t have pre-made holes for the net pots, you’ll need to drill some. Make sure the holes are slightly smaller than the diameter of the net pots so they fit snugly. Space the holes evenly across the lid of the container.
2. Add the Nutrient Solution: Fill the container with water, leaving a few inches of space at the top. Add the hydroponic nutrients according to the manufacturer’s instructions. It’s always better to start with a slightly weaker solution and gradually increase the concentration as needed.
3. Check and Adjust the pH: Use your pH meter to check the pH of the nutrient solution. Sweet potatoes prefer a pH between 5.5 and 6.5. Use pH up or pH down solutions to adjust the pH as needed.
4. Install the Air Pump and Air Stone: Place the air stone at the bottom of the container and connect it to the air pump. The air pump will provide oxygen to the roots, which is essential for healthy growth.
5. Prepare the Net Pots: Place a rockwool cube or coco coir in each net pot. This will provide support for the sweet potato slips.
6. Plant the Sweet Potato Slips: Gently insert the rooted sweet potato slips into the rockwool cubes or coco coir in the net pots. Make sure the roots are pointing downwards.
7. Place the Net Pots in the Container: Carefully place the net pots into the holes in the lid of the container. The roots should be submerged in the nutrient solution.
Caring for Your Hydroponic Sweet Potatoes
Now that your system is set up, it’s time to nurture your sweet potatoes.
1. Provide Adequate Light: Sweet potatoes need plenty of light to grow. If you don’t have a sunny spot, use grow lights. Aim for at least 12-14 hours of light per day.
2. Monitor the Nutrient Solution: Check the pH and nutrient levels of the solution regularly. Adjust as needed. You may need to add more nutrients as the sweet potatoes grow. I usually check every other day.
3. Change the Nutrient Solution: Replace the nutrient solution every 2-3 weeks to prevent the buildup of salts and other impurities.
4. Prune the Vines: Sweet potato vines can grow quite long. Prune them regularly to encourage tuber development. You can also propagate the pruned vines to create even more sweet potato plants!
5. Watch for Pests and Diseases: Keep an eye out for pests and diseases. Treat any problems promptly. Hydroponic systems are generally less susceptible to pests and diseases than soil-based systems, but it’s still important to be vigilant.
6. Maintain Water Temperature: Try to keep the water temperature between 65-75°F (18-24°C). Extreme temperatures can stress the plants.
Harvesting Your Hydroponic Sweet Potatoes
This is the moment you’ve been waiting for! Harvesting your own homegrown sweet potatoes is incredibly satisfying.
1. Harvest Time: Sweet potatoes typically take 3-4 months to mature. You’ll know they’re ready to harvest when the vines start to yellow and die back.
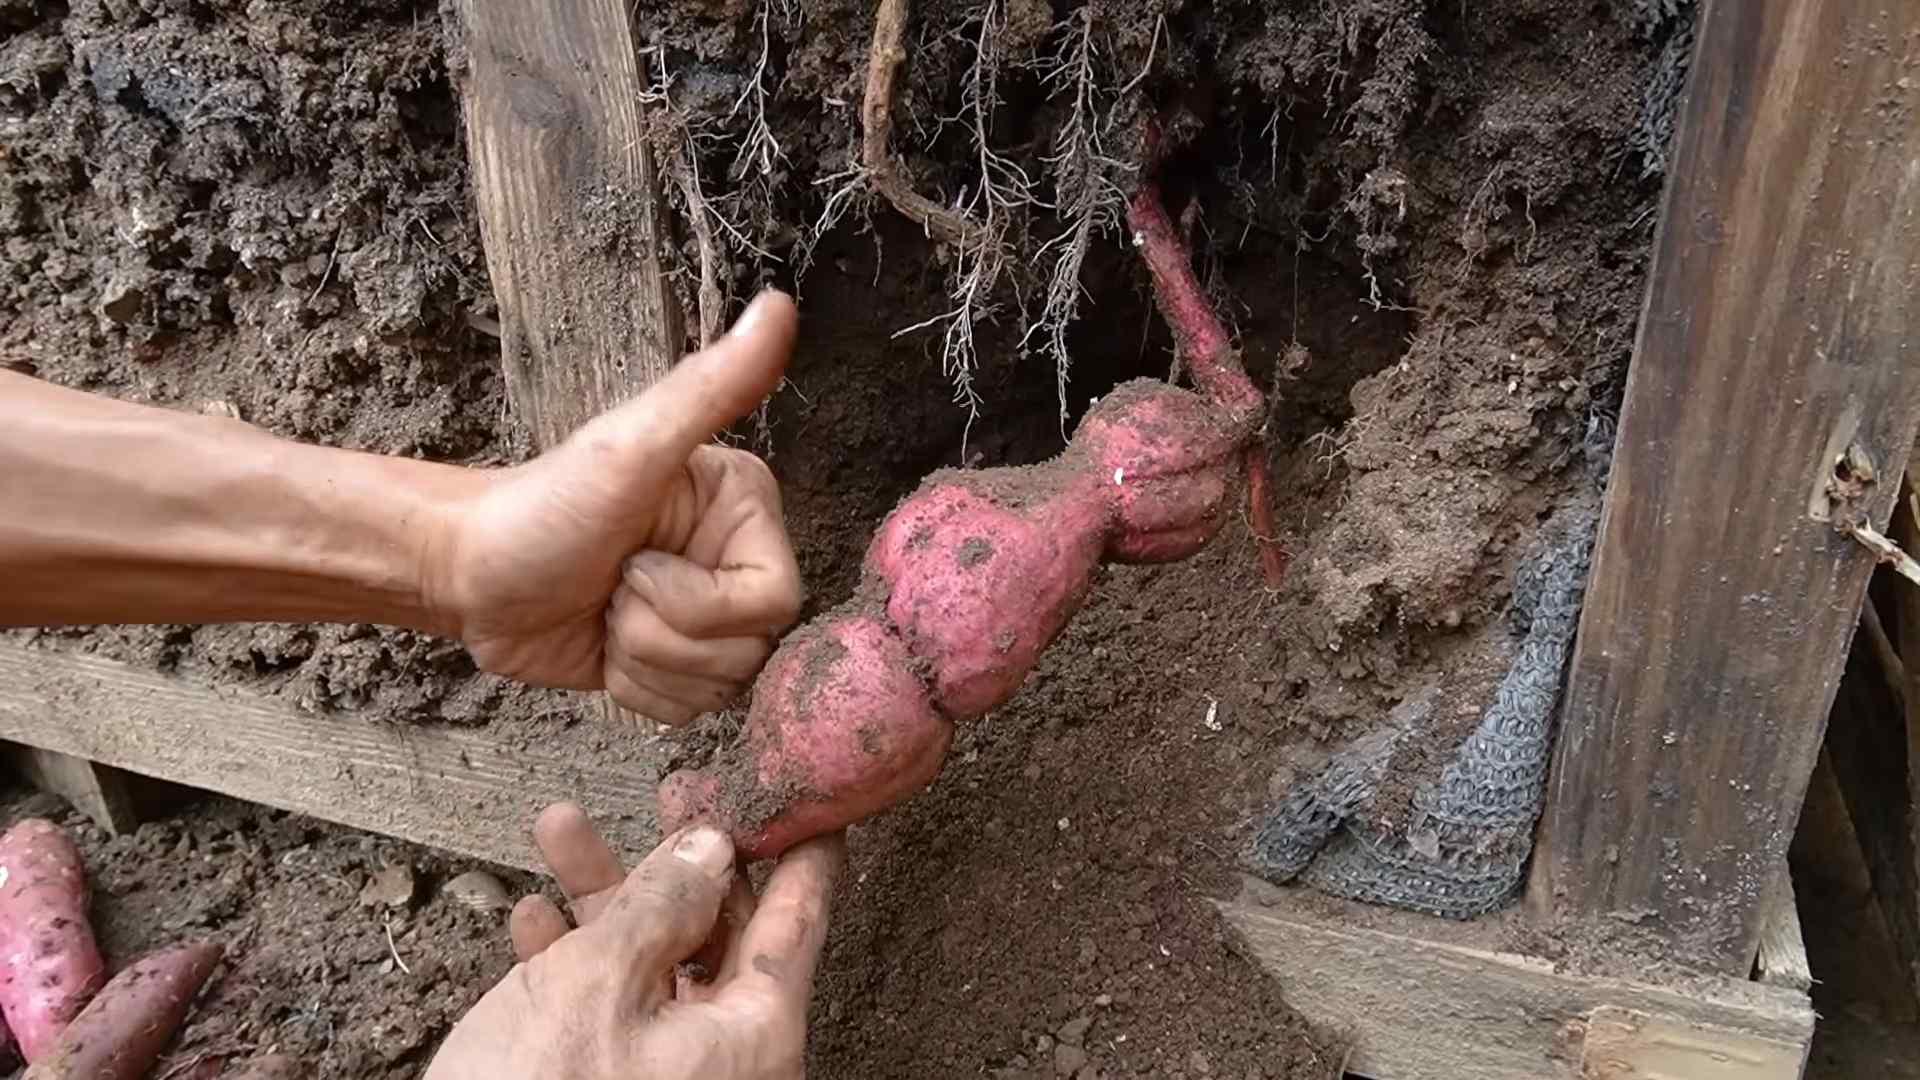
2. Harvesting Process: Carefully remove the net pots from the container. Gently pull the sweet potatoes from the roots.
3. Curing the Sweet Potatoes: Curing is an important step that improves the flavor and storage life of sweet potatoes. To cure them, place them in a warm, humid place (80-85°F and 85-90% humidity) for about a week.
4. Storing the Sweet Potatoes: After curing, store the sweet potatoes in a cool, dry place. They should last for several months.
Troubleshooting Tips
Even with the best planning, things can sometimes go wrong. Here are a few common problems and how to fix them:
* Yellowing Leaves: This could be a sign of nutrient deficiency. Check the pH and nutrient levels of the solution.
* Slow Growth: This could be due to insufficient light, incorrect pH, or nutrient deficiency.
* Root Rot: This is caused by a lack of oxygen in the nutrient solution. Make sure your air pump is working properly.
* Pests: Treat any pest infestations promptly with appropriate organic pesticides.
Why Grow Sweet Potatoes Hydroponically?
You might be wondering, “Why go through all this trouble when I could just grow sweet potatoes in the ground?” Well, there are several advantages to hydroponic growing:
* Faster Growth: Hydroponic plants typically grow faster than soil-based plants because they have direct access to nutrients and water.
* Higher Yields: Hydroponic systems can produce higher yields than soil-based systems because the plants are grown in optimal conditions.
* Less Water Usage: Hydroponic systems use less water than soil-based systems because the water is recycled.
* No Soilborne Diseases: Hydroponic systems are less susceptible to soilborne diseases.
* Year-Round Growing: You can grow sweet potatoes year-round in a hydroponic system, regardless of the weather.
* Space Saving: Hydroponics can be done in small spaces, making it ideal for urban gardeners.
Final Thoughts
Growing sweet potatoes hydroponically is a fun and rewarding experience. It’s a great way to learn about plant science and enjoy fresh, homegrown produce. So, give it a try and see

Conclusion
So, there you have it! Growing sweet potatoes soil-free, whether you choose the water propagation method or the more involved hydroponic setup, is not just a fun experiment; it’s a genuinely rewarding way to cultivate your own food, even without a traditional garden. We’ve walked through the steps, addressed potential challenges, and hopefully, inspired you to ditch the dirt and embrace a new approach to growing these delicious and nutritious tubers.
Why is this DIY trick a must-try? Because it opens up the world of sweet potato cultivation to everyone, regardless of their living situation. Apartment dwellers, urban gardeners with limited space, and even those simply looking for a unique and engaging gardening project can all benefit from this method. It’s also incredibly educational, allowing you to witness the entire life cycle of the sweet potato in a transparent and fascinating way. Plus, let’s be honest, watching those roots sprout and vines unfurl is just plain cool!
Beyond the basic methods outlined, there’s plenty of room for experimentation. Consider trying different varieties of sweet potatoes to see which performs best in your chosen setup. You could also explore different nutrient solutions for hydroponics, carefully monitoring the growth and health of your plants. For a decorative touch, try training the vines to climb a trellis or cascade down a hanging basket. Imagine a lush, green curtain of sweet potato foliage adorning your balcony or window!
And speaking of variations, don’t be afraid to get creative with your containers. While glass jars and plastic tubs work perfectly well, you could also repurpose old buckets, decorative planters, or even create a custom hydroponic system using PVC pipes. The possibilities are truly endless.
Ultimately, the success of your soil-free sweet potato venture hinges on your willingness to experiment, observe, and adapt. Pay close attention to your plants, adjust your methods as needed, and don’t be discouraged by setbacks. Remember, even experienced gardeners face challenges, and learning from your mistakes is all part of the process.
We are confident that you’ll find growing sweet potatoes soil-free to be a surprisingly simple and satisfying experience. The taste of a homegrown sweet potato, nurtured from a simple sprout to a fully formed tuber, is simply unmatched. It’s a testament to your efforts and a delicious reward for your patience.
So, what are you waiting for? Grab a sweet potato, gather your supplies, and embark on this exciting gardening adventure. We encourage you to try this **soil-free sweet potato** growing method and share your experiences with us! Post photos of your progress, ask questions, and let us know what worked (and what didn’t) for you. Together, we can learn and grow a community of innovative, soil-free sweet potato enthusiasts! We can’t wait to see what you create!
Frequently Asked Questions (FAQ)
1. What kind of sweet potato should I use for soil-free growing?
You can use any variety of sweet potato for soil-free growing, but some varieties tend to sprout more readily than others. Jewel, Garnet, and Beauregard are popular choices that are widely available and generally perform well. Experiment with different varieties to see which ones thrive best in your specific environment and setup. Keep in mind that the size and shape of the sweet potato can also influence its suitability for certain containers. Smaller, more compact varieties might be easier to manage in smaller spaces.
2. How long does it take for a sweet potato to sprout in water?
Sprouting time can vary depending on factors such as temperature, humidity, and the freshness of the sweet potato. Generally, you can expect to see sprouts emerging within 2-4 weeks. To speed up the process, ensure the sweet potato is kept in a warm (around 70-75°F or 21-24°C) and humid environment. You can also try partially submerging the sweet potato in water, leaving the top portion exposed to air. Regularly change the water to prevent bacterial growth and maintain optimal conditions for sprouting.
3. What kind of water should I use for water propagation?
It’s best to use filtered or dechlorinated water for water propagation. Tap water often contains chlorine and other chemicals that can inhibit root growth. If you only have access to tap water, let it sit in an open container for 24 hours to allow the chlorine to dissipate. Avoid using distilled water, as it lacks the essential minerals that plants need for healthy growth. Rainwater is also a good option, provided it’s collected from a clean source.
4. How often should I change the water in my water propagation setup?
You should change the water every 2-3 days to prevent the growth of bacteria and algae. Stagnant water can become a breeding ground for harmful microorganisms that can damage the sweet potato and inhibit root development. When changing the water, gently rinse the sweet potato and the container to remove any debris or slime.
5. What kind of nutrients do sweet potatoes need in a hydroponic system?
Sweet potatoes require a balanced nutrient solution containing macronutrients (nitrogen, phosphorus, and potassium) and micronutrients (iron, manganese, zinc, copper, boron, and molybdenum). Look for a hydroponic nutrient solution specifically formulated for root vegetables or general-purpose vegetative growth. Follow the manufacturer’s instructions for dilution and application rates. Regularly monitor the pH and EC (electrical conductivity) of the nutrient solution to ensure it’s within the optimal range for sweet potato growth.
6. How much light do sweet potatoes need when grown soil-free?
Sweet potatoes need plenty of light to thrive. Aim for at least 6-8 hours of direct sunlight per day. If you’re growing your sweet potatoes indoors, supplement with artificial grow lights. LED grow lights are a good option because they are energy-efficient and produce minimal heat. Position the grow lights close enough to the plants to provide adequate illumination, but not so close that they burn the leaves.
7. How do I know when my sweet potatoes are ready to harvest from a hydroponic system?
Harvest time depends on the variety of sweet potato and the growing conditions. Generally, you can expect to harvest your sweet potatoes around 90-120 days after planting the slips (sprouts). The leaves will start to yellow and die back, indicating that the tubers are mature. Gently remove the sweet potatoes from the hydroponic system, being careful not to damage them.
8. Can I grow sweet potatoes soil-free year-round?
Yes, you can grow sweet potatoes soil-free year-round, especially if you’re using a hydroponic system indoors. Control over the environment, including temperature, humidity, and light, allows you to extend the growing season and harvest sweet potatoes even during the winter months.
9. What are some common problems I might encounter when growing sweet potatoes soil-free, and how can I fix them?
Some common problems include:
* **Root rot:** This can occur if the water is not changed regularly or if the sweet potato is exposed to excessive moisture. Ensure good drainage and change the water frequently.
* **Nutrient deficiencies:** Yellowing leaves or stunted growth can indicate a nutrient deficiency. Adjust the nutrient solution according to the manufacturer’s instructions.
* **Pests:** Although less common in soil-free systems, pests like aphids or spider mites can still infest your plants. Inspect your plants regularly and treat any infestations with insecticidal soap or neem oil.
* **Lack of light:** Insufficient light can lead to leggy growth and poor tuber development. Provide adequate light, either through direct sunlight or artificial grow lights.
10. Can I eat the sweet potato leaves (vines) grown soil-free?
Yes, sweet potato leaves are edible and nutritious. They can be cooked and eaten like spinach or other leafy greens. However, it’s important to ensure that the leaves are free from pests and diseases before consuming them. Also, avoid eating leaves that have been treated with pesticides or herbicides. The leaves are a great addition to salads, stir-fries, and soups. They have a mild, slightly sweet flavor.
Leave a Comment