
Growing Romanesco Cauliflower Pots: Ever dreamt of harvesting those stunning, fractal-patterned Romanesco cauliflowers right from your own backyard? I know I have! This unique vegetable, with its mesmerizing spirals, isn’t just a feast for the eyes; it’s also packed with nutrients and boasts a delicious, nutty flavor. But let’s be honest, the thought of cultivating this architectural marvel can be a little intimidating. That’s where this DIY guide comes in!
While Romanesco cauliflower might seem like a modern culinary creation, its roots trace back to 16th-century Italy. For centuries, it has been cherished for its distinctive appearance and delicate taste, gracing the tables of those who appreciate both beauty and flavor. Now, you can bring a touch of Italian elegance to your own garden, no matter how small your space may be.
Many gardeners shy away from growing Romanesco, fearing it’s too difficult or requires too much space. But I’m here to tell you that with the right techniques, particularly growing Romanesco cauliflower pots, even beginner gardeners can succeed! This DIY article will break down the process into simple, manageable steps, showing you how to nurture these beauties in containers. We’ll cover everything from choosing the right pot size and soil mix to providing the perfect amount of sunlight and water. So, ditch the grocery store produce aisle and get ready to experience the joy of harvesting your own homegrown Romanesco cauliflower – it’s easier than you think!
Growing Romanesco Cauliflower in Pots: A Step-by-Step Guide
Hey there, fellow gardening enthusiasts! Ever wanted to grow something truly unique and visually stunning in your garden? Look no further than Romanesco cauliflower! Its fractal florets are not only a feast for the eyes but also a delicious and nutritious addition to your meals. While it might seem intimidating, growing Romanesco in pots is totally achievable, even for beginner gardeners. I’m going to walk you through the entire process, from seed to harvest, so you can enjoy your own homegrown Romanesco.
Choosing the Right Pot and Soil
First things first, let’s talk about the container and soil. Romanesco needs space to grow, so a good-sized pot is essential.
* Pot Size: Aim for a pot that’s at least 12 inches in diameter and 12 inches deep. A 5-gallon pot is a good starting point, but bigger is always better! The more room the roots have, the happier your Romanesco will be.
* Drainage: Make sure your pot has plenty of drainage holes. Romanesco doesn’t like sitting in soggy soil, which can lead to root rot.
* Soil: Use a high-quality potting mix that’s well-draining and rich in organic matter. I like to amend my potting mix with compost or aged manure to give my Romanesco a nutrient boost. Avoid using garden soil directly in pots, as it can compact and not drain well.
Starting Your Romanesco Seeds
You can either start your Romanesco seeds indoors or directly sow them into your pots, depending on your climate and the time of year. I prefer starting them indoors to get a head start.
* Timing: Romanesco needs a long growing season, so start your seeds indoors about 4-6 weeks before the last expected frost. If you’re in a warmer climate, you can start them earlier.
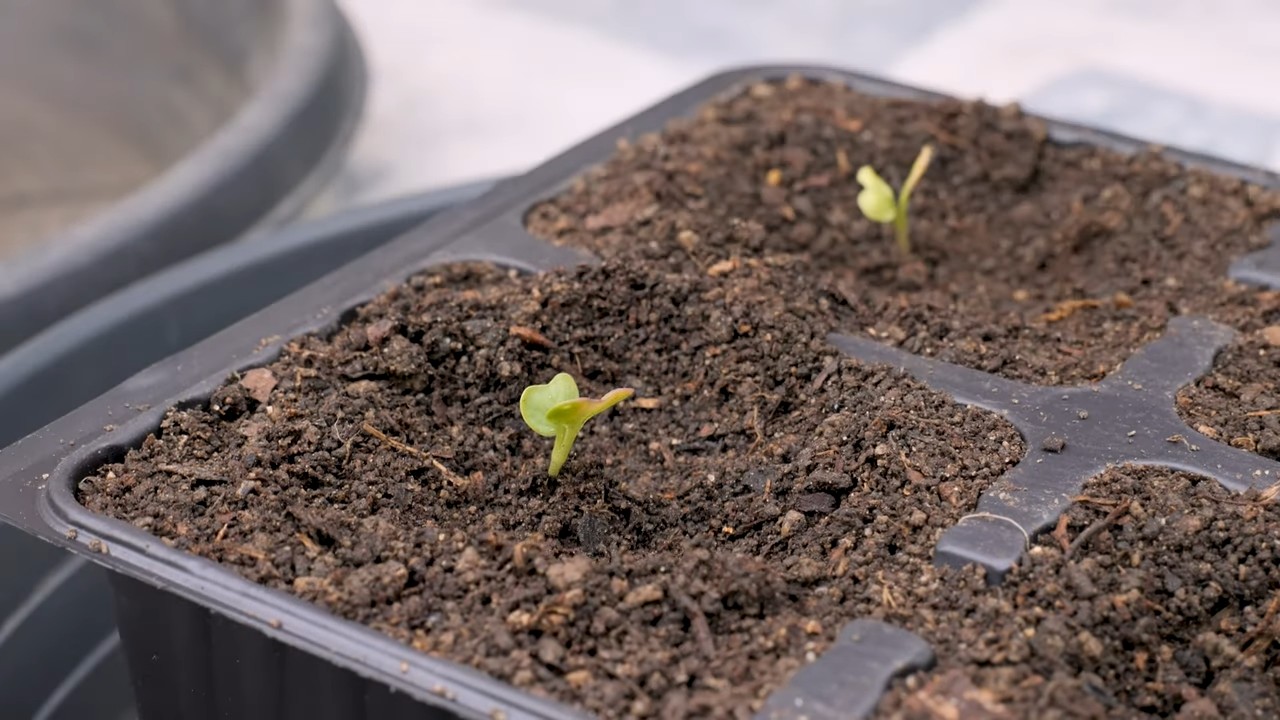
* Seed Starting Mix: Use a seed starting mix that’s light and airy. This will help the seedlings develop strong roots.
* Planting Depth: Sow the seeds about 1/4 inch deep.
* Watering: Keep the soil consistently moist but not waterlogged.
* Light: Place the seed trays under grow lights or in a sunny window. Seedlings need at least 6 hours of sunlight per day.
* Temperature: Maintain a temperature of around 65-75°F (18-24°C) for optimal germination.
* Hardening Off: Once the seedlings have developed a few sets of true leaves, gradually acclimate them to outdoor conditions over a period of 7-10 days before transplanting them into their final pots. This process is called “hardening off” and helps prevent transplant shock.
Transplanting Your Seedlings
Once your seedlings are hardened off, it’s time to transplant them into their final pots.
1. Prepare the Pot: Fill your pot with the potting mix, leaving a few inches of space at the top.
2. Dig a Hole: Dig a hole in the center of the pot that’s large enough to accommodate the seedling’s root ball.
3. Gently Remove the Seedling: Carefully remove the seedling from its tray, being careful not to damage the roots.
4. Place the Seedling in the Hole: Place the seedling in the hole and gently backfill with potting mix.
5. Water Thoroughly: Water the seedling thoroughly after transplanting.
6. Mulch: Add a layer of mulch around the base of the plant to help retain moisture and suppress weeds. I like to use straw or wood chips.
Caring for Your Romanesco Plants
Now that your Romanesco is in its pot, it’s time to provide it with the care it needs to thrive.
* Watering: Romanesco needs consistent moisture, especially during hot weather. Water deeply whenever the top inch of soil feels dry to the touch. Avoid overhead watering, as this can lead to fungal diseases.
* Fertilizing: Romanesco is a heavy feeder, so it needs regular fertilization. Use a balanced fertilizer every 2-3 weeks. You can also amend the soil with compost tea or fish emulsion for an extra boost.
* Sunlight: Romanesco needs at least 6 hours of sunlight per day. Place your pot in a sunny location.
* Pest Control: Keep an eye out for common pests like aphids, cabbage worms, and flea beetles. You can use insecticidal soap or neem oil to control these pests. I also like to inspect my plants regularly and handpick any pests I find.
* Weed Control: Keep the pot free of weeds. Weeds can compete with your Romanesco for nutrients and water.
* Support: As your Romanesco grows, it may need some support. You can use a stake or tomato cage to help keep the plant upright.
Protecting Your Romanesco from the Elements
Romanesco is susceptible to frost damage, so it’s important to protect it from cold weather.
* Frost Protection: If frost is predicted, cover your Romanesco plant with a frost blanket or move it indoors.
* Heat Protection: In extremely hot weather, provide your Romanesco with some shade during the hottest part of the day.
* Wind Protection: Protect your Romanesco from strong winds, which can damage the plant.
Harvesting Your Romanesco
The moment you’ve been waiting for! Harvesting your beautiful Romanesco.
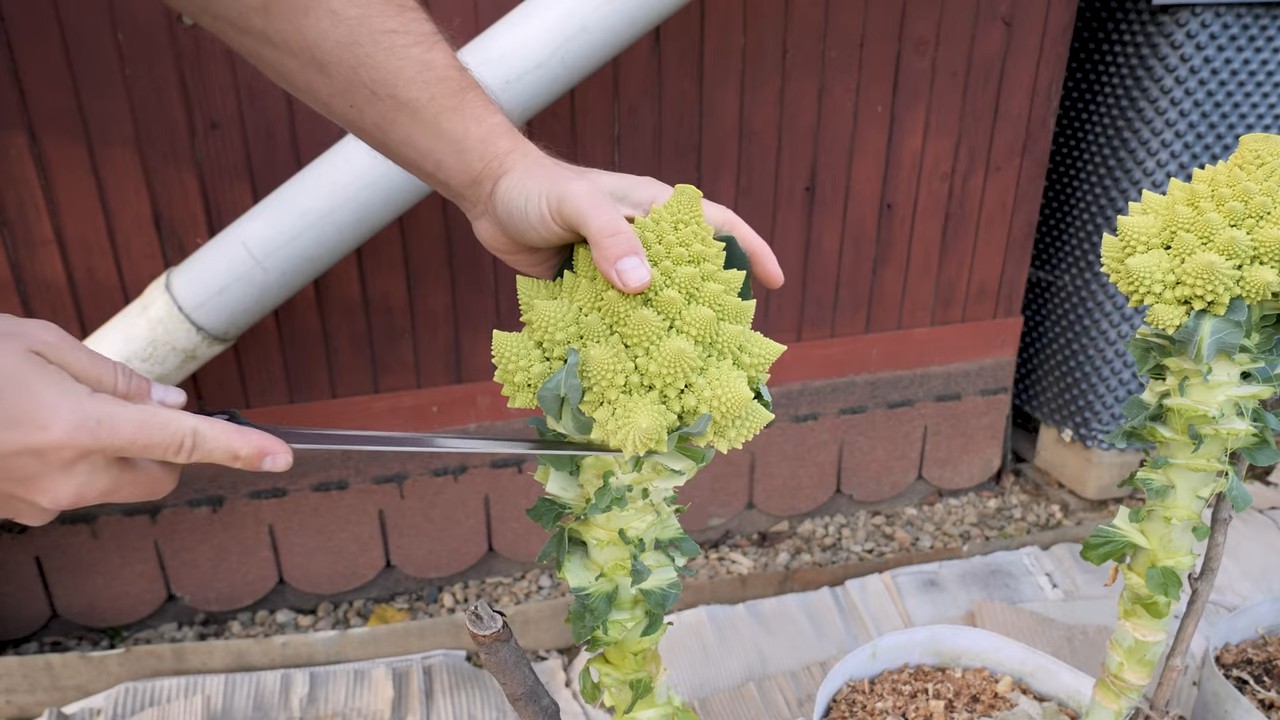
1. Timing: Romanesco is typically ready to harvest about 75-85 days after transplanting. The head should be firm and compact, and the florets should be tightly closed.
2. Cutting: Use a sharp knife to cut the head from the plant, leaving a few inches of stem attached.
3. Storage: Store your Romanesco in the refrigerator for up to a week.
Troubleshooting Common Problems
Even with the best care, you might encounter some problems while growing Romanesco. Here are a few common issues and how to address them:
* Buttoning: This is when the head forms prematurely and remains small. It’s often caused by stress, such as lack of water or nutrients. Make sure your Romanesco is getting enough water and fertilizer.
* Bolting: This is when the plant starts to flower prematurely. It’s often caused by heat stress. Provide your Romanesco with some shade during hot weather.
* Root Rot: This is caused by overwatering. Make sure your pot has good drainage and avoid overwatering.
* Pest Infestations: As mentioned earlier, keep an eye out for common pests and take action to control them.
Enjoying Your Homegrown Romanesco
Congratulations! You’ve successfully grown Romanesco cauliflower in a pot. Now it’s time to enjoy the fruits (or rather, vegetables) of your labor. Romanesco can be cooked in a variety of ways, such as steaming, roasting, or stir-frying. It’s also delicious raw in salads. Its unique flavor is slightly nutty and milder than regular cauliflower.
Growing Romanesco in pots is a rewarding experience. With a little bit of care and attention, you can enjoy your own homegrown Romanesco cauliflower, adding a touch of beauty and deliciousness to your garden and your meals. Happy gardening!
Conclusion
So, there you have it! Growing Romanesco cauliflower in pots might seem like a daunting task, but with the right approach, it’s entirely achievable, even for those with limited garden space. This DIY method unlocks the potential to cultivate this stunning and nutritious vegetable right on your balcony, patio, or even a sunny windowsill.
Why is this a must-try? Because it offers a unique blend of benefits. Firstly, it provides a controlled environment, allowing you to manage soil quality, watering, and pest control more effectively than in a traditional garden bed. This is especially crucial for Romanesco, which can be sensitive to soil conditions and temperature fluctuations. Secondly, it’s incredibly space-efficient. If you’re an urban gardener or simply short on space, growing in pots is the perfect solution. You can enjoy fresh, homegrown Romanesco without sacrificing valuable garden real estate. Thirdly, it’s a rewarding experience. Witnessing the intricate spiral patterns of the Romanesco head develop is truly fascinating, and the satisfaction of harvesting your own produce is unparalleled.
But the beauty of this DIY approach lies in its adaptability. Feel free to experiment with different pot sizes to see what works best for your growing conditions. Consider using a self-watering pot to minimize the risk of underwatering, especially during hot summer months. You can also try companion planting in the same pot. Marigolds, for example, can help deter pests, while basil can improve the flavor of your Romanesco.
Don’t be afraid to get creative with your soil mix. While the recommended blend of potting mix, compost, and perlite works well, you can adjust the ratios based on your local climate and soil conditions. If you live in a particularly dry area, you might want to add more compost to retain moisture. If your soil tends to be heavy, increase the amount of perlite for better drainage.
And remember, success in gardening often comes down to observation and adaptation. Keep a close eye on your Romanesco plants, and adjust your watering, fertilizing, and pest control strategies as needed. Don’t be discouraged if you encounter challenges along the way. Every gardening experience is a learning opportunity.
We wholeheartedly encourage you to give this DIY trick a try. Growing Romanesco cauliflower in pots is not only a practical solution for space-constrained gardeners, but also a fun and educational experience. Once you’ve harvested your first Romanesco head, you’ll be hooked!
We’d love to hear about your experiences. Share your photos, tips, and challenges in the comments below. Let’s build a community of Romanesco enthusiasts and learn from each other’s successes and failures. Together, we can unlock the secrets to growing this magnificent vegetable and enjoy its unique flavor and beauty. So, grab your pots, soil, and Romanesco seeds, and let’s get growing! Remember, the key to successful **growing Romanesco cauliflower** lies in patience, observation, and a willingness to experiment. Happy gardening!
Frequently Asked Questions (FAQ)
What is the ideal pot size for growing Romanesco cauliflower?
The ideal pot size for growing Romanesco cauliflower is at least 12 inches in diameter and 12 inches deep. A 5-gallon pot is generally considered a good starting point. However, larger pots (7-10 gallons) are even better, as they provide more room for the roots to grow and allow the plant to access more nutrients and water. This is especially important for Romanesco, which is a relatively large and heavy-feeding vegetable. Using a larger pot can also help prevent the plant from becoming root-bound, which can stunt its growth and reduce its yield. If you’re planning to grow multiple Romanesco plants in the same pot, you’ll need an even larger container.
What type of soil mix should I use?
A well-draining and nutrient-rich soil mix is essential for growing healthy Romanesco cauliflower in pots. A good starting point is a mix of equal parts potting mix, compost, and perlite. The potting mix provides a good base for the soil, while the compost adds essential nutrients and improves water retention. Perlite helps to improve drainage and aeration, preventing the soil from becoming waterlogged. You can also add a slow-release fertilizer to the soil mix to provide a steady supply of nutrients throughout the growing season. Avoid using garden soil in pots, as it can become compacted and poorly drained.
How often should I water my Romanesco cauliflower plants?
Watering frequency will depend on several factors, including the size of the pot, the type of soil mix, the weather conditions, and the stage of growth of the plant. In general, you should water your Romanesco cauliflower plants whenever the top inch of soil feels dry to the touch. During hot and dry weather, you may need to water them daily. Be sure to water deeply, so that the water reaches the roots of the plant. Avoid overwatering, as this can lead to root rot. A good way to check if your plants need water is to stick your finger into the soil. If the soil feels dry, it’s time to water.
How much sunlight do Romanesco cauliflower plants need?
Romanesco cauliflower plants need at least 6 hours of direct sunlight per day to thrive. If you’re growing them indoors, you’ll need to supplement with artificial light. A grow light can provide the necessary light intensity and spectrum for healthy growth. Place your Romanesco plants in a sunny location, such as a south-facing window or balcony. If you live in a hot climate, you may need to provide some shade during the hottest part of the day to prevent the plants from overheating.
What are some common pests and diseases that affect Romanesco cauliflower?
Romanesco cauliflower is susceptible to several common pests and diseases, including aphids, cabbage worms, flea beetles, and clubroot. Aphids are small, sap-sucking insects that can weaken the plant and transmit diseases. Cabbage worms are the larvae of cabbage butterflies and moths, and they can devour the leaves of the plant. Flea beetles are small, jumping insects that can create small holes in the leaves. Clubroot is a soilborne disease that can cause the roots of the plant to swell and become distorted. To prevent pests and diseases, you can use organic pest control methods, such as insecticidal soap, neem oil, and Bacillus thuringiensis (Bt). You can also practice crop rotation and avoid planting Romanesco cauliflower in the same spot year after year.
How do I know when my Romanesco cauliflower is ready to harvest?
Romanesco cauliflower is typically ready to harvest when the head is firm and compact, and the individual florets are tightly closed. The head should be about 6-8 inches in diameter. You can harvest the head by cutting it off at the base of the plant with a sharp knife. Be careful not to damage the surrounding leaves. After harvesting the main head, you may be able to harvest smaller side shoots from the plant.
Can I grow Romanesco cauliflower from seed?
Yes, you can grow Romanesco cauliflower from seed. Start the seeds indoors about 6-8 weeks before the last expected frost. Sow the seeds in a seed-starting mix and keep them moist. Once the seedlings have developed a few true leaves, you can transplant them into individual pots. Harden off the seedlings by gradually exposing them to outdoor conditions before transplanting them into their final pots.
What are some variations I can try when growing Romanesco cauliflower in pots?
There are several variations you can try when growing Romanesco cauliflower in pots. You can experiment with different soil mixes, pot sizes, and companion plants. You can also try growing different varieties of Romanesco cauliflower, such as ‘Veronica’ or ‘Natalino’. Another variation is to try growing Romanesco cauliflower in a hydroponic system. Hydroponics is a method of growing plants without soil, using a nutrient-rich water solution. This can be a great way to grow Romanesco cauliflower indoors, as it provides a controlled environment and eliminates the risk of soilborne diseases.
Leave a Comment