
Growing Plums in your kitchen garden might seem like a far-fetched dream, especially if you’re short on space or new to the world of home gardening. But trust me, with a few clever tricks and a dash of DIY spirit, you can be harvesting juicy, homegrown plums sooner than you think! Forget those bland, store-bought plums – imagine sinking your teeth into a sun-ripened plum, bursting with flavor, grown right outside your kitchen door.
Plum cultivation has a rich history, dating back thousands of years. Evidence suggests plums were enjoyed in ancient China and later spread throughout Europe and the rest of the world. For centuries, they’ve been a symbol of abundance and good fortune in many cultures. Now, you can bring that same sense of abundance to your own home!
Why bother with the effort? Well, beyond the unparalleled taste, growing plums in your kitchen garden offers a fantastic way to connect with nature, reduce your carbon footprint, and enjoy a healthier, more sustainable lifestyle. Plus, let’s be honest, there’s something incredibly satisfying about nurturing a plant from a sapling to a fruit-bearing tree. This DIY guide will equip you with the essential knowledge and simple hacks to successfully cultivate plums, even in limited spaces. I’m excited to share these tips and tricks with you, so let’s get started!
Growing Plums in Your Own Garden: How to Succeed!
I love picking fresh, juicy plums straight from the tree. And the best part? You can too! Plum trees are surprisingly easy to grow, and with a little patience and the right steps, you’ll soon be enjoying your own harvest. Here is my comprehensive guide to help you grow plums in your own garden.
Choosing the Right Plum Variety
Choosing the right plum variety is crucial for your success. Not all plums are the same, and some varieties are better suited for certain climates or uses.
- European Plums (Prunus domestica): These are ideal for eating fresh, baking, and making plum butter. They are usually self-fertile, which means you only need one tree to get fruit. Popular varieties include ‘Stanley’, ‘Italian’, and ‘President’.
- Japanese Plums (Prunus salicina): These plums are juicier and have thinner skin than European plums. They are good for eating fresh and making jam. Japanese plums are generally not self-fertile, so you will need at least two different varieties for pollination. Popular varieties include ‘Santa Rosa’, ‘Methley’, and ‘Shiro’.
- Plum Hybrids: There are also hybrids that combine the best characteristics of both types. Check with your local nursery to see which varieties thrive in your region.
Important Consideration: Pay attention to the variety’s frost hardiness, especially if you live in a region with cold winters.
The Perfect Location for Your Plum Tree
Plum trees love the sun! Choose a location that receives at least 6-8 hours of sunlight per day.
- Sunlight: The more sun, the better. The sun ensures good fruit development and helps prevent diseases.
- Soil: Plum trees prefer well-draining soil. Waterlogging can lead to root rot. If your soil is heavy and clay-like, improve it with compost or other organic material.
- Wind Protection: A location that is protected from strong winds is ideal. Wind can damage the blossoms and affect fruit production.
- Space: Plum trees can get quite large, so plan for enough space. Find out the final size of your chosen variety and leave sufficient distance from buildings, fences, and other trees.
Planting Your Plum Tree: Step by Step
Now comes the exciting part: planting!
- The Right Time: The best time to plant a plum tree is in the spring or fall, when the ground is not frozen.
- Prepare the Planting Hole: Dig a hole that is twice as wide and as deep as the tree’s root ball.
- Prepare the Tree: Carefully remove the tree from its pot and gently loosen the roots. If the roots have grown in a circle, carefully trim them to encourage outward growth.
- Plant the Tree: Place the tree in the hole, making sure the top of the root ball is level with the soil surface. Fill the hole with soil and press it down lightly.
- Water: Water the tree thoroughly to settle the soil and moisten the roots.
- Mulch: Apply a layer of mulch (e.g., bark mulch or straw) around the tree to retain moisture and suppress weeds. Make sure the mulch does not touch the trunk directly.
- Staking (optional): If the tree is still young and unstable, you can support it with a stake. Make sure the stake does not rub directly against the trunk.
The Right Care for Your Plum Tree
A young plum tree needs regular care to grow well and bear fruit.
- Watering: Water the tree regularly, especially in the first few years after planting. Make sure the soil is moist, but not wet.
- Fertilizing: Fertilize the tree in the spring with a balanced fertilizer. Follow the instructions on the packaging.
- Pruning: Pruning is important to maintain the shape of the tree, encourage fruit production, and remove dead or diseased branches. The best time to prune is in late winter or early spring, before the tree begins to bud.
- Training Prune: In the first few years after planting, you should train the tree by selecting and shaping the main branches.
- Maintenance Prune: After a few years, you should regularly remove dead, diseased, or crossing branches.
- Fruiting Prune: To encourage fruit production, you can thin out the branches to let more light and air into the canopy.
- Protecting Against Pests and Diseases: Plum trees can be affected by various pests and diseases. Check the tree regularly and take action if necessary.
- Aphids: Aphids can infest the leaves and shoots. You can spray them off with a strong jet of water or treat them with an insecticide.
- Plum Moth: The plum moth is a pest that infests the fruit. You can combat it with pheromone traps or insecticides.
- Brown Rot (Monilia): Brown rot is a fungal disease that affects flowers and fruit. Remove affected branches and fruit and treat the tree with a fungicide.
The Harvest: The Reward for Your Work
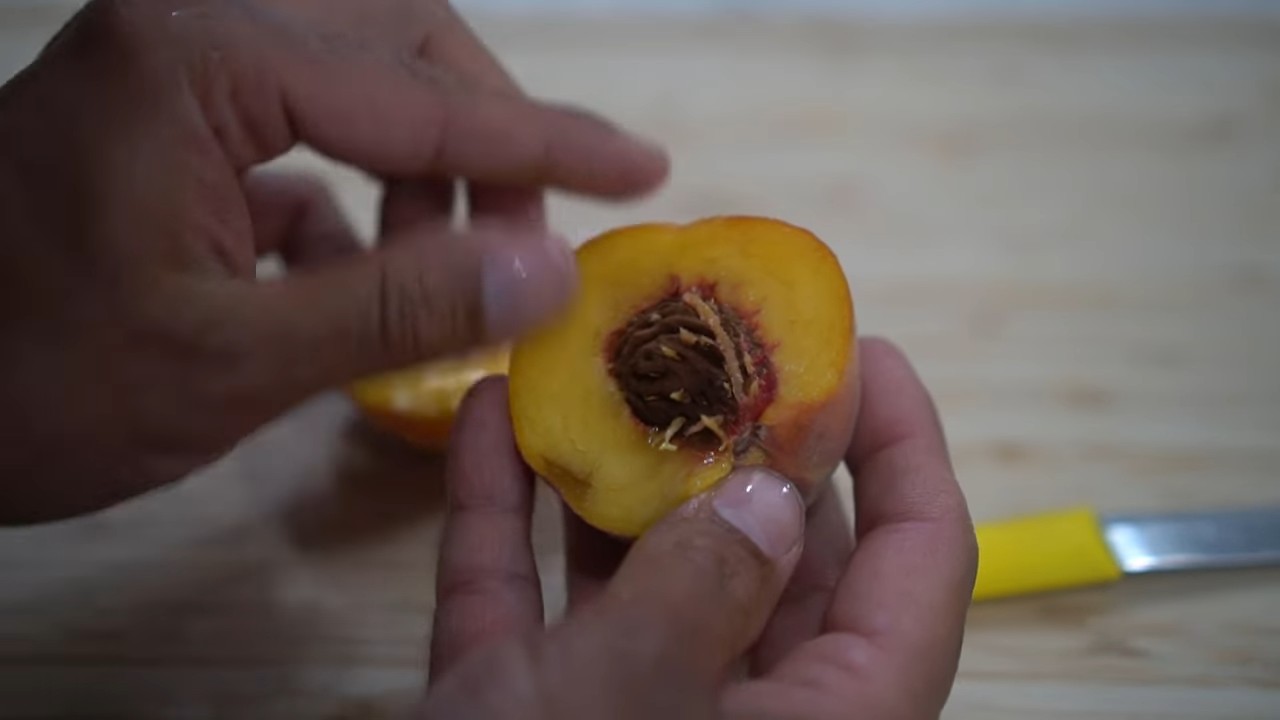
After all the work, the harvest finally arrives! Plums are ripe when they give slightly when you gently press them. The color of the plums should also be intense.
- Harvest Time: The harvest time depends on the variety and climate. Plums are generally ripe in late summer or early fall.
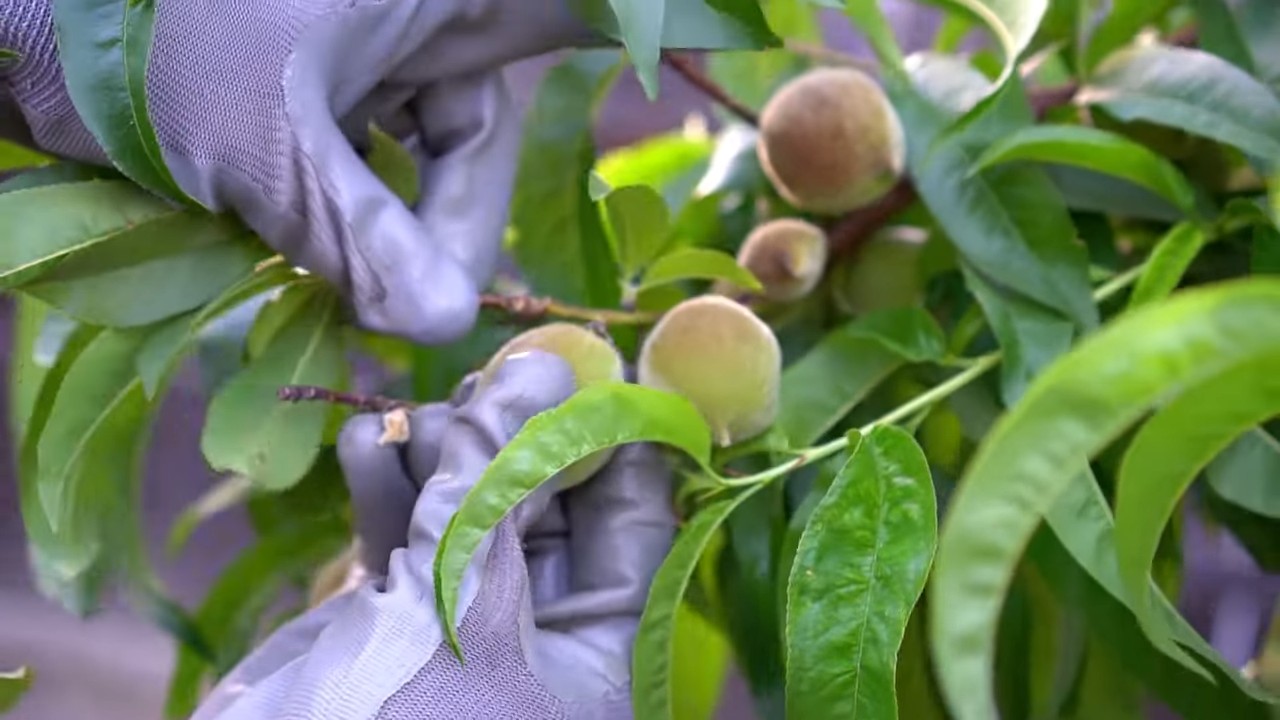
- Harvesting Method: Gently pick the plums from the tree. Avoid bruising the fruit.
- Storage: Plums can be stored in the refrigerator for a few days. You can also freeze them, process them into jam, or dry them.
Additional Tips for Successful Plum Growing
- Pollination: As mentioned, some plum varieties are not self-fertile and require another variety for pollination. Before planting, find out which varieties pollinate each other.
- Soil Analysis: A soil analysis can help you determine the pH and nutrient content of your soil. This allows you to improve the soil in a targeted way.
- Regular Checks: Check your tree regularly for pests, diseases, and other problems. The sooner you identify a problem, the easier it is to fix.
- Patience: Plum trees take a few years to bear fruit. Be patient and don’t give up!
Common Problems and Solutions
Diseases: Plum trees can be affected by various diseases. Learn about the most common diseases in your region.
No Fruit: If your plum tree does not bear fruit, there could be several reasons. The variety may not be self-fertile and may require another variety for pollination. Or the tree may not be getting enough sunlight or nutrients.
Fruit Drop: If the fruit falls off prematurely, it could be due to a lack of water, pests, or diseases.
Conclusion
So, there you have it! Mastering the art of growing plums in your kitchen garden is not only achievable but also incredibly rewarding. We’ve explored the key steps, from selecting the right plum variety for your space to nurturing your tree for optimal fruit production. But why is this DIY approach a must-try?
Firstly, consider the unparalleled flavor of homegrown plums. Forget the bland, often underripe fruit you find in supermarkets. Plums ripened on the tree, kissed by the sun, and harvested at their peak offer an explosion of sweetness and a depth of flavor that is simply unmatched. This alone makes the effort worthwhile.
Secondly, growing your own plums allows you to control the entire process, ensuring that your fruit is free from harmful pesticides and chemicals. You know exactly what goes into nurturing your tree, giving you peace of mind and a healthier harvest for you and your family. This is especially important if you are conscious about organic gardening practices.
Thirdly, the act of gardening itself is incredibly therapeutic. Spending time outdoors, connecting with nature, and nurturing a living thing can reduce stress, improve your mood, and provide a sense of accomplishment. Watching your plum tree blossom and bear fruit is a truly magical experience.
But the benefits don’t stop there. Growing plums in your kitchen garden can also be a sustainable practice. By reducing your reliance on commercially grown fruit, you are minimizing your carbon footprint and supporting local biodiversity. Plus, you’ll have a surplus of delicious plums to share with friends and neighbors!
Now, let’s talk about variations and suggestions. While we’ve focused on the basics, there are plenty of ways to customize your plum-growing experience. Consider experimenting with different plum varieties to find your favorites. Try grafting different varieties onto a single tree for a diverse harvest. Explore companion planting to attract pollinators and deter pests. You can even train your plum tree into an espalier shape to save space and create a beautiful focal point in your garden.
For those with limited space, dwarf plum trees are an excellent option. These compact varieties can be grown in containers on patios or balconies, bringing the joy of homegrown plums to even the smallest of spaces. And don’t forget about the importance of proper pruning. Regular pruning will help to maintain the shape and size of your tree, improve air circulation, and encourage fruit production.
Finally, remember that growing plums is a journey, not a destination. There will be challenges along the way, but don’t be discouraged. Learn from your mistakes, adapt your approach, and celebrate your successes. The rewards of homegrown plums are well worth the effort.
So, what are you waiting for? Grab your gardening gloves, choose your plum variety, and get started on your own plum-growing adventure today! We encourage you to try this DIY trick and share your experiences with us. Tell us about your successes, your challenges, and your favorite plum recipes. Let’s create a community of plum-loving gardeners who are passionate about growing their own delicious fruit. Share your photos and stories on social media using #HomegrownPlums and inspire others to join the movement. Happy gardening!
Frequently Asked Questions (FAQ)
1. What is the best time of year to plant a plum tree?
The best time to plant a plum tree is typically in the late fall or early spring, while the tree is dormant. This allows the tree to establish its roots before the growing season begins. Avoid planting during the heat of summer or when the ground is frozen. Fall planting allows the roots to establish before winter, giving the tree a head start in the spring. Spring planting should be done as soon as the ground is workable.
2. What kind of soil is best for growing plums?
Plum trees thrive in well-drained soil that is rich in organic matter. The ideal soil pH is between 6.0 and 7.0. Before planting, amend the soil with compost or other organic materials to improve drainage and fertility. Avoid heavy clay soils that retain too much water, as this can lead to root rot. If you have clay soil, consider planting your plum tree in a raised bed or container.
3. How much sunlight do plum trees need?
Plum trees need at least 6-8 hours of direct sunlight per day to produce a good crop of fruit. Choose a planting location that receives plenty of sunlight throughout the day. Avoid planting near buildings or other trees that may cast shade on your plum tree. Insufficient sunlight can result in poor fruit production and weak growth.
4. How often should I water my plum tree?
Water your plum tree regularly, especially during dry periods. Young trees need more frequent watering than established trees. Water deeply and thoroughly, allowing the water to soak into the soil. Avoid overwatering, as this can lead to root rot. A good rule of thumb is to water when the top inch of soil feels dry to the touch. Mulching around the base of the tree can help to retain moisture and suppress weeds.
5. How do I fertilize my plum tree?
Fertilize your plum tree in the spring, before the growing season begins. Use a balanced fertilizer that is specifically formulated for fruit trees. Follow the instructions on the fertilizer package carefully. Avoid over-fertilizing, as this can damage the tree. You can also amend the soil with compost or other organic materials to provide nutrients. Soil testing can help determine the specific nutrient needs of your tree.
6. How do I prune my plum tree?
Pruning is essential for maintaining the shape and size of your plum tree, improving air circulation, and encouraging fruit production. Prune your plum tree in the late winter or early spring, before the buds begin to swell. Remove any dead, damaged, or diseased branches. Thin out crowded branches to allow sunlight to penetrate the canopy. Prune to create an open, vase-shaped structure.
7. What are some common pests and diseases that affect plum trees?
Plum trees can be susceptible to a variety of pests and diseases, including aphids, plum curculio, brown rot, and black knot. Monitor your tree regularly for signs of pests or diseases. Use organic pest control methods, such as insecticidal soap or neem oil, to control pests. Prune away any diseased branches and dispose of them properly. Ensure good air circulation to prevent fungal diseases. Consider using disease-resistant plum varieties.
8. How long does it take for a plum tree to bear fruit?
Most plum trees will begin to bear fruit within 3-5 years of planting. However, some varieties may take longer. The age at which a plum tree begins to bear fruit depends on the variety, the growing conditions, and the care that it receives. Proper pruning, fertilization, and watering can help to encourage fruit production.
9. How do I know when my plums are ripe?
Plums are ripe when they are fully colored, slightly soft to the touch, and easily detach from the tree. The color of the plum will vary depending on the variety. Gently squeeze the plum to test for ripeness. If it gives slightly, it is likely ripe. You can also taste a plum to check for sweetness.
10. Can I grow plums in containers?
Yes, you can grow plums in containers, especially dwarf varieties. Choose a large container with good drainage. Use a well-draining potting mix that is rich in organic matter. Water regularly and fertilize as needed. Place the container in a sunny location that receives at least 6-8 hours of direct sunlight per day. Container-grown plum trees may need to be protected from frost in colder climates.
11. What are some good companion plants for plum trees?
Companion planting can help to attract pollinators, deter pests, and improve soil health. Some good companion plants for plum trees include:
* **Flowers:** Lavender, rosemary, and thyme attract beneficial insects.
* **Vegetables:** Garlic and onions deter pests.
* **Herbs:** Chamomile and yarrow attract pollinators.
* **Ground covers:** Clover and comfrey improve soil health.
Avoid planting competitive plants, such as sunflowers or corn, near your plum tree.
12. How do I protect my plum tree from frost?
Protecting your plum tree from frost is important, especially during the spring when the buds are swelling. Cover the tree with a blanket or tarp to insulate it from the cold. You can also wrap the trunk of the tree with burlap. Water the tree thoroughly before a frost to help protect the roots. For container-grown trees, move them to a sheltered location, such as a garage or shed.
13. How do I deal with plum curculio?
Plum curculio is a common pest that can damage plum fruit. The adult curculio lays its eggs in the developing fruit, causing it to become misshapen and drop prematurely. To control plum curculio, you can use a variety of methods, including:
* **Trapping:** Hang sticky traps in the tree to catch adult curculios.
* **Spraying:** Apply an insecticide specifically formulated for plum curculio.
* **Sanitation:** Remove any fallen fruit from the ground to prevent the curculios from overwintering.
* **Kaolin clay:** Spray the tree with kaolin clay to create a barrier that prevents the curculios from laying their eggs.
14. How do I prevent brown rot on my plum tree?
Brown rot is a fungal disease that can
Leave a Comment