
Growing Pineapples at Home might seem like an impossible tropical dream, especially if you don’t live in a sunny, equatorial paradise. But guess what? I’m here to tell you that with a few clever tricks and a little DIY spirit, you can absolutely cultivate your own sweet, juicy pineapples, no matter where you call home!
For centuries, the pineapple has been a symbol of hospitality and luxury. Originating in South America, it was once so rare and prized that it was often rented out as a centerpiece for lavish parties! While we no longer have to go to such extremes to enjoy this delicious fruit, there’s something incredibly satisfying about nurturing your own pineapple plant from start to finish.
Why should you embark on this DIY adventure? Well, store-bought pineapples are often picked before they’re fully ripe, sacrificing some of that incredible flavor. Plus, think of the bragging rights! Imagine serving a pineapple you actually grew yourself. Beyond the novelty, growing pineapples at home is a fantastic way to connect with nature, learn about plant life cycles, and enjoy a truly rewarding gardening experience. So, ditch the store-bought fruit and let’s dive into the secrets of cultivating your own tropical treat!
Growing Pineapples at Home: Your Tropical Dream for Your Home
Hey everyone! Have you ever wondered what it would be like to grow your own pineapple? I tried it, and it’s easier than you think! With a little patience and the right steps, you too can soon be harvesting your own sun-ripened pineapple. Let’s dive into this tropical adventure together!
What you need: The Ingredients for Your Pineapple Success
Before we get started, here is a list of the things you’ll need:
- A ripe pineapple (preferably from the supermarket, with green, healthy leaves)
- A sharp knife
- A pot (about 15-20 cm or 6-8 inches in diameter)
- High-quality potting soil (preferably a mix for tropical plants)
- Optional: Rooting hormone powder
- A spray bottle with water
- Patience! (Pineapples take time)
Pineapple Preparation: The Start of Your Tropical Project
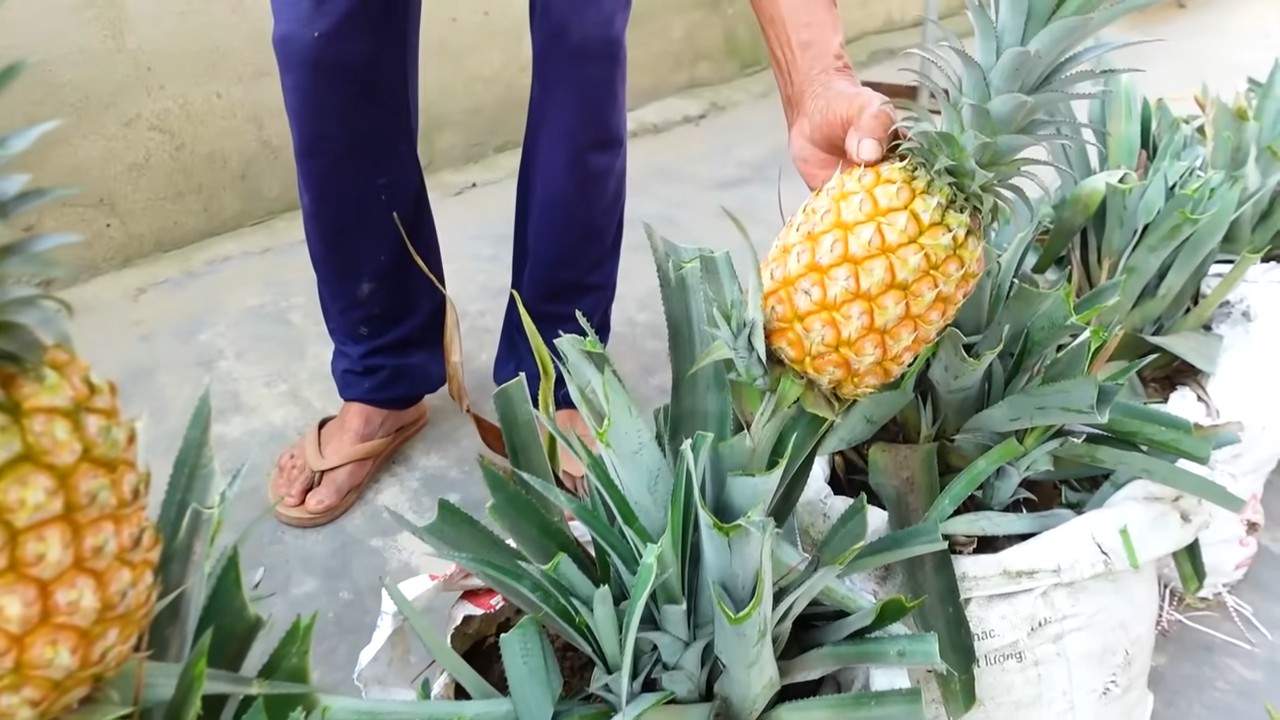
- Prepare the pineapple: First things first: Choose a ripe pineapple. Make sure the leaves look green and healthy and do not pull out of the crown easily.
- Cut off the crown: Take your sharp knife and carefully cut off the crown (the top part with the leaves). Make sure to leave about 2-3 cm (about 1 inch) of fruit flesh on the stalk.
- Remove the fruit flesh: Now, remove the remaining fruit flesh from the stalk. This is important because the flesh can otherwise rot and hinder root formation. you can either cut the flesh off or carefully scrape it away.
- Remove the lower leaves: Remove the bottom leaves of the crown, about 2-3 cm (1 inch) high. This exposes the small root nubs from which the roots will later grow.
- Optional: Apply rooting hormone: If you like, you can dip the exposed root nubs in rooting hormone powder. This encourages root formation but is not strictly necessary.
Planting: The Foundation for Your Pineapple Plant
- Prepare the pot: Fill the pot with high-quality potting soil. Make sure the soil is loose and well-draining.
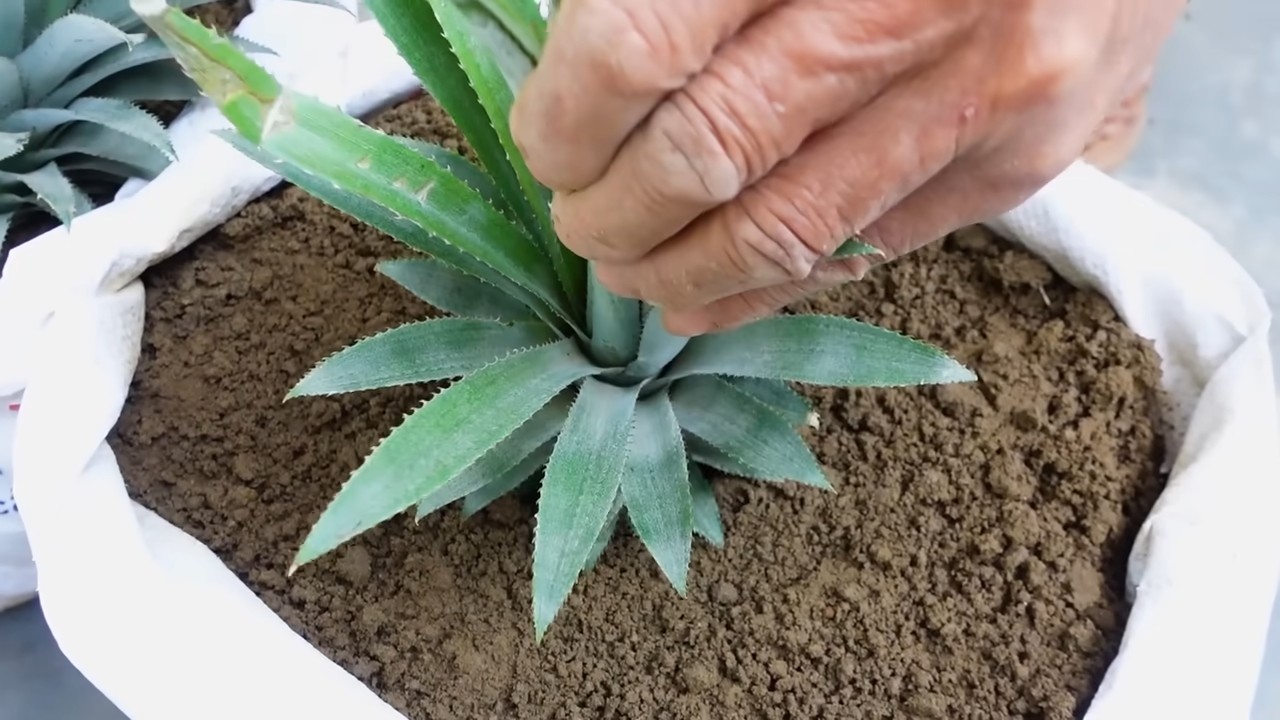
- Prepare the planting hole: Make a small hole in the center of the soil with your finger or a pen. The hole should be deep enough to accommodate the stalk of the crown.
- Plant the crown: Carefully place the crown in the hole and press the soil down lightly. Make sure the lower leaves are not buried in the soil.
- Water in: Gently water the soil until it is slightly moist. Avoid waterlogging, as this can lead to rot.
Care: How Your Pineapple Will Thrive
- Location: Place the pot in a warm and sunny location. Pineapples love warmth and light! A south-facing window is ideal.
- Watering: Water the pineapple regularly, but not too much. The soil should always be slightly moist, but not wet. Let the top layer of soil dry out between waterings.
- Humidity: Pineapples love high humidity. Spray the leaves regularly with water, especially in winter when the heating air is dry. You can also place the pot on a saucer with pebbles and water.
- Fertilizing: During the growing season (spring and summer), fertilize the pineapple every two weeks with a liquid fertilizer for tropical plants.
- Patience: Pineapples grow slowly. It can take several months before you see new roots and the plant starts to grow. Be patient and don’t give up!
The Test of Patience: When Will My Pineapple Bear Fruit?
Here comes the hardest part: waiting! It can take 2-3 years for your pineapple plant to bear fruit. The exact time depends on various factors, such as the variety, location, and care.
How you can encourage fruit formation:
There is a trick to encourage fruit formation:
- Ethylene gas: Pineapples react to ethylene gas, which triggers fruit formation. You can put the plant in a clear plastic bag and place a ripe apple inside. The apple produces ethylene gas.
- Duration: Leave the plant in the bag for about a week. Make sure the bag is not sealed airtight so the plant can still breathe.
- Repetition: Repeat this process every few weeks.
Harvest Time: Your Tropical Reward
When your pineapple is finally ripe, you can harvest it. The pineapple is ripe when it has a golden-yellow color and gives off a sweet scent. Cut the pineapple with a sharp knife and enjoy your homegrown, tropical delicacy!
Common Problems and Solutions: Your Pineapple Emergency Plan
- Leaves turning brown: This can have various causes, such as too much sun, too little water, or too dry air. Check the location conditions and adjust watering and humidity.
- No root formation: This can be because the fruit flesh was not completely removed or the soil is too wet. Make sure the stalk is clean and the soil is well-draining.
- No fruit formation: Be patient! It can take a long time for a pineapple to bear fruit. Try the trick with the apple and the ethylene gas.
Additional Tips for the Pineapple Pro
- Pineapple varieties: There are different varieties of pineapples. Find out which variety is best suited for growing at home.
- Suckers (pups): After your pineapple has borne fruit, it will form suckers (small plants) at its base. You can separate these suckers and plant them in separate pots.
- Overwintering: Pineapples are not winter-hardy. In winter, place the plant in a bright and cool place (about 15-20 degrees Celsius or 59-68°F) and water it less.
I hope this guide helps you grow your own pineapple. It’s an exciting and rewarding project that brings a piece of the tropics into your home. Good luck and have fun gardening
Conclusion
So, there you have it! Growing pineapples at home, while it might seem like a tropical dream reserved for expert gardeners, is surprisingly achievable with a little patience and the right approach. This DIY trick isn’t just about saving money on store-bought fruit; it’s about experiencing the unique satisfaction of nurturing a plant from a simple pineapple top to a thriving, fruit-bearing beauty. It’s about connecting with nature, learning about plant life cycles, and ultimately, enjoying a pineapple that tastes all the sweeter because you grew it yourself.
Why is this a must-try? Because it’s a rewarding project that brings a touch of the tropics to your home, regardless of your climate. It’s a fantastic educational opportunity for kids (and adults!), teaching them about botany and the origins of their food. Plus, imagine the bragging rights when you serve a homemade pineapple dessert made with fruit you cultivated yourself!
Don’t be afraid to experiment with variations. While we’ve focused on the water propagation method, you can also try planting the pineapple top directly into the soil. Just ensure the soil is well-draining and keep it consistently moist. Another variation involves using different types of containers. While a standard pot works well, consider using a terracotta pot for better drainage or even a decorative container to add a touch of style to your pineapple plant. You can also experiment with different fertilizers. While a balanced liquid fertilizer is recommended, you can also try using organic options like compost tea or diluted fish emulsion. Remember to always follow the instructions on the fertilizer label and avoid over-fertilizing, which can damage the plant.
Consider the climate you live in. If you live in a colder region, you might need to bring your pineapple plant indoors during the winter months. Place it in a sunny location and ensure it gets enough light. You can also use a grow light to supplement the natural light. If you live in a warmer region, you can keep your pineapple plant outdoors year-round. Just make sure it’s protected from frost and extreme heat.
The key to success with this DIY trick is patience. Pineapples take time to grow, so don’t get discouraged if you don’t see results immediately. With consistent care and attention, you’ll be rewarded with a delicious, homegrown pineapple in due time.
We wholeheartedly encourage you to give this DIY trick a try. It’s a fun, educational, and ultimately rewarding experience. And most importantly, don’t forget to share your journey with us! We’d love to see your pineapple plants progress and hear about your experiences. Share your photos and tips on social media using #HomegrownPineapple or leave a comment below. Let’s create a community of pineapple enthusiasts and inspire others to embark on this tropical adventure! Your success story could be the inspiration someone else needs to start their own pineapple-growing journey. So, grab a pineapple, enjoy the fruit, and get ready to embark on a rewarding gardening adventure. Happy growing!
Frequently Asked Questions (FAQ)
How long does it take to grow a pineapple from a top?
Growing a pineapple from a top is a marathon, not a sprint! It typically takes anywhere from 2 to 3 years for a pineapple plant to mature and produce fruit. The exact timeframe depends on various factors, including the climate, the amount of sunlight the plant receives, and the overall care it gets. Don’t be discouraged by the long wait; the satisfaction of harvesting your own homegrown pineapple is well worth the effort. Remember to be patient and consistent with your care, and you’ll eventually be rewarded with a delicious, homegrown pineapple.
What kind of soil is best for growing pineapples?
Pineapples thrive in well-draining, slightly acidic soil. A mixture of potting soil, perlite, and sand is ideal. The perlite and sand help improve drainage, preventing the roots from becoming waterlogged, which can lead to root rot. The potting soil provides essential nutrients for the plant’s growth. You can also add some compost to the soil to further enrich it with organic matter. Avoid using heavy clay soil, as it retains too much moisture and can suffocate the roots. The ideal pH range for pineapple soil is between 5.5 and 6.5. You can test the pH of your soil using a soil testing kit and adjust it accordingly if necessary.
How much sunlight does a pineapple plant need?
Pineapples are sun-loving plants and require at least 6 hours of direct sunlight per day. If you’re growing your pineapple plant indoors, place it near a sunny window where it can receive ample sunlight. If you don’t have a sunny window, you can supplement the natural light with a grow light. When growing outdoors, choose a location that receives full sun throughout the day. In hotter climates, you may need to provide some afternoon shade to protect the plant from scorching. Insufficient sunlight can lead to stunted growth and reduced fruit production.
How often should I water my pineapple plant?
Water your pineapple plant regularly, but avoid overwatering. Allow the soil to dry out slightly between waterings. During the growing season (spring and summer), you may need to water more frequently than during the dormant season (fall and winter). The frequency of watering will also depend on the climate and the type of soil you’re using. A good rule of thumb is to water when the top inch of soil feels dry to the touch. When watering, water thoroughly until the water drains out of the bottom of the pot. Avoid letting the plant sit in standing water, as this can lead to root rot.
Do I need to fertilize my pineapple plant?
Yes, fertilizing your pineapple plant is essential for healthy growth and fruit production. Use a balanced liquid fertilizer diluted to half strength every 2-3 weeks during the growing season. Look for a fertilizer with a ratio of 10-10-10 or similar. You can also use organic fertilizers like compost tea or diluted fish emulsion. Avoid over-fertilizing, as this can damage the plant. Follow the instructions on the fertilizer label carefully. During the dormant season, you can reduce the frequency of fertilization to once a month or stop fertilizing altogether.
How do I know when my pineapple is ripe?
Determining when a pineapple is ripe can be tricky, but there are a few telltale signs to look for. First, the pineapple should have a vibrant golden-yellow color. The base of the pineapple will often turn yellow first, gradually spreading upwards. Second, the pineapple should have a sweet, fragrant aroma. If you can smell the pineapple from a distance, it’s likely ripe. Third, the “eyes” of the pineapple should be relatively flat and slightly bulging. Finally, the pineapple should feel slightly soft to the touch, but not mushy. You can also try gently pulling on one of the leaves; if it comes out easily, the pineapple is likely ripe.
Can I grow a pineapple indoors?
Yes, you can absolutely grow a pineapple indoors, especially if you live in a colder climate. The key is to provide the plant with enough sunlight and warmth. Place the pineapple plant near a sunny window where it can receive at least 6 hours of direct sunlight per day. If you don’t have a sunny window, you can supplement the natural light with a grow light. Maintain a consistent temperature between 65°F and 80°F. Avoid placing the plant near drafts or cold windows. Ensure the pot has good drainage to prevent root rot. With proper care, you can successfully grow a pineapple indoors and enjoy the fruits of your labor.
What are some common problems when growing pineapples and how do I fix them?
Some common problems when growing pineapples include root rot, mealybugs, and scale. Root rot is caused by overwatering and poor drainage. To prevent root rot, ensure the soil is well-draining and avoid overwatering. If you suspect root rot, repot the plant in fresh soil and remove any affected roots. Mealybugs and scale are common pests that can infest pineapple plants. They can be removed by hand or treated with insecticidal soap. Regularly inspect your pineapple plant for signs of pests and diseases and take action promptly to prevent them from spreading. Yellowing leaves can indicate a nutrient deficiency or overwatering. Adjust your watering and fertilizing accordingly.
Leave a Comment