
Growing Peppers in Containers: Imagine biting into a juicy, sun-ripened pepper, bursting with flavor, and knowing you grew it yourself, right on your patio! That’s the magic of container gardening, and it’s easier than you might think. For centuries, people have cultivated plants in pots, from the hanging gardens of Babylon to the humble window boxes of today. This age-old practice brings nature closer to us, especially when space is limited.
But let’s be honest, getting those peppers to thrive in containers can sometimes feel like a challenge. Maybe your plants are stunted, or the fruit is small and bland. That’s where these DIY tricks and hacks come in! I’m going to share some simple, yet effective, techniques that will transform your container pepper garden into a bountiful harvest.
In today’s world, where access to fresh, healthy produce can be a concern, growing peppers in containers offers a fantastic solution. You control the soil, the water, and the nutrients, ensuring your peppers are packed with flavor and free from unwanted chemicals. Plus, it’s incredibly rewarding to nurture a plant from seed to table. So, grab your gardening gloves, and let’s dive into these easy DIY tips that will have you enjoying homegrown peppers in no time!
Growing Peppers in Containers: A Beginner’s Guide
Hey there, fellow gardening enthusiasts! I’m so excited to share my experience and tips on growing peppers in containers. It’s a fantastic way to enjoy fresh, homegrown peppers even if you don’t have a sprawling backyard. Trust me, with a little know-how, you can have a thriving pepper garden right on your balcony, patio, or even a sunny windowsill!
Choosing the Right Pepper Variety
First things first, let’s talk peppers! Not all peppers are created equal, especially when it comes to container gardening. Some varieties are naturally more compact and well-suited for pots than others.
* Compact Varieties: These are your best bet! Think bell peppers like ‘Patio Bell’ or ‘Mini Bell’, chili peppers like ‘Thai Hot’ or ‘Jalapeño’, and ornamental peppers. These tend to stay smaller and bushier, making them perfect for containers.
* Larger Varieties: If you’re set on growing a larger pepper like a ‘California Wonder’ bell pepper or a ‘Banana Pepper’, you absolutely can! Just be prepared to provide a larger container and potentially some support as the plant grows.
* Consider Your Climate: Think about your local climate and growing season. Some peppers need a longer, hotter growing season than others. Choose varieties that are known to thrive in your area.
Gathering Your Supplies
Okay, now that we’ve picked our pepper varieties, let’s gather the necessary supplies. This is where the fun really begins!
* Containers: This is crucial! The size of your container will directly impact the size and yield of your pepper plant.
* Small Peppers (e.g., Thai Hot, ornamental peppers): A 5-gallon container is usually sufficient.
* Medium Peppers (e.g., Jalapeño, Serrano): Aim for a 7-gallon container.
* Large Peppers (e.g., Bell Peppers, Banana Peppers): Go for a 10-gallon container or larger.
Make sure your containers have drainage holes! Peppers hate sitting in soggy soil.
* Potting Mix: Don’t use garden soil! It’s too heavy and doesn’t drain well in containers. Instead, opt for a high-quality potting mix specifically designed for containers. I personally love a mix that includes peat moss, perlite, and vermiculite for good drainage and aeration.
* Pepper Seeds or Seedlings: You can start your peppers from seed indoors or purchase seedlings from a local nursery. Starting from seed gives you more variety options, but seedlings are a quicker way to get started.
* Fertilizer: Peppers are heavy feeders, so you’ll need a good fertilizer to keep them happy and productive. I recommend a balanced fertilizer (e.g., 10-10-10) or one specifically formulated for vegetables.
* Watering Can or Hose: Essential for keeping your peppers hydrated.
* Optional:
* Plant Markers: To keep track of your different pepper varieties.
* Gloves: To protect your hands.
* Trowel: For planting.
* Support Stakes or Cages: For taller or heavier pepper varieties.
Planting Your Peppers
Alright, let’s get our hands dirty! This is the most rewarding part, watching your little pepper plants take root and grow.
1. Prepare Your Containers: Fill your containers with potting mix, leaving a few inches of space at the top.
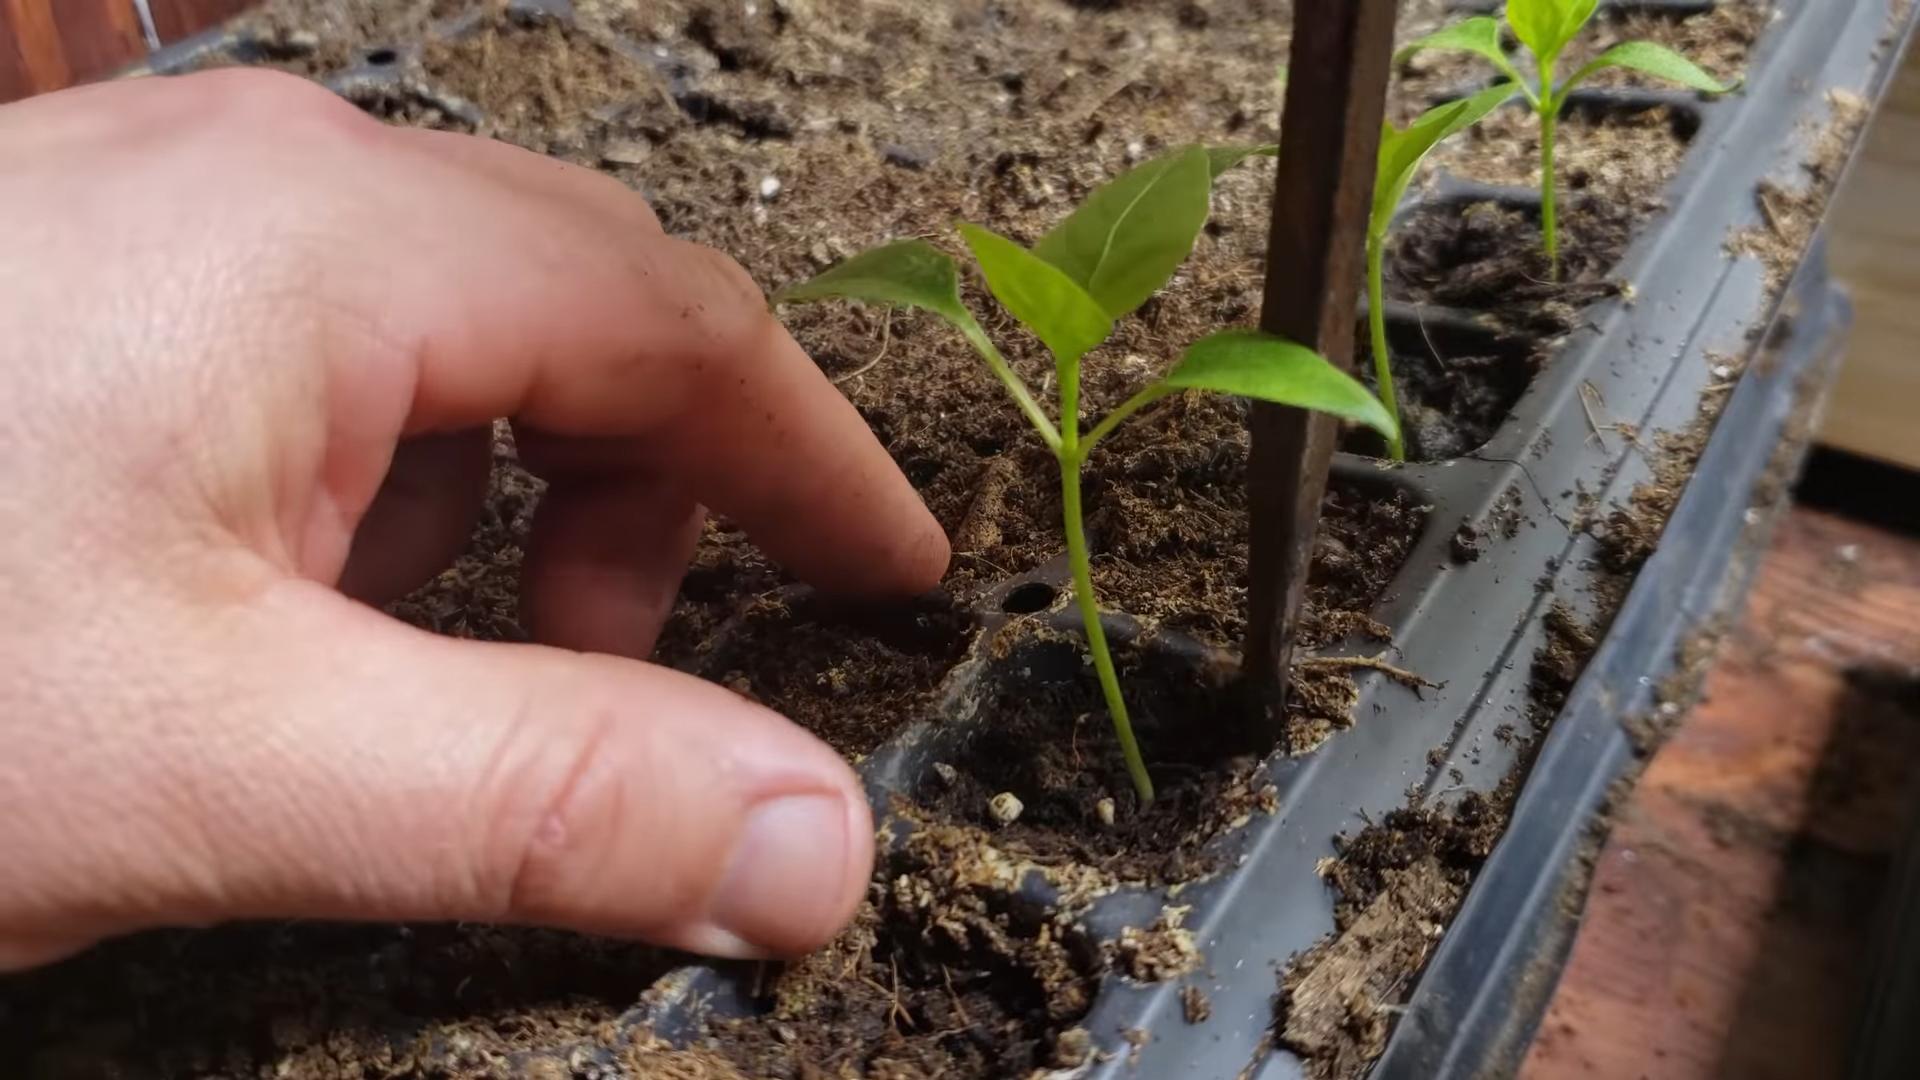
2. Starting from Seedlings:
* Gently remove the seedling from its container.
* Loosen the roots slightly.
* Dig a hole in the potting mix large enough to accommodate the root ball.
* Place the seedling in the hole and backfill with potting mix.
* Water thoroughly.
3. Starting from Seeds:
* Sow seeds about 1/4 inch deep in the potting mix.
* Water gently.
* Keep the soil consistently moist until the seeds germinate (usually 7-14 days).
* Once the seedlings have a few sets of true leaves, thin them out, leaving only the strongest seedling in each container.
4. Spacing: If you’re planting multiple pepper plants in a large container, make sure to space them adequately. Check the seed packet or plant label for recommended spacing.
5. Location, Location, Location: Peppers need at least 6-8 hours of sunlight per day. Choose a sunny spot for your containers. A south-facing balcony or patio is ideal.
6. Watering: Water your pepper plants regularly, especially during hot weather. The soil should be consistently moist but not soggy. Check the soil moisture by sticking your finger into the soil. If the top inch feels dry, it’s time to water.
7. Fertilizing: Start fertilizing your pepper plants about 2-3 weeks after planting. Follow the instructions on your fertilizer label. I usually fertilize every 2-3 weeks during the growing season.
Caring for Your Pepper Plants
Now that your peppers are planted, it’s time to nurture them and watch them flourish! Consistent care is key to a bountiful harvest.
1. Watering: As mentioned before, consistent watering is crucial. Avoid letting the soil dry out completely, especially during hot weather. Water deeply and thoroughly, allowing the excess water to drain out of the drainage holes.
2. Fertilizing: Continue fertilizing your pepper plants regularly throughout the growing season. You can also supplement with a foliar feed (spraying the leaves with a diluted fertilizer solution) every few weeks.
3. Pruning: Pruning isn’t strictly necessary for peppers, but it can help improve air circulation and encourage bushier growth. You can pinch off the suckers (small shoots that grow between the main stem and the branches) to encourage more fruit production.
4. Pest and Disease Control: Keep an eye out for common pepper pests like aphids, whiteflies, and spider mites. You can control these pests with insecticidal soap or neem oil. Also, watch out for diseases like blossom end rot (caused by calcium deficiency) and fungal diseases. Ensure good air circulation and avoid overwatering to prevent fungal problems. If you spot any diseased leaves, remove them immediately.
5. Support: As your pepper plants grow, they may need some support, especially if they’re producing heavy fruit. Use stakes or cages to support the plants and prevent them from falling over.
6. Mulching: Adding a layer of mulch around your pepper plants can help retain moisture, suppress weeds, and regulate soil temperature. I like to use straw or shredded bark as mulch.
7. Pollination: Peppers are self-pollinating, but sometimes they need a little help, especially if you’re growing them indoors. You can gently shake the plants or use a small brush to transfer pollen from one flower to another.
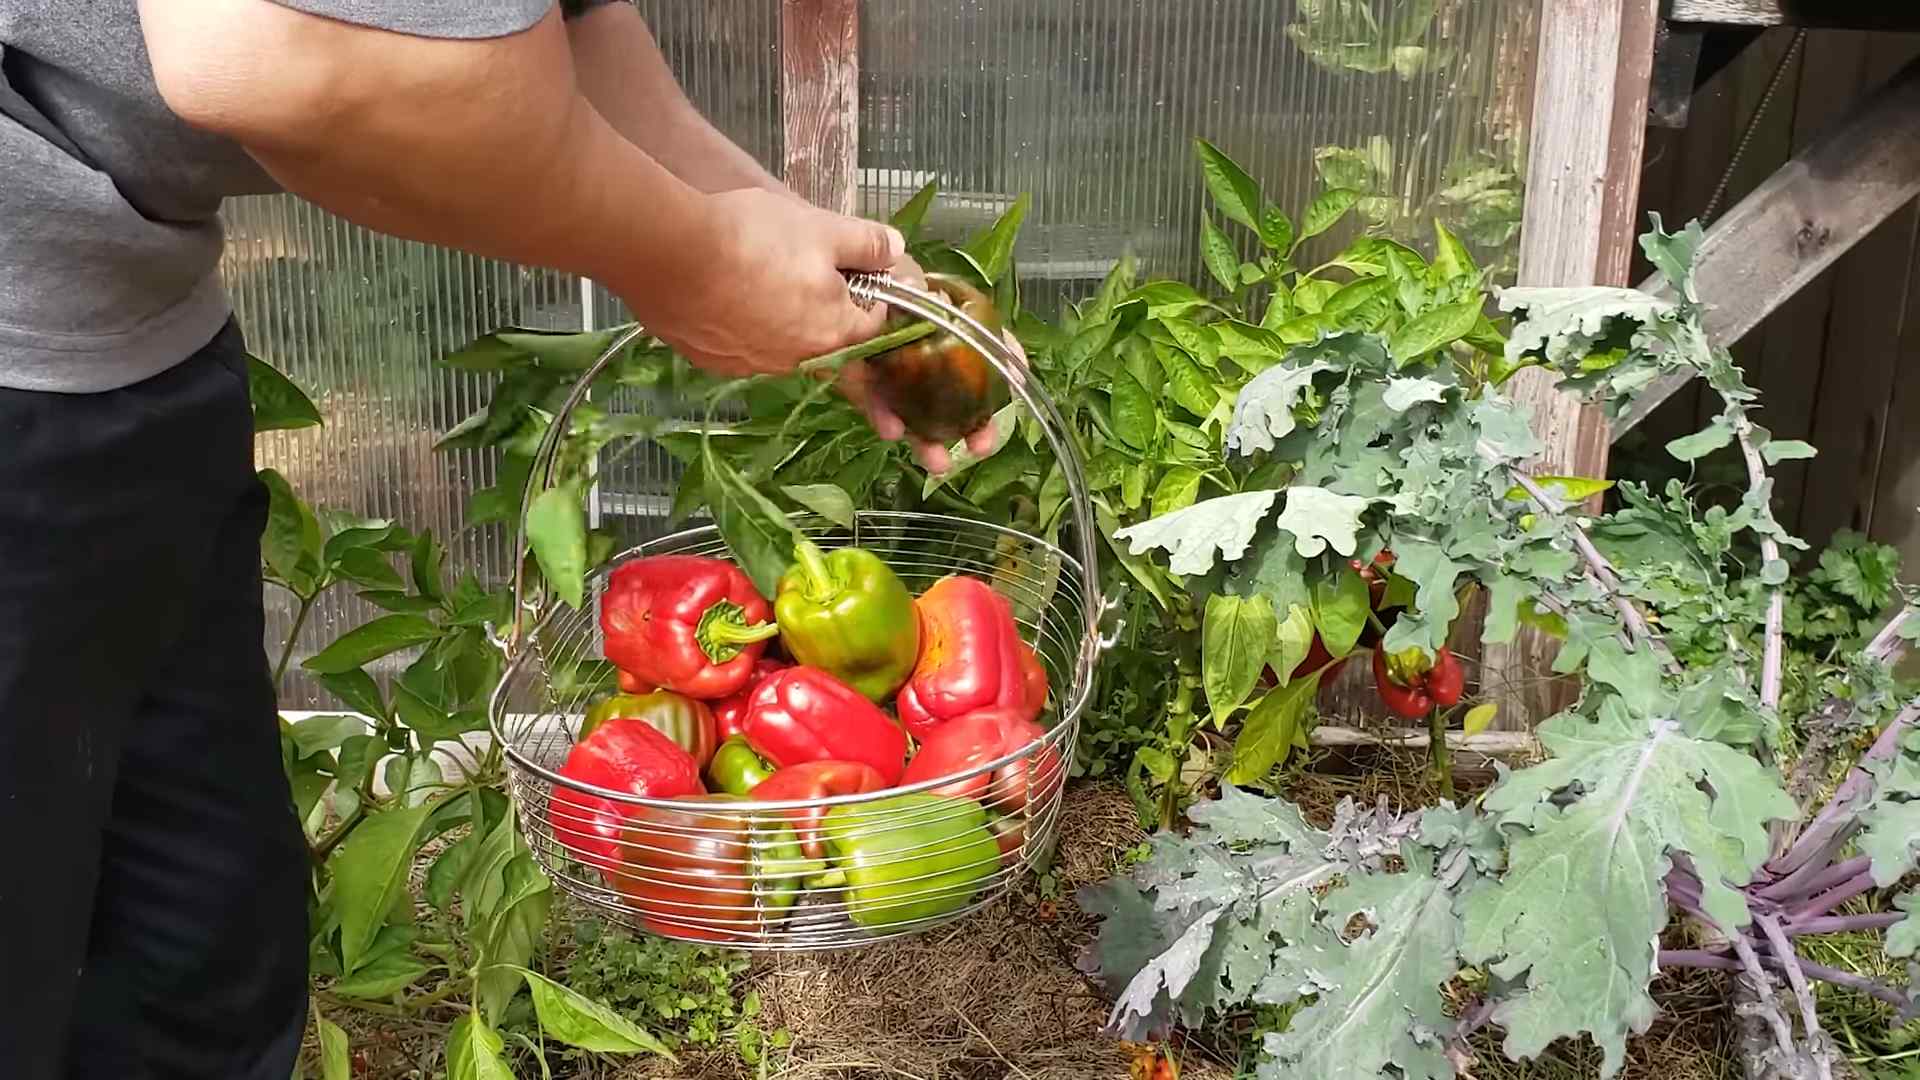
Harvesting Your Peppers
The moment you’ve been waiting for! Harvesting your peppers is the most satisfying part of the whole process.
1. Timing: The timing of your harvest will depend on the variety of pepper you’re growing and your personal preference. Some peppers are best harvested when they’re green, while others are best harvested when they’re fully ripe and have turned red, yellow, or orange.
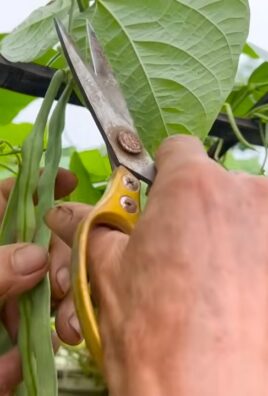
2. Technique: Use a sharp knife or scissors to cut the peppers from the plant. Be careful not to damage the plant.
3. Storage: Freshly harvested peppers can be stored in the refrigerator for up to a week. You can also freeze them, pickle them, or dry them for longer storage.
Troubleshooting Common Problems
Even with the best care, you might encounter some problems along the way. Don’t worry, it happens to everyone! Here are some common issues and how to address them:
* Blossom End Rot: This is a common problem in peppers, especially bell peppers. It’s caused by a calcium deficiency. To prevent blossom end rot, make sure your soil is well-drained and that you’re providing your plants with adequate calcium. You can add calcium to the soil by using bone meal or eggshells.
* Aphids: These tiny pests can suck the sap from your pepper plants, causing them to weaken and become stunted. Control aphids with insecticidal soap or neem oil.
* Whiteflies: Similar to aphids, whiteflies can also damage your pepper plants. Control whiteflies with insecticidal soap or neem oil.
* Spider Mites: These tiny mites can cause yellowing and stippling on the leaves of your pepper plants. Control spider mites with insecticidal soap or neem oil.
* Fungal Diseases: Fungal diseases can cause spots on the leaves and stems of your pepper plants. Prevent fungal diseases by ensuring good air circulation and avoiding overwatering. If you spot any diseased leaves, remove them immediately.
* Lack of Fruit: If
Conclusion
So, there you have it! Growing peppers in containers isn’t just a feasible option; it’s a rewarding and surprisingly simple way to bring fresh, flavorful peppers right to your doorstep. We’ve covered everything from selecting the right container and choosing the perfect pepper varieties to providing optimal sunlight, water, and nutrients. You’ve learned how to combat common pests and diseases, and even how to overwinter your pepper plants for a second, bountiful harvest.
Why is this DIY trick a must-try? Because it empowers you to control every aspect of your pepper’s growing environment. No more relying on grocery store produce that may have traveled hundreds of miles and lost its peak flavor. No more wondering about the pesticides used or the growing conditions endured. With container gardening, you are the master of your pepper destiny!
But the beauty of growing peppers in containers lies not only in its convenience but also in its adaptability. Feel free to experiment! Try different potting mixes to see which one your peppers thrive in. Consider adding companion plants like basil or marigolds to deter pests and attract pollinators. Explore different container materials – terracotta, plastic, even repurposed buckets – to find what works best for your space and aesthetic.
For those seeking a spicier adventure, try growing habaneros or ghost peppers in separate containers, ensuring you handle them with care. If you prefer a milder flavor, bell peppers and banana peppers are excellent choices. And don’t forget the ornamental peppers! These vibrant plants add a splash of color to your patio while still providing edible (though often spicy) fruits.
Growing peppers in containers is more than just a gardening project; it’s an opportunity to connect with nature, learn new skills, and enjoy the fruits (or rather, the peppers) of your labor. It’s a chance to cultivate not only delicious ingredients but also a sense of accomplishment and pride.
We wholeheartedly encourage you to give this DIY trick a try. Start small, perhaps with just one or two pepper plants, and gradually expand your container garden as you gain experience. Don’t be afraid to make mistakes – that’s how we learn! And most importantly, have fun with it.
Once you’ve harvested your first batch of homegrown peppers, we’d love to hear about your experience. Share your photos, tips, and stories in the comments below. Let’s build a community of container pepper growers and inspire others to embark on this flavorful journey. What varieties did you choose? What challenges did you face? What successes did you celebrate? Your insights can help others achieve their own pepper-growing dreams. So, grab your containers, your potting mix, and your pepper seeds, and let’s get growing!
Frequently Asked Questions (FAQ)
What is the best size container for growing peppers?
The ideal container size depends on the type of pepper you’re growing. For smaller pepper varieties like chili peppers or ornamental peppers, a 5-gallon container is usually sufficient. However, for larger pepper varieties like bell peppers or jalapeños, a 10-gallon container or larger is recommended. The larger the container, the more room the roots have to grow, resulting in a healthier and more productive plant. Ensure the container has adequate drainage holes to prevent waterlogging.
How often should I water my container peppers?
Watering frequency depends on several factors, including the weather, the size of the container, and the type of potting mix you’re using. Generally, you should water your pepper plants when the top inch of soil feels dry to the touch. During hot, dry weather, you may need to water them daily, while during cooler, wetter weather, you may only need to water them every few days. Avoid overwatering, as this can lead to root rot. A good rule of thumb is to water deeply until water drains out of the drainage holes.
What kind of fertilizer should I use for my container peppers?
Peppers are heavy feeders and require regular fertilization to thrive. Use a balanced fertilizer with an NPK ratio (nitrogen, phosphorus, potassium) of 5-10-10 or 10-10-10. You can also use a fertilizer specifically formulated for tomatoes and peppers. Fertilize your pepper plants every two to three weeks during the growing season, following the instructions on the fertilizer label. Avoid over-fertilizing, as this can burn the roots. Consider using a slow-release fertilizer at planting time for a steady supply of nutrients.
How much sunlight do container peppers need?
Peppers need at least six to eight hours of direct sunlight per day to produce a good harvest. Choose a location for your container peppers that receives plenty of sunlight. If you live in a particularly hot climate, you may need to provide some afternoon shade to prevent the plants from getting scorched. If you don’t have a sunny spot, you can supplement with grow lights.
What are some common pests and diseases that affect container peppers?
Common pests that can affect container peppers include aphids, spider mites, whiteflies, and pepper hornworms. Regularly inspect your plants for signs of infestation and take action promptly. You can use insecticidal soap, neem oil, or horticultural oil to control these pests. Common diseases that can affect container peppers include blossom end rot, fungal leaf spot, and verticillium wilt. Ensure good air circulation around your plants and avoid overwatering to prevent these diseases. Use disease-resistant pepper varieties whenever possible.
Can I overwinter my container pepper plants?
Yes, you can overwinter your container pepper plants to enjoy a second harvest the following year. Before the first frost, prune your pepper plants back to about 6-8 inches tall. Move them to a cool, dark location, such as a garage or basement, where the temperature stays above freezing. Water them sparingly throughout the winter, just enough to keep the soil from drying out completely. In the spring, gradually acclimate your pepper plants to outdoor conditions and transplant them into fresh potting mix.
What are some good companion plants for container peppers?
Several plants can benefit peppers when grown together in containers. Basil repels aphids and whiteflies, while marigolds deter nematodes and other soil pests. Carrots and onions can also help to deter pests. Avoid planting peppers near fennel, as it can inhibit their growth.
How do I prevent blossom end rot in my container peppers?
Blossom end rot is a common problem in peppers caused by a calcium deficiency. To prevent blossom end rot, ensure your potting mix is rich in calcium. You can add lime or bone meal to the potting mix before planting. Also, water your pepper plants consistently to prevent fluctuations in soil moisture. Avoid over-fertilizing with nitrogen, as this can interfere with calcium uptake.
Can I grow different varieties of peppers in the same container?
While it’s possible to grow different varieties of peppers in the same container, it’s generally not recommended, especially for beginners. Different pepper varieties have different growth habits and nutrient requirements, which can make it challenging to provide optimal conditions for all of them. It’s best to grow each variety in its own container to ensure they all thrive.
How long does it take for container peppers to produce fruit?
The time it takes for container peppers to produce fruit depends on the variety and growing conditions. Generally, it takes about 60-90 days from transplanting for peppers to start producing fruit. Hotter pepper varieties tend to take longer to mature than milder varieties. Provide your pepper plants with plenty of sunlight, water, and nutrients to encourage faster fruit production.
Leave a Comment