
Growing Peppers at Home can seem daunting, but trust me, it’s easier than you think! Imagine plucking vibrant, sun-ripened peppers straight from your own garden, adding a burst of flavor and freshness to your meals. Forget those bland, overpriced peppers from the grocery store – with a few simple tricks and a little DIY magic, you can cultivate a thriving pepper patch right in your backyard, balcony, or even on your windowsill.
The history of pepper cultivation stretches back thousands of years, with evidence suggesting that peppers were first domesticated in South America. From ancient civilizations using them for culinary and medicinal purposes to their global spread through trade and exploration, peppers have always held a special place in human culture. Today, they’re a staple ingredient in cuisines worldwide, adding spice, color, and essential nutrients to our diets.
But why should you embark on this pepper-growing adventure? Well, besides the obvious benefit of having a readily available supply of fresh, delicious peppers, growing peppers at home offers a fantastic opportunity to connect with nature, learn new skills, and even save money. Plus, it’s incredibly rewarding to nurture a plant from seed to harvest, knowing that you’ve created something beautiful and beneficial with your own two hands. This DIY guide will equip you with all the essential knowledge and practical tips you need to successfully grow peppers at home, regardless of your experience level. Let’s get started!
Growing Peppers at Home: From Seed to Salsa!
Hey there, fellow gardening enthusiasts! I’m so excited to share my tried-and-true method for growing peppers at home. Whether you’re dreaming of spicy jalapeños, sweet bell peppers, or something a little more exotic, this guide will walk you through every step of the process. Get ready to have a bumper crop of peppers that will make your taste buds sing!
Choosing Your Peppers
Before we dive into the nitty-gritty, let’s talk about pepper varieties. The possibilities are endless! Consider these factors when making your selection:
* Spice Level: Do you prefer mild, medium, or hot peppers? The Scoville scale measures the heat of peppers, so do a little research to find varieties that suit your palate.
* Pepper Type: Bell peppers, jalapeños, habaneros, cayenne peppers, banana peppers – the list goes on! Each type has a unique flavor and texture.
* Growing Conditions: Some peppers thrive in hot, sunny climates, while others prefer cooler temperatures. Make sure to choose varieties that are well-suited to your local climate.
* Space: Consider the size of your garden or containers. Some pepper plants can grow quite large, so choose varieties that will fit comfortably in your available space.
Some of my personal favorites include:
* Jalapeños: A classic choice for adding a kick to salsas, nachos, and more.
* Bell Peppers: Versatile and delicious, perfect for stuffing, roasting, or adding to salads.
* Cayenne Peppers: Great for making homemade hot sauce or adding a fiery touch to your cooking.
* Serrano Peppers: A bit hotter than jalapeños, these are perfect for adding a serious punch of flavor.
Starting Your Peppers from Seed
Starting peppers from seed gives you the widest selection of varieties and is surprisingly rewarding. Here’s how I do it:
* Timing is Key: Peppers need a long growing season, so start your seeds indoors 6-8 weeks before the last expected frost.
* Gather Your Supplies: You’ll need:
* Pepper seeds
* Seed starting trays or small pots
* Seed starting mix (a light, sterile mix is essential)
* A heat mat (optional, but highly recommended)
* A grow light (also optional, but provides the best results)
* A spray bottle filled with water
* Sowing the Seeds:
1. Moisten the seed starting mix. It should be damp but not soggy.
2. Fill your seed starting trays or pots with the moistened mix.
3. Sow the seeds about ¼ inch deep, placing 2-3 seeds in each cell or pot.
4. Gently cover the seeds with more seed starting mix.
5. Lightly mist the surface with water.
6. Label each tray or pot with the pepper variety.
* Creating the Ideal Environment:
1. Place the seed starting trays or pots on a heat mat, if using. Peppers germinate best in warm temperatures (around 80-85°F).
2. Position a grow light above the trays or pots, if using. Keep the light on for 14-16 hours per day.
3. If you don’t have a heat mat or grow light, place the trays or pots in a warm, sunny location.
* Maintaining Moisture:
1. Keep the seed starting mix consistently moist, but not waterlogged.
2. Mist the surface with water as needed to prevent it from drying out.
3. Avoid overwatering, as this can lead to fungal diseases.
* Germination:
1. Pepper seeds can take anywhere from 7-21 days to germinate, depending on the variety and growing conditions.
2. Be patient and keep the soil consistently moist and warm.
* Thinning Seedlings:
1. Once the seedlings have emerged and have a few sets of true leaves (the leaves that look like miniature pepper plant leaves), thin them to one seedling per cell or pot.
2. Choose the strongest, healthiest-looking seedling and snip off the others at the soil line.
Transplanting Your Pepper Seedlings
Once your pepper seedlings are strong and healthy, it’s time to transplant them into larger pots or directly into your garden.
* Hardening Off:
1. Before transplanting, you need to “harden off” your seedlings. This process gradually acclimates them to outdoor conditions.
2. Start by placing the seedlings outdoors in a sheltered location for a few hours each day.
3. Gradually increase the amount of time they spend outdoors over the course of a week or two.
4. Protect them from direct sunlight and strong winds during this process.
* Choosing a Location:
1. Peppers need at least 6-8 hours of sunlight per day.
2. Choose a location with well-drained soil.
3. If you’re growing peppers in containers, make sure the pots are large enough to accommodate the mature plants (at least 5 gallons).
* Preparing the Soil:
1. Amend the soil with compost or other organic matter to improve drainage and fertility.
2. Peppers prefer slightly acidic soil (pH 6.0-6.8).
* Transplanting:
1. Dig a hole that is slightly larger than the root ball of the seedling.
2. Gently remove the seedling from its pot or tray.
3. Loosen the roots slightly.
4. Place the seedling in the hole and backfill with soil.
5. Water thoroughly.
6. Space pepper plants 18-24 inches apart.
* Mulching:
1. Apply a layer of mulch around the base of the plants to help retain moisture, suppress weeds, and regulate soil temperature.
Caring for Your Pepper Plants
Once your pepper plants are in the ground, it’s important to provide them with the care they need to thrive.
* Watering:
1. Water pepper plants regularly, especially during hot, dry weather.
2. Aim to keep the soil consistently moist, but not waterlogged.
3. Water deeply and less frequently, rather than shallowly and often.
* Fertilizing:
1. Fertilize pepper plants every 2-3 weeks with a balanced fertilizer.
2. Look for a fertilizer that is specifically formulated for vegetables.
3. Avoid over-fertilizing, as this can lead to excessive foliage growth and fewer peppers.
* Pruning:
1. Pruning pepper plants can help to improve air circulation and encourage fruit production.
2. Remove any suckers (small shoots that grow from the base of the plant) to direct energy towards the main stems.
3. You can also prune away any yellowing or diseased leaves.
* Pest and Disease Control:
1. Keep an eye out for common pepper pests, such as aphids, spider mites, and whiteflies.
2. Treat infestations with insecticidal soap or neem oil.
3. Prevent fungal diseases by providing good air circulation and avoiding overwatering.
4. If you notice any signs of disease, remove the affected leaves or plants immediately.
* Supporting Plants:
1. Some pepper varieties, especially those with heavy fruit, may need to be supported with stakes or cages.
2. This will prevent the plants from falling over and breaking.
Harvesting Your Peppers
The moment you’ve been waiting for! Harvesting your peppers is the most rewarding part of the process.
* Timing:
1. Peppers are typically ready to harvest when they have reached their mature size and color.
2. The exact timing will depend on the variety of pepper.
3. For example, bell peppers are usually harvested when they are fully colored (green, red, yellow, or orange).
4. Jalapeños are typically harvested when they are green and firm.
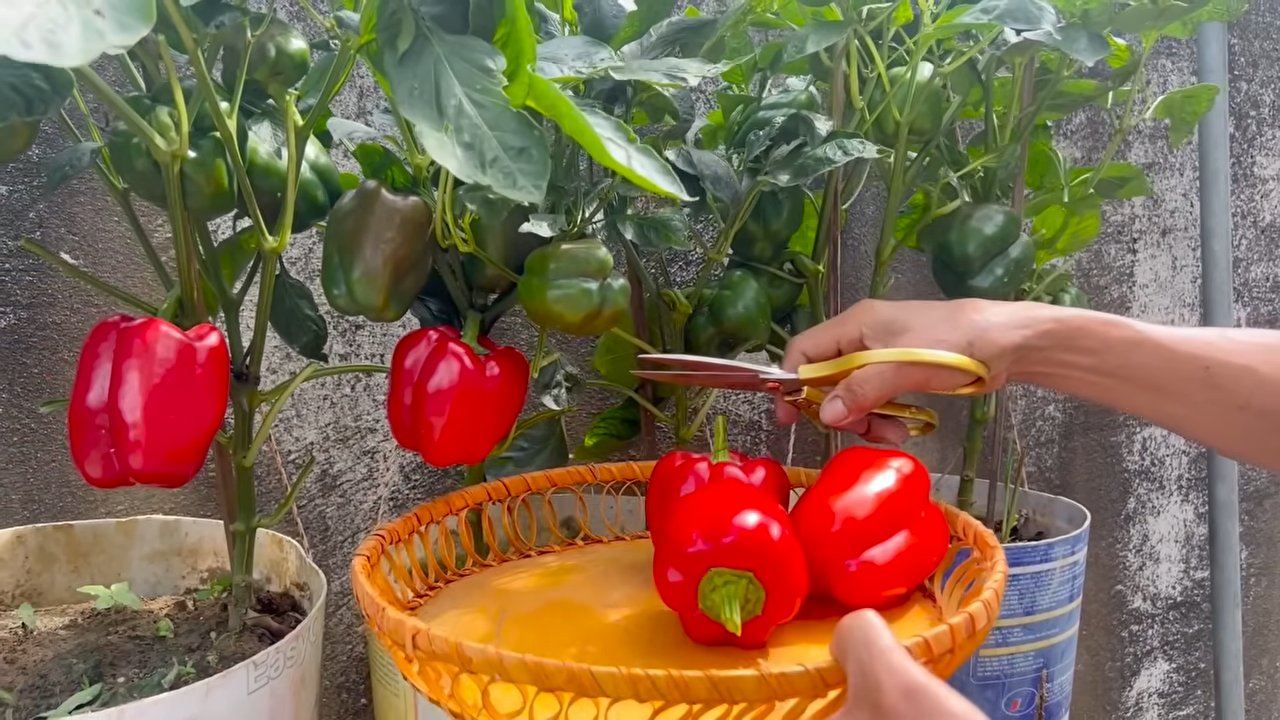
* Harvesting Technique:
1. Use a sharp knife or scissors to cut the peppers from the plant.
2. Leave a small piece of stem attached to the pepper.
3. Avoid pulling the peppers off the plant, as this can damage the stems.
* Storage:
1. Freshly harvested peppers can be stored in the refrigerator for up to a week.
2. For longer storage, you can freeze, dry, or pickle your peppers.
Troubleshooting
Even with the best care, you might encounter some challenges along the way. Here are a few common problems and
Conclusion
So, there you have it! Growing peppers at home, especially with these simple DIY tricks, is not just a rewarding experience; it’s a gateway to fresher, more flavorful meals and a deeper connection with the food you consume. We’ve explored how to optimize your pepper plants’ growth, from seed to harvest, using readily available materials and straightforward techniques. Forget expensive gardening supplies and complicated procedures. This approach is all about simplicity, sustainability, and, most importantly, delicious peppers.
Why is this DIY approach a must-try? Because it empowers you to take control of your food source, reduces your reliance on store-bought produce (often laden with pesticides), and provides a tangible connection to the natural world. Imagine the satisfaction of serving a salsa made entirely from peppers you nurtured from tiny seeds! The flavor difference alone is worth the effort. Plus, it’s a fantastic way to reduce your carbon footprint and contribute to a more sustainable lifestyle.
But the beauty of growing peppers at home lies in its adaptability. Feel free to experiment with different varieties. Try growing bell peppers, jalapeños, habaneros, or even exotic varieties like Scotch bonnets. Each pepper offers a unique flavor profile and level of heat, allowing you to tailor your garden to your specific culinary preferences.
Consider these variations to further enhance your pepper-growing experience:
* Vertical Gardening: If you’re short on space, explore vertical gardening techniques. Peppers thrive in containers, making them ideal for balconies, patios, or even indoor spaces with sufficient sunlight.
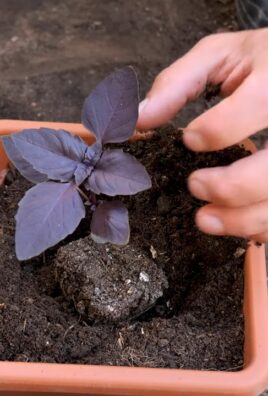
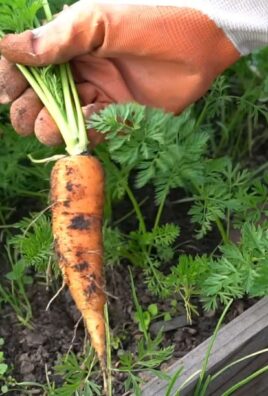
* Companion Planting: Plant basil, marigolds, or carrots alongside your peppers. These companion plants can deter pests and improve the overall health of your pepper plants.
* Fermented Pepper Sauce: Once you’ve harvested your peppers, consider making your own fermented pepper sauce. Fermentation not only enhances the flavor but also adds beneficial probiotics to your diet.
* Pepper Powder: Dehydrate your peppers and grind them into a homemade pepper powder. This is a great way to preserve your harvest and add a spicy kick to your dishes year-round.
We’ve armed you with the knowledge and inspiration to embark on your pepper-growing journey. Now, it’s time to get your hands dirty! Don’t be afraid to experiment, learn from your mistakes, and most importantly, have fun. Growing peppers at home is a continuous learning process, and each season brings new opportunities for discovery.
We are confident that you will find these DIY tricks invaluable in your quest for a bountiful pepper harvest. So, grab your seeds, gather your supplies, and get ready to experience the joy of growing your own peppers.
We’d love to hear about your experiences! Share your tips, tricks, and photos of your pepper plants in the comments below. Let’s create a community of passionate pepper growers and inspire others to embrace the joys of homegrown produce. Happy gardening!
Frequently Asked Questions (FAQ)
What is the best time to start growing peppers from seed?
The ideal time to start growing peppers from seed depends on your climate. In general, you should start seeds indoors 6-8 weeks before the last expected frost. This allows the seedlings to develop a strong root system before being transplanted outdoors. If you live in a warmer climate with a longer growing season, you can start seeds later. A good rule of thumb is to check your local frost dates and count back 6-8 weeks. Starting too early can result in leggy seedlings that are difficult to transplant, while starting too late can shorten your growing season and reduce your harvest.
How much sunlight do pepper plants need?
Pepper plants are sun-loving vegetables and require at least 6-8 hours of direct sunlight per day to thrive. Insufficient sunlight can lead to stunted growth, reduced fruit production, and bland-tasting peppers. If you’re growing peppers indoors, supplement natural sunlight with grow lights to ensure they receive adequate light. When transplanting outdoors, choose a location that receives full sun throughout the day. Pay attention to shadows cast by trees or buildings, and ensure your pepper plants are not shaded for extended periods.
What kind of soil is best for growing peppers?
Peppers prefer well-draining, fertile soil with a slightly acidic pH (around 6.0-6.8). Amend your soil with compost or other organic matter to improve drainage, aeration, and nutrient content. Avoid heavy clay soils that retain too much water, as this can lead to root rot. If you’re growing peppers in containers, use a high-quality potting mix specifically formulated for vegetables. Consider adding perlite or vermiculite to improve drainage and prevent compaction. Regular soil testing can help you determine the pH and nutrient levels of your soil and make necessary adjustments.
How often should I water my pepper plants?
Water your pepper plants deeply and regularly, especially during hot, dry weather. The frequency of watering will depend on factors such as soil type, climate, and plant size. As a general rule, water when the top inch of soil feels dry to the touch. Avoid overwatering, as this can lead to root rot and other fungal diseases. Use a soaker hose or drip irrigation to deliver water directly to the roots, minimizing water loss through evaporation. Mulching around your pepper plants can also help retain moisture and suppress weeds.
What are some common pests and diseases that affect pepper plants?
Pepper plants are susceptible to various pests and diseases, including aphids, spider mites, whiteflies, blossom-end rot, and fungal diseases. Regularly inspect your plants for signs of infestation or disease, and take action promptly to prevent further damage. Use organic pest control methods such as insecticidal soap, neem oil, or horticultural oil to control pests. Ensure good air circulation around your plants to prevent fungal diseases. Blossom-end rot is caused by calcium deficiency and can be prevented by ensuring adequate calcium levels in the soil and consistent watering.
How do I prevent blossom-end rot in my peppers?
Blossom-end rot, a common issue in peppers, is caused by a calcium deficiency at the blossom end of the fruit. It manifests as a dark, sunken spot. To prevent it, ensure your soil has adequate calcium levels by amending it with bone meal or crushed eggshells before planting. Maintain consistent watering to help the plant absorb calcium effectively. Avoid over-fertilizing with nitrogen, as this can interfere with calcium uptake. Foliar sprays of calcium chloride can also provide a temporary solution.
When should I harvest my peppers?
The timing of pepper harvest depends on the variety and your desired level of ripeness. Bell peppers are typically harvested when they are fully colored and firm to the touch. Hot peppers can be harvested at various stages of ripeness, depending on your preference for heat level. Use pruning shears or a sharp knife to cut the peppers from the plant, leaving a small stem attached. Regular harvesting encourages the plant to produce more peppers.
Can I grow peppers indoors?
Yes, you can grow peppers indoors, but it requires providing them with adequate sunlight or supplemental lighting. Choose a sunny location near a south-facing window, or use grow lights to provide at least 6-8 hours of light per day. Use a well-draining potting mix and water regularly. Consider using a self-pollinating variety or manually pollinate the flowers with a small brush. Indoor pepper plants may require more frequent fertilization than outdoor plants.
How do I encourage my pepper plants to produce more fruit?
To encourage your pepper plants to produce more fruit, ensure they receive adequate sunlight, water, and nutrients. Prune your plants to remove suckers (small shoots that grow between the main stem and branches) to improve air circulation and direct energy towards fruit production. Fertilize regularly with a balanced fertilizer or a fertilizer specifically formulated for vegetables. Harvest peppers regularly to encourage the plant to produce more fruit.
What are some good companion plants for peppers?
Companion planting can benefit pepper plants by deterring pests, attracting beneficial insects, and improving soil health. Some good companion plants for peppers include basil, marigolds, carrots, onions, and garlic. Basil repels aphids and whiteflies, while marigolds deter nematodes. Carrots attract beneficial insects that prey on pests, and onions and garlic repel various pests. Avoid planting peppers near fennel or brassicas (such as cabbage and broccoli), as these can inhibit their growth.
Leave a Comment