
Growing Peas Indoors: Imagine harvesting fresh, sweet peas right from your windowsill, even in the dead of winter! It sounds like a gardener’s dream, right? Well, it doesn’t have to be just a dream. This DIY guide will unlock the secrets to successfully growing peas indoors, bringing a touch of spring to your home year-round.
The humble pea has a rich history, dating back thousands of years. From ancient civilizations using them as a staple food source to modern-day gardeners cherishing their delicate flavor, peas have always held a special place in our hearts (and stomachs!). While traditionally grown outdoors, the desire for fresh produce regardless of the season has led to innovative techniques like indoor gardening.
Why should you learn this DIY trick? Because let’s face it, store-bought peas just don’t compare to the taste of freshly picked ones. Plus, growing peas indoors is a fantastic way to add some greenery to your living space, boost your mood, and even reduce your carbon footprint by cutting down on transportation emissions. I’m excited to share these simple yet effective methods that will have you enjoying homegrown peas in no time, regardless of your outdoor space or the weather outside!
Erbsen drinnen anbauen: Dein DIY-Guide für eine reiche Ernte
Hey Gartenfreunde! Habt ihr auch genug vom tristen Winter und sehnt euch nach frischem Grün? Dann habe ich genau das Richtige für euch: Erbsen drinnen anbauen! Ja, das geht wirklich und ist gar nicht so schwer. Ich zeige euch, wie ihr euch auch ohne Garten eine kleine Ernte ins Haus holen könnt. Los geht’s!
Was du brauchst: Die Vorbereitung
Bevor wir loslegen, brauchen wir natürlich das richtige Equipment. Hier ist eine Liste mit allem, was ihr benötigt:
* Erbsensamen: Wählt am besten Sorten, die für den Anbau in Töpfen geeignet sind. Zwergerbsen oder Markerbsen sind eine gute Wahl. Achtet auf die Beschreibung auf der Samenpackung.
* Töpfe oder Behälter: Sie sollten mindestens 15 cm tief sein, damit die Erbsenwurzeln genug Platz haben. Ihr könnt normale Blumentöpfe, Pflanzkästen oder sogar recycelte Behälter verwenden. Hauptsache, sie haben Abzugslöcher, damit das Wasser ablaufen kann.
* Anzuchterde: Normale Blumenerde ist oft zu nährstoffreich für junge Erbsenpflanzen. Anzuchterde ist lockerer und enthält weniger Dünger.
* Rankhilfe: Erbsen sind Kletterpflanzen und brauchen etwas, woran sie sich festhalten können. Ihr könnt Bambusstäbe, kleine Gitter oder sogar Zweige aus dem Garten verwenden.
* Sprühflasche: Zum Befeuchten der Erde.
* Gießkanne: Zum Gießen der Pflanzen.
* Helles Fenster oder Pflanzenlampe: Erbsen brauchen viel Licht, um gut zu wachsen.
* Optional: Ein kleines Gewächshaus oder eine Plastiktüte, um die Keimung zu beschleunigen.
Schritt-für-Schritt-Anleitung: So gelingt der Anbau
Jetzt geht’s ans Eingemachte! Hier ist eine detaillierte Anleitung, wie ihr eure Erbsen drinnen anbauen könnt:
1. Die Samen vorbereiten
* Einweichen: Legt die Erbsensamen für 24 Stunden in lauwarmes Wasser. Das beschleunigt die Keimung. Ich mache das immer in einem kleinen Glas auf der Fensterbank.
* Abtrocknen: Gießt das Wasser ab und lasst die Samen kurz abtrocknen.
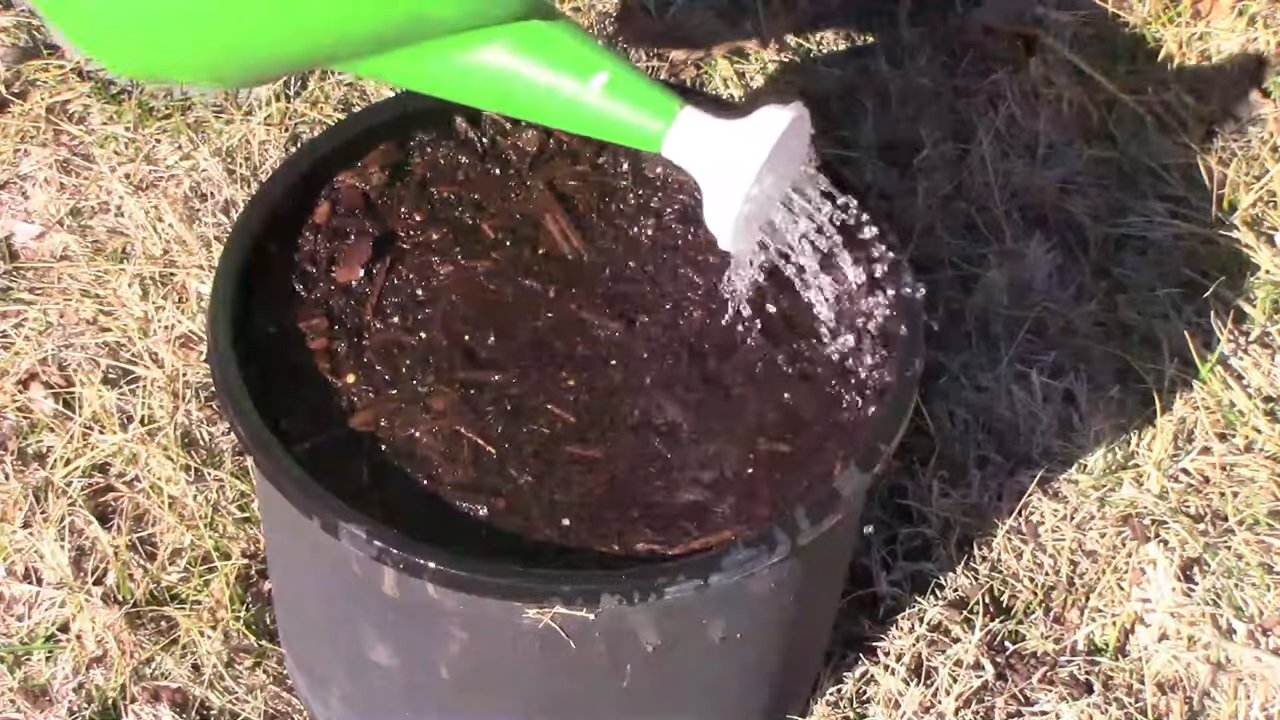
2. Die Töpfe vorbereiten
* Befüllen: Füllt die Töpfe oder Behälter mit Anzuchterde. Lasst etwa 2-3 cm Platz bis zum Rand.
* Anfeuchten: Befeuchtet die Erde mit der Sprühflasche. Sie sollte feucht, aber nicht nass sein.
3. Die Samen säen
* Aussaat: Drückt die Samen etwa 2-3 cm tief in die Erde. Achtet darauf, dass zwischen den Samen genügend Platz ist (ca. 5 cm). Ich säe meistens 5-6 Samen pro Topf.
* Bedecken: Bedeckt die Samen mit einer dünnen Schicht Erde.
* Angießen: Gießt die Erde vorsichtig mit der Gießkanne an.
4. Die Keimung fördern
* Standort: Stellt die Töpfe an einen warmen und hellen Ort. Ein Fensterbrett mit direkter Sonneneinstrahlung ist ideal.
* Feuchtigkeit: Haltet die Erde feucht, aber nicht nass. Besprüht sie regelmäßig mit der Sprühflasche.
* Optional: Um die Keimung zu beschleunigen, könnt ihr die Töpfe mit einem kleinen Gewächshaus oder einer Plastiktüte abdecken. Achtet aber darauf, dass ihr die Abdeckung regelmäßig lüftet, um Schimmelbildung zu vermeiden.
5. Die Pflege der jungen Pflanzen
* Licht: Sobald die ersten Keimlinge erscheinen, brauchen sie viel Licht. Wenn ihr kein helles Fenster habt, solltet ihr eine Pflanzenlampe verwenden.
* Gießen: Gießt die Pflanzen regelmäßig, aber vermeidet Staunässe. Die Erde sollte immer leicht feucht sein.
* Düngen: Nach etwa 2-3 Wochen könnt ihr mit dem Düngen beginnen. Verwendet einen organischen Flüssigdünger und haltet euch an die Dosierungsanleitung auf der Verpackung.
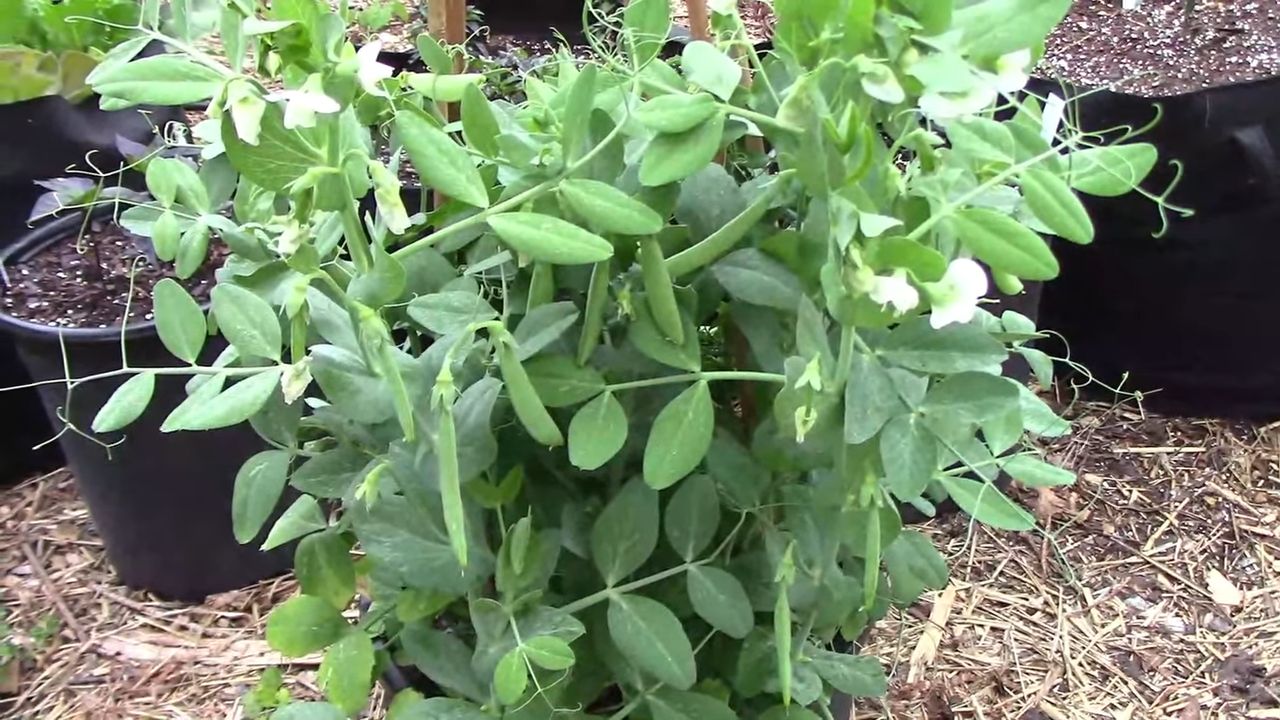
* Rankhilfe: Sobald die Pflanzen etwa 10 cm hoch sind, brauchen sie eine Rankhilfe. Steckt die Bambusstäbe oder das Gitter in die Erde und helft den Pflanzen, sich daran festzuhalten.
6. Die Ernte
* Reife: Die Erbsen sind erntereif, wenn die Hülsen prall gefüllt sind und sich leicht öffnen lassen.
* Ernten: Pflückt die Erbsen vorsichtig von der Pflanze.
* Genießen: Frische Erbsen schmecken am besten direkt aus dem Garten (oder eben vom Fensterbrett!). Ihr könnt sie roh essen, kochen oder in Salaten verwenden.
Häufige Probleme und Lösungen
Auch beim Erbsenanbau drinnen kann es zu Problemen kommen. Hier sind einige häufige Probleme und wie ihr sie lösen könnt:
* Schlechte Keimung: Wenn die Samen nicht keimen, kann das verschiedene Ursachen haben. Vielleicht waren die Samen zu alt, die Erde zu trocken oder zu nass, oder die Temperatur zu niedrig. Achtet darauf, frische Samen zu verwenden, die Erde feucht zu halten und die Töpfe an einen warmen Ort zu stellen.
* Gelbe Blätter: Gelbe Blätter können ein Zeichen für Nährstoffmangel sein. Düngt die Pflanzen mit einem organischen Flüssigdünger.
* Schädlinge: Auch drinnen können Schädlinge auftreten. Kontrolliert die Pflanzen regelmäßig auf Blattläuse oder andere Schädlinge. Bei Befall könnt ihr die Pflanzen mit einer milden Seifenlösung besprühen.
* Pilzkrankheiten: Bei zu hoher Luftfeuchtigkeit können Pilzkrankheiten auftreten. Achtet auf eine gute Belüftung und vermeidet Staunässe.
Zusätzliche Tipps für eine reiche Ernte
Hier sind noch ein paar zusätzliche Tipps, die euch helfen, eine reiche Ernte zu erzielen:
* Sortenwahl: Wählt Sorten, die für den Anbau in Töpfen geeignet sind. Zwergerbsen oder Markerbsen sind eine gute Wahl.
* Regelmäßiges Gießen: Erbsen brauchen regelmäßig Wasser, aber vermeidet Staunässe.
* Ausreichend Licht: Erbsen brauchen viel Licht, um gut zu wachsen. Wenn ihr kein helles Fenster habt, solltet ihr eine Pflanzenlampe verwenden.
* Düngen: Düngt die Pflanzen regelmäßig mit einem organischen Flüssigdünger.
* Rankhilfe: Gebt den Pflanzen eine Rankhilfe, damit sie sich festhalten können.
* Regelmäßige Kontrolle: Kontrolliert die Pflanzen regelmäßig auf Schädlinge und Krankheiten.
* Erntezeitpunkt: Erntet die Erbsen, wenn die Hülsen prall gefüllt sind und sich leicht öffnen lassen.
Fazit
Ich hoffe, diese Anleitung hat euch geholfen, eure eigenen Erbsen drinnen anzubauen. Es ist wirklich ein tolles Gefühl, frische Erbsen aus dem eigenen “Garten” zu ernten. Probiert es einfach aus und lasst euch überraschen! Viel Erfolg und viel Spaß beim Gärtnern!
Conclusion
So, there you have it! Growing peas indoors is not only achievable, but it’s also a surprisingly rewarding experience. Forget relying solely on the fleeting outdoor growing season. With this simple DIY trick, you can enjoy the sweet, tender taste of homegrown peas year-round, right from the comfort of your own home.
Why is this a must-try? Because it offers a multitude of benefits. First and foremost, it puts you in control. You dictate the environment, ensuring optimal growing conditions free from pests, unpredictable weather, and other outdoor challenges. Secondly, it’s incredibly space-efficient. Whether you live in a sprawling suburban home or a cozy city apartment, you can cultivate a thriving pea patch with minimal space requirements. And finally, let’s not forget the sheer joy of nurturing something from seed to harvest. There’s a unique satisfaction in watching those tiny sprouts emerge and transform into a bountiful crop.
But don’t think you’re limited to just one type of pea! Experiment with different varieties to discover your favorites. Try growing snow peas for their delicate pods, snap peas for their crunchy sweetness, or shelling peas for their plump, juicy kernels. You can also adjust the growing medium to suit your preferences. While we’ve outlined a simple soil-based method, you could also explore hydroponics for an even more efficient and controlled growing environment. Consider adding companion plants like marigolds to deter pests naturally.
Growing peas indoors is a fantastic way to bring a touch of nature into your home and enjoy fresh, healthy produce all year long. It’s a project that’s both educational and delicious, perfect for families, gardening enthusiasts, and anyone looking to add a little green to their lives.
We’re confident that you’ll find this DIY trick to be a game-changer. So, grab your seeds, gather your supplies, and get ready to embark on your indoor pea-growing adventure. Don’t be afraid to experiment, adapt, and personalize the process to suit your own unique needs and preferences.
And most importantly, we want to hear about your experience! Share your successes, your challenges, and your tips with us in the comments below. Let’s create a community of indoor pea growers and learn from each other. What varieties did you try? What growing medium did you use? What challenges did you overcome? Your insights could be invaluable to other aspiring indoor gardeners.
So, what are you waiting for? Start growing peas indoors today and experience the joy of fresh, homegrown produce year-round! We can’t wait to see what you create.
Frequently Asked Questions (FAQ)
What kind of peas grow best indoors?
While many pea varieties can be grown indoors, bush varieties tend to be more suitable than vining types due to their compact size. Look for varieties labeled as “bush peas” or “dwarf peas.” Some popular choices include ‘Little Marvel,’ ‘Sugar Ann’ (a bush snap pea), and ‘Tom Thumb.’ These varieties are naturally shorter and require less support than their vining counterparts, making them ideal for indoor containers. However, even bush varieties may benefit from some support, such as small stakes or a trellis, to keep them upright and prevent them from sprawling. Experimenting with different varieties is part of the fun, so don’t be afraid to try a few to see which ones thrive best in your indoor environment.
How much light do indoor peas need?
Peas are sun-loving plants and require at least 6-8 hours of direct sunlight per day to thrive. If you don’t have a sunny window that provides sufficient light, you’ll need to supplement with artificial lighting. Grow lights, particularly LED grow lights, are an excellent option. Position the lights about 6-12 inches above the plants and keep them on for 14-16 hours per day. Monitor your plants closely and adjust the light as needed. If the leaves are pale or the stems are leggy, it’s a sign that they’re not getting enough light. Remember, adequate light is crucial for healthy growth and abundant pea production.
What kind of soil should I use for growing peas indoors?
Peas prefer well-draining soil that is rich in organic matter. A good potting mix specifically formulated for vegetables is an excellent choice. Avoid using garden soil, as it can be too heavy and may contain pests or diseases. You can also amend your potting mix with compost or other organic materials to improve its fertility and drainage. Ensure the soil is loose and airy to allow for proper root development. Good drainage is essential to prevent root rot, which can be a common problem with indoor plants.
How often should I water my indoor pea plants?
Water your pea plants regularly, keeping the soil consistently moist but not waterlogged. Check the soil moisture level daily by sticking your finger about an inch into the soil. If it feels dry, it’s time to water. Water deeply, allowing the excess water to drain out of the bottom of the container. Avoid overhead watering, as this can promote fungal diseases. Instead, water at the base of the plants. The frequency of watering will depend on factors such as the size of the container, the temperature, and the humidity level.
Do I need to fertilize my indoor pea plants?
Peas are relatively light feeders, but they will benefit from occasional fertilization. Use a balanced liquid fertilizer diluted to half strength every 2-3 weeks. Look for a fertilizer that is specifically formulated for vegetables. Avoid over-fertilizing, as this can lead to excessive foliage growth at the expense of pea production. You can also amend the soil with compost or other organic materials to provide a slow-release source of nutrients.
How do I support my indoor pea plants?
Even bush varieties of peas may benefit from some support to keep them upright and prevent them from sprawling. You can use small stakes, a trellis, or even a tomato cage to provide support. Insert the support into the container when you plant the seeds to avoid damaging the roots later. As the plants grow, gently tie the stems to the support using soft twine or plant ties.
How long does it take for peas to mature indoors?
The time it takes for peas to mature indoors will depend on the variety and the growing conditions. Generally, it takes about 60-70 days from planting to harvest. Check the seed packet for specific information on the maturity time for your chosen variety. You’ll know the peas are ready to harvest when the pods are plump and filled with peas.
How do I harvest my indoor peas?
Harvest your peas regularly to encourage continued production. Pick the pods when they are plump and filled with peas, but before they become tough or starchy. For snow peas and snap peas, harvest when the pods are still flat and tender. Gently snap the pods off the plant, being careful not to damage the stems.
What are some common problems with growing peas indoors?
Some common problems with growing peas indoors include aphids, spider mites, and fungal diseases. Inspect your plants regularly for signs of pests or diseases. If you find any pests, you can try washing them off with a strong stream of water or using insecticidal soap. To prevent fungal diseases, ensure good air circulation and avoid overhead watering.
Can I grow peas indoors year-round?
Yes, you can grow peas indoors year-round as long as you provide them with the necessary light, water, and nutrients. With proper care, you can enjoy a continuous harvest of fresh, homegrown peas, regardless of the season.


Leave a Comment