
Growing Ginger at Home might seem like a challenge reserved for seasoned gardeners, but I’m here to tell you it’s surprisingly achievable, even if you’re a complete beginner! Forget those expensive trips to the grocery store every time you need a little zing in your stir-fry or a soothing cup of ginger tea. Imagine harvesting your own fresh, flavorful ginger right from your backyard or even your windowsill.
Ginger, with its fiery kick and numerous health benefits, has been cultivated for thousands of years. Originating in South Asia, it quickly spread across the globe, becoming a staple in traditional medicine and cuisines worldwide. From ancient Ayurvedic practices to modern-day culinary creations, ginger’s versatility is undeniable. But why rely on store-bought ginger when you can easily cultivate your own supply?
Let’s face it, store-bought ginger can sometimes be a gamble. You never quite know how fresh it is or how long it’s been sitting on the shelf. Growing Ginger at Home ensures you have access to the freshest, most potent ginger whenever you need it. Plus, it’s incredibly rewarding to nurture a plant from rhizome to harvest. In this article, I’ll share my favorite DIY tricks and hacks to help you successfully grow ginger at home, regardless of your gardening experience. Get ready to unleash your inner gardener and enjoy the delicious rewards!

Ingwer zu Hause anbauen: Dein eigener kleiner Ingwer-Garten
Ich liebe Ingwer! Ob im Tee, im Curry oder einfach so geknabbert – die scharfe Knolle ist ein echter Alleskönner. Und das Beste: Du kannst Ingwer ganz einfach selbst zu Hause anbauen! Ich zeige dir, wie es geht. Keine Angst, es ist einfacher als du denkst und macht richtig Spaß.
Was du brauchst:
* Ein Stück Ingwerwurzel (Rhizom) aus dem Supermarkt oder Bioladen. Achte darauf, dass es prall, fest und am besten schon kleine grüne “Augen” hat.
* Einen Topf oder Behälter mit guter Drainage (Löcher im Boden sind wichtig!). Er sollte mindestens 15 cm tief sein, besser noch etwas größer.
* Hochwertige Blumenerde oder eine Mischung aus Blumenerde, Kompost und etwas Sand. Ingwer mag es locker und nährstoffreich.
* Eine Sprühflasche mit Wasser.
* Einen warmen, hellen Standort, aber ohne direkte Mittagssonne.
* Geduld! Ingwer wächst nicht über Nacht.
Schritt-für-Schritt-Anleitung:
1. Die Ingwerwurzel vorbereiten:
* Nimm deine Ingwerwurzel und schau sie dir genau an. Siehst du die kleinen grünen Knospen, die “Augen”? Das sind die Stellen, aus denen die neuen Triebe wachsen werden.
* Wenn deine Ingwerwurzel sehr groß ist, kannst du sie in mehrere Stücke schneiden. Wichtig ist, dass jedes Stück mindestens ein oder zwei “Augen” hat. Lass die Schnittflächen am besten ein paar Tage antrocknen, bevor du sie einpflanzt. Das verhindert Fäulnis.
* Ich persönlich lasse die Wurzel oft einfach so, wie sie ist, wenn sie nicht zu riesig ist.
2. Den Topf vorbereiten:
* Fülle den Topf mit deiner Blumenerde-Mischung. Lass oben etwa 2-3 cm Platz.
* Befeuchte die Erde leicht mit der Sprühflasche. Sie sollte feucht, aber nicht nass sein.
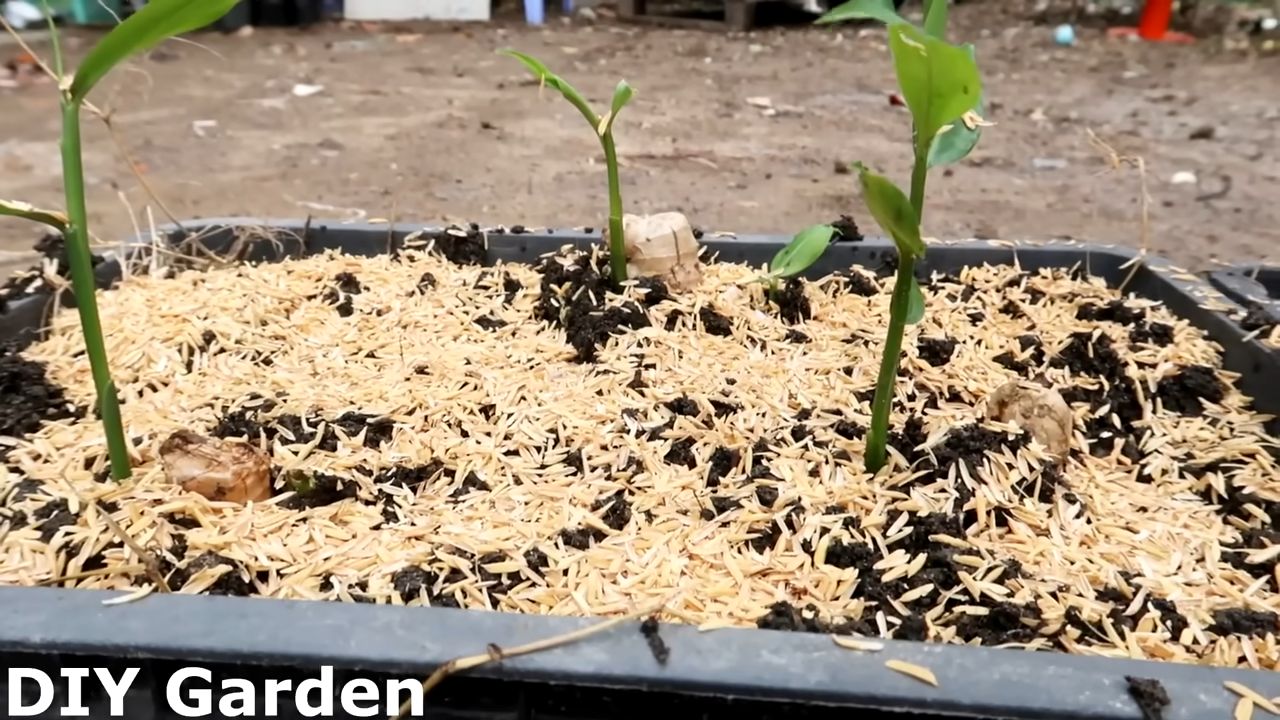
3. Die Ingwerwurzel einpflanzen:
* Lege die Ingwerwurzel horizontal auf die Erde, mit den “Augen” nach oben.
* Bedecke die Wurzel mit etwa 2-3 cm Erde. Drücke die Erde leicht an.
* Gieße die Erde vorsichtig an, sodass sie gut durchfeuchtet ist. Achte darauf, dass das Wasser gut ablaufen kann.
4. Der richtige Standort:
* Stelle den Topf an einen warmen und hellen Ort. Ideal ist ein Fensterbrett, das nach Osten oder Westen ausgerichtet ist. Vermeide direkte Mittagssonne, da diese die Blätter verbrennen kann.
* Ingwer mag es warm, aber nicht zu heiß. Eine Temperatur zwischen 20 und 25 Grad Celsius ist ideal.
5. Die Pflege:
* Halte die Erde immer leicht feucht, aber vermeide Staunässe. Ich gieße meinen Ingwer etwa alle 2-3 Tage, je nach Wetterlage.
* Besprühe die Blätter regelmäßig mit Wasser, um die Luftfeuchtigkeit zu erhöhen. Das mag Ingwer sehr gerne.
* Dünge den Ingwer alle paar Wochen mit einem organischen Flüssigdünger. Das sorgt für ein kräftiges Wachstum.
* Achte auf Schädlinge. Blattläuse können manchmal auftreten. Wenn du welche entdeckst, kannst du sie mit einem milden Insektizid oder einer Seifenlösung bekämpfen.
Geduld ist gefragt:
Es kann ein paar Wochen dauern, bis die ersten Triebe aus der Erde sprießen. Hab Geduld! Ingwer ist kein Schnellstarter. Aber wenn er einmal loslegt, wächst er recht zügig.
Erntezeit:
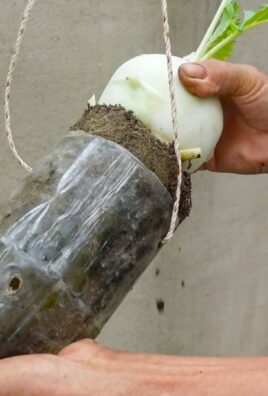
* Nach etwa 8-10 Monaten kannst du deinen eigenen Ingwer ernten!
* Du kannst entweder die ganze Pflanze aus dem Topf nehmen und die Wurzeln ernten, oder du schneidest einfach ein Stück der Wurzel ab und lässt den Rest im Topf weiterwachsen.
* Wenn du die ganze Pflanze erntest, kannst du einen Teil der Wurzeln für die nächste Anbausaison aufbewahren.
Noch ein paar Tipps:
* Die richtige Erde: Ingwer mag eine lockere, gut durchlässige Erde. Ich mische meine Blumenerde immer mit etwas Kompost und Sand. Das sorgt für eine gute Drainage und versorgt den Ingwer mit Nährstoffen.
* Der richtige Topf: Achte darauf, dass der Topf groß genug ist. Ingwer braucht Platz, um sich auszubreiten. Ein Topf mit einem Durchmesser von mindestens 20 cm ist ideal.
* Die richtige Bewässerung: Gieße den Ingwer regelmäßig, aber vermeide Staunässe. Die Erde sollte immer leicht feucht sein.
* Der richtige Standort: Ingwer mag es warm und hell, aber nicht zu sonnig. Ein Fensterbrett, das nach Osten oder Westen ausgerichtet ist, ist ideal.
* Die richtige Düngung: Dünge den Ingwer alle paar Wochen mit einem organischen Flüssigdünger. Das sorgt für ein kräftiges Wachstum.
* Überwinterung: In kälteren Regionen solltest du den Ingwer im Winter ins Haus holen. Er verträgt keinen Frost.
Häufige Probleme und Lösungen:
* Gelbe Blätter: Gelbe Blätter können ein Zeichen für zu viel oder zu wenig Wasser sein. Überprüfe die Feuchtigkeit der Erde und passe die Bewässerung entsprechend an.
* Braune Blattspitzen: Braune Blattspitzen können ein Zeichen für zu trockene Luft sein. Besprühe die Blätter regelmäßig mit Wasser, um die Luftfeuchtigkeit zu erhöhen.
* Kein Wachstum: Wenn der Ingwer nicht wächst, kann das an zu wenig Licht, zu wenig Wärme oder zu wenig Nährstoffen liegen. Stelle den Topf an einen helleren und wärmeren Ort und dünge den Ingwer regelmäßig.
* Fäulnis: Fäulnis kann auftreten, wenn die Erde zu nass ist. Achte darauf, dass das Wasser gut ablaufen kann und vermeide Staunässe.
Ingwer im Wasser ziehen (Alternative Methode):
Man kann Ingwer auch zuerst im Wasser ziehen, bevor man ihn in Erde pflanzt. Das beschleunigt oft den Keimprozess.
1. Vorbereitung: Wähle ein Stück Ingwer mit sichtbaren “Augen”.
2. Einweichen: Lege den Ingwer in ein Glas oder eine Schale mit Wasser, sodass etwa die Hälfte der Wurzel bedeckt ist.
3. Standort: Stelle das Glas an einen hellen, warmen Ort, aber ohne direkte Sonneneinstrahlung.
4. Wasserwechsel: Wechsle das Wasser alle paar Tage.
5. Wurzelbildung: Nach einigen Tagen oder Wochen sollten sich kleine Wurzeln bilden.
6. Einpflanzen: Sobald die Wurzeln etwa 1-2 cm lang sind, kannst du den Ingwer in Erde pflanzen, wie oben beschrieben.
Warum Ingwer selbst anbauen?
Es gibt viele Gründe, warum ich es liebe, Ingwer selbst anzubauen:
* Frischer Ingwer: Du hast immer frischen Ingwer zur Hand, wenn du ihn brauchst.
* Bio-Qualität: Du weißt genau, was in deinem Ingwer steckt, da du ihn selbst anbaust.
* Nachhaltigkeit: Du sparst Transportwege und Verpackungsmüll.
* Entspannung: Gärtnern ist eine tolle Möglichkeit, um zu entspannen und Stress abzubauen.
* Es macht Spaß!: Es ist einfach toll zu sehen, wie etwas wächst, das man selbst gepflanzt hat.
Ich hoffe, diese Anleitung hilft dir dabei, deinen eigenen kleinen Ingwer-Garten zu starten! Viel Erfolg und viel Spaß beim Gärtnern!
Conclusion
So, there you have it! Growing ginger at home is not only achievable, but it’s also a deeply rewarding experience that connects you directly to the food you consume. Forget those bland, store-bought rhizomes that have been sitting on shelves for weeks. Imagine the vibrant, spicy flavor of freshly harvested ginger, ready to elevate your culinary creations and soothe your senses. This DIY project transforms a simple root into a source of pride and a constant supply of fresh, organic ginger.
Why is this a must-try? Because it empowers you to control the quality and freshness of your ginger. You know exactly where it came from, how it was grown, and what (or rather, what wasn’t) used in its cultivation. This is especially important if you’re conscious about avoiding pesticides and herbicides. Plus, let’s be honest, there’s a certain magic in nurturing something from a small piece of root to a thriving plant. It’s a tangible connection to nature, right in your own home.
But the benefits don’t stop there. Growing your own ginger allows for experimentation. Try different varieties! Explore the nuances of flavor between young ginger, with its delicate sweetness, and mature ginger, with its fiery kick. Consider growing ginger in containers of varying sizes to see how it affects the yield. You can even experiment with different soil mixes to optimize growth.
Variations to Consider:
* Ornamental Ginger: While this article focuses on culinary ginger, remember that there are also beautiful ornamental ginger varieties. These add a tropical flair to your garden or indoor space with their stunning foliage and exotic flowers. While not typically used for cooking, they offer a visual delight.
* Ginger Tea Garden: Combine your ginger plants with other herbs like mint, lemon balm, and chamomile to create a dedicated tea garden. This ensures a constant supply of fresh ingredients for soothing and flavorful herbal teas.
* Hydroponic Ginger: For the more adventurous gardener, consider growing ginger hydroponically. This soilless method can lead to faster growth and higher yields, but it requires a bit more technical knowledge and setup.
We wholeheartedly encourage you to embark on this ginger-growing adventure. It’s a simple, satisfying, and sustainable way to enhance your culinary life and connect with nature. Don’t be intimidated by the process; it’s far more forgiving than you might think. Start small, be patient, and enjoy the journey.
Most importantly, we want to hear about your experiences! Share your successes, your challenges, and your tips with us and the rest of the community. Did you try a particular variety of ginger? Did you encounter any unexpected hurdles? What did you learn along the way? Your insights can help others succeed in their own ginger-growing endeavors. Post your photos, share your stories, and let’s cultivate a thriving community of home-grown ginger enthusiasts. We are confident that you will enjoy the process of growing ginger at home.
Frequently Asked Questions (FAQ)
1. What kind of ginger should I use to start growing?
The best ginger to use for planting is fresh, plump ginger rhizomes from a grocery store or nursery. Look for rhizomes that are firm, with visible “eyes” or buds. Organic ginger is often recommended, as it’s less likely to have been treated with growth inhibitors. Avoid ginger that is shriveled, soft, or moldy. If you can find ginger specifically labeled as “seed ginger,” that’s even better, as it’s been specifically cultivated for propagation.
2. How long does it take to grow ginger from rhizome to harvest?
Generally, it takes about 8-10 months from planting to harvest mature ginger. However, you can start harvesting young ginger (also known as “spring ginger”) after about 4-6 months. Young ginger has a milder flavor and more tender texture. The exact time will depend on your climate, growing conditions, and the variety of ginger you’re growing.
3. What are the ideal growing conditions for ginger?
Ginger thrives in warm, humid conditions with partial shade. It prefers well-draining soil that is rich in organic matter. The ideal temperature range is between 65°F and 90°F (18°C and 32°C). Protect your ginger plants from direct sunlight, especially during the hottest part of the day. Consistent moisture is crucial, but avoid overwatering, which can lead to root rot.
4. Can I grow ginger indoors?
Yes, you can absolutely grow ginger indoors! Choose a pot that is at least 12 inches deep and wide to accommodate the growing rhizomes. Use a well-draining potting mix and place the pot in a location that receives bright, indirect light. You may need to supplement with artificial light if you don’t have enough natural light. Maintain consistent moisture and humidity levels. A humidifier or pebble tray can help increase humidity.
5. What are some common problems when growing ginger, and how can I prevent them?
Some common problems include root rot, fungal diseases, and pests like aphids and spider mites. To prevent root rot, ensure your soil is well-draining and avoid overwatering. Improve air circulation around the plants. For fungal diseases, use a fungicide if necessary and remove any affected leaves. Regularly inspect your plants for pests and treat them with insecticidal soap or neem oil.
6. How do I harvest ginger?
To harvest mature ginger, carefully dig up the entire plant. You can then break off pieces of the rhizome as needed. For young ginger, you can simply dig around the plant and harvest a few pieces of the rhizome without disturbing the rest of the plant. After harvesting, wash the ginger thoroughly and store it in the refrigerator or freezer.
7. How do I store ginger after harvesting?
Freshly harvested ginger can be stored in the refrigerator for several weeks. Wrap it in a paper towel and place it in a plastic bag to prevent it from drying out. For longer storage, you can freeze ginger. Peel and chop the ginger into smaller pieces, then freeze them in a single layer on a baking sheet. Once frozen, transfer the pieces to a freezer bag or container. You can also grate the ginger before freezing it.
8. What kind of fertilizer should I use for ginger?
Ginger benefits from regular fertilization. Use a balanced organic fertilizer with a ratio of 10-10-10 or 14-14-14. You can also use compost tea or other organic soil amendments to provide nutrients. Fertilize every 2-3 weeks during the growing season.
9. Can I grow ginger in colder climates?
Yes, you can grow ginger in colder climates, but you’ll need to start it indoors and provide extra protection during the winter months. Start the rhizomes indoors in pots about 6-8 weeks before the last expected frost. Once the weather warms up, you can move the plants outdoors. In colder climates, you may need to bring the plants back indoors before the first frost.
10. Is growing ginger at home worth the effort?
Absolutely! Growing your own ginger offers numerous benefits, including access to fresh, organic ginger, the satisfaction of nurturing a plant from seed to harvest, and the opportunity to experiment with different varieties and growing techniques. The flavor of homegrown ginger is far superior to store-bought ginger, and you’ll have a constant supply of this versatile spice at your fingertips. The process of growing ginger at home is a rewarding experience.


Leave a Comment