
Growing Giant Mustard Greens might sound like something out of a fairytale, but trust me, it’s totally achievable right in your own backyard! Forget those puny, store-bought greens – we’re talking about colossal, flavorful leaves that will make your salads and stir-fries sing. For centuries, mustard greens have been a staple in Asian and Southern cuisines, prized not only for their peppery bite but also for their impressive nutritional benefits. Think of it as a delicious way to boost your vitamin intake!
But why settle for ordinary when you can have extraordinary? That’s where this DIY guide comes in. I’m going to share my secrets for cultivating truly gigantic mustard greens, even if you’re a complete beginner. Imagine the bragging rights when you present a single leaf that dwarfs your dinner plate! More importantly, think of the savings on groceries and the satisfaction of harvesting your own bountiful crop. So, grab your gardening gloves, and let’s embark on this exciting journey of growing giant mustard greens together. You’ll be amazed at what you can accomplish with a little know-how and a touch of green thumb magic!
Riesige Senfblätter selbst anbauen: Mein DIY-Leitfaden für den Garten
Ich liebe Senfblätter! Ihr pfeffriger Geschmack ist einfach unschlagbar, und wenn sie riesig sind, kann man sie für alles verwenden, von Salaten bis hin zu Wraps. Ich habe mich entschlossen, meine eigenen riesigen Senfblätter anzubauen, und ich möchte meine Erfahrungen mit euch teilen. Es ist einfacher, als man denkt!
Was du brauchst:
* Senfsamen (Ich empfehle ‘Giant Red’ oder ‘Florida Broadleaf’ für große Blätter)
* Gartenboden oder Pflanzerde
* Kompost oder organischen Dünger
* Gießkanne oder Schlauch
* Gartengeräte (Schaufel, Harke)
* Optional: Pflanzgefäße oder Hochbeete
* Optional: Mulch (Stroh, Holzhackschnitzel)
Schritt-für-Schritt-Anleitung:
1. Die Vorbereitung des Bodens:
1. Wähle den richtigen Standort: Senfblätter lieben die Sonne, also wähle einen Standort in deinem Garten, der mindestens 6 Stunden Sonnenlicht pro Tag bekommt. Ein halbschattiger Standort funktioniert auch, aber die Blätter werden möglicherweise nicht so groß.
2. Bereite den Boden vor: Senfblätter bevorzugen einen gut durchlässigen, fruchtbaren Boden. Wenn dein Boden schwer oder lehmig ist, arbeite Kompost oder andere organische Stoffe ein, um die Drainage und die Nährstoffversorgung zu verbessern. Ich habe festgestellt, dass ein Verhältnis von 1:1 von Gartenerde zu Kompost ideal ist.
3. Lockere den Boden auf: Verwende eine Schaufel oder eine Gartenkralle, um den Boden bis zu einer Tiefe von etwa 20-30 cm aufzulockern. Entferne Steine, Wurzeln und andere Hindernisse.
4. Glätte die Oberfläche: Verwende eine Harke, um die Oberfläche des Bodens zu glätten. Dies erleichtert das gleichmäßige Aussäen der Samen.
2. Aussaat der Senfsamen:
1. Wähle den richtigen Zeitpunkt: Senfblätter sind ein kühles Saison-Gemüse, das am besten im Frühjahr oder Herbst angebaut wird. Ich säe meine Samen normalerweise 2-4 Wochen vor dem letzten erwarteten Frost im Frühjahr oder 6-8 Wochen vor dem ersten erwarteten Frost im Herbst.
2. Säe die Samen aus: Senfsamen sind sehr klein, daher ist es wichtig, sie nicht zu dicht auszusäen. Streue die Samen gleichmäßig über die vorbereitete Bodenfläche. Ich verwende gerne meine Finger, um die Samen leicht in den Boden zu drücken.
3. Bedecke die Samen: Bedecke die Samen mit einer dünnen Schicht Erde (etwa 0,5 cm).
4. Gieße vorsichtig: Gieße die ausgesäten Samen vorsichtig mit einer Gießkanne oder einem Schlauch mit einem sanften Sprühkopf. Achte darauf, den Boden nicht zu stark zu befeuchten, da dies die Samen wegspülen kann.
3. Pflege der Senfpflanzen:
1. Halte den Boden feucht: Senfblätter benötigen eine gleichmäßige Feuchtigkeit, um gut zu wachsen. Gieße die Pflanzen regelmäßig, besonders bei trockenem Wetter. Ich überprüfe den Boden täglich und gieße, wenn sich die oberste Schicht trocken anfühlt.
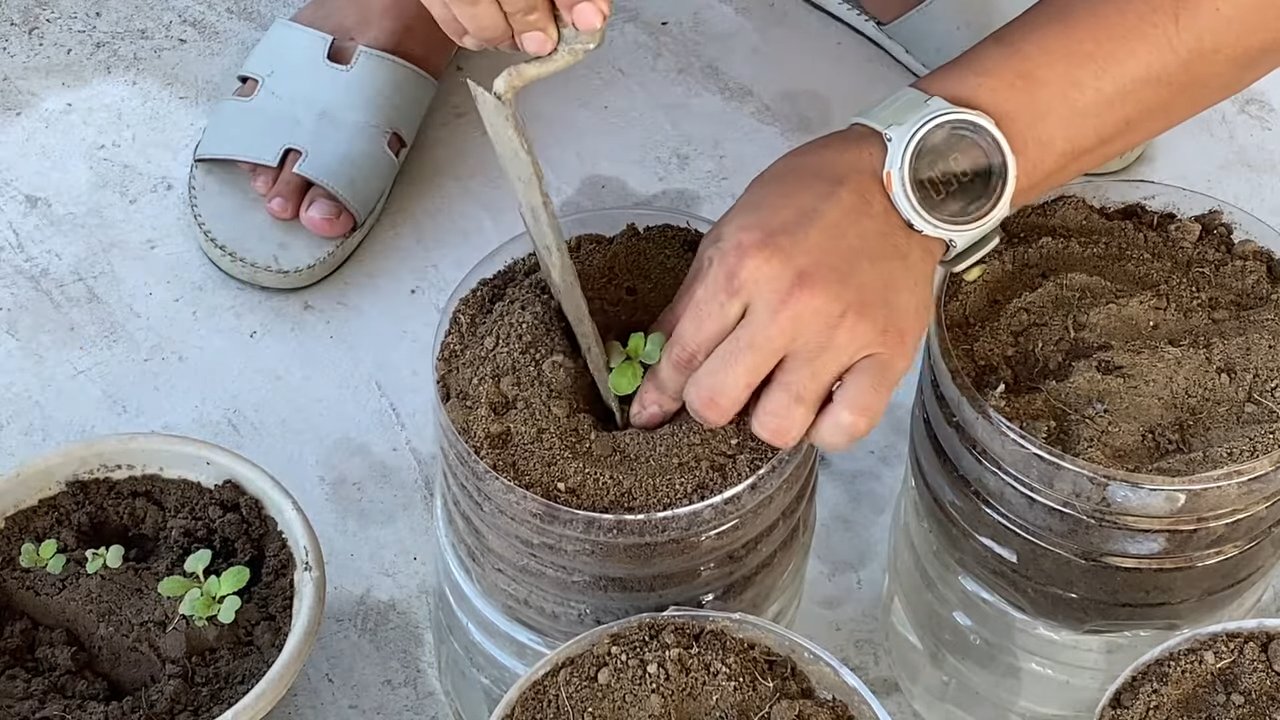
2. Dünne die Pflanzen aus: Sobald die Sämlinge ein paar Zentimeter groß sind, dünne sie aus, so dass sie etwa 15-20 cm voneinander entfernt stehen. Dies gibt den Pflanzen genügend Platz zum Wachsen und verhindert, dass sie sich gegenseitig konkurrieren. Die ausgedünnten Sämlinge können in Salaten verwendet werden!
3. Dünge die Pflanzen: Senfblätter sind Starkzehrer und profitieren von einer regelmäßigen Düngung. Ich dünge meine Pflanzen alle 2-3 Wochen mit einem organischen Dünger oder Komposttee.
4. Kontrolliere Schädlinge und Krankheiten: Senfblätter können von verschiedenen Schädlingen und Krankheiten befallen werden, wie z. B. Blattläusen, Kohlweißlingen und Mehltau. Überprüfe die Pflanzen regelmäßig auf Anzeichen von Befall und ergreife bei Bedarf Maßnahmen. Ich verwende gerne natürliche Schädlingsbekämpfungsmittel wie Neemöl oder Insektizidseife.
5. Mulche die Pflanzen: Das Mulchen der Pflanzen hilft, die Feuchtigkeit im Boden zu halten, Unkraut zu unterdrücken und die Bodentemperatur zu regulieren. Ich verwende gerne Stroh oder Holzhackschnitzel als Mulch.
4. Ernte der riesigen Senfblätter:
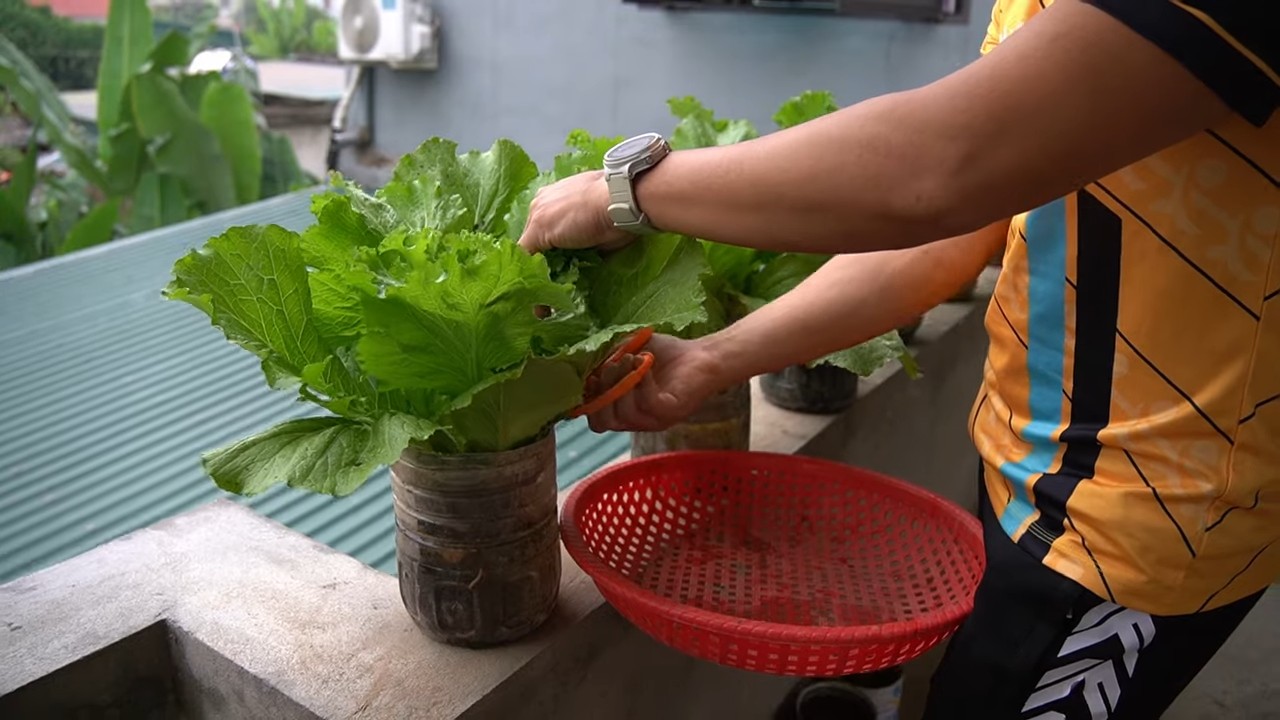
1. Wähle den richtigen Zeitpunkt: Senfblätter können geerntet werden, sobald sie eine angemessene Größe erreicht haben. Ich ernte meine Blätter normalerweise, wenn sie etwa 20-30 cm lang sind. Für riesige Blätter warte ich, bis sie noch größer sind, manchmal bis zu 45 cm oder mehr!
2. Ernte die Blätter: Verwende ein scharfes Messer oder eine Schere, um die Blätter am Stiel abzuschneiden. Du kannst entweder die ganzen Pflanzen ernten oder nur die äußeren Blätter, so dass die inneren Blätter weiterwachsen können. Ich bevorzuge es, nur die äußeren Blätter zu ernten, da dies die Erntezeit verlängert.
3. Wasche die Blätter: Wasche die geernteten Blätter gründlich unter kaltem Wasser, um Schmutz und Insekten zu entfernen.
4. Lagere die Blätter: Senfblätter sind am besten, wenn sie frisch verzehrt werden. Sie können jedoch auch für ein paar Tage im Kühlschrank aufbewahrt werden. Ich wickle die Blätter gerne in ein feuchtes Papiertuch und lege sie in einen Plastikbeutel.
Tipps und Tricks für noch größere Senfblätter:
* Wähle die richtige Sorte: Einige Senfsorten sind von Natur aus größer als andere. ‘Giant Red’ und ‘Florida Broadleaf’ sind zwei Sorten, die für ihre großen Blätter bekannt sind.
* Sorge für ausreichend Nährstoffe: Senfblätter benötigen viele Nährstoffe, um groß zu werden. Dünge die Pflanzen regelmäßig mit einem organischen Dünger oder Komposttee. Ich habe auch gute Ergebnisse mit Knochenmehl und Blutmehl erzielt.
* Gieße regelmäßig: Senfblätter benötigen eine gleichmäßige Feuchtigkeit, um gut zu wachsen. Gieße die Pflanzen regelmäßig, besonders bei trockenem Wetter.
* Schütze die Pflanzen vor Schädlingen und Krankheiten: Schädlinge und Krankheiten können das Wachstum der Senfblätter beeinträchtigen. Überprüfe die Pflanzen regelmäßig auf Anzeichen von Befall und ergreife bei Bedarf Maßnahmen.
* Ernte die Blätter regelmäßig: Das regelmäßige Ernten der Blätter fördert das Wachstum neuer Blätter. Ich ernte meine Blätter normalerweise alle paar Tage.
* Schatten in der Mittagssonne: Wenn du in einer Region mit sehr heißem Klima lebst, kann es hilfreich sein, die Senfblätter während der heißesten Stunden des Tages zu beschatten. Dies verhindert, dass die Blätter verbrennen und das Wachstum verlangsamt wird. Ich verwende dafür gerne ein Schattiernetz.
* Bodenuntersuchung: Eine Bodenuntersuchung kann dir helfen, den Nährstoffgehalt deines Bodens zu bestimmen und festzustellen, welche Nährstoffe du hinzufügen musst, um das Wachstum deiner Senfblätter zu fördern.
* Verwende Hochbeete: Hochbeete erwärmen sich schneller als der Boden und bieten eine bessere Drainage, was zu einem schnelleren Wachstum führen kann.
Verwendung der riesigen Senfblätter:
* Salate: Junge, zarte Senfblätter sind eine köstliche Ergänzung zu Salaten.
* Wraps: Große Senfblätter können als Wraps für Sandwiches oder andere Füllungen verwendet werden.
* Gekocht: Senfblätter können gekocht, gedünstet oder gebraten werden. Sie sind eine köstliche Beilage zu Fleisch oder Fisch.
* Suppen und Eintöpfe: Senfblätter können Suppen und Eintöpfen hinzugefügt werden, um ihnen einen pfeffrigen Geschmack zu verleihen.
* Pesto: Senfblätter können zu Pesto verarbeitet werden.
Ich hoffe, dieser Leitfaden hilft dir dabei, deine eigenen riesigen Senfblätter anzubauen! Es ist ein lohn
Conclusion
So, there you have it! Mastering the art of growing giant mustard greens isn’t just about bragging rights; it’s about unlocking a world of flavor, nutrition, and gardening satisfaction. We’ve walked you through the key steps, from selecting the right seeds to nurturing your plants with the care they deserve. The payoff? A bountiful harvest of colossal mustard greens that will elevate your culinary creations and impress your friends and family.
But why is this DIY trick a must-try? Because it empowers you to take control of your food source, ensuring freshness, quality, and a connection to the earth that you simply can’t get from store-bought produce. Imagine the vibrant, peppery taste of freshly harvested giant mustard greens in your salads, stir-fries, or even pickled for a tangy treat. The possibilities are endless!
Don’t be afraid to experiment with variations. Try different varieties of mustard greens to find your favorite flavor profile. Some gardeners swear by adding compost tea to their watering routine for an extra boost of nutrients. Others prefer to succession plant, sowing seeds every few weeks to ensure a continuous harvest throughout the growing season. Consider companion planting with other vegetables like radishes or carrots to deter pests and improve soil health. You can even try growing them in containers if you have limited garden space. The key is to adapt the techniques to your specific environment and preferences.
We understand that gardening can sometimes feel daunting, but we encourage you to embrace the challenge and give this DIY trick a try. The rewards are well worth the effort. Not only will you enjoy the delicious taste of your homegrown giant mustard greens, but you’ll also experience the satisfaction of nurturing something from seed to harvest.
We’re confident that with a little patience and attention, you can successfully grow your own impressive crop of giant mustard greens. And we want to hear all about your experience! Share your photos, tips, and challenges in the comments below. Let’s create a community of giant mustard green enthusiasts and learn from each other’s successes and failures. Your insights could be invaluable to other gardeners embarking on this exciting journey. So, grab your seeds, get your hands dirty, and prepare to be amazed by the incredible potential of growing giant mustard greens!
Frequently Asked Questions (FAQ)
What exactly makes mustard greens “giant”?
The term “giant” refers to the size of the leaves that these particular varieties of mustard greens can achieve. While standard mustard greens typically grow to a manageable size, giant varieties, like ‘Giant Southern Curled’ or ‘Florida Broadleaf,’ can produce leaves that are significantly larger, sometimes reaching over two feet in length. This impressive size is due to a combination of genetics, optimal growing conditions, and proper care. The larger leaves provide a greater yield per plant, making them a popular choice for gardeners looking to maximize their harvest.
How long does it take to grow giant mustard greens from seed to harvest?
The time it takes to grow giant mustard greens from seed to harvest can vary depending on factors such as climate, soil conditions, and the specific variety you’re growing. Generally, you can expect to harvest your first leaves within 40-60 days after sowing the seeds. However, for the leaves to reach their full “giant” potential, you may need to wait a bit longer, perhaps 60-80 days. Keep a close eye on your plants and harvest the leaves when they reach the desired size and tenderness. Regular harvesting will also encourage continued growth.
What are the best soil conditions for growing giant mustard greens?
Giant mustard greens thrive in well-drained soil that is rich in organic matter. Before planting, amend your soil with compost or well-rotted manure to improve its fertility and drainage. A slightly acidic to neutral soil pH (around 6.0 to 7.0) is ideal. If your soil is heavy clay, consider adding sand or other amendments to improve drainage. Proper soil preparation is crucial for healthy growth and the development of large, flavorful leaves.
How much sunlight do giant mustard greens need?
Mustard greens generally prefer full sun, meaning at least 6 hours of direct sunlight per day. However, in hotter climates, they can benefit from some afternoon shade to prevent the leaves from scorching. If you’re growing them indoors, provide them with ample light using grow lights. Insufficient sunlight can result in leggy growth and smaller leaves.
What are some common pests and diseases that affect mustard greens, and how can I prevent them?
Common pests that can affect mustard greens include aphids, flea beetles, cabbage worms, and slugs. To prevent pest infestations, consider using row covers to protect your plants. You can also attract beneficial insects to your garden by planting flowers that attract pollinators. Regularly inspect your plants for signs of pests and address any infestations promptly using organic pest control methods such as insecticidal soap or neem oil. Diseases like downy mildew and white rust can also affect mustard greens, especially in humid conditions. To prevent these diseases, ensure good air circulation around your plants and avoid overhead watering.
Can I grow giant mustard greens in containers?
Yes, you can successfully grow giant mustard greens in containers, especially if you have limited garden space. Choose a large container (at least 12 inches in diameter) with drainage holes. Fill the container with a high-quality potting mix that is rich in organic matter. Water regularly and fertilize as needed. Container-grown mustard greens may require more frequent watering and fertilization than those grown in the ground.
How often should I water my giant mustard greens?
Water your giant mustard greens regularly, especially during dry periods. Aim to keep the soil consistently moist but not waterlogged. Water deeply at the base of the plants, avoiding overhead watering to prevent fungal diseases. The frequency of watering will depend on factors such as climate, soil type, and the size of your plants. Check the soil moisture regularly and adjust your watering schedule accordingly.
When is the best time to harvest giant mustard greens?
Harvest your giant mustard greens when the leaves reach the desired size and tenderness. Younger leaves tend to be more tender and have a milder flavor, while older leaves can be tougher and more pungent. You can harvest individual leaves as needed or harvest the entire plant at once. Regular harvesting will encourage continued growth and prolong the harvest season.
How do I store harvested giant mustard greens?
To store harvested giant mustard greens, wash them thoroughly and pat them dry. Wrap them loosely in a damp paper towel and store them in a plastic bag in the refrigerator. They should stay fresh for several days. You can also freeze mustard greens for longer storage. To freeze them, blanch them in boiling water for a few minutes, then cool them in ice water. Drain them well and store them in freezer bags.
Are there any specific fertilizer recommendations for growing giant mustard greens?
Mustard greens benefit from regular fertilization, especially during their active growth phase. Use a balanced fertilizer that is rich in nitrogen to promote leafy growth. You can also supplement with compost tea or other organic fertilizers. Avoid over-fertilizing, as this can lead to excessive growth and a bitter taste. Follow the instructions on the fertilizer label and adjust the amount based on the needs of your plants.
Leave a Comment