
Growing corn on concrete? Sounds impossible, right? I thought so too, until I stumbled upon a revolutionary DIY trick that’s changing the way urban gardeners approach their passion. Forget sprawling fields and acres of farmland; we’re bringing the taste of summer to even the most unlikely of spaces!
For centuries, corn has been a staple crop, deeply woven into the fabric of countless cultures. From the ancient civilizations of Mesoamerica, where it was revered as a sacred gift, to its modern-day prominence in global cuisine, corn’s journey is a testament to its resilience and adaptability. But what happens when traditional growing methods are no longer feasible? That’s where our innovative DIY solution comes in.
Let’s face it, not everyone has access to a lush backyard or fertile soil. Apartment dwellers, city residents, and those with limited mobility often feel excluded from the joys of home gardening. But with this simple yet effective hack, you can defy the limitations of your environment and cultivate your own delicious corn, even if all you have is a concrete patio. Imagine the satisfaction of harvesting your own homegrown corn, knowing you’ve overcome the odds and brought a touch of nature to your urban oasis. This growing corn on concrete method is not just about food; it’s about empowerment, sustainability, and reconnecting with the earth, no matter where you live.
Mais Anbauen auf Beton: Ein DIY-Projekt für den Urbanen Gärtner
Hey Leute! Habt ihr auch so wenig Platz im Garten, aber trotzdem Lust auf frischen, selbst angebauten Mais? Dann habe ich hier genau das Richtige für euch: Maisanbau auf Beton! Ja, ihr habt richtig gelesen. Mit ein paar Tricks und Kniffen könnt ihr auch auf versiegelten Flächen leckeren Mais ernten. Lasst uns loslegen!
Was ihr braucht:
* Große Pflanzgefäße: Am besten eignen sich große Kübel oder Mörtelwannen mit einem Volumen von mindestens 50 Litern pro Pflanze. Je größer, desto besser!
* Hochwertige Pflanzerde: Mais ist ein Starkzehrer, also braucht er nährstoffreiche Erde.
* Kompost: Für eine extra Portion Nährstoffe und eine gute Bodenstruktur.
* Langzeitdünger: Mais braucht während der Wachstumsphase viel Dünger.
* Mais-Saatgut: Wählt eine Sorte, die für den Anbau im Kübel geeignet ist. Es gibt spezielle Sorten für den Balkon oder kleine Gärten.
* Drainagematerial: Blähton, Kies oder Tonscherben für den Boden der Pflanzgefäße.
* Gießkanne oder Gartenschlauch: Für die Bewässerung.
* Pflanzschaufel: Zum Befüllen der Pflanzgefäße.
* Stützstäbe (optional): Bei hohen Sorten, um die Pflanzen vor Windbruch zu schützen.
* Mulchmaterial (optional): Stroh, Holzhackschnitzel oder Rasenschnitt, um die Feuchtigkeit im Boden zu halten und Unkraut zu unterdrücken.
Die Vorbereitung: Der Grundstein für eine erfolgreiche Ernte
Bevor wir mit dem Pflanzen loslegen, müssen wir die Pflanzgefäße vorbereiten. Das ist super wichtig, damit der Mais sich wohlfühlt und gut wachsen kann.
1. Drainage legen: Zuerst füllen wir den Boden der Pflanzgefäße mit einer Schicht Drainagematerial. Das verhindert Staunässe, die Mais gar nicht mag. Eine Schicht von etwa 5-10 cm Blähton, Kies oder Tonscherben ist ideal.
2. Erde mischen: Jetzt mischen wir die Pflanzerde mit Kompost. Das Verhältnis sollte etwa 2:1 sein (2 Teile Erde, 1 Teil Kompost). So bekommen die jungen Maispflanzen gleich einen guten Start.
3. Gefäße befüllen: Die Pflanzgefäße werden nun mit der Erdmischung befüllt. Lasst etwa 5-10 cm Platz bis zum Rand, damit ihr später noch gießen könnt, ohne dass die Erde überschwappt.
4. Langzeitdünger einarbeiten: Mischt den Langzeitdünger gemäß der Packungsanweisung unter die oberste Erdschicht. So ist die Nährstoffversorgung für die nächsten Wochen gesichert.
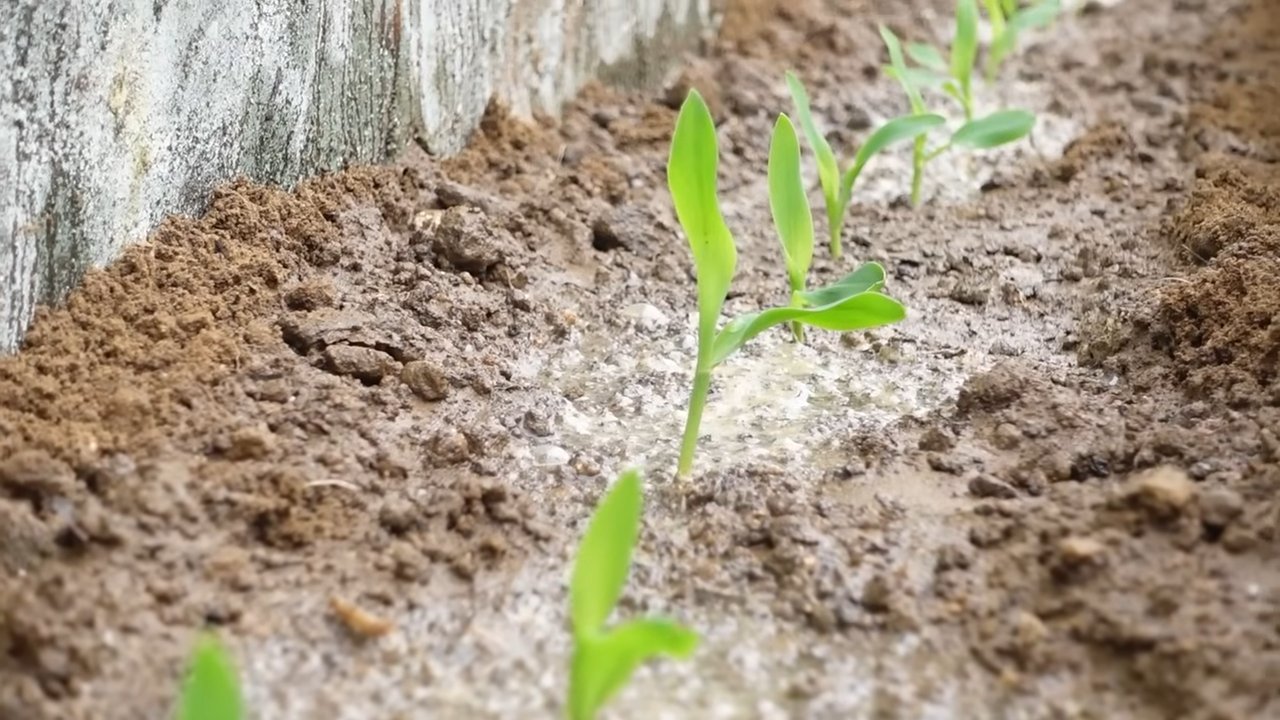
Die Aussaat: Der Start ins Mais-Abenteuer
Jetzt kommt der spannende Teil: die Aussaat! Achtet darauf, dass die Bodentemperatur mindestens 10 Grad Celsius beträgt, bevor ihr mit dem Säen beginnt. Am besten wartet ihr bis nach den Eisheiligen (Mitte Mai).
1. Saattiefe bestimmen: Die Maiskörner werden etwa 3-5 cm tief in die Erde gelegt.
2. Aussaat: Legt 3-4 Maiskörner pro Pflanzgefäß in die Erde. So habt ihr eine höhere Wahrscheinlichkeit, dass mindestens eine Pflanze keimt.
3. Mit Erde bedecken: Bedeckt die Maiskörner mit Erde und drückt sie leicht an.
4. Angießen: Gießt die Erde vorsichtig an, damit sie gut durchfeuchtet ist. Achtet darauf, dass die Erde nicht zu nass wird.
Die Pflege: Damit der Mais prächtig gedeiht
Nach der Aussaat ist es wichtig, den Mais gut zu pflegen, damit er prächtig gedeiht.
1. Gießen: Mais braucht regelmäßig Wasser, besonders während der Wachstumsphase und der Kolbenbildung. Gießt am besten morgens oder abends, damit das Wasser nicht so schnell verdunstet. Achtet darauf, dass die Erde immer leicht feucht ist, aber nicht nass.
2. Düngen: Mais ist ein Starkzehrer und braucht während der Wachstumsphase viel Dünger. Neben dem Langzeitdünger, den wir bereits eingearbeitet haben, könnt ihr alle 2-3 Wochen mit einem Flüssigdünger nachdüngen. Achtet dabei auf die Dosierungsanleitung des Herstellers.
3. Ausdünnen: Wenn mehrere Pflanzen gekeimt sind, müsst ihr die schwächsten entfernen, damit die stärkste Pflanze genügend Platz und Nährstoffe hat. Lasst pro Pflanzgefäß nur eine Pflanze stehen.
4. Unkraut entfernen: Haltet die Pflanzgefäße frei von Unkraut, damit der Mais nicht um Nährstoffe und Wasser konkurrieren muss.
5. Stützen: Bei hohen Sorten kann es sinnvoll sein, die Pflanzen mit Stützstäben zu stabilisieren, besonders wenn sie an einem windigen Standort stehen.
6. Mulchen (optional): Eine Mulchschicht aus Stroh, Holzhackschnitzeln oder Rasenschnitt hilft, die Feuchtigkeit im Boden zu halten und Unkraut zu unterdrücken.
Die Bestäubung: Der Schlüssel zur Maisernte
Mais ist ein Fremdbestäuber, das heißt, er braucht Pollen von einer anderen Pflanze, um Kolben zu bilden. Wenn ihr nur eine Pflanze habt, kann es schwierig werden, eine gute Ernte zu erzielen.
1. Mehrere Pflanzen: Am besten pflanzt ihr mehrere Maispflanzen in euren Pflanzgefäßen, um die Bestäubung zu gewährleisten.
2. Handbestäubung: Wenn ihr nur wenige Pflanzen habt, könnt ihr die Bestäubung auch von Hand vornehmen. Sammelt dazu mit einem Pinsel Pollen von den männlichen Blütenständen (den Fahnen oben an der Pflanze) und übertragt sie auf die weiblichen Blütenstände (die Seidenfäden, die aus den Kolben herausragen). Wiederholt diesen Vorgang mehrmals, um sicherzustellen, dass alle Seidenfäden bestäubt werden.
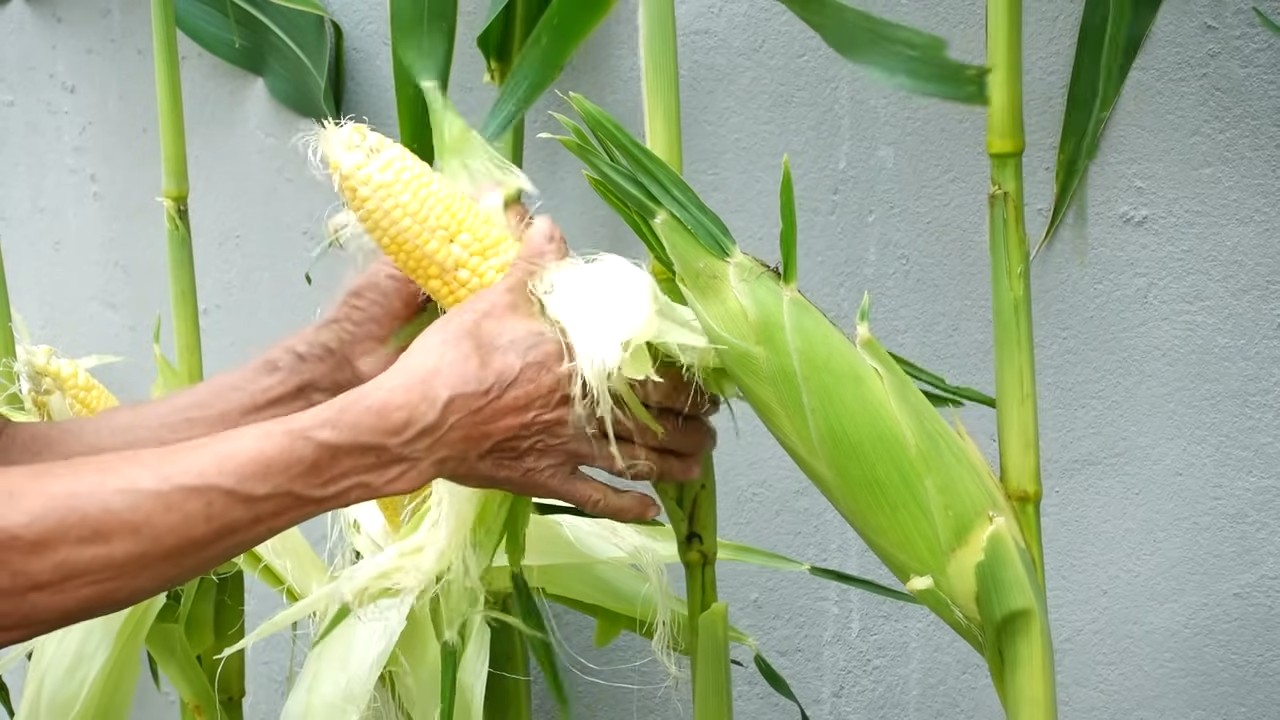
Die Ernte: Der Lohn für eure Mühe
Nach etwa 80-120 Tagen, je nach Sorte, ist der Mais reif für die Ernte.
1. Reife erkennen: Die Maiskolben sind reif, wenn die Seidenfäden braun und trocken sind und die Kolben sich prall anfühlen.
2. Ernten: Brecht die Kolben vorsichtig von der Pflanze ab.
3. Genießen: Jetzt könnt ihr euren selbst angebauten Mais genießen! Ob gekocht, gegrillt oder als Zutat in euren Lieblingsgerichten – er schmeckt einfach fantastisch.
Zusätzliche Tipps und Tricks:
* Sortenwahl: Wählt eine Maissorte, die für den Anbau im Kübel geeignet ist. Es gibt spezielle Sorten für den Balkon oder kleine Gärten.
* Standort: Mais braucht einen sonnigen Standort, um gut zu wachsen.
* Schädlinge: Achtet auf Schädlinge wie Maiszünsler oder Blattläuse und bekämpft sie gegebenenfalls mit geeigneten Mitteln.
* Windschutz: Bei einem windigen Standort solltet ihr die Pflanzen mit Stützstäben stabilisieren, um Windbruch zu vermeiden.
* Nachhaltigkeit: Verwendet torffreie Erde und recycelte Pflanzgefäße, um die Umwelt zu schonen.
Häufige Fehler und wie man sie vermeidet:
* Zu kleine Pflanzgefäße: Mais braucht viel Platz für seine Wurzeln. Wählt daher ausreichend große Pflanzgefäße.
* Staunässe: Staunässe führt zu Wurzelfäule. Sorgt für eine gute Drainage im Pflanzgefäß.
* Nährstoffmangel: Mais ist ein Starkzehrer und braucht viel Dünger. Düngt regelmäßig nach.
* Mangelnde Bestäubung: Sorgt für eine gute Bestäubung, entweder durch mehrere Pflanzen oder durch Handbestäubung.
* Zu wenig Sonne: Mais braucht einen sonnigen Standort, um gut zu wachsen.
Mit diesen Tipps und Tricks könnt ihr auch auf Beton erfolgreich Mais anbauen. Es ist ein tolles Projekt, um etwas Grün in die Stadt zu bringen und frische, selbst angebaute Lebensmittel zu
Conclusion
So, there you have it! Growing corn on concrete might sound like an impossible feat, but with this simple DIY trick, you can enjoy fresh, homegrown corn even without a traditional garden. This method is a game-changer for urban dwellers, apartment residents, or anyone with limited space. It’s not just about the convenience; it’s about reconnecting with nature, understanding where your food comes from, and experiencing the satisfaction of nurturing something from seed to harvest.
This DIY approach to growing corn on concrete offers a unique opportunity to control the growing environment. You can tailor the soil mix to your corn’s specific needs, ensuring optimal nutrient availability. You can also easily monitor and manage pests and diseases, leading to healthier and more productive plants. Plus, the mobility of containers allows you to chase the sun, maximizing sunlight exposure for robust growth.
But the benefits don’t stop there. This method is incredibly cost-effective. You can repurpose old containers, use readily available soil amendments, and save money on transportation costs by growing your own corn. It’s also an environmentally friendly option, reducing your carbon footprint and promoting sustainable living.
Don’t be afraid to experiment with different varieties of corn. While sweet corn is a popular choice, you can also try growing popcorn corn or ornamental corn for a unique twist. Consider adding companion plants like beans or squash to your containers to create a mini-ecosystem that benefits all the plants. You can also adjust the size of your containers to accommodate different corn varieties or growing spaces. For example, dwarf corn varieties might thrive in smaller containers, while taller varieties will need larger ones.
Remember, success with growing corn on concrete hinges on providing adequate sunlight, consistent watering, and proper fertilization. Monitor your plants regularly for signs of stress or nutrient deficiencies and adjust your care accordingly. Don’t be discouraged if you encounter challenges along the way. Gardening is a learning process, and every experience, whether successful or not, provides valuable insights.
We encourage you to give this DIY trick a try and experience the joy of growing your own corn. It’s a rewarding and fulfilling experience that will connect you with nature and provide you with fresh, delicious corn. And most importantly, share your experiences with us! We’d love to hear about your successes, challenges, and any variations you’ve tried. Your feedback will help us refine this method and make it even more accessible to others. So, grab your containers, soil, and corn seeds, and get ready to embark on a concrete corn-growing adventure! Let’s prove that even in the most unlikely places, nature can thrive.
Frequently Asked Questions (FAQ)
What type of corn is best for growing in containers on concrete?
While many corn varieties can be grown in containers, sweet corn is a popular and readily available choice. Look for varieties that are specifically bred for container gardening or shorter growing seasons. Dwarf or compact varieties are also excellent options, as they require less space and are less prone to toppling over in windy conditions. Consider the climate in your area and choose varieties that are well-suited to your local growing conditions. Popcorn corn and ornamental corn can also be grown in containers, offering a unique and visually appealing alternative.
How big should the containers be for growing corn on concrete?
The size of the container is crucial for successful corn cultivation. Corn plants have extensive root systems and require ample space to grow. A minimum container size of 15-20 gallons is recommended for each corn plant. Larger containers are always better, as they provide more room for root growth and help retain moisture. Ensure that the containers have drainage holes to prevent waterlogging, which can lead to root rot. You can use plastic containers, terracotta pots, or even repurposed containers like large buckets or barrels.
What type of soil should I use for growing corn in containers?
Corn plants thrive in well-draining, nutrient-rich soil. A good potting mix is essential for providing the necessary nutrients and support for healthy growth. Avoid using garden soil, as it can be too heavy and compact for container gardening. A mixture of potting soil, compost, and perlite or vermiculite is ideal. Compost provides essential nutrients and improves soil structure, while perlite or vermiculite enhances drainage and aeration. You can also add slow-release fertilizer to the soil mix to provide a steady supply of nutrients throughout the growing season.
How much sunlight does corn need when grown on concrete?
Corn plants require at least 6-8 hours of direct sunlight per day to thrive. Choose a location on your concrete surface that receives ample sunlight throughout the day. If you don’t have a sunny spot, you may need to supplement with artificial lighting. Rotate the containers regularly to ensure that all sides of the plants receive adequate sunlight. Consider using reflective surfaces, such as white walls or aluminum foil, to bounce sunlight onto the plants.
How often should I water corn grown in containers?
Corn plants require consistent watering, especially during hot and dry weather. Water deeply and regularly, ensuring that the soil is evenly moist but not waterlogged. Check the soil moisture regularly by sticking your finger into the soil. If the top inch of soil feels dry, it’s time to water. Avoid watering the foliage, as this can promote fungal diseases. Use a watering can or hose with a gentle spray nozzle to avoid damaging the plants.
How do I fertilize corn grown in containers?
Corn plants are heavy feeders and require regular fertilization to support their rapid growth. Use a balanced fertilizer with a ratio of 10-10-10 or 14-14-14. Apply fertilizer every 2-3 weeks, following the instructions on the fertilizer package. You can also use organic fertilizers, such as compost tea or fish emulsion. Avoid over-fertilizing, as this can burn the roots and damage the plants. Monitor the plants for signs of nutrient deficiencies, such as yellowing leaves or stunted growth, and adjust your fertilization accordingly.
How do I pollinate corn grown in containers?
Corn is wind-pollinated, meaning that the pollen from the tassels (male flowers) needs to reach the silks (female flowers) for fertilization to occur. In a container setting, you may need to assist with pollination to ensure a good harvest. Gently shake the plants to release pollen from the tassels. You can also collect pollen from the tassels with a small brush and apply it to the silks. Repeat this process every day for several days to ensure that all the silks are pollinated.
What are some common pests and diseases that affect corn grown on concrete, and how can I control them?
Common pests that can affect corn include aphids, corn earworms, and spider mites. Diseases that can affect corn include rust, smut, and leaf blight. Monitor your plants regularly for signs of pests or diseases. Use organic pest control methods, such as insecticidal soap or neem oil, to control pests. Remove any infected leaves or plants to prevent the spread of diseases. Ensure that the plants have good air circulation to reduce the risk of fungal diseases.
Can I grow multiple corn plants in the same container?
While it’s possible to grow multiple corn plants in the same container, it’s generally recommended to grow only one plant per container to ensure adequate space and nutrients for each plant. If you choose to grow multiple plants in the same container, make sure the container is large enough to accommodate all the plants. Space the plants evenly apart to allow for proper air circulation and sunlight penetration.
How long does it take for corn to mature when grown on concrete?
The time it takes for corn to mature depends on the variety and growing conditions. Generally, it takes 60-100 days for corn to mature. Monitor the plants regularly for signs of maturity, such as the silks turning brown and the kernels filling out. You can also check the kernels by peeling back the husk and squeezing them. If the kernels release a milky liquid, they are ready to harvest.
Leave a Comment