
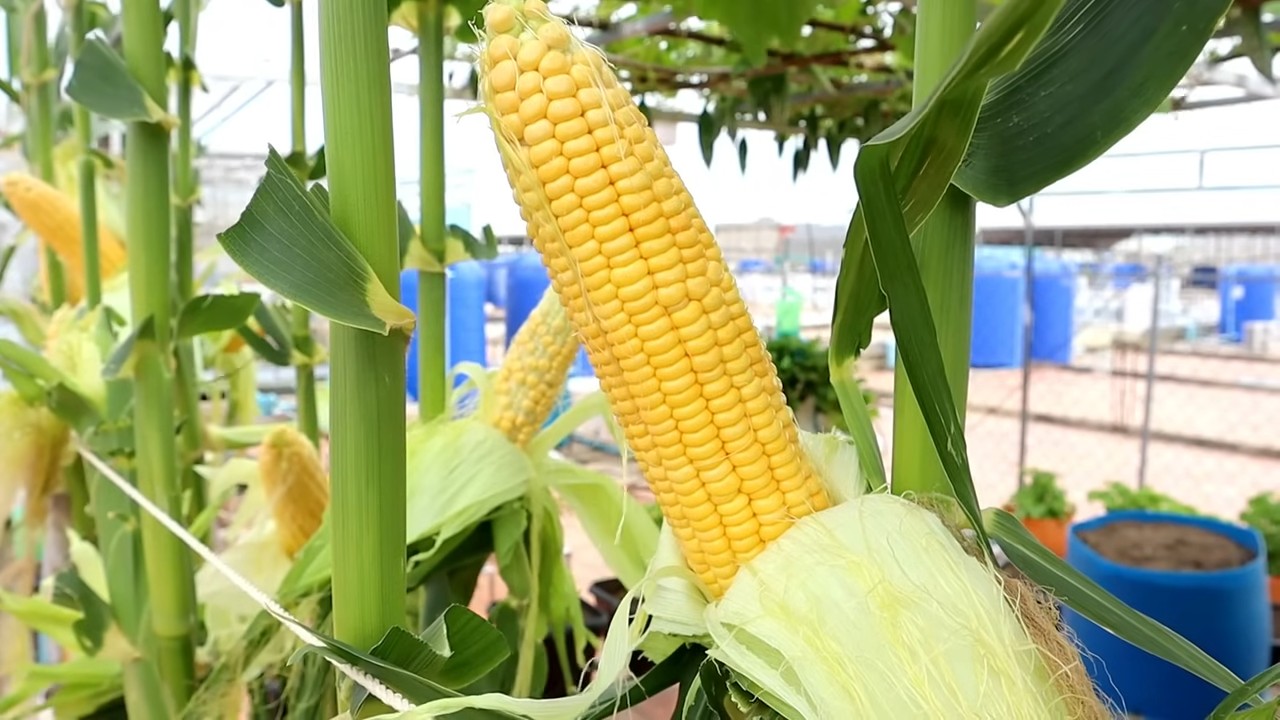
Growing corn in containers might sound like something only a seasoned farmer can achieve, but trust me, it’s totally doable, even if you’re a beginner gardener like I once was! Have you ever dreamed of stepping outside your back door and harvesting fresh, sweet corn for dinner? Well, dream no more! This DIY guide is packed with simple tricks and hacks that will transform your patio or balcony into a mini cornfield.
Corn, or maize, has a rich history, dating back thousands of years to ancient civilizations in Mexico. It was a staple food for the Mayans and Aztecs, and its cultivation spread throughout the Americas and eventually the world. Today, corn remains a vital crop, but you don’t need acres of farmland to enjoy its deliciousness.
So, why should you try growing corn in containers? Well, for starters, it’s incredibly rewarding! Imagine the satisfaction of nurturing a tiny seed into a towering stalk laden with golden ears. Plus, it’s a fantastic way to maximize space if you have a small yard or only a balcony. More importantly, you’ll have access to fresh, homegrown corn that tastes far superior to anything you can buy in the store. Get ready to roll up your sleeves and discover the secrets to successful container corn gardening!
Growing Corn in Containers: A Beginner’s Guide
Hey there, fellow gardening enthusiasts! Ever thought about growing corn, but you’re short on space? Well, I’m here to tell you that you absolutely can grow corn in containers! It’s a fun and rewarding project, and I’m going to walk you through every step of the way. It might seem daunting, but trust me, with a little patience and the right know-how, you’ll be enjoying homegrown corn on the cob in no time.
What You’ll Need
Before we dive into the nitty-gritty, let’s gather our supplies. Here’s a list of everything you’ll need to successfully grow corn in containers:
* Large Containers: This is crucial! You’ll need containers that are at least 12 inches in diameter and 12 inches deep. The bigger, the better, really. Think 15-20 gallons. Corn roots need room to spread.
* Potting Mix: Don’t skimp on this! Use a high-quality potting mix that drains well. Avoid using garden soil, as it can compact in containers and hinder root growth. I like to use a mix specifically formulated for vegetables.
* Corn Seeds: Choose a variety that’s suitable for container growing. Look for shorter, bushier varieties like ‘On Deck’, ‘Golden Bantam’, or ‘Trinity’. These are bred to be more compact and manageable in smaller spaces.
* Slow-Release Fertilizer: Corn is a heavy feeder, so a slow-release fertilizer will provide a steady supply of nutrients throughout the growing season. Look for a balanced fertilizer with an NPK ratio like 10-10-10 or 14-14-14.
* Watering Can or Hose: Essential for keeping your corn plants hydrated.
* Sunlight: Corn needs at least 6-8 hours of direct sunlight per day. Choose a sunny spot on your patio, balcony, or in your garden.
* Optional:
* Stakes or Trellis: For support, especially if you’re growing a taller variety or live in a windy area.
* Mulch: To help retain moisture and suppress weeds.
* Pollination Brush: If you’re having trouble with pollination, you can use a small brush to manually transfer pollen.
Step-by-Step Instructions: Planting Your Corn
Okay, let’s get our hands dirty! Here’s how to plant your corn seeds in containers:
1. Prepare Your Containers: Start by cleaning your containers thoroughly. This will help prevent the spread of diseases. Make sure there are drainage holes at the bottom to allow excess water to escape.
2. Fill with Potting Mix: Fill your containers with the high-quality potting mix, leaving about an inch or two of space at the top. Gently pat down the soil to remove any air pockets.
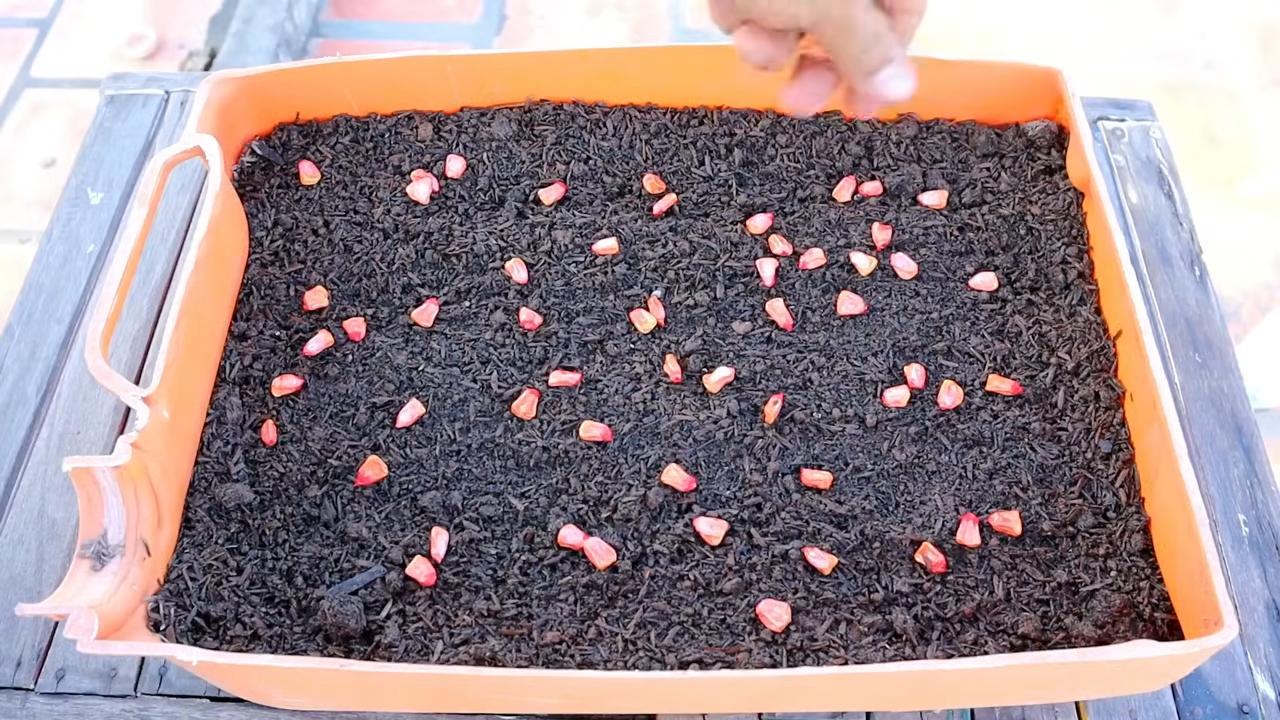
3. Sow the Seeds: Plant the corn seeds about 1-2 inches deep and 4-6 inches apart. I usually plant 3-4 seeds per container and then thin them out later, keeping the strongest seedling. Planting multiple seeds increases your chances of germination.
4. Water Thoroughly: After planting, water the soil thoroughly until water drains out of the bottom of the container. This will help settle the soil and ensure good seed-to-soil contact.
5. Place in a Sunny Location: Move your containers to a sunny spot that receives at least 6-8 hours of direct sunlight per day. This is crucial for corn growth.
6. Wait for Germination: Corn seeds typically germinate within 7-10 days, depending on the temperature and moisture levels. Keep the soil consistently moist but not waterlogged during this time.
Caring for Your Corn Plants
Once your corn seedlings have emerged, it’s time to focus on providing them with the care they need to thrive.
1. Thinning Seedlings: Once the seedlings are a few inches tall, thin them out to one strong seedling per container (if you planted multiple seeds). Choose the healthiest and most vigorous seedling and gently remove the others by snipping them off at the soil level.
2. Watering: Corn plants need consistent moisture, especially during hot weather. Water deeply whenever the top inch of soil feels dry to the touch. Avoid overwatering, as this can lead to root rot. I usually water in the morning to allow the foliage to dry before nightfall, which helps prevent fungal diseases.
3. Fertilizing: As I mentioned earlier, corn is a heavy feeder. Apply a slow-release fertilizer according to the package instructions. You can also supplement with a liquid fertilizer every few weeks to provide an extra boost of nutrients. I like to use a balanced liquid fertilizer diluted to half strength.
4. Providing Support: As your corn plants grow taller, they may need support, especially if you’re growing a taller variety or live in a windy area. You can use stakes or a trellis to provide support and prevent the plants from falling over. Gently tie the stalks to the stakes or trellis using soft twine or plant ties.
5. Pollination: Corn is wind-pollinated, meaning that the pollen from the tassels (the male flowers at the top of the plant) needs to reach the silks (the female flowers that emerge from the developing ears of corn). In a container setting, pollination can sometimes be a challenge, especially if you only have a few plants. To improve pollination, you can try hand-pollinating. Gently shake the tassels to release pollen and then brush the pollen onto the silks. You can also use a small brush to collect pollen from the tassels and manually transfer it to the silks. Repeat this process every day for a few days to ensure good pollination.
6. Pest and Disease Control: Keep an eye out for common corn pests like corn earworms, aphids, and spider mites. You can control these pests with insecticidal soap or neem oil. Also, watch out for fungal diseases like corn smut and leaf blight. Prevent these diseases by providing good air circulation, avoiding overwatering, and removing any infected leaves.
Harvesting Your Corn
The moment we’ve all been waiting for! Harvesting your homegrown corn is the most rewarding part of the process.
1. Knowing When to Harvest: Corn is typically ready to harvest about 60-100 days after planting, depending on the variety. The silks will turn brown and dry, and the ears will feel plump and full.
2. Checking for Ripeness: To check for ripeness, gently peel back a portion of the husk and puncture a kernel with your fingernail. If the liquid that comes out is milky, the corn is ready to harvest. If the liquid is clear, the corn needs more time to mature.
3. Harvesting the Ears: To harvest the ears, grasp the ear firmly and twist it downward. The ear should snap off easily from the stalk.
4. Enjoying Your Harvest: Enjoy your freshly harvested corn on the cob grilled, boiled, or steamed. You can also freeze or can your corn for later use.
Troubleshooting Common Problems
Even with the best care, you might encounter some challenges along the way. Here are some common problems and how to address them:
* Poor Germination: If your corn seeds aren’t germinating, make sure the soil is consistently moist and the temperature is warm enough. You can also try soaking the seeds in water for 24 hours before planting to improve germination rates.
* Stunted Growth: Stunted growth can be caused by a lack of nutrients, insufficient sunlight, or poor drainage. Make sure you’re providing your corn plants with adequate fertilizer, sunlight, and well-draining soil.
* Yellowing Leaves: Yellowing leaves can indicate a nutrient deficiency, especially nitrogen. Apply a nitrogen-rich fertilizer to correct the deficiency.
* Poor Pollination: As mentioned earlier, poor pollination can be a challenge in container settings. Try hand-pollinating to improve pollination rates.
* Pest Infestations: Keep an eye out for common corn pests and treat them promptly with insecticidal soap or neem oil.
* Disease Problems: Prevent fungal diseases by providing good air circulation, avoiding overwatering, and removing any infected leaves.
Choosing the Right Corn Variety for Containers
Selecting the right corn variety is key to success when growing in containers. Look for varieties that are specifically bred for smaller spaces and shorter growing seasons. Here are a few of my favorites:
* ‘On Deck’: This is a super sweet variety that matures quickly and produces small, manageable ears. It’s a great choice for beginners.
* ‘Golden Bantam’: An heirloom variety known for its delicious flavor and compact size. It’s a classic choice for container gardening.
* ‘Trinity’: A hybrid variety that produces high yields of sweet, tender corn. It’s a good option for those looking for a more productive container corn.
* ‘Sweet Painted Mountain’: This is a shorter variety of corn that
Conclusion
So, there you have it! Growing corn in containers might seem like a whimsical idea at first, but as we’ve explored, it’s a surprisingly achievable and rewarding project. It’s a fantastic way to bring a touch of the countryside to even the smallest urban balcony or patio. The sheer joy of harvesting your own sweet corn, knowing exactly where it came from and how it was grown, is an experience that store-bought corn simply can’t replicate.
But why is this DIY trick a must-try? Beyond the novelty, growing corn in containers offers several compelling advantages. Firstly, it provides accessibility. If you lack a traditional garden plot, containers open up the possibility of growing your own food. Secondly, it offers control. You have complete command over the soil quality, watering schedule, and pest management, leading to healthier and potentially more productive plants. Thirdly, it’s educational. Watching the entire life cycle of a corn plant, from tiny seedling to towering stalk laden with ears, is an invaluable learning experience, especially for children. Finally, and perhaps most importantly, it’s delicious! Freshly picked, homegrown corn has an unparalleled sweetness and flavor that will elevate your summer meals.
Don’t be afraid to experiment with different varieties of corn to find your personal favorite. Consider trying dwarf or compact varieties specifically bred for container gardening. These varieties are naturally smaller and better suited to the limited space of a pot. You could also explore different soil mixes to see which one yields the best results in your specific climate and growing conditions. Adding a slow-release fertilizer at planting time can provide a steady stream of nutrients throughout the growing season.
For those seeking a bit more of a challenge, consider companion planting. Marigolds, for example, can help deter pests, while beans can fix nitrogen in the soil, benefiting the corn plants. Just be sure to choose companion plants that won’t compete with the corn for resources like sunlight and water.
Ultimately, the success of growing corn in containers hinges on your willingness to learn, adapt, and experiment. Don’t be discouraged if your first attempt isn’t perfect. Every growing season is a learning opportunity. The key is to pay attention to your plants, observe their needs, and adjust your approach accordingly.
We wholeheartedly encourage you to give this DIY trick a try. It’s a fun, educational, and ultimately delicious way to connect with nature and enjoy the fruits (or rather, vegetables) of your labor. Once you’ve harvested your first batch of homegrown corn, we’d love to hear about your experience! Share your photos, tips, and challenges in the comments below. Let’s create a community of container corn growers and learn from each other’s successes and failures. Happy growing! Remember that **growing corn in containers** is not only possible, but also a rewarding experience.
Frequently Asked Questions (FAQ)
1. What is the best variety of corn to grow in containers?
The best corn varieties for container gardening are typically dwarf or compact varieties specifically bred for smaller spaces. Look for terms like “dwarf,” “short-stalk,” or “container-friendly” on the seed packet. Some popular choices include ‘On Deck’, ‘Golden Bantam’, and ‘Trinity’. These varieties tend to have shorter stalks and smaller ears, making them better suited to the limited space of a container. Standard-sized corn varieties can be grown, but they may require larger containers and more support.
2. How big of a container do I need to grow corn?
Corn plants need a significant amount of space for their roots to develop properly. A minimum container size of 12 inches in diameter and 12 inches deep is recommended for dwarf varieties. However, larger containers (18-24 inches in diameter and depth) are preferable, especially for standard-sized varieties. The larger the container, the more room the roots have to grow, and the more stable the plant will be. Ensure the container has adequate drainage holes to prevent waterlogging.
3. What type of soil should I use for growing corn in containers?
Corn thrives in well-draining, nutrient-rich soil. A good potting mix specifically formulated for vegetables is ideal. You can also create your own mix by combining equal parts of potting soil, compost, and perlite or vermiculite. Compost provides essential nutrients, while perlite or vermiculite improves drainage and aeration. Avoid using garden soil, as it can be too heavy and compact in containers.
4. How much sunlight does corn need?
Corn requires at least 6-8 hours of direct sunlight per day to thrive. Choose a location for your container that receives ample sunlight throughout the day. If you live in a particularly hot climate, some afternoon shade may be beneficial to prevent the plants from overheating.
5. How often should I water corn in containers?
Corn plants are heavy drinkers, especially during hot weather and when the ears are developing. Water deeply and regularly, ensuring the soil remains consistently moist but not waterlogged. Check the soil moisture daily by sticking your finger about an inch into the soil. If it feels dry, it’s time to water. Container-grown plants tend to dry out more quickly than those grown in the ground, so you may need to water them daily or even twice a day during hot spells.
6. How do I pollinate corn in containers?
Corn is wind-pollinated, meaning the pollen from the tassels (male flowers at the top of the plant) needs to reach the silks (female flowers emerging from the ears). In a container setting, natural wind pollination may not be sufficient. You can assist pollination by gently shaking the corn stalks or using a small paintbrush to transfer pollen from the tassels to the silks. Repeat this process every day for several days to ensure proper pollination. You can also plant the corn in blocks instead of a single row to increase the chances of pollination.
7. How do I fertilize corn in containers?
Corn is a heavy feeder and requires regular fertilization. Start with a slow-release fertilizer at planting time to provide a steady stream of nutrients. Supplement with a liquid fertilizer every 2-3 weeks during the growing season. Choose a fertilizer that is high in nitrogen, phosphorus, and potassium (NPK). Follow the instructions on the fertilizer label for proper application rates.
8. What are some common pests and diseases that affect corn?
Common pests that can affect corn include corn earworms, aphids, and spider mites. Regularly inspect your plants for signs of infestation and take appropriate action, such as hand-picking pests, spraying with insecticidal soap, or using neem oil. Common diseases include corn smut and rust. Ensure good air circulation around the plants and avoid overhead watering to prevent fungal diseases.
9. How do I know when my corn is ready to harvest?
Several indicators can help you determine when your corn is ready to harvest. The silks should turn brown and dry. The ears should feel plump and full. You can also gently peel back a portion of the husk and puncture a kernel with your fingernail. If the liquid that comes out is milky, the corn is ready to harvest. If it’s clear, the corn needs more time to mature.
10. Can I grow multiple corn plants in the same container?
Yes, you can grow multiple corn plants in the same container, but be sure to provide adequate spacing. A good rule of thumb is to allow at least 8-12 inches between plants. Overcrowding can lead to stunted growth and reduced yields. Choose a container that is large enough to accommodate the number of plants you intend to grow.
Leave a Comment