
Growing chili peppers at home can seem daunting, but trust me, it’s more rewarding than you might think! Imagine plucking fiery red peppers straight from your own garden, ready to spice up your next meal. Forget those bland, store-bought chilies – with a few simple tricks, you can cultivate a vibrant and flavorful harvest right on your windowsill or in your backyard.
Chili peppers have a rich history, dating back thousands of years in the Americas. They weren’t just a food source; they held cultural significance, used in rituals and even as medicine. Today, their popularity has exploded worldwide, and for good reason! They add a delicious kick to countless dishes and are packed with vitamins and antioxidants.
But why bother with the effort of growing your own? Well, for starters, you’ll have access to varieties you simply can’t find in supermarkets. Plus, you’ll know exactly where your food is coming from, free from harmful pesticides and chemicals. And let’s be honest, there’s a certain satisfaction that comes from nurturing a plant from seed to harvest. This DIY guide will equip you with all the essential tips and tricks to successfully growing chili peppers at home, even if you’re a complete beginner. Get ready to unleash your inner gardener and add some serious heat to your life!
Chili-Anbau für Jedermann: So ziehst du deine eigenen scharfen Schoten!
Ich liebe Chili! Und was gibt es Besseres, als sie selbst anzubauen? Es ist einfacher, als du denkst, und das Ergebnis ist unglaublich befriedigend. Stell dir vor, du erntest deine eigenen, feurig-roten Chilis, um deine Gerichte zu verfeinern. In diesem Artikel zeige ich dir, wie du das ganz einfach zu Hause schaffen kannst. Egal, ob du einen Garten, einen Balkon oder nur ein sonniges Fensterbrett hast, es gibt eine Möglichkeit, Chilis anzubauen.
Was du brauchst: Die richtige Ausrüstung und Vorbereitung
Bevor wir loslegen, lass uns sicherstellen, dass wir alles haben, was wir brauchen. Hier ist eine Liste der wichtigsten Dinge:
* Chilisamen: Wähle deine Lieblingssorten! Es gibt so viele verschiedene Chili-Sorten, von mild bis extrem scharf. Informiere dich vorher, welche Sorte am besten zu deinen Vorlieben und deinem Klima passt.
* Anzuchterde: Normale Blumenerde ist oft zu nährstoffreich für die empfindlichen Keimlinge. Anzuchterde ist lockerer und enthält weniger Nährstoffe, was das Wurzelwachstum fördert.
* Anzuchtgefäße: Kleine Töpfe, Anzuchtschalen oder sogar Eierkartons eignen sich hervorragend für die Anzucht.
* Pflanztöpfe: Wenn die Pflanzen größer werden, brauchen sie größere Töpfe. Wähle Töpfe mit guter Drainage.
* Blumenerde: Hochwertige Blumenerde ist wichtig für das Wachstum der Pflanzen.
* Dünger: Ein spezieller Chili-Dünger oder ein Tomatendünger ist ideal, um die Pflanzen mit den notwendigen Nährstoffen zu versorgen.
* Gießkanne oder Sprühflasche: Zum Bewässern der Pflanzen.
* Pflanzenschilder: Um den Überblick über die verschiedenen Sorten zu behalten.
* Optional: Ein Mini-Gewächshaus oder eine Plastikfolie, um die Luftfeuchtigkeit zu erhöhen.
* Optional: Eine Pflanzenlampe, falls du nicht genügend Sonnenlicht hast.
Phase 1: Die Anzucht – Der Start in ein scharfes Leben
Die Anzucht ist der erste und wichtigste Schritt. Hier legen wir den Grundstein für gesunde und ertragreiche Chilipflanzen.
1. Samen vorbereiten (optional): Um die Keimung zu beschleunigen, kannst du die Samen vorquellen lassen. Lege sie dazu für 24 Stunden in lauwarmes Wasser. Das Wasser sollte nicht zu heiß sein, da dies die Samen beschädigen kann.
2. Anzuchtgefäße vorbereiten: Fülle die Anzuchtgefäße mit Anzuchterde. Drücke die Erde leicht an.
3. Samen aussäen: Lege pro Gefäß 1-2 Samen auf die Erde. Bedecke die Samen mit einer dünnen Schicht Anzuchterde (ca. 0,5 cm).
4. Bewässern: Befeuchte die Erde vorsichtig mit einer Sprühflasche. Die Erde sollte feucht, aber nicht nass sein.
5. Für Wärme sorgen: Chilisamen keimen am besten bei einer Temperatur von 22-28°C. Stelle die Anzuchtgefäße an einen warmen Ort, z.B. auf eine Heizung oder in ein Mini-Gewächshaus.
6. Luftfeuchtigkeit erhöhen (optional): Um die Luftfeuchtigkeit zu erhöhen, kannst du die Anzuchtgefäße mit einer Plastikfolie abdecken. Achte darauf, dass die Folie nicht direkt auf der Erde aufliegt und lüfte regelmäßig, um Schimmelbildung zu vermeiden.
7. Geduld haben: Die Keimung kann je nach Sorte und Temperatur 1-3 Wochen dauern. Halte die Erde feucht und warte geduldig.
Phase 2: Pikieren – Den kleinen Pflanzen mehr Raum geben
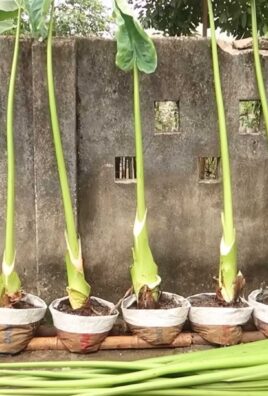
Sobald die Keimlinge ihre ersten richtigen Blätter (nach den Keimblättern) entwickelt haben, ist es Zeit zum Pikieren. Das bedeutet, dass wir die kleinen Pflanzen in größere Töpfe umsetzen, damit sie mehr Platz zum Wachsen haben.
1. Vorbereitung: Fülle die Pflanztöpfe mit Blumenerde. Mache in der Mitte jedes Topfes ein kleines Loch.
2. Keimlinge vorsichtig ausheben: Löse die Keimlinge vorsichtig mit einem Pikierstab oder einem Löffel aus der Anzuchterde. Achte darauf, die Wurzeln nicht zu beschädigen.
3. Einsetzen: Setze jeden Keimling in einen Pflanztopf. Die Wurzeln sollten sich gut ausbreiten können.
4. Auffüllen: Fülle die Töpfe mit Blumenerde auf und drücke die Erde leicht an.
5. Bewässern: Gieße die Pflanzen vorsichtig an.
6. Standort: Stelle die pikierten Pflanzen an einen hellen, aber nicht zu sonnigen Ort.
Phase 3: Pflege – Damit deine Chilis prächtig gedeihen
Nach dem Pikieren beginnt die eigentliche Pflege der Chilipflanzen. Hier sind einige wichtige Tipps:
1. Bewässerung: Gieße die Pflanzen regelmäßig, aber vermeide Staunässe. Die Erde sollte immer leicht feucht sein. Überprüfe die Feuchtigkeit der Erde, indem du deinen Finger ca. 2 cm tief in die Erde steckst. Wenn sich die Erde trocken anfühlt, ist es Zeit zum Gießen.
2. Düngung: Dünge die Pflanzen regelmäßig mit einem Chili-Dünger oder einem Tomatendünger. Befolge die Anweisungen auf der Verpackung. Beginne mit dem Düngen ca. 2-3 Wochen nach dem Pikieren.
3. Licht: Chilis brauchen viel Licht, mindestens 6-8 Stunden pro Tag. Stelle die Pflanzen an einen sonnigen Ort oder verwende eine Pflanzenlampe.
4. Temperatur: Chilis mögen es warm. Die ideale Temperatur liegt zwischen 20-25°C.
5. Luftfeuchtigkeit: Eine hohe Luftfeuchtigkeit fördert das Wachstum. Du kannst die Luftfeuchtigkeit erhöhen, indem du die Pflanzen regelmäßig mit Wasser besprühst oder eine Schale mit Wasser in die Nähe der Pflanzen stellst.
6. Schädlinge und Krankheiten: Achte auf Schädlinge wie Blattläuse oder Spinnmilben. Bei Befall kannst du die Pflanzen mit einem biologischen Schädlingsbekämpfungsmittel behandeln. Achte auch auf Anzeichen von Krankheiten wie Pilzbefall.
7. Ausgeizen (optional): Bei einigen Chili-Sorten kann es sinnvoll sein, die Seitentriebe (Geiztriebe) auszugeizen, um die Bildung von Früchten zu fördern. Informiere dich vorher, ob deine Chili-Sorte ausgegeizt werden muss.
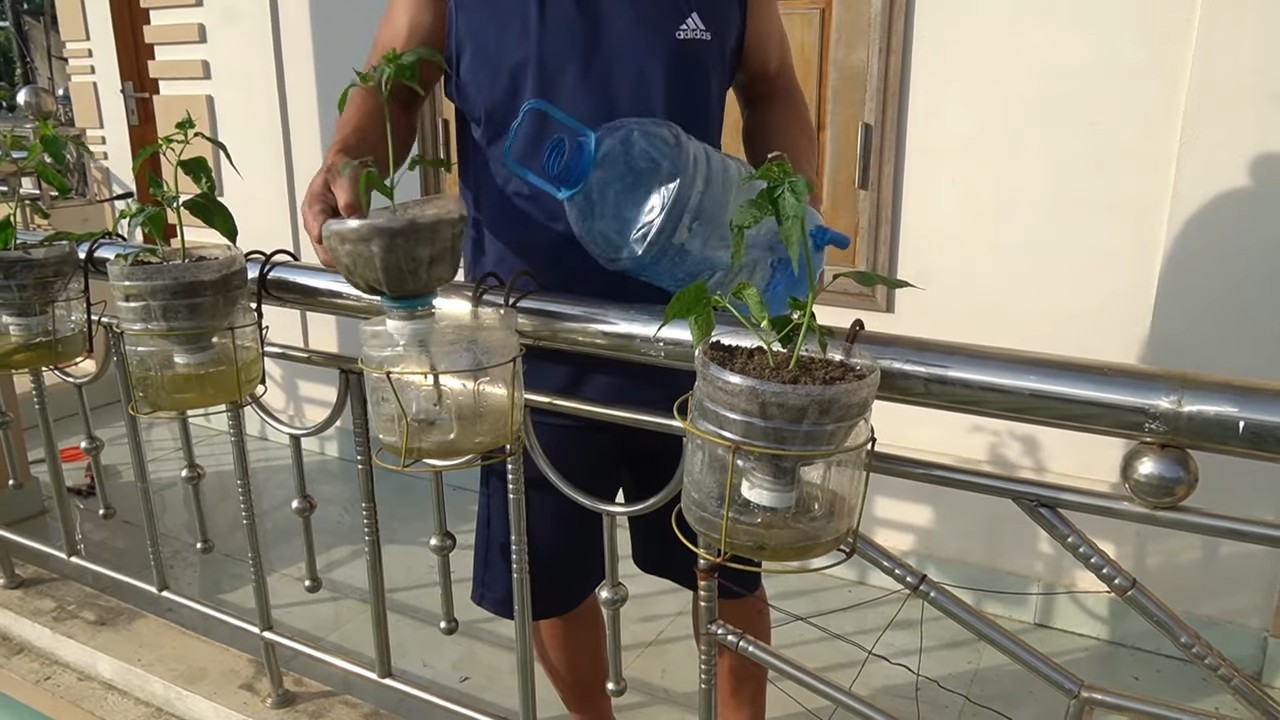
Phase 4: Auspflanzen – Raus in die Freiheit!
Sobald die Temperaturen steigen und keine Frostgefahr mehr besteht, können die Chilipflanzen ins Freie umziehen.
1. Abhärten: Bevor du die Pflanzen ins Freie pflanzt, solltest du sie langsam an die neuen Bedingungen gewöhnen. Stelle sie dazu tagsüber für einige Stunden ins Freie und hole sie abends wieder rein. Steigere die Zeit im Freien jeden Tag, bis die Pflanzen den ganzen Tag draußen bleiben können.
2. Standort vorbereiten: Wähle einen sonnigen und windgeschützten Standort. Lockere die Erde auf und mische Kompost oder organischen Dünger unter.
3. Pflanzen aussetzen: Grabe ein Loch, das groß genug für den Wurzelballen ist. Setze die Pflanzen ein und fülle das Loch mit Erde auf. Drücke die Erde leicht an.
4. Bewässern: Gieße die Pflanzen gründlich an.
5. Schutz vor Schnecken: Schnecken lieben Chilipflanzen! Schütze deine Pflanzen mit Schneckenkorn oder anderen Schneckenabwehrmitteln.
Phase 5: Ernte – Die Früchte deiner Arbeit genießen
Nach einigen Wochen oder Monaten (je nach Sorte) sind die Chilis reif und können geerntet werden.
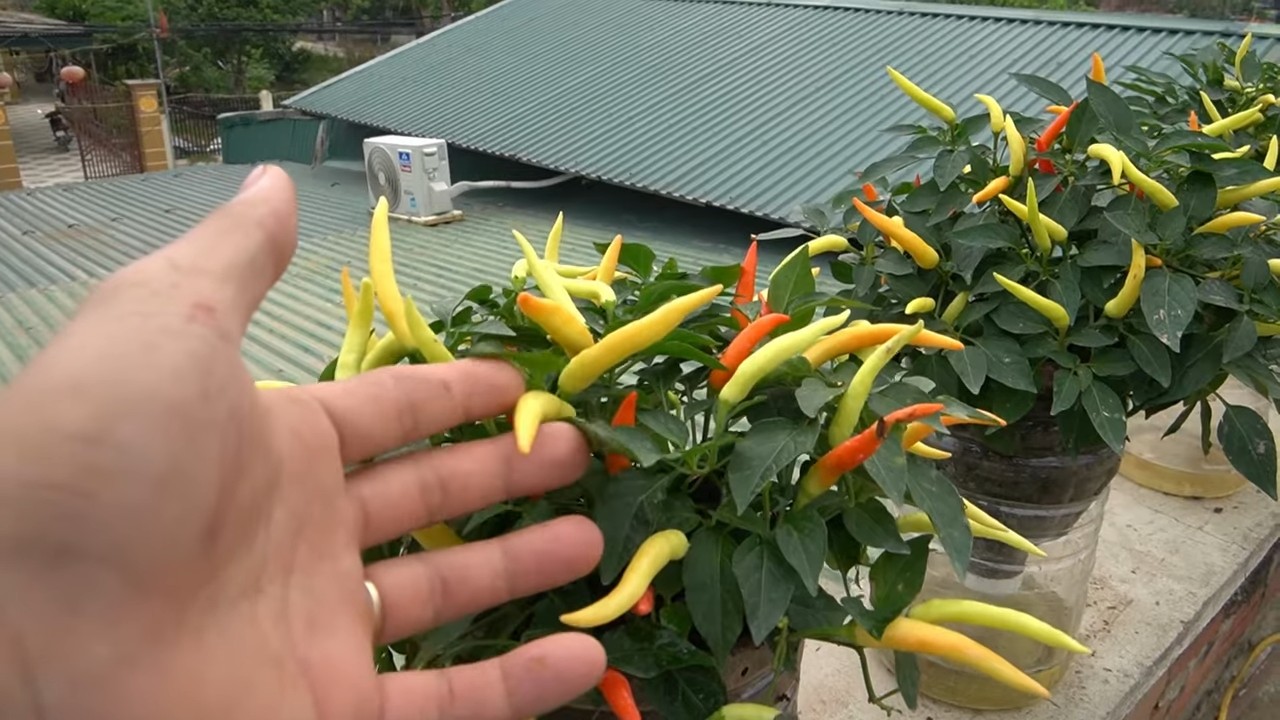
1. Reife erkennen: Die Farbe der Chilis ändert sich, wenn sie reif sind. Die meisten Chilis werden rot, es gibt aber auch Sorten, die gelb, orange oder braun werden. Die Chilis sollten sich fest anfühlen und leicht vom
Conclusion
So, there you have it! Growing chili peppers at home isn’t just a fun hobby; it’s a gateway to a world of flavor, freshness, and fiery satisfaction. We’ve explored the simple yet effective DIY trick of using coffee grounds as a natural fertilizer and soil amendment, and hopefully, you’re now convinced of its power.
Why is this a must-try? Because it’s sustainable, cost-effective, and genuinely beneficial for your chili plants. Instead of relying solely on synthetic fertilizers, you’re repurposing a common household waste product into a nutrient-rich boost for your peppers. Coffee grounds provide essential nitrogen, improve soil drainage, and even deter some common garden pests. This DIY trick is a win-win for your garden and the environment.
But the beauty of gardening lies in experimentation! Feel free to explore variations on this technique. For instance, you could try composting your coffee grounds first before adding them to the soil. This can further break down the grounds and make the nutrients even more readily available to your plants. Another option is to create a “coffee ground tea” by steeping used grounds in water and using the liquid as a fertilizer. This is a gentler approach, perfect for seedlings or plants that are sensitive to strong fertilizers.
Consider pairing your coffee ground amendment with other organic fertilizers like bone meal or Epsom salts for an even more robust nutrient profile. Remember to monitor your plants closely and adjust your approach based on their individual needs. Some chili varieties might thrive with more coffee grounds than others.
Ultimately, the best way to discover the magic of this DIY trick is to try it yourself. Don’t be afraid to get your hands dirty and experiment. We’re confident that you’ll be amazed by the results. Imagine harvesting your own vibrant, flavorful chili peppers, knowing that you nurtured them with a simple, sustainable solution.
We encourage you to embark on this chili-growing adventure and share your experiences with us! Let us know in the comments below how the coffee ground trick worked for you. What chili varieties are you growing? Did you notice a significant difference in growth or yield? Your insights will not only inspire other gardeners but also help us refine this technique even further. So, grab your coffee grounds, prepare your soil, and get ready to unleash the fiery potential of your chili pepper plants! Happy gardening!
Frequently Asked Questions (FAQ)
1. How often should I add coffee grounds to my chili pepper plants?
The frequency of application depends on several factors, including the size of your plants, the type of soil you have, and the climate you live in. As a general guideline, you can add a thin layer of coffee grounds (about 1/2 inch) around the base of your chili pepper plants every 2-4 weeks. Avoid piling the grounds directly against the stem, as this can lead to rot.
It’s crucial to observe your plants closely. If you notice signs of over-fertilization, such as leaf burn or stunted growth, reduce the frequency of application. Conversely, if your plants appear to be lacking nutrients, you can increase the frequency slightly. Remember, slow and steady is the key.
2. Are all types of coffee grounds suitable for chili pepper plants?
Yes, both used and unused coffee grounds can be beneficial for chili pepper plants. However, used coffee grounds are generally preferred because they are less acidic. The brewing process removes some of the acidity, making them gentler on the soil and plant roots.
If you’re using unused coffee grounds, it’s best to mix them with compost or other organic matter before adding them to the soil. This will help to buffer the acidity and prevent any potential harm to your plants.
3. Can I use coffee grounds on all types of chili peppers?
Generally, yes, coffee grounds can be used on most types of chili peppers. However, some varieties might be more sensitive than others. It’s always a good idea to start with a small amount and monitor your plants closely for any adverse reactions.
If you’re growing a particularly delicate or rare chili pepper variety, you might want to test the coffee ground amendment on a single plant first before applying it to your entire crop. This will allow you to assess its suitability without risking the health of all your plants.
4. Will coffee grounds make my chili peppers spicier?
While coffee grounds provide essential nutrients that promote healthy growth and fruit production, they don’t directly influence the spiciness of your chili peppers. The spiciness of a chili pepper is primarily determined by its genetics and environmental factors, such as sunlight and temperature.
However, healthy plants are more likely to produce high-quality fruits with optimal flavor and spiciness. By using coffee grounds to improve soil health and provide essential nutrients, you can indirectly contribute to the overall quality of your chili peppers.
5. Can I use too many coffee grounds? What are the signs of over-fertilization?
Yes, it is possible to use too many coffee grounds, which can lead to over-fertilization. Signs of over-fertilization include:
* Leaf burn (browning or yellowing of leaf edges)
* Stunted growth
* Wilting, even when the soil is moist
* Salt buildup on the soil surface
If you notice any of these signs, immediately reduce the frequency of coffee ground application or flush the soil with water to remove excess nutrients.
6. How do coffee grounds help deter pests?
Coffee grounds contain caffeine and other compounds that can be toxic to certain garden pests, such as slugs, snails, and some types of insects. The abrasive texture of coffee grounds can also create a barrier that deters pests from crawling on your plants.
While coffee grounds are not a foolproof pest control solution, they can be a helpful addition to your overall pest management strategy. Consider combining them with other natural pest control methods, such as companion planting and hand-picking pests.
7. Can I mix coffee grounds directly into the soil, or should I compost them first?
You can do either! Mixing coffee grounds directly into the soil is a simple and effective way to add nutrients. However, composting them first offers several advantages. Composting breaks down the coffee grounds, making the nutrients more readily available to your plants. It also helps to reduce the acidity of the grounds and create a more balanced soil amendment.
If you choose to compost your coffee grounds, be sure to mix them with other organic materials, such as leaves, grass clippings, and vegetable scraps. This will help to create a balanced compost pile that decomposes efficiently.
8. Where can I get enough coffee grounds to fertilize all my chili pepper plants?
If you’re a heavy coffee drinker, you might have enough coffee grounds at home. However, if you need more, consider asking local coffee shops if they’re willing to give away their used coffee grounds. Many coffee shops are happy to donate their grounds to gardeners, as it helps them reduce waste.
You can also check with local businesses that have coffee machines, such as offices or restaurants. You might be surprised at how much coffee grounds are available if you simply ask.
9. What other organic materials can I use to supplement coffee grounds for growing chili peppers?
Coffee grounds are a great addition, but a balanced diet is key for chili peppers. Consider supplementing with:
* **Compost:** Provides a wide range of nutrients and improves soil structure.
* **Bone meal:** Rich in phosphorus, which is essential for root development and flowering.
* **Epsom salts:** Provides magnesium, which helps plants absorb nutrients and produce chlorophyll.
* **Seaweed extract:** Contains trace minerals and growth hormones that can boost plant health.
* **Worm castings:** A nutrient-rich fertilizer produced by earthworms.
Experiment with different combinations to find what works best for your chili pepper plants and your local soil conditions.
10. How long does it take to see results from using coffee grounds on my chili pepper plants?
The time it takes to see results can vary depending on several factors, including the size of your plants, the type of soil you have, and the climate you live in. In general, you should start to see noticeable improvements in plant growth and health within a few weeks of applying coffee grounds.
Be patient and consistent with your application, and remember to monitor your plants closely for any signs of over-fertilization. With a little time and effort, you’ll be rewarded with healthy, productive chili pepper plants.
Leave a Comment