
Growing Celery at Home might seem like a challenge reserved for seasoned gardeners, but I’m here to tell you it’s totally achievable, even if you’re a beginner! Forget those bland, watery stalks from the grocery store. Imagine crisp, flavorful celery, bursting with freshness, right from your own backyard (or even your balcony!).
Celery has a fascinating history, dating back to ancient Greece and Rome, where it was initially valued for its medicinal properties rather than its culinary uses. Over time, it transformed into the crunchy vegetable we know and love, becoming a staple in soups, salads, and snacks worldwide. But the celery we buy in stores often lacks the vibrant taste and satisfying crunch of homegrown varieties.
That’s where this DIY guide comes in! I’m going to share some simple yet effective tricks and hacks that will empower you to successfully start growing celery at home. Whether you’re looking to save money, reduce your environmental impact, or simply enjoy the unparalleled flavor of freshly harvested produce, this article is packed with practical tips to help you succeed. Plus, who doesn’t love the satisfaction of nurturing a plant from seed to table? Let’s get started and unlock the secrets to a thriving celery patch!
Growing Celery at Home: A Comprehensive DIY Guide
Hello garden friends! Have you ever wondered how you can grow that crisp, aromatic celery you love in soups and salads yourself? I’ll show you how! It’s easier than you think, and the result is incredibly satisfying. Let’s dive into the world of growing celery together!
What You Need for Growing Celery
Before we get started, here’s a list of the things you’ll need. Don’t worry, you probably already have most of them at home or can easily get them:
- Celery stump: Yes, that’s right! The one you buy at the supermarket. Make sure it has a healthy base.
- A glass or a bowl: Something you can put the celery stump in.
- Water: Fresh, clean water is important.
- Potting soil: Good quality is crucial for growth.
- A pot: Choose a pot that is large enough for the celery.
- A sunny location: Celery loves the sun!
- Patience: The most important ingredient!
Growing Celery from a Stump: Step-by-Step Guide
Okay, let’s get started! Here is a detailed guide on how you can grow new celery from a simple celery stump.
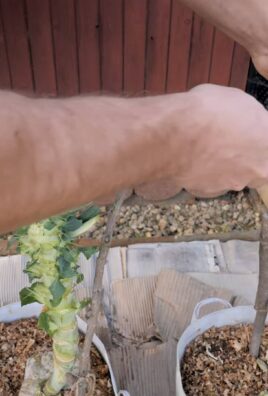
1. Prepare the celery stump:
- Take your celery stump and cut off the bottom part, about 5-7 cm from the end. Make sure the base, where the roots will grow, remains intact.
- Remove the outer, wilted, or damaged stalks. This helps the plant focus on new growth.
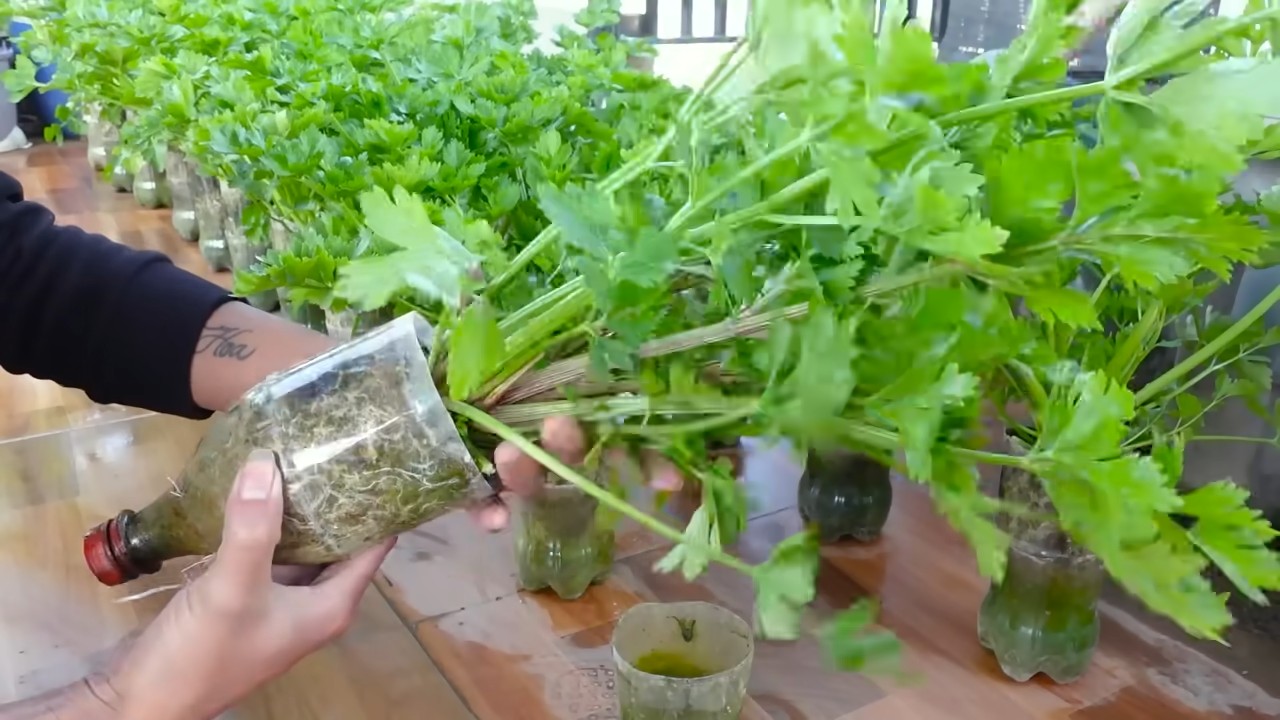
2. Place the stump in water:
- Fill your glass or bowl with about 2-3 cm of water.
- Place the celery stump with the cut side down into the water. Make sure that only the base is in the water, not the upper stalks.
- Place the glass in a sunny spot, for example, on a windowsill.
3. Change the water and observe:
- Change the water every 1-2 days to keep it fresh and clean. This prevents bacteria from forming.
- Observe the stump carefully. After a few days, you should see small roots sprouting from the base. Additionally, new, small leaves will start to grow in the center of the stump.
4. Wait for the roots to grow:
- Be patient! It can take one to two weeks for the roots to become strong enough to plant the celery in soil. Wait until the roots are at least 5 cm long.
Planting the Celery in Soil
Once your celery has enough roots, it’s time to plant it in soil.
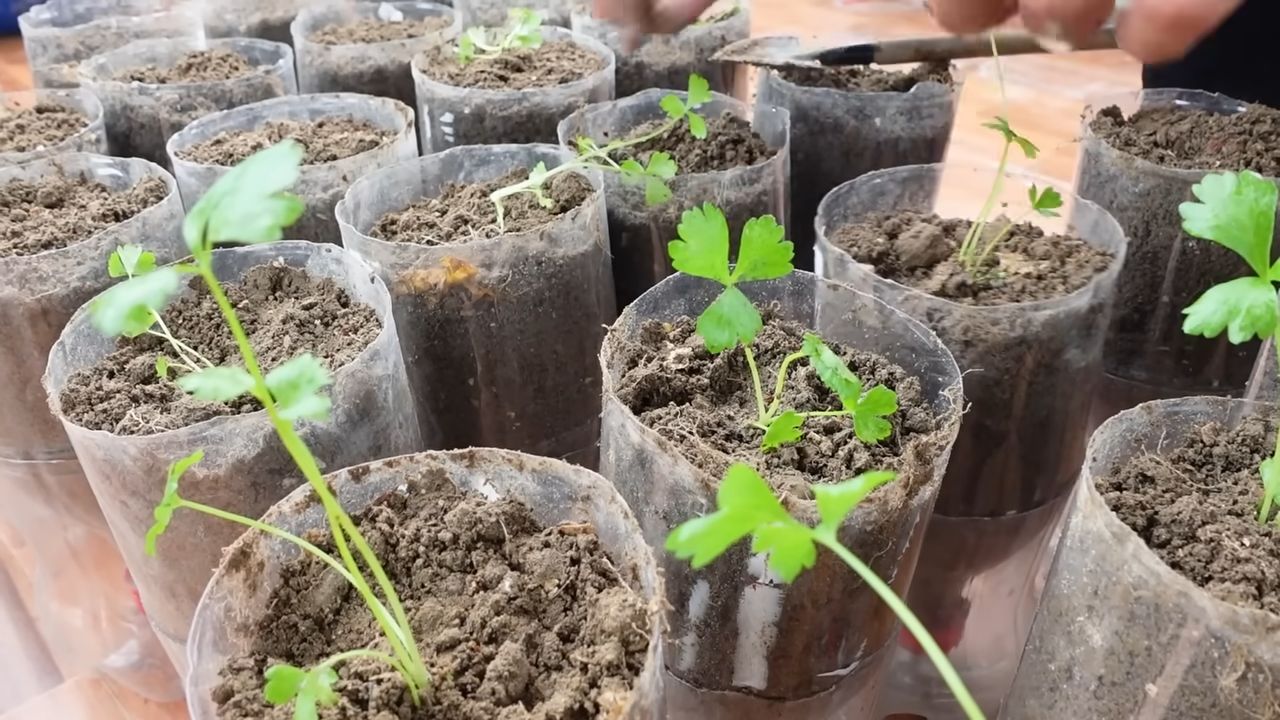
1. Prepare the pot:
- Fill your pot with high-quality potting soil. Leave about 2-3 cm of space to the rim of the pot.
- Moisten the soil slightly, but not too wet.
2. Plant the celery:
- Make a small hole in the center of the soil, large enough to accommodate the celery’s roots.
- Carefully take the celery stump out of the water and place it in the hole. Be careful not to damage the roots.
- Fill the hole with soil and press it down lightly to stabilize the celery.
3. Water and care:
- Water the celery thoroughly after planting.
- Place the pot in a sunny location. Celery needs at least 6 hours of sunlight per day.
- Keep the soil moist, but not wet. Water when the top layer of soil feels dry.
Caring for Your Celery
Now that your celery is planted in soil, it’s important to care for it properly so that it grows well.
1. Watering:
- Celery needs a lot of water, especially during its growth phase. Water regularly, but avoid waterlogging.
- Check the soil daily and water when it feels dry.
2. Fertilizing:
- Celery is a heavy feeder, which means it needs a lot of nutrients. Fertilize it every two weeks with an organic liquid fertilizer.
- Be sure to dilute the fertilizer according to the instructions on the package.
3. Sunlight:
- Make sure your celery gets enough sunlight. If it doesn’t get enough sun, the stalks will become pale and thin.
4. Pests and Diseases:
- Watch out for pests like aphids or slugs. If you discover pests, you can combat them with a natural insecticide or by picking them off.
- Celery can also be affected by fungal diseases. Ensure good air circulation and avoid wetting the leaves when watering.
Harvesting Celery
The harvest is the most exciting part!
1. When to harvest:
- Celery is ready to harvest when the stalks have reached a reasonable size and are firm. This can take 2-3 months, depending on the variety and growing conditions.
2. How to harvest:
- You can either harvest the whole celery at once or cut off individual stalks as needed.
- To harvest the whole celery, cut it just above the ground.
- To harvest individual stalks, simply cut them off with a sharp knife.
Additional Tips and Tricks
Here are a few more tips that can help you with growing celery:
- Blanching: To get lighter and milder celery stalks, you can blanch the celery. This means covering the stalks with soil or cardboard a few weeks before harvest to protect them from sunlight.
- Celery in winter: If you live in a region with cold winters, you can grow your celery in a pot and bring it indoors during the winter.
- Growing celery from seed: You can also grow celery from seed, but this is a bit more challenging than growing from a stump.
Common Problems and Solutions
Problems can also arise when growing celery. Here are some common problems and how you can solve them:
- Yellow leaves: Yellow leaves can be a sign of overwatering, nutrient deficiency, or pest infestation. Check your watering habits, fertilize the celery, and look for pests.
- Thin stalks: Thin stalks can be a sign of too little sunlight or nutrient deficiency. Move the celery to a sunnier location and fertilize it regularly.
- Pests: Aphids, slugs, and other pests can infest celery. Combat them with natural insecticides or by picking them off.
Conclusion
So, that’s it! With this guide, you should be able to grow your own celery at home. It’s a rewarding project that will reward you with fresh, aromatic celery. Happy gardening! And remember: patience is the key
Conclusion
So, there you have it! Growing celery at home, while it might seem daunting at first, is an incredibly rewarding experience. It’s not just about saving money on store-bought celery; it’s about connecting with your food, understanding the growing process, and enjoying the unparalleled freshness of homegrown produce. Forget the limp, often bitter stalks you find at the grocery store. Imagine crisp, juicy celery, bursting with flavor, ready to be enjoyed in salads, soups, or as a healthy snack.
This DIY trick of regrowing celery from the base is a must-try for several reasons. First, it’s incredibly simple and requires minimal effort. You’re essentially giving a second life to something you would normally discard. Second, it’s a fantastic way to reduce food waste and contribute to a more sustainable lifestyle. Third, it’s a fun and educational project for the whole family, especially if you have children. They can witness the magic of regeneration firsthand and learn about plant growth.
But the benefits don’t stop there. Homegrown celery often boasts a superior flavor profile compared to commercially grown varieties. You have complete control over the growing conditions, ensuring that your celery is free from harmful pesticides and herbicides. Plus, the satisfaction of harvesting your own celery is simply unmatched.
Don’t be afraid to experiment with variations! Try different types of celery, such as Pascal celery or red celery, to see which ones thrive best in your environment. You can also adjust the growing conditions to influence the flavor and texture of your celery. For example, providing more sunlight can result in sweeter, more flavorful stalks. Consider adding organic fertilizers to boost growth and nutrient content. You can even try growing celery in containers if you have limited garden space.
Growing celery at home is a journey of discovery, and we encourage you to embark on it! It’s a chance to reconnect with nature, learn new skills, and enjoy the delicious rewards of your labor.
We’re confident that you’ll find this DIY trick to be both enjoyable and successful. So, grab that celery base, follow our simple instructions, and get ready to harvest your own homegrown celery.
We’d love to hear about your experiences! Share your photos, tips, and challenges in the comments below. Let’s create a community of home gardeners who are passionate about growing their own food. Your insights could inspire others to try this rewarding DIY project. Happy growing!
Frequently Asked Questions (FAQ)
How long does it take to regrow celery from the base?
The time it takes to regrow celery from the base can vary depending on several factors, including the variety of celery, the growing conditions, and the climate. Generally, you can expect to see new growth within a week or two after placing the celery base in water. However, it will take several weeks, or even a couple of months, to grow a full-sized celery plant that is ready for harvest. Be patient and provide consistent care, and you’ll be rewarded with delicious homegrown celery.
What kind of water should I use to regrow celery?
It’s best to use filtered or dechlorinated water to regrow celery. Tap water often contains chlorine and other chemicals that can inhibit plant growth. If you don’t have filtered water, you can let tap water sit out for 24 hours to allow the chlorine to evaporate. Change the water every one to two days to prevent the growth of bacteria and algae.
How much sunlight does regrowing celery need?
Celery needs plenty of sunlight to thrive. Aim for at least six hours of direct sunlight per day. If you’re growing celery indoors, place it near a sunny window or use a grow light to supplement natural light. Insufficient sunlight can result in leggy, weak plants.
What kind of soil is best for growing celery?
Celery prefers rich, well-drained soil that is high in organic matter. Amend your garden soil with compost or other organic materials to improve its fertility and drainage. The ideal soil pH for celery is between 6.0 and 6.8. You can test your soil pH with a soil testing kit and adjust it accordingly.
How often should I water my regrowing celery?
Celery needs consistent moisture to thrive. Water your celery regularly, especially during hot, dry weather. The soil should be consistently moist but not waterlogged. Overwatering can lead to root rot, so be sure to provide good drainage. A good rule of thumb is to water when the top inch of soil feels dry to the touch.
Can I grow celery in a container?
Yes, you can definitely grow celery in a container! Choose a pot that is at least 12 inches deep and wide to accommodate the celery’s root system. Use a well-draining potting mix and provide consistent moisture and sunlight. Container-grown celery may require more frequent watering and fertilization than celery grown in the ground.
How do I know when my celery is ready to harvest?
Celery is ready to harvest when the stalks are at least 6-8 inches long and have reached the desired thickness. You can harvest individual stalks as needed or harvest the entire plant at once. To harvest, simply cut the stalks at the base of the plant with a sharp knife.
What are some common problems when growing celery and how do I fix them?
Some common problems when growing celery include pests, diseases, and nutrient deficiencies. Pests such as aphids and celery loopers can be controlled with insecticidal soap or neem oil. Diseases such as celery blight can be prevented by providing good air circulation and avoiding overhead watering. Nutrient deficiencies can be addressed by amending the soil with compost or using a balanced fertilizer.
Can I use the leaves of the regrown celery?
Absolutely! Celery leaves are packed with flavor and nutrients. You can use them in salads, soups, stews, or as a garnish. They can also be dried and used as a seasoning. Don’t let those leaves go to waste!
Is regrowing celery from the base a sustainable practice?
Yes, regrowing celery from the base is a very sustainable practice. It reduces food waste, saves money, and allows you to grow your own fresh produce without relying on commercial agriculture. It’s a small but significant step towards a more sustainable lifestyle.


Leave a Comment