
Growing Cauliflower at Home can seem daunting, right? I get it! You might picture sprawling farms and think, “No way can I do that in my backyard!” But guess what? You absolutely can, and I’m here to show you how with some simple, effective DIY tricks that will have you harvesting your own delicious cauliflower in no time.
Cauliflower, a member of the Brassica family, has a rich history, dating back to ancient times in the Mediterranean region. It wasn’t until the 15th century that it really started gaining popularity in Europe, and now it’s a staple in cuisines worldwide. Think about all the amazing dishes you can create: creamy cauliflower soup, roasted cauliflower steaks, or even cauliflower rice! But imagine how much more satisfying it would be to make those dishes with cauliflower you nurtured from seed to harvest.
So, why should you bother with these DIY tricks for growing cauliflower at home? Well, for starters, store-bought cauliflower can be expensive and sometimes lacks that fresh, vibrant flavor. Plus, you have no control over the pesticides or chemicals used in its cultivation. By growing your own, you’re not only saving money but also ensuring you’re feeding yourself and your family healthy, organic produce. I’m going to share some easy-to-follow tips and hacks that will help you overcome common challenges and enjoy a bountiful cauliflower harvest, even if you’re a complete beginner. Let’s get started!
Blumenkohl Anbauen: Dein DIY-Guide für den eigenen Garten
Hey Gartenfreunde! Habt ihr euch jemals gefragt, wie ihr diesen knackigen, vielseitigen Blumenkohl direkt in eurem Garten anbauen könnt? Ich zeige euch, wie es geht! Es ist einfacher als ihr denkt und das Ergebnis ist einfach unschlagbar – frischer, selbst angebauter Blumenkohl, der besser schmeckt als alles, was ihr im Supermarkt findet. Lasst uns loslegen!
Was du brauchst: Die Vorbereitung
Bevor wir mit dem Pflanzen beginnen, brauchen wir ein paar Dinge. Keine Sorge, die meisten davon habt ihr wahrscheinlich schon zu Hause oder könnt sie leicht besorgen.
* Blumenkohlsamen oder Jungpflanzen: Ich empfehle, mit Jungpflanzen zu beginnen, besonders wenn ihr Anfänger seid. Das spart Zeit und Mühe.
* Gute Erde: Blumenkohl liebt nährstoffreiche, gut durchlässige Erde. Kompost ist hier euer bester Freund!
* Kompost oder organischer Dünger: Für einen extra Nährstoffschub.
* Gartengeräte: Spaten, Harke, Gießkanne oder Gartenschlauch.
* Mulch: Stroh oder Holzhackschnitzel helfen, die Feuchtigkeit zu halten und Unkraut zu unterdrücken.
* Schutz vor Schädlingen: Schneckenkorn oder ein Netz, um die jungen Pflanzen vor hungrigen Besuchern zu schützen.
* Geduld: Blumenkohl braucht Zeit und Pflege, aber es lohnt sich!
Der richtige Zeitpunkt: Wann pflanzen?
Der Zeitpunkt ist entscheidend für eine erfolgreiche Blumenkohlernte. Blumenkohl mag es kühl, daher ist es wichtig, ihn zur richtigen Zeit zu pflanzen.
* Frühjahrspflanzung: Beginnt im Frühjahr, sobald der Boden aufgetaut ist und die Frostgefahr vorüber ist. Das ist normalerweise im April oder Mai.
* Herbstpflanzung: Für eine Herbsternte könnt ihr im Juli oder August pflanzen. Achtet darauf, dass die Pflanzen genügend Zeit haben, vor dem ersten Frost zu reifen.
Schritt-für-Schritt Anleitung: Blumenkohl pflanzen
Jetzt geht’s ans Eingemachte! Hier ist eine detaillierte Anleitung, wie ihr euren Blumenkohl erfolgreich pflanzt.
1. Boden vorbereiten:
* Lockert den Boden gründlich auf. Blumenkohl braucht lockere Erde, damit die Wurzeln gut wachsen können.
* Entfernt Steine und Unkraut.
* Mischt Kompost oder organischen Dünger unter die Erde. Das gibt dem Blumenkohl einen guten Start.
2. Pflanzlöcher graben:
* Grabt Löcher, die etwas größer sind als die Wurzelballen der Jungpflanzen.
* Haltet einen Abstand von etwa 45-60 cm zwischen den Pflanzen ein. Blumenkohl braucht Platz zum Wachsen.
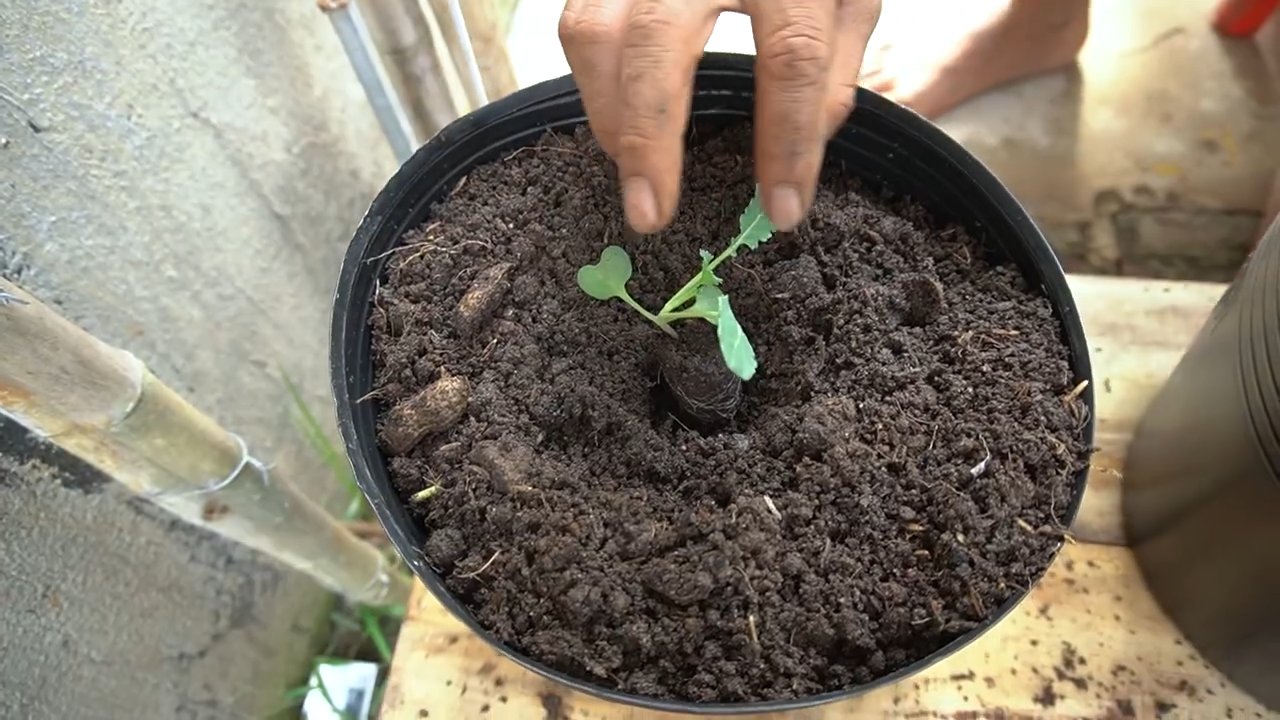
3. Pflanzen einsetzen:
* Nehmt die Jungpflanzen vorsichtig aus ihren Töpfen.
* Setzt sie in die Löcher und achtet darauf, dass der Wurzelballen mit der Erdoberfläche abschließt.
* Füllt die Löcher mit Erde und drückt sie leicht an.
4. Gießen:
* Gießt die Pflanzen gründlich an. Das hilft ihnen, sich im Boden zu etablieren.
5. Mulchen:
* Tragt eine Schicht Mulch um die Pflanzen auf. Das hält die Feuchtigkeit im Boden, unterdrückt Unkraut und schützt die Wurzeln vor extremen Temperaturen.
6. Schutzmaßnahmen:
* Bringt Schneckenkorn aus oder legt ein Netz über die Pflanzen, um sie vor Schädlingen zu schützen. Besonders junge Pflanzen sind anfällig.
Die Pflege: So bleibt dein Blumenkohl gesund und glücklich
Blumenkohl braucht regelmäßige Pflege, um gut zu wachsen und eine schöne Blüte zu entwickeln.
1. Gießen:
* Gießt den Blumenkohl regelmäßig, besonders während trockener Perioden. Der Boden sollte immer leicht feucht sein, aber nicht nass.
2. Düngen:
* Düngt den Blumenkohl alle paar Wochen mit einem organischen Dünger. Das sorgt für eine gute Nährstoffversorgung.
3. Unkraut entfernen:
* Haltet den Bereich um den Blumenkohl frei von Unkraut. Unkraut konkurriert mit dem Blumenkohl um Nährstoffe und Wasser.
4. Schädlinge und Krankheiten:
* Achtet auf Schädlinge wie Kohlweißlinge, Blattläuse und Schnecken.
* Kontrolliert die Pflanzen regelmäßig auf Krankheiten wie Kohlhernie oder Falscher Mehltau.
* Entfernt befallene Blätter oder Pflanzen sofort, um die Ausbreitung zu verhindern.
* Bei Bedarf könnt ihr biologische Schädlingsbekämpfungsmittel einsetzen.
5. Blanchieren (Bleichen):
* Sobald der Blumenkohlkopf etwa die Größe eines Tennisballs erreicht hat, könnt ihr ihn blanchieren, um ihn weiß zu halten.
* Dazu biegt ihr die äußeren Blätter über den Kopf und fixiert sie mit einer Wäscheklammer oder einem Gummiband.
* Das verhindert, dass der Kopf durch Sonneneinstrahlung gelb wird.
* Lasst die Blätter etwa eine Woche lang über dem Kopf, bevor ihr erntet.
Die Ernte: Wann ist der Blumenkohl reif?
Die Ernte ist der krönende Abschluss eurer Arbeit!
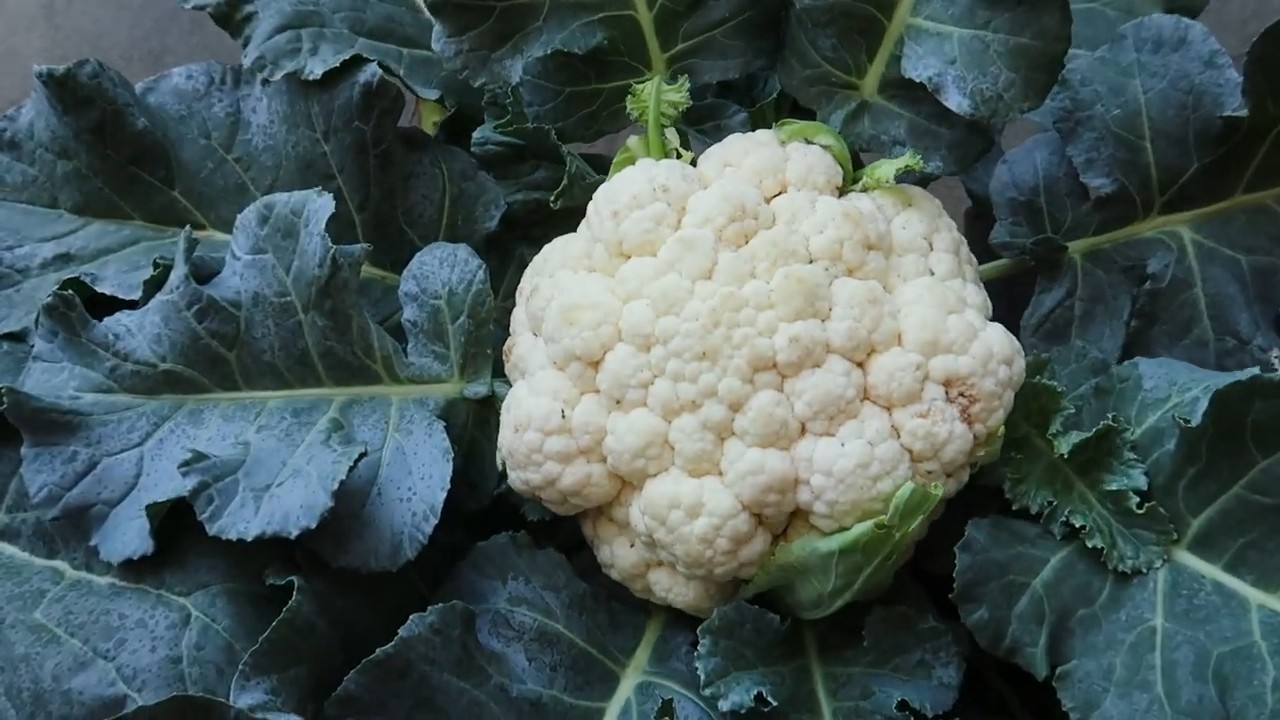
1. Reife erkennen:
* Der Blumenkohl ist reif, wenn der Kopf fest und kompakt ist und die einzelnen Röschen noch geschlossen sind.
* Die Größe des Kopfes hängt von der Sorte ab, aber im Allgemeinen sollte er etwa 15-20 cm Durchmesser haben.
2. Ernten:
* Schneidet den Blumenkohlkopf mit einem scharfen Messer ab.
* Lasst einige Blätter am Strunk, um den Kopf zu schützen.
3. Lagerung:
* Blumenkohl hält sich im Kühlschrank etwa eine Woche.
* Ihr könnt ihn auch einfrieren, nachdem ihr ihn blanchiert habt.
Häufige Probleme und Lösungen
Auch beim Blumenkohlanbau können Probleme auftreten. Hier sind einige häufige Probleme und wie ihr sie lösen könnt:
* Kohlhernie: Eine Pilzkrankheit, die die Wurzeln befällt.
* Lösung: Sorgt für eine gute Bodendrainage und vermeidet saure Böden. Verwendet resistente Sorten.
* Kohlweißlinge: Die Raupen fressen die Blätter.
* Lösung: Sammelt die Raupen ab oder verwendet ein Netz, um die Pflanzen zu schützen.
* Blattläuse: Saugen Pflanzensaft und schwächen die Pflanzen.
* Lösung: Spritzt die Pflanzen mit einem Wasserstrahl ab oder verwendet eine Seifenlösung.
* Schnecken: Fressen die jungen Pflanzen.
* Lösung: Bringt Schneckenkorn aus oder stellt Bierfallen auf.
Zusätzliche Tipps für eine reiche Ernte
Hier sind noch ein paar zusätzliche Tipps, die euch helfen, eine reiche Blumenkohlernte zu erzielen:
* Fruchtfolge: Baut Blumenkohl nicht jedes Jahr am selben Standort an. Das hilft, Krankheiten und Schädlinge zu vermeiden.
* Begleitpflanzung: Pflanzt Blumenkohl zusammen mit anderen Pflanzen, die ihn schützen oder fördern. Gute Begleitpflanzen sind zum Beispiel Ringelblumen, Dill oder Thymian.
* Sortenwahl: Wählt Sorten, die für euer Klima und eure Bodenbedingungen geeignet sind. Es gibt frühe, mittlere und späte Sorten.
* Bodenanalyse: Lasst euren Boden analysieren, um sicherzustellen, dass er die richtigen Nährstoffe enthält.
Fazit: Dein eigener Blumenkohl – ein Erfolgserlebnis!
Ich hoffe, dieser Guide hat euch geholfen, den Blumenkohlanbau zu verstehen und euch Mut gemacht, es selbst zu versuchen. Es ist ein tolles Gefühl, seinen eigenen Blumenkohl zu ernten und zu wissen, dass er ohne schädliche Pestizide gewachsen ist. Also, ran an die Schaufel und viel Erfolg beim Gärtnern! Lasst mich wissen, wie es läuft
Conclusion
So, there you have it! Growing cauliflower at home, while it might seem daunting at first, is an incredibly rewarding experience that puts fresh, flavorful produce right at your fingertips. We’ve walked through the essential steps, from selecting the right variety and preparing your soil to nurturing your plants and protecting them from pests and diseases. The satisfaction of harvesting your own perfectly formed cauliflower head, knowing you nurtured it from a tiny seedling, is truly unparalleled.
But why should you take the plunge and dedicate some space in your garden to this cruciferous beauty? Beyond the sheer joy of gardening, growing your own cauliflower offers several compelling advantages. Firstly, you have complete control over the growing process. You can choose organic methods, avoiding harmful pesticides and herbicides, ensuring that your cauliflower is as healthy and nutritious as possible. Secondly, homegrown cauliflower often boasts a superior flavor compared to store-bought varieties. Freshly harvested, it retains its sweetness and crispness, making it a delicious addition to your meals. Finally, growing your own food is a sustainable practice that reduces your carbon footprint and connects you to the natural world.
Don’t be afraid to experiment with different cauliflower varieties to find your favorites. Consider trying colorful options like purple or orange cauliflower for a visually stunning and nutrient-rich addition to your plate. You can also explore different planting times to extend your harvest season. For example, planting a late-season variety can provide you with fresh cauliflower well into the fall.
Ready to embark on your cauliflower-growing adventure? We encourage you to give it a try! Start small, perhaps with just a few plants, and gradually expand your garden as you gain experience. Remember to pay close attention to your plants’ needs, providing them with adequate sunlight, water, and nutrients. And don’t hesitate to reach out to fellow gardeners or consult online resources for guidance and support.
We’re confident that you’ll find growing cauliflower at home to be a fulfilling and delicious experience. Once you’ve harvested your first head, be sure to share your success stories and tips with us! We’d love to hear about your favorite varieties, growing techniques, and delicious cauliflower recipes. Let’s build a community of cauliflower enthusiasts and inspire others to discover the joys of homegrown produce. Happy gardening!
Frequently Asked Questions (FAQ)
What is the best time of year to plant cauliflower?
The best time to plant cauliflower depends on your climate and the specific variety you’re growing. Generally, cauliflower thrives in cool weather, so it’s typically planted in the spring or fall. For a spring crop, start seeds indoors 6-8 weeks before the last expected frost. Transplant seedlings outdoors 2-3 weeks before the last frost. For a fall crop, start seeds indoors in mid-summer and transplant seedlings outdoors in late summer or early fall. Check the specific recommendations for your chosen variety, as some are better suited for certain seasons. Consider your local climate and average frost dates when planning your planting schedule.
How much sunlight does cauliflower need?
Cauliflower requires at least 6 hours of direct sunlight per day to thrive. Choose a planting location that receives ample sunlight throughout the day. If you live in a particularly hot climate, some afternoon shade may be beneficial to prevent the plants from overheating. Insufficient sunlight can lead to leggy growth, smaller heads, and reduced yields. Monitor your plants closely and adjust their location if necessary to ensure they receive adequate sunlight.
What kind of soil is best for growing cauliflower?
Cauliflower prefers well-drained, fertile soil that is rich in organic matter. The ideal soil pH is between 6.0 and 7.0. Before planting, amend your soil with compost, well-rotted manure, or other organic materials to improve its fertility and drainage. Avoid heavy clay soils, as they can become waterlogged and inhibit root growth. If your soil is compacted, consider adding sand or perlite to improve drainage. A soil test can help you determine the pH and nutrient levels of your soil and guide you in making necessary amendments.
How often should I water cauliflower plants?
Cauliflower plants need consistent moisture to thrive. Water deeply and regularly, especially during dry periods. Aim to keep the soil consistently moist but not waterlogged. The frequency of watering will depend on your climate, soil type, and the age of your plants. Young seedlings require more frequent watering than mature plants. Check the soil moisture regularly by inserting your finger into the soil. If the top inch feels dry, it’s time to water. Avoid overhead watering, as it can promote fungal diseases. Instead, water at the base of the plants using a soaker hose or drip irrigation system.
How do I prevent cauliflower from bolting (going to seed)?
Bolting, or premature flowering, can occur when cauliflower plants are exposed to stress, such as extreme temperatures or inconsistent watering. To prevent bolting, choose bolt-resistant varieties, plant at the appropriate time of year, and provide consistent moisture. Protect your plants from extreme heat by providing shade during the hottest part of the day. Avoid letting the soil dry out completely, as this can also trigger bolting. Mulching around the plants can help retain moisture and regulate soil temperature.
What are some common pests and diseases that affect cauliflower?
Cauliflower is susceptible to several pests and diseases, including cabbage worms, aphids, flea beetles, clubroot, and black rot. To prevent pest and disease problems, practice good garden hygiene, such as removing plant debris and weeds. Use row covers to protect young plants from pests. Inspect your plants regularly for signs of infestation or disease. If you spot any problems, take action immediately. Organic pest control methods, such as insecticidal soap or neem oil, can be effective against many common pests. For diseases, ensure good air circulation and avoid overhead watering. If necessary, use a fungicide specifically labeled for use on cauliflower.
How do I blanch cauliflower?
Blanching is the process of covering the developing cauliflower head to protect it from sunlight and prevent it from turning yellow or brown. To blanch cauliflower, when the head is about 2-3 inches in diameter, gather the outer leaves around the head and secure them with twine, rubber bands, or clothespins. Check the head regularly and harvest it when it reaches the desired size. Blanching is not always necessary, especially for colored varieties of cauliflower. However, it can help to produce a whiter, more tender head.
How do I know when cauliflower is ready to harvest?
Cauliflower is ready to harvest when the head is firm, compact, and reaches the desired size. The size of the head will vary depending on the variety. Check the seed packet or plant tag for specific information. The curds should be tightly packed and free from blemishes. If the curds start to separate or the head becomes loose, it’s time to harvest. To harvest cauliflower, cut the stem just below the head, leaving a few leaves attached for protection.
Can I grow cauliflower in containers?
Yes, you can grow cauliflower in containers, but you’ll need to choose a large container that is at least 12 inches in diameter and 12 inches deep. Use a well-draining potting mix and provide consistent moisture and nutrients. Container-grown cauliflower may require more frequent watering and fertilization than plants grown in the ground. Choose a sunny location for your container and protect the plants from extreme temperatures. Dwarf varieties of cauliflower are particularly well-suited for container gardening.
What are some delicious ways to use homegrown cauliflower?
Homegrown cauliflower can be used in a variety of delicious dishes. It can be roasted, steamed, boiled, mashed, or pureed. It can also be used in soups, stews, salads, and stir-fries. Cauliflower rice is a popular low-carb alternative to rice. Cauliflower can also be used to make pizza crust, gnocchi, and other creative dishes. Experiment with different recipes and flavor combinations to discover your favorite ways to enjoy this versatile vegetable.


Leave a Comment