Growing Broccoli at Home can seem daunting, but trust me, it’s more achievable (and rewarding!) than you might think. Have you ever imagined strolling into your backyard, snipping off a perfectly formed head of broccoli, and serving it fresh to your family? That’s the magic we’re unlocking today!
Broccoli, a member of the brassica family, has a rich history dating back to the Roman Empire. For centuries, it’s been celebrated not only for its unique flavor but also for its incredible nutritional benefits. From boosting your immune system to providing essential vitamins and minerals, broccoli is a true superfood. But why rely solely on grocery stores when you can cultivate your own supply?
In today’s world, where we’re increasingly conscious of where our food comes from, growing broccoli at home offers a fantastic solution. You control the pesticides, you reduce your carbon footprint, and you get the unparalleled satisfaction of nurturing something from seed to table. Plus, let’s be honest, store-bought broccoli just can’t compare to the vibrant flavor of freshly harvested, homegrown goodness. This DIY guide will equip you with simple yet effective tricks and hacks to successfully grow broccoli, even if you’re a complete beginner. So, grab your gardening gloves, and let’s get started!

Growing Broccoli at Home: A DIY Guide for Beginners
Hey there, fellow gardening enthusiasts! I’m so excited to share my experience and guide you through the process of growing your own broccoli at home. It’s surprisingly rewarding, and nothing beats the taste of fresh, homegrown broccoli. Let’s dive in!
Choosing Your Broccoli Variety
Before we get our hands dirty, let’s talk broccoli varieties. There are tons to choose from, each with its own characteristics. Here are a few popular options:
* Calabrese: This is your classic broccoli, producing a large central head. It’s a reliable choice for beginners.
* Waltham 29: Another great option for beginners, known for its heat tolerance and good yields.
* DiCicco: This variety produces smaller, more numerous side shoots after the main head is harvested, giving you a longer harvest period.
* Purple Sprouting Broccoli: If you’re feeling adventurous, try this one! It produces beautiful purple florets and is very cold-hardy.
I personally love growing Calabrese because of its large, satisfying heads. But feel free to experiment and find what works best for you and your climate!
Getting Started: Seeds vs. Transplants
You have two main options for starting your broccoli: seeds or transplants.
* Seeds: Starting from seed gives you more control over the entire process and is generally more economical. However, it requires more time and attention.
* Transplants: Buying transplants from a nursery is a quicker and easier option, especially if you’re short on time or space.
I usually start my broccoli from seed indoors about 6-8 weeks before the last expected frost. This gives them a head start and ensures they’re strong enough to handle the outdoor conditions.
Starting Broccoli from Seed (Indoor Method)
Here’s how I start my broccoli seeds indoors:
1. Gather Your Supplies: You’ll need seed starting trays or small pots, seed starting mix (a light, well-draining soil), broccoli seeds, a spray bottle, and a grow light (optional, but highly recommended).
2. Prepare the Seed Starting Mix: Moisten the seed starting mix with water until it’s damp but not soggy.
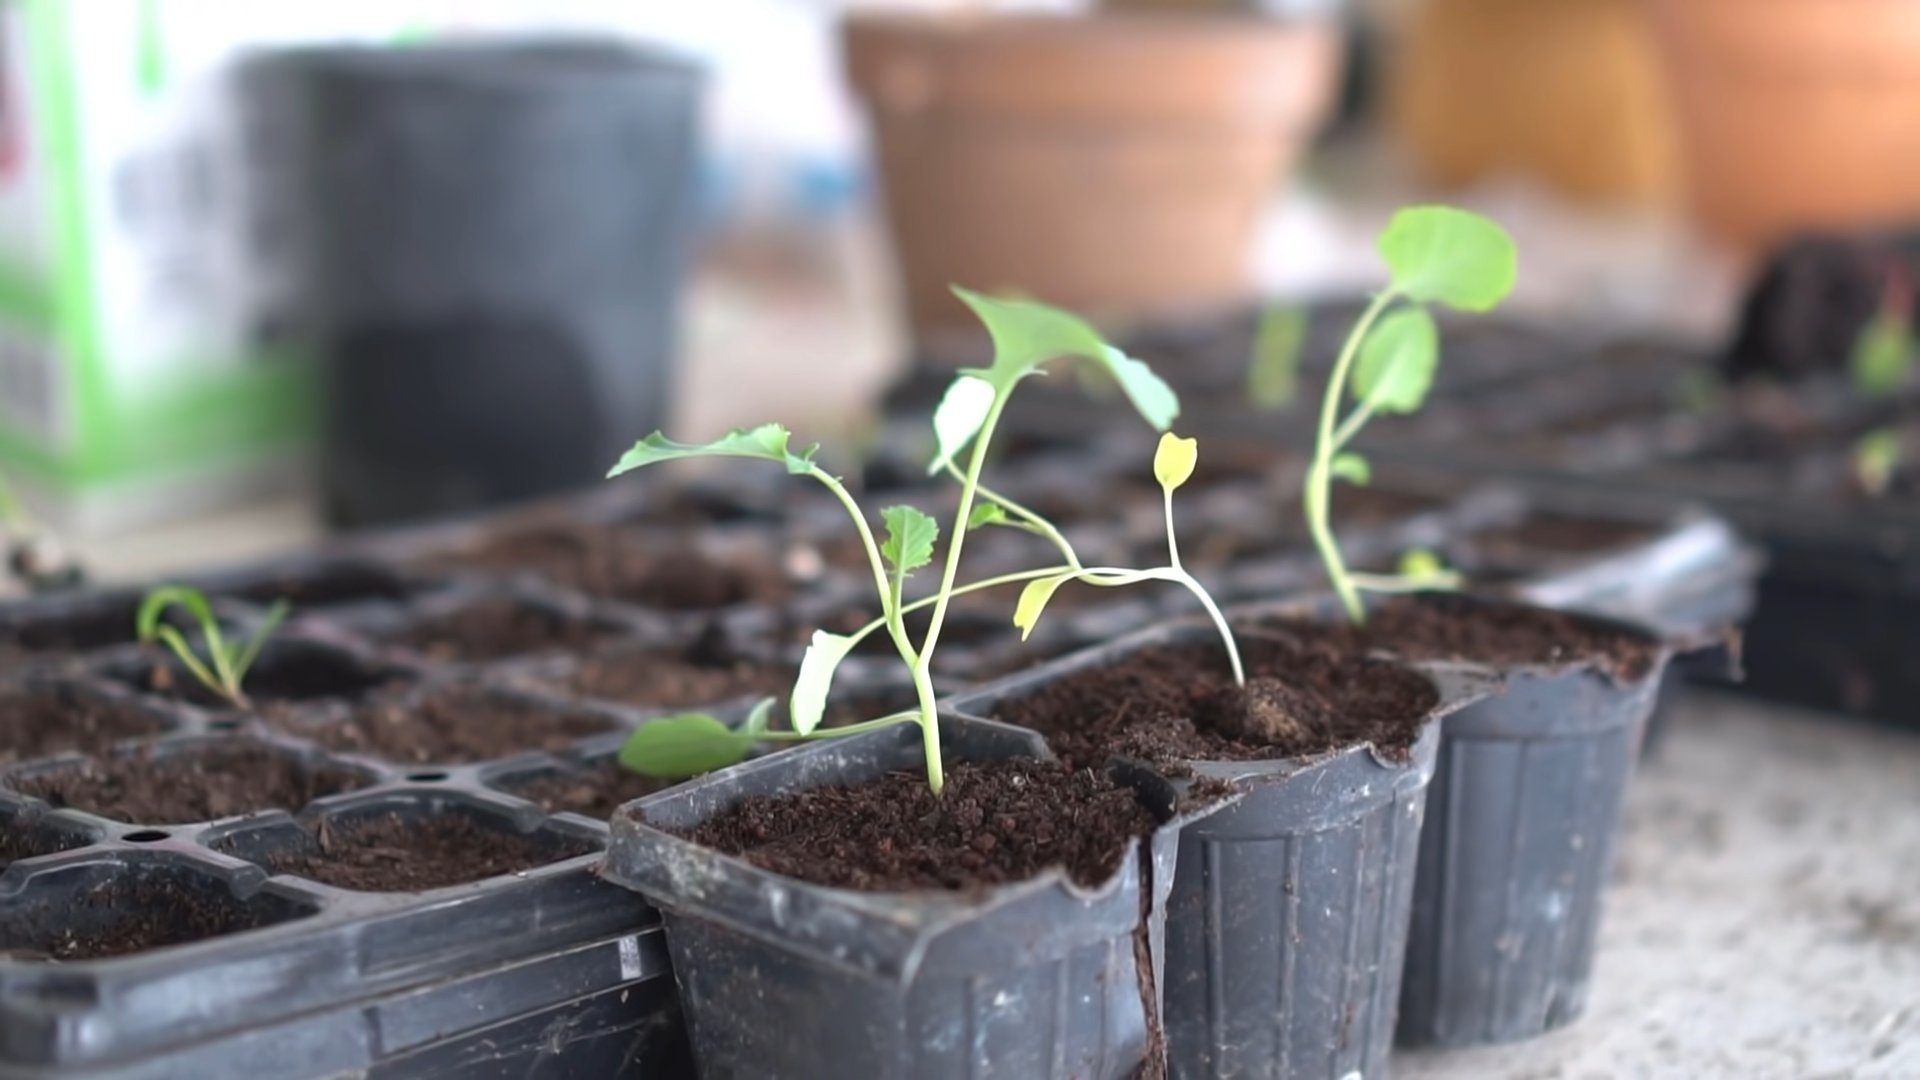
3. Sow the Seeds: Fill the seed starting trays or pots with the moistened mix. Make a small indentation (about 1/4 inch deep) in the center of each cell or pot. Place 2-3 broccoli seeds in each indentation.
4. Cover the Seeds: Gently cover the seeds with a thin layer of seed starting mix.
5. Water Gently: Use a spray bottle to mist the surface of the soil. Avoid overwatering, as this can lead to damping off (a fungal disease that can kill seedlings).
6. Provide Light: Place the seed starting trays or pots under a grow light or in a sunny window. If using a grow light, keep it about 2-4 inches above the seedlings.
7. Maintain Moisture: Keep the soil consistently moist but not soggy. Check the soil daily and mist with water as needed.
8. Thin the Seedlings: Once the seedlings have developed their first true leaves (the leaves that appear after the initial seed leaves), thin them to one seedling per cell or pot. Choose the strongest, healthiest-looking seedling and snip off the others at the soil line.
9. Harden Off the Seedlings: About a week before you plan to transplant the seedlings outdoors, you’ll need to “harden them off.” This process gradually acclimates the seedlings to the outdoor conditions. Start by placing the seedlings outdoors in a sheltered location for a few hours each day, gradually increasing the amount of time they spend outside. Protect them from direct sunlight and strong winds.
Preparing the Garden Bed
Broccoli needs a sunny spot with well-drained soil. Here’s how I prepare my garden bed:
1. Choose a Sunny Location: Broccoli needs at least 6 hours of sunlight per day.
2. Test the Soil: Ideally, broccoli prefers a soil pH between 6.0 and 7.0. You can test your soil using a soil testing kit.
3. Amend the Soil: Amend the soil with compost or other organic matter to improve drainage and fertility. Broccoli is a heavy feeder, so it needs plenty of nutrients. I usually add a generous amount of compost and some slow-release fertilizer.
4. Till or Dig the Soil: Loosen the soil to a depth of at least 12 inches. This will allow the broccoli roots to grow easily.
5. Create Planting Rows or Beds: Create raised rows or beds to improve drainage.
Transplanting Broccoli Seedlings
Now for the exciting part – transplanting your broccoli seedlings into the garden!
1. Choose a Cloudy Day: Transplanting on a cloudy day will help reduce stress on the seedlings.
2. Dig Holes: Dig holes that are slightly larger than the root balls of the seedlings. Space the holes about 18-24 inches apart.
3. Remove Seedlings from Pots: Gently remove the seedlings from their pots, being careful not to damage the roots.
4. Plant the Seedlings: Place the seedlings in the holes and backfill with soil. Make sure the top of the root ball is level with the soil surface.
5. Water Thoroughly: Water the seedlings thoroughly after planting.
6. Mulch: Apply a layer of mulch around the seedlings to help retain moisture and suppress weeds. I like to use straw or wood chips.
Caring for Your Broccoli Plants
Once your broccoli plants are in the ground, it’s important to provide them with proper care.
* Watering: Broccoli needs consistent moisture, especially during hot weather. Water deeply whenever the top inch of soil feels dry.
* Fertilizing: Fertilize your broccoli plants every 2-3 weeks with a balanced fertilizer. Follow the instructions on the fertilizer package.
* Weeding: Keep the garden bed free of weeds, as they can compete with the broccoli plants for nutrients and water.
* Pest Control: Broccoli is susceptible to several pests, including cabbage worms, aphids, and flea beetles. Inspect your plants regularly for signs of pests.
* Cabbage Worms: These green caterpillars can quickly devour broccoli leaves. Handpick them off the plants or use Bacillus thuringiensis (Bt), a natural insecticide.
* Aphids: These small, sap-sucking insects can weaken broccoli plants. Spray them off with a strong stream of water or use insecticidal soap.
* Flea Beetles: These tiny beetles can create small holes in broccoli leaves. Cover the plants with row covers to prevent flea beetles from reaching them.
* Disease Prevention: Broccoli can also be affected by diseases such as clubroot and black rot.
* Clubroot: This soilborne disease causes swollen, distorted roots. Prevent clubroot by maintaining a soil pH above 7.0 and practicing crop rotation.
* Black Rot: This bacterial disease causes yellowing and browning of the leaves. Prevent black rot by using disease-free seeds and avoiding overhead watering.
Harvesting Your Broccoli
The moment you’ve been waiting for! Harvesting your homegrown broccoli is incredibly satisfying.
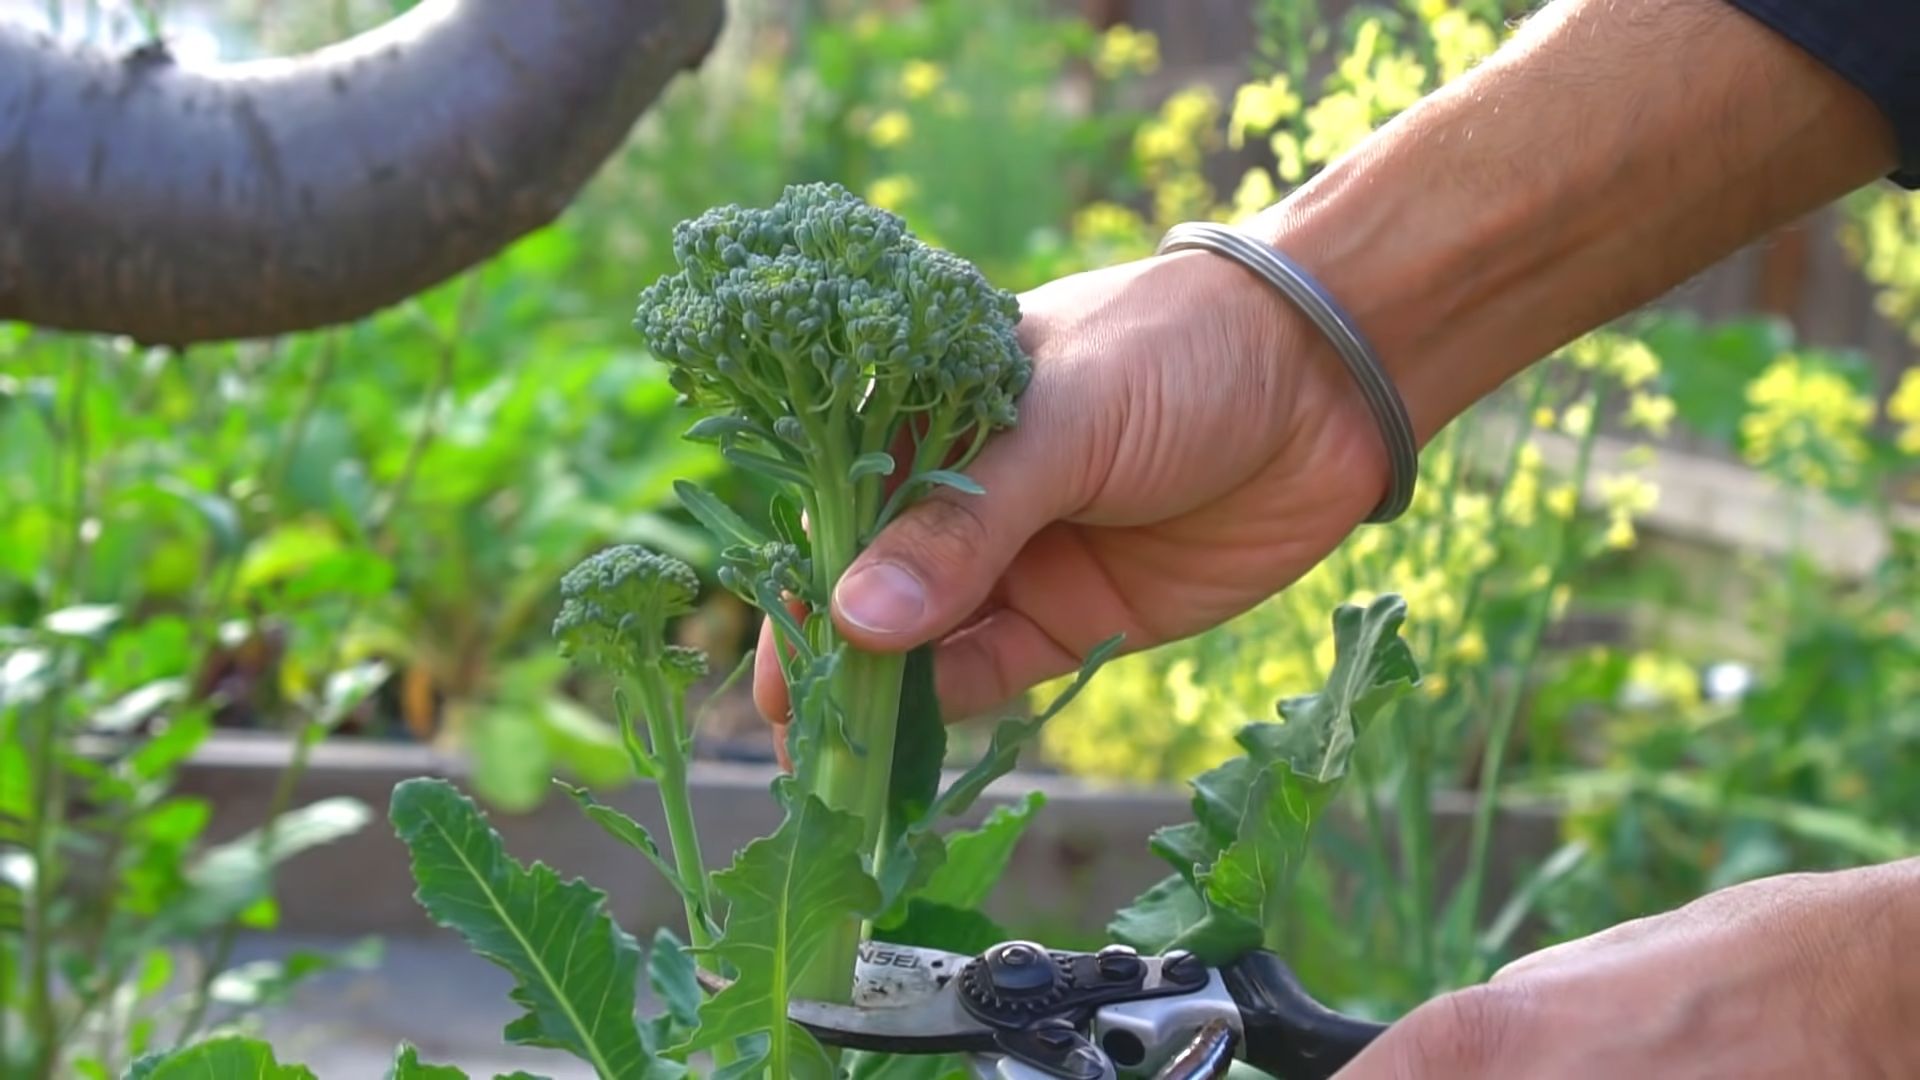
1. Harvest When the Head is Firm and Tight: Harvest the main head when it’s firm, tight, and the florets are still closed. If the florets start to open and turn yellow, it’s time to harvest.
2. Cut the Stem: Use a sharp knife to cut the stem about 5-6 inches below the head.
3. Encourage Side Shoots: After harvesting the main head, the plant will often produce smaller side shoots. Continue to water and fertilize the plant to encourage these side shoots to develop.
4. Store Properly: Store harvested broccoli in the refrigerator for up to a week.
Troubleshooting Common Broccoli Problems
Even with the best care, you might encounter some problems while growing broccoli. Here are a few common issues and how to address them:
* Yellowing Leaves: This could be a sign of nutrient deficiency, overwatering, or disease. Check the soil pH and nutrient levels, adjust your watering schedule, and inspect the plants for signs of disease.
* Small Heads: Small heads can be caused by insufficient sunlight, poor soil fertility, or overcrowding. Make sure your broccoli plants are getting enough sunlight, fertilize them regularly, and space them properly.
* Bolting: Bolting (premature flowering) can occur when broccoli plants are exposed to hot weather or stress. Choose heat-tolerant varieties and provide shade during hot weather.
* Hollow Stems: Hollow stems can be caused by boron deficiency. Amend the soil with boron or use a fertilizer that contains boron.
Enjoying Your Homegrown Broccoli
Congratulations! You’ve successfully grown your own broccoli. Now it’s time to enjoy the

Conclusion
So, there you have it! Growing broccoli at home, while it might seem daunting at first, is an incredibly rewarding experience. It’s not just about saving money (though that’s a definite perk!), it’s about connecting with your food, understanding the growing process, and enjoying the unparalleled flavor of freshly harvested, homegrown broccoli. Forget the bland, sometimes rubbery broccoli you find at the grocery store. This is about vibrant green florets, packed with nutrients and bursting with a slightly sweet, earthy taste that will transform your perception of this humble vegetable.
We’ve walked you through the key steps, from selecting the right variety and starting your seeds indoors (or directly sowing them if your climate allows), to providing the optimal growing conditions and protecting your precious plants from pests and diseases. Remember, patience is key. Broccoli takes time and attention, but the payoff is well worth the effort.
But don’t stop there! Experiment with different varieties to find your favorites. Try growing Romanesco broccoli for its stunning fractal patterns and delicate flavor, or perhaps some purple sprouting broccoli for a splash of color in your garden and on your plate. Consider companion planting to deter pests and improve soil health. Marigolds, for example, are excellent at repelling nematodes, while dill attracts beneficial insects that prey on aphids.
And speaking of pests, don’t be discouraged if you encounter a few challenges along the way. Cabbage worms and aphids are common broccoli pests, but with a little diligence and the right organic pest control methods (like introducing ladybugs or using insecticidal soap), you can keep them at bay. Regularly inspect your plants and address any problems early on to prevent them from escalating.
The beauty of growing your own broccoli is that you have complete control over the process. You can choose to use organic fertilizers and pest control methods, ensuring that your broccoli is free from harmful chemicals. You can also harvest your broccoli at its peak ripeness, when the florets are tight and the color is vibrant.
Growing broccoli at home is more than just a gardening project; it’s an investment in your health, your well-being, and your connection to the natural world. It’s a chance to learn new skills, to get your hands dirty, and to experience the satisfaction of nurturing something from seed to harvest.
So, what are you waiting for? Grab some seeds, prepare your soil, and get ready to embark on your own broccoli-growing adventure. We’re confident that you’ll be amazed by the results. And once you’ve harvested your first crop, be sure to share your experiences with us! We’d love to hear about your successes, your challenges, and your favorite ways to enjoy your homegrown broccoli. Share your photos and stories on social media using #HomegrownBroccoli and inspire others to join the movement. Happy gardening!
Frequently Asked Questions (FAQ)
What is the best time of year to start growing broccoli?
The timing for planting broccoli depends largely on your climate. Broccoli thrives in cooler temperatures, ideally between 60°F and 70°F (15°C and 21°C). For spring crops, start seeds indoors 6-8 weeks before the last expected frost. You can also direct sow seeds outdoors a few weeks before the last frost, provided the soil is workable. For fall crops, start seeds indoors in mid-summer, about 10-12 weeks before the first expected frost. This allows the plants to mature during the cooler fall months. In warmer climates, you can grow broccoli throughout the winter.
How much sunlight does broccoli need?
Broccoli requires at least 6 hours of direct sunlight per day to thrive. More sunlight is always better, especially in cooler climates. Insufficient sunlight can result in leggy plants with small heads. Choose a location in your garden that receives full sun throughout the day. If you’re growing broccoli indoors under grow lights, ensure the lights are positioned close to the plants and provide adequate intensity.
What kind of soil is best for growing broccoli?
Broccoli prefers well-drained, fertile soil with a pH between 6.0 and 7.0. Amend your soil with compost or other organic matter to improve drainage and fertility. Broccoli is a heavy feeder, so it’s important to provide it with plenty of nutrients. Before planting, incorporate a balanced fertilizer into the soil. You can also side-dress your plants with fertilizer throughout the growing season. Avoid soils that are heavy clay or prone to waterlogging, as these can lead to root rot.
How often should I water my broccoli plants?
Broccoli needs consistent moisture to thrive. Water deeply and regularly, especially during dry periods. Aim to keep the soil consistently moist but not waterlogged. Water at the base of the plants to avoid wetting the foliage, which can increase the risk of fungal diseases. Mulching around your broccoli plants can help to retain moisture and suppress weeds. Check the soil moisture regularly by sticking your finger into the soil. If the top inch feels dry, it’s time to water.
What are some common pests and diseases that affect broccoli?
Broccoli is susceptible to several pests and diseases, including cabbage worms, aphids, flea beetles, clubroot, and downy mildew. Cabbage worms can be controlled with Bacillus thuringiensis (Bt), a natural insecticide. Aphids can be washed off with a strong stream of water or treated with insecticidal soap. Flea beetles can be deterred with row covers. Clubroot is a soilborne disease that can be prevented by rotating crops and maintaining a soil pH above 7.0. Downy mildew is a fungal disease that can be prevented by providing good air circulation and avoiding overhead watering. Regularly inspect your plants for signs of pests or diseases and take action promptly to prevent them from spreading.
How do I know when my broccoli is ready to harvest?
Broccoli is ready to harvest when the head is firm and the florets are tight and green. The size of the head will vary depending on the variety, but generally, you should harvest it before the florets start to open and turn yellow. Use a sharp knife to cut the head from the plant, leaving a few inches of stem. After harvesting the main head, the plant may produce smaller side shoots, which can also be harvested.
Can I grow broccoli in containers?
Yes, you can grow broccoli in containers, but you’ll need to choose a large container, at least 12 inches in diameter and depth. Use a high-quality potting mix and provide your plants with plenty of sunlight and water. Container-grown broccoli may require more frequent fertilization than broccoli grown in the ground. Choose a compact variety that is well-suited for container growing.
How can I store my harvested broccoli?
Freshly harvested broccoli can be stored in the refrigerator for up to a week. Wrap the broccoli head in a damp paper towel and place it in a plastic bag. You can also blanch and freeze broccoli for longer storage. To blanch broccoli, cut it into florets and boil it for 3-5 minutes. Then, plunge it into ice water to stop the cooking process. Drain the broccoli and freeze it in a single layer on a baking sheet. Once frozen, transfer the florets to a freezer bag or container.
Is growing broccoli at home worth the effort?
Absolutely! While it requires some effort and attention, growing your own broccoli offers numerous benefits. You’ll enjoy fresher, more flavorful broccoli, free from harmful chemicals. You’ll also save money and gain a sense of satisfaction from nurturing your own food. Plus, gardening is a great way to get exercise and reduce stress. Growing broccoli at home is a rewarding experience that will enhance your health, your well-being, and your connection to the natural world.


Leave a Comment