
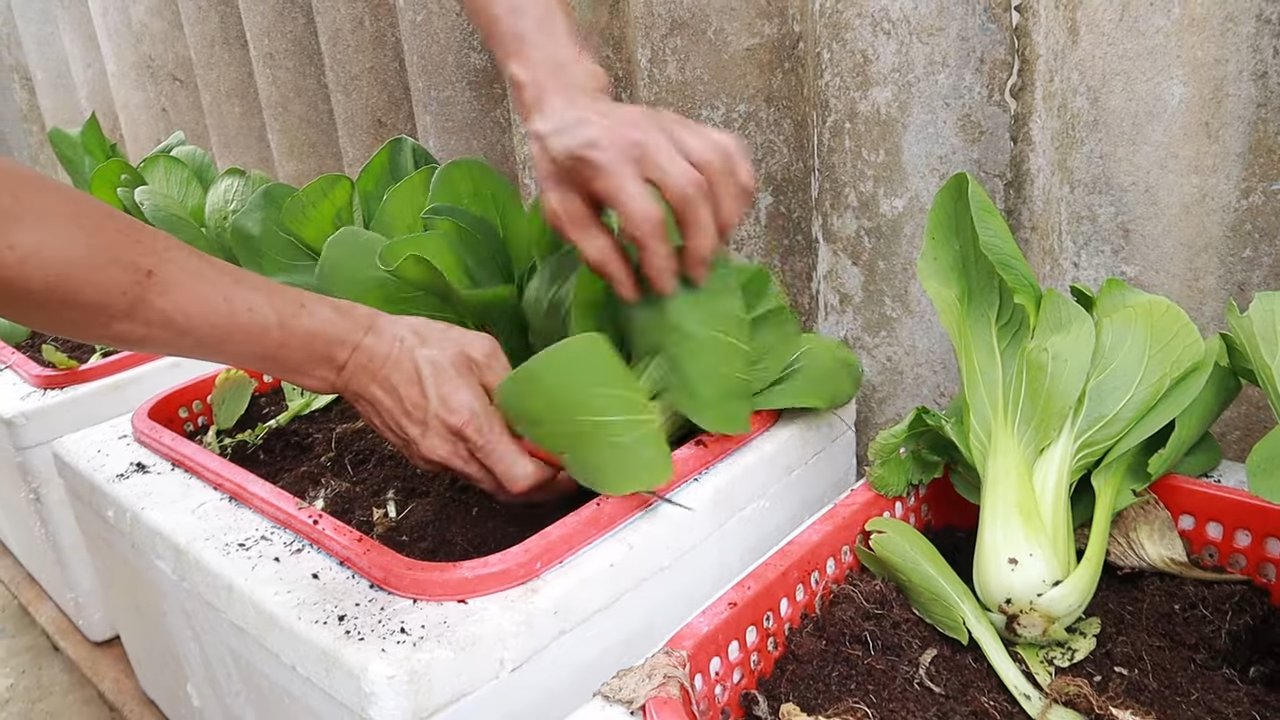
Growing Bok Choy Indoors might seem like a challenge reserved for seasoned gardeners, but trust me, it’s totally achievable, even if you’re a beginner like I once was! Imagine fresh, crisp Bok Choy, ready to add a vibrant crunch to your stir-fries or salads, all harvested from your very own indoor garden. Forget those pricey grocery store runs and questionable freshness – we’re talking about homegrown goodness right at your fingertips!
Bok Choy, also known as Pak Choi, has a rich history deeply rooted in Chinese cuisine, dating back over 5,000 years. It’s not just a delicious vegetable; it’s a symbol of good fortune and prosperity in many Asian cultures. For centuries, families have cultivated this leafy green, appreciating its versatility and nutritional benefits. Now, you can bring that tradition into your own home, regardless of your outdoor space.
Why should you learn this DIY trick? Well, for starters, growing Bok Choy indoors allows you to enjoy fresh, organic produce year-round, regardless of the weather outside. Plus, it’s incredibly rewarding to nurture a plant from seed to harvest. More importantly, in today’s world, knowing how to grow your own food, even on a small scale, provides a sense of self-sufficiency and connection to nature. So, let’s dive in and discover the secrets to successfully cultivating this amazing vegetable within the comfort of your own home!
Growing Bok Choy Indoors: A Beginner’s Guide
Hey there, fellow plant enthusiasts! Ever thought about growing your own fresh, crisp bok choy right in your kitchen? It’s easier than you might think, and trust me, nothing beats the flavor of homegrown veggies. I’m going to walk you through everything you need to know to successfully cultivate bok choy indoors, from seed to harvest. Let’s get started!
Choosing the Right Bok Choy Variety
First things first, you need to pick the right bok choy variety for indoor growing. Some varieties are simply better suited for containers and limited space. Here are a few of my favorites:
* Dwarf Bok Choy: As the name suggests, these are compact and perfect for pots. They mature quickly, making them ideal for indoor gardening.
* Baby Bok Choy: Similar to dwarf varieties, baby bok choy stays small and is ready to harvest sooner.
* Joi Choi: This variety is a bit larger but still manageable indoors. It has a mild flavor and crisp texture.
Gathering Your Supplies
Before you even think about planting, let’s make sure you have everything you need. Here’s a checklist:
* Seeds: Choose your preferred bok choy variety from a reputable source.
* Containers: You’ll need pots that are at least 6 inches deep and wide. Good drainage is crucial!
* Potting Mix: Use a high-quality, well-draining potting mix. Avoid garden soil, as it can compact too much in containers.
* Grow Lights: Bok choy needs plenty of light, especially indoors. LED grow lights are energy-efficient and work wonders.
* Watering Can or Spray Bottle: For gentle watering.
* Fertilizer: A balanced liquid fertilizer will help your bok choy thrive.
* Seed Starting Tray (Optional): If you prefer to start your seeds indoors before transplanting.
Planting Your Bok Choy
Okay, now for the fun part! Let’s get those seeds in the soil.
1. Starting Seeds (Optional): If you’re using a seed starting tray, fill it with potting mix and moisten it. Sow the seeds about 1/4 inch deep and gently cover them. Keep the tray moist and warm (around 70°F) until the seeds germinate, which usually takes about 5-7 days.
2. Direct Sowing: If you’re planting directly into your containers, fill them with potting mix, leaving about an inch of space at the top. Moisten the soil thoroughly.
3. Sowing the Seeds: Sow the seeds about 1/4 inch deep and 1-2 inches apart. If you’re using larger containers, you can sow more seeds, but remember to thin them out later.
4. Covering the Seeds: Gently cover the seeds with potting mix and lightly water the surface.
5. Placement: Place your containers in a warm location, ideally around 70-75°F. If you’re not using a seed starting tray, you can place the containers directly under your grow lights.
Providing the Right Environment
Bok choy needs specific conditions to flourish indoors. Here’s how to create the perfect environment:
* Light: Bok choy needs at least 6 hours of direct light per day. If you don’t have a sunny window, use grow lights. Position the lights a few inches above the plants and adjust as they grow. I usually keep my grow lights on for 12-14 hours a day.
* Temperature: Bok choy prefers cooler temperatures, ideally between 60-70°F. Avoid placing them near heat sources.
* Watering: Keep the soil consistently moist, but not soggy. Water when the top inch of soil feels dry to the touch. Overwatering can lead to root rot, so be careful. I usually water every 2-3 days, but it depends on the humidity and temperature in my home.
* Humidity: Bok choy likes moderate humidity. If your home is dry, you can increase humidity by placing a tray of water near the plants or using a humidifier.
* Fertilizing: Feed your bok choy with a balanced liquid fertilizer every 2-3 weeks. Follow the instructions on the fertilizer package. I like to use a fertilizer that’s specifically formulated for leafy greens.
Thinning and Transplanting
As your bok choy seedlings grow, you’ll need to thin them out to give them enough space to develop.
1. Thinning: Once the seedlings have a few true leaves (the second set of leaves that appear after the initial seed leaves), thin them out so that they are about 4-6 inches apart. Simply snip off the weaker seedlings at the soil level. Don’t pull them out, as this can disturb the roots of the remaining plants.
2. Transplanting (If Necessary): If you started your seeds in a seed starting tray, you’ll need to transplant them into larger containers once they have a few true leaves. Gently remove the seedlings from the tray and plant them in individual pots, making sure to bury the stem up to the first set of leaves.
Dealing with Pests and Diseases
Even indoors, your bok choy can be susceptible to pests and diseases. Here’s how to prevent and treat them:
* Aphids: These tiny pests can suck the sap from your plants. You can wash them off with a strong stream of water or use insecticidal soap.
* Flea Beetles: These small beetles can chew holes in the leaves. Cover your plants with row covers or use insecticidal soap.
* Cabbage Worms: These caterpillars can devour your bok choy. Handpick them off the plants or use Bacillus thuringiensis (Bt), a natural insecticide.
* Root Rot: This fungal disease can occur if the soil is too wet. Prevent it by using well-draining potting mix and avoiding overwatering.
* Downy Mildew: This fungal disease can cause yellow spots on the leaves. Improve air circulation and avoid overhead watering.
Harvesting Your Bok Choy
The best part! You can start harvesting your bok choy when the leaves are about 6-8 inches long.
1. Harvesting Individual Leaves: You can harvest individual leaves as needed, starting with the outer leaves. This will allow the plant to continue growing and producing more leaves.
2. Harvesting the Whole Plant: If you want to harvest the entire plant, simply cut it off at the base.
3. Washing and Storing: Wash the bok choy thoroughly and store it in the refrigerator in a plastic bag. It will keep for about a week.
Troubleshooting Tips
Sometimes, things don’t go as planned. Here are a few common problems and how to fix them:
* Leggy Seedlings: If your seedlings are tall and spindly, they’re not getting enough light. Move them closer to the grow lights or provide more light.
* Yellowing Leaves: Yellowing leaves can be a sign of overwatering, underwatering, or nutrient deficiency. Check the soil moisture and adjust your watering accordingly. Fertilize your plants if they’re lacking nutrients.
* Slow Growth: Slow growth can be caused by a variety of factors, including insufficient light, cool temperatures, or poor soil. Make sure your plants are getting enough light and warmth, and that the soil is well-draining and nutrient-rich.
Extending Your Harvest
To enjoy a continuous harvest of bok choy, consider succession planting. Sow new seeds every 2-3 weeks to ensure a steady supply of fresh greens.
Enjoying Your Homegrown Bok Choy
Now that you’ve successfully grown your own bok choy, it’s time to enjoy the fruits (or rather, vegetables) of your labor! Bok choy is incredibly versatile and can be used in a variety of dishes. Here are a few of my favorite ways to use it:
* Stir-fries: Bok choy is a classic ingredient in stir-fries. Simply chop it up and add it to your favorite stir-fry recipe.
* Soups: Bok choy adds a delicious flavor and texture to soups. Add it to your favorite soup recipe or try a simple bok choy soup with ginger and garlic.
* Salads: Baby bok choy can be used in salads. Its mild flavor and crisp texture make it a great addition to any salad.
* Steamed: Steamed bok choy is a simple and healthy side dish. Steam it until it’s tender-crisp and season with salt, pepper, and a drizzle of sesame oil.
* Grilled: Grilled bok choy is a delicious and unexpected treat. Grill it until it’s slightly charred and season with your favorite spices.
Growing bok choy indoors is a rewarding experience that allows you to enjoy fresh, healthy greens year-round.

Conclusion
So, there you have it! Growing bok choy indoors is not only achievable but also incredibly rewarding. We’ve walked through the simple steps, from selecting the right container and soil to providing adequate light and water. You’ve learned how to nurture these leafy greens from tiny seeds to vibrant, edible plants, all within the comfort of your own home.
Why is this DIY trick a must-try? Because it offers a multitude of benefits. Firstly, it provides you with a constant supply of fresh, organic bok choy, free from pesticides and herbicides. Imagine the convenience of snipping off a few leaves whenever you need them for a stir-fry, salad, or soup. Secondly, it’s a fantastic way to connect with nature, even if you don’t have a garden. Watching your bok choy grow is a therapeutic and fulfilling experience. Thirdly, it’s an economical choice. Once you’ve invested in the initial supplies, the cost of growing your own bok choy is significantly lower than buying it from the store, especially if you are looking for organic options.
But the best part? You have complete control over the growing process. You can experiment with different varieties of bok choy, such as the baby bok choy for a more delicate flavor or the Shanghai bok choy for its thicker stems. You can also adjust the growing conditions to suit your preferences. For example, if you prefer a milder flavor, you can provide less direct sunlight.
Variations and Suggestions:
* Succession Planting: Plant new seeds every few weeks to ensure a continuous harvest. This way, you’ll always have fresh bok choy ready to eat.
* Companion Planting: Consider growing bok choy alongside other compatible herbs and vegetables, such as radishes or carrots. These companion plants can help deter pests and improve the overall health of your bok choy.
* Hydroponics: For a more advanced approach, you can try growing bok choy hydroponically. This method involves growing plants without soil, using nutrient-rich water solutions.
* Microgreens: Harvest your bok choy at the microgreen stage for a concentrated burst of flavor and nutrients. Microgreens are perfect for adding to salads, sandwiches, and smoothies.
* Fertilizer Options: While we recommended a balanced liquid fertilizer, you can also explore organic options like compost tea or fish emulsion. Just be sure to dilute them properly to avoid burning the roots.
We are confident that with a little patience and care, you can successfully grow bok choy indoors and enjoy the delicious rewards. Don’t be afraid to experiment and find what works best for you. Remember, gardening is a learning process, and every mistake is an opportunity to improve.
So, what are you waiting for? Grab your seeds, soil, and containers, and embark on this exciting journey of growing bok choy indoors. We encourage you to try this DIY trick and share your experiences with us. Post photos of your indoor bok choy garden on social media using #IndoorBokChoy and tag us! We can’t wait to see your thriving plants and hear about your successes. Happy growing!
Frequently Asked Questions (FAQ)
1. What is the best type of bok choy to grow indoors?
While you can grow almost any type of bok choy indoors, some varieties are better suited for container gardening. Baby bok choy is a popular choice because it matures quickly and doesn’t require as much space as larger varieties. Shanghai bok choy is another good option, known for its mild flavor and crisp texture. Ultimately, the best type of bok choy for you will depend on your personal preferences and the space you have available. Experiment with different varieties to see which ones thrive best in your indoor environment.
2. How much light does bok choy need when grown indoors?
Bok choy requires at least 6 hours of direct sunlight per day to grow properly. If you don’t have a sunny window, you can supplement with artificial grow lights. Fluorescent or LED grow lights are excellent choices. Position the lights a few inches above the plants and keep them on for 12-14 hours per day. Monitor your plants closely and adjust the light as needed. If the leaves start to look pale or leggy, it’s a sign that they’re not getting enough light.
3. What type of soil is best for growing bok choy indoors?
Bok choy prefers well-draining soil that is rich in organic matter. A good potting mix will provide the necessary nutrients and drainage. You can also amend your potting mix with compost or aged manure to improve its fertility. Avoid using garden soil, as it can be too heavy and may contain pests or diseases. The ideal pH for bok choy is between 6.0 and 7.5.
4. How often should I water my indoor bok choy plants?
Water your bok choy plants regularly, keeping the soil consistently moist but not waterlogged. Check the soil moisture by sticking your finger about an inch deep. If the soil feels dry, it’s time to water. Water deeply, allowing the excess water to drain out of the bottom of the container. Avoid overwatering, as this can lead to root rot. The frequency of watering will depend on the temperature, humidity, and the size of your container.
5. What kind of fertilizer should I use for indoor bok choy?
Bok choy is a heavy feeder and benefits from regular fertilization. Use a balanced liquid fertilizer, such as a 10-10-10 or 20-20-20, diluted to half strength. Fertilize every two to three weeks during the growing season. You can also use organic fertilizers, such as compost tea or fish emulsion. Be sure to follow the instructions on the fertilizer label carefully. Avoid over-fertilizing, as this can burn the roots and damage the plants.
6. How do I deal with pests and diseases when growing bok choy indoors?
Growing bok choy indoors can help minimize pest and disease problems, but it’s still important to be vigilant. Common pests that may affect bok choy include aphids, cabbage worms, and flea beetles. Inspect your plants regularly for signs of infestation. If you find pests, you can try washing them off with a strong stream of water or using insecticidal soap. Diseases that may affect bok choy include downy mildew and clubroot. To prevent diseases, ensure good air circulation and avoid overwatering. If you notice any signs of disease, remove the affected leaves immediately.
7. How long does it take to grow bok choy indoors?
Bok choy is a fast-growing vegetable, and you can typically harvest it in about 30-50 days from planting. Baby bok choy can be harvested even sooner, in as little as 20-30 days. The exact time will depend on the variety, growing conditions, and your desired size. You can harvest the entire plant at once or harvest individual leaves as needed.
8. Can I grow bok choy indoors year-round?
Yes, you can grow bok choy indoors year-round, provided you provide the necessary light, water, and nutrients. Indoor growing allows you to control the environment and avoid the challenges of outdoor gardening, such as extreme temperatures and pests. With proper care, you can enjoy a continuous harvest of fresh bok choy throughout the year.
9. How do I harvest bok choy that I’ve grown indoors?
You can harvest bok choy in a couple of ways. For a continuous harvest, you can snip off the outer leaves as needed, allowing the inner leaves to continue growing. Alternatively, you can harvest the entire plant at once by cutting it off at the base. Be sure to harvest your bok choy before it bolts (goes to seed), as this can make the leaves bitter.
10. Is growing bok choy indoors difficult for beginners?
No, growing bok choy indoors is relatively easy, even for beginners. It’s a forgiving plant that doesn’t require a lot of special care. With a little attention to detail and the right growing conditions, you can successfully grow bok choy indoors and enjoy the delicious rewards. Don’t be afraid to experiment and learn from your mistakes. Gardening is a journey, and every experience is an opportunity to grow.
Leave a Comment