
Growing Asparagus Effortlessly – sounds like a dream, right? I know, I used to think so too! But trust me, with a few clever tricks and a little DIY spirit, you can be harvesting your own delicious spears of asparagus right from your backyard. Forget those pricey supermarket bundles; imagine the satisfaction of serving up freshly picked, homegrown asparagus to your family and friends.
Asparagus has a rich history, dating back to ancient Greece and Rome, where it was prized for its medicinal properties and culinary delights. Emperors even had special asparagus farms! Today, while we might not be emperors, we can certainly enjoy the regal taste of this vegetable without breaking the bank.
Why do you need these DIY tricks for growing asparagus effortlessly? Well, asparagus can be a bit finicky. It requires patience and the right conditions to thrive. But with my simple, step-by-step guide, you’ll learn how to prepare your soil, choose the best varieties, and protect your plants from pests and diseases. I’ll share my secret hacks for maximizing your yield and ensuring a bountiful harvest year after year. So, grab your gardening gloves, and let’s get started on your asparagus adventure!
Growing Asparagus Effortlessly: A DIY Guide to a Lifetime of Delicious Spears
Asparagus, that delectable spring vegetable, can seem intimidating to grow. But trust me, with a little patience and the right approach, you can enjoy fresh, homegrown asparagus for years to come. This guide will walk you through the process, making it surprisingly easy and rewarding. I’m going to share my secrets to getting a thriving asparagus patch that will keep you in spears for decades!
Choosing the Right Asparagus Variety
Before we even think about digging, let’s talk varieties. Not all asparagus is created equal! Choosing the right one for your climate and preferences is crucial.
* ‘Jersey Knight’: This is a popular all-male hybrid known for its high yields and disease resistance. It’s a great choice for beginners and performs well in most climates.
* ‘Jersey Giant’: Similar to ‘Jersey Knight,’ but produces slightly larger spears. Also an all-male hybrid.
* ‘Purple Passion’: A unique variety with beautiful purple spears that turn green when cooked. It’s sweeter and more tender than green varieties.
* ‘Mary Washington’: An older, heirloom variety that’s still widely grown. It’s reliable and produces good yields, but may be more susceptible to disease than newer hybrids.
I personally recommend starting with ‘Jersey Knight’ or ‘Jersey Giant’ if you’re new to asparagus. They’re reliable and forgiving. If you’re feeling adventurous, ‘Purple Passion’ is a fun and flavorful option!
Preparing Your Asparagus Bed: Location, Location, Location!
Asparagus is a long-term investment, so choosing the right location is paramount. These plants can live for 15-20 years (or even longer!), so you want to get it right from the start.
* Sunlight: Asparagus needs at least 6-8 hours of direct sunlight per day. The more sun, the better!
* Soil: Well-drained soil is essential. Asparagus hates wet feet! A sandy loam is ideal, but you can amend heavier clay soils with plenty of organic matter.
* Space: Asparagus plants need room to spread. Allow at least 3-4 feet between rows and 12-18 inches between plants within a row.
* Avoid Shady Areas: Don’t plant near trees or buildings that will cast shade on your asparagus bed.
* Consider Drainage: If your soil is prone to waterlogging, consider building raised beds to improve drainage.
Soil Testing and Amendment
Before planting, it’s a good idea to test your soil’s pH. Asparagus prefers a slightly acidic to neutral pH of 6.5-7.0. You can purchase a soil testing kit at most garden centers or send a sample to your local agricultural extension office.
* Amend with Organic Matter: Regardless of your soil type, amending with plenty of organic matter is crucial. Compost, well-rotted manure, and leaf mold are all excellent choices.
* Add Phosphorus and Potassium: Asparagus needs phosphorus and potassium for strong root development and spear production. Bone meal and wood ash are good natural sources.
* Avoid Nitrogen-Rich Fertilizers: Too much nitrogen can encourage fern growth at the expense of spear production.
I like to amend my asparagus bed in the fall before planting in the spring. This gives the organic matter time to break down and enrich the soil.
Planting Asparagus Crowns: The Heart of Your Patch
Asparagus is typically grown from crowns, which are one-year-old dormant plants. You can purchase crowns from nurseries or online retailers.
* Timing: The best time to plant asparagus crowns is in early spring, as soon as the soil can be worked.
* Soaking: Before planting, soak the crowns in water for a few hours to rehydrate them.
* Trenching: Dig trenches that are 6-8 inches deep and 12-18 inches wide.
* Mounding: Create small mounds of soil in the bottom of the trenches, spaced 12-18 inches apart.
* Placement: Place the asparagus crowns on top of the mounds, spreading out the roots.
* Covering: Gently cover the crowns with 2-3 inches of soil.
* Watering: Water thoroughly after planting.
The Gradual Filling Method
As the asparagus ferns grow, gradually fill in the trenches with soil. This encourages the crowns to develop a strong root system.
1. **Initial Planting:** Plant the crowns as described above, covering them with only 2-3 inches of soil.
2. **First Growth:** As the ferns emerge, add another inch or two of soil to the trench.
3. **Continued Filling:** Continue adding soil gradually throughout the first growing season, until the trenches are completely filled.
This gradual filling method helps to prevent the crowns from rotting and encourages them to send out more roots.
Caring for Your Asparagus Patch: Patience is a Virtue
Asparagus requires patience. You won’t be harvesting spears in the first year! It takes a few years for the plants to establish themselves.
* Watering: Water regularly, especially during dry periods. Asparagus needs consistent moisture to thrive.
* Weeding: Keep the asparagus bed free of weeds. Weeds compete with the asparagus for nutrients and water.
* Fertilizing: Fertilize in early spring with a balanced fertilizer or compost.
* Mulching: Mulch with straw, hay, or wood chips to help retain moisture, suppress weeds, and regulate soil temperature.
* Fern Management: Allow the asparagus ferns to grow and mature in the fall. They will turn brown and die back in the winter. Cut them back to the ground in late winter or early spring.
Pest and Disease Control
Asparagus is relatively pest and disease-resistant, but there are a few things to watch out for.
* Asparagus Beetles: These small, colorful beetles can damage the spears and ferns. Handpick them or use an insecticidal soap.
* Asparagus Rust: This fungal disease can cause orange or brown spots on the ferns. Choose rust-resistant varieties and ensure good air circulation.
* Crown Rot: This fungal disease can cause the crowns to rot. Avoid overwatering and ensure good drainage.
I’ve found that regular monitoring and prompt action are the best ways to prevent pest and disease problems.
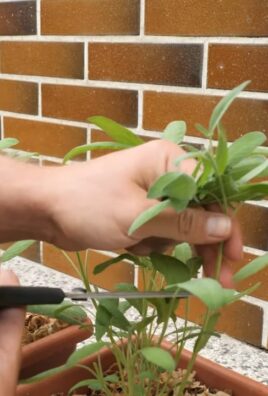
Harvesting Asparagus: The Sweet Reward
After a few years of patience, you’ll finally be able to harvest your own delicious asparagus spears!
* Timing: Don’t harvest any spears in the first year. In the second year, you can harvest lightly for a few weeks. In the third year and beyond, you can harvest for 6-8 weeks.
* Spear Size: Harvest spears when they are 6-8 inches tall and about as thick as your finger.
* Cutting: Cut the spears at ground level with a sharp knife.
* Frequency: Harvest spears every day or two during the peak of the season.
* Stop Harvesting: Stop harvesting when the spears become thin and spindly. This indicates that the plants need to rest and replenish their energy reserves.
Post-Harvest Care
After the harvest season, allow the ferns to grow and mature. They will provide the plants with the energy they need to produce spears next year.
* Fertilize: Fertilize again after the harvest
Asparagus, that delectable spring vegetable, can seem intimidating to grow. But trust me, with a little patience and the right approach, you can enjoy fresh, homegrown asparagus for years to come. This guide will walk you through the process, making it surprisingly easy and rewarding. I’m going to share my secrets to getting a thriving asparagus patch that will keep you in spears for decades!
Choosing the Right Asparagus Variety
Before we even think about digging, let’s talk varieties. Not all asparagus is created equal! Choosing the right one for your climate and preferences is crucial.
* ‘Jersey Knight’: This is a popular all-male hybrid known for its high yields and disease resistance. It’s a great choice for beginners and performs well in most climates.
* ‘Jersey Giant’: Similar to ‘Jersey Knight,’ but produces slightly larger spears. Also an all-male hybrid.
* ‘Purple Passion’: A unique variety with beautiful purple spears that turn green when cooked. It’s sweeter and more tender than green varieties.
* ‘Mary Washington’: An older, heirloom variety that’s still widely grown. It’s reliable and produces good yields, but may be more susceptible to disease than newer hybrids.
I personally recommend starting with ‘Jersey Knight’ or ‘Jersey Giant’ if you’re new to asparagus. They’re reliable and forgiving. If you’re feeling adventurous, ‘Purple Passion’ is a fun and flavorful option!
Preparing Your Asparagus Bed: Location, Location, Location!
Asparagus is a long-term investment, so choosing the right location is paramount. These plants can live for 15-20 years (or even longer!), so you want to get it right from the start.
* Sunlight: Asparagus needs at least 6-8 hours of direct sunlight per day. The more sun, the better!
* Soil: Well-drained soil is essential. Asparagus hates wet feet! A sandy loam is ideal, but you can amend heavier clay soils with plenty of organic matter.
* Space: Asparagus plants need room to spread. Allow at least 3-4 feet between rows and 12-18 inches between plants within a row.
* Avoid Shady Areas: Don’t plant near trees or buildings that will cast shade on your asparagus bed.
* Consider Drainage: If your soil is prone to waterlogging, consider building raised beds to improve drainage.
Soil Testing and Amendment
Before planting, it’s a good idea to test your soil’s pH. Asparagus prefers a slightly acidic to neutral pH of 6.5-7.0. You can purchase a soil testing kit at most garden centers or send a sample to your local agricultural extension office.
* Amend with Organic Matter: Regardless of your soil type, amending with plenty of organic matter is crucial. Compost, well-rotted manure, and leaf mold are all excellent choices.
* Add Phosphorus and Potassium: Asparagus needs phosphorus and potassium for strong root development and spear production. Bone meal and wood ash are good natural sources.
* Avoid Nitrogen-Rich Fertilizers: Too much nitrogen can encourage fern growth at the expense of spear production.
I like to amend my asparagus bed in the fall before planting in the spring. This gives the organic matter time to break down and enrich the soil.
Planting Asparagus Crowns: The Heart of Your Patch
Asparagus is typically grown from crowns, which are one-year-old dormant plants. You can purchase crowns from nurseries or online retailers.
* Timing: The best time to plant asparagus crowns is in early spring, as soon as the soil can be worked.
* Soaking: Before planting, soak the crowns in water for a few hours to rehydrate them.
* Trenching: Dig trenches that are 6-8 inches deep and 12-18 inches wide.
* Mounding: Create small mounds of soil in the bottom of the trenches, spaced 12-18 inches apart.
* Placement: Place the asparagus crowns on top of the mounds, spreading out the roots.
* Covering: Gently cover the crowns with 2-3 inches of soil.
* Watering: Water thoroughly after planting.
The Gradual Filling Method
As the asparagus ferns grow, gradually fill in the trenches with soil. This encourages the crowns to develop a strong root system.
1. **Initial Planting:** Plant the crowns as described above, covering them with only 2-3 inches of soil.
2. **First Growth:** As the ferns emerge, add another inch or two of soil to the trench.
3. **Continued Filling:** Continue adding soil gradually throughout the first growing season, until the trenches are completely filled.
This gradual filling method helps to prevent the crowns from rotting and encourages them to send out more roots.
Caring for Your Asparagus Patch: Patience is a Virtue
Asparagus requires patience. You won’t be harvesting spears in the first year! It takes a few years for the plants to establish themselves.
* Watering: Water regularly, especially during dry periods. Asparagus needs consistent moisture to thrive.
* Weeding: Keep the asparagus bed free of weeds. Weeds compete with the asparagus for nutrients and water.
* Fertilizing: Fertilize in early spring with a balanced fertilizer or compost.
* Mulching: Mulch with straw, hay, or wood chips to help retain moisture, suppress weeds, and regulate soil temperature.
* Fern Management: Allow the asparagus ferns to grow and mature in the fall. They will turn brown and die back in the winter. Cut them back to the ground in late winter or early spring.
Pest and Disease Control
Asparagus is relatively pest and disease-resistant, but there are a few things to watch out for.
* Asparagus Beetles: These small, colorful beetles can damage the spears and ferns. Handpick them or use an insecticidal soap.
* Asparagus Rust: This fungal disease can cause orange or brown spots on the ferns. Choose rust-resistant varieties and ensure good air circulation.
* Crown Rot: This fungal disease can cause the crowns to rot. Avoid overwatering and ensure good drainage.
I’ve found that regular monitoring and prompt action are the best ways to prevent pest and disease problems.
Harvesting Asparagus: The Sweet Reward
After a few years of patience, you’ll finally be able to harvest your own delicious asparagus spears!
* Timing: Don’t harvest any spears in the first year. In the second year, you can harvest lightly for a few weeks. In the third year and beyond, you can harvest for 6-8 weeks.
* Spear Size: Harvest spears when they are 6-8 inches tall and about as thick as your finger.
* Cutting: Cut the spears at ground level with a sharp knife.
* Frequency: Harvest spears every day or two during the peak of the season.
* Stop Harvesting: Stop harvesting when the spears become thin and spindly. This indicates that the plants need to rest and replenish their energy reserves.
Post-Harvest Care
After the harvest season, allow the ferns to grow and mature. They will provide the plants with the energy they need to produce spears next year.
* Fertilize: Fertilize again after the harvest season to replenish nutrients.
* Water: Continue to water regularly.
* Mulch: Maintain the mulch layer.
Extending Your Asparagus Season
Want to enjoy asparagus for even longer? Here are a few tips:
* Succession Planting: Plant different varieties that mature at different times.
* Cold Frames: Use cold frames to protect the plants from frost and extend the harvest season in the spring.
* Forcing: You can force asparagus to produce spears earlier in the season by covering the bed with black plastic or a dark tarp.
Troubleshooting Common Asparagus Problems
Even with the best care, you may encounter some problems with your asparagus patch. Here are a few common issues and how to address them:
* Thin Spears: This can be caused by overharvesting, lack of nutrients, or poor soil. Fertilize and amend the soil with organic matter.
* Yellowing Ferns: This can be caused by nutrient deficiencies, pests, or diseases. Check for pests and diseases and fertilize if necessary.
* Poor Spear Production: This can be caused by a variety of factors, including poor soil, lack of sunlight, or overharvesting. Ensure that your asparagus bed is in a sunny location with well-drained soil and that you are not overharvesting.
Enjoying Your Homegrown Asparagus
Now for the best part: enjoying the fruits (or rather, vegetables)
Conclusion
So, there you have it! Growing asparagus doesn’t have to be a daunting task reserved for seasoned gardeners. This DIY trick for growing asparagus effortlessly, focusing on creating a raised bed with well-draining soil and utilizing asparagus crowns for a quicker harvest, is a game-changer for both beginners and experienced gardeners alike.
Why is this a must-try? Because it simplifies the process, maximizes your yield, and minimizes the common pitfalls associated with asparagus cultivation. Forget about years of waiting for spears to emerge from seeds. By starting with crowns, you’re essentially fast-tracking your way to enjoying fresh, delicious asparagus from your own backyard. The raised bed approach tackles the crucial drainage issue, preventing root rot and ensuring your asparagus plants thrive for years to come. Plus, the concentrated growing area makes weeding and maintenance significantly easier.
But don’t stop there! Feel free to experiment with different asparagus varieties. ‘Jersey Knight’ is a popular choice known for its high yield and disease resistance, while ‘Purple Passion’ offers a unique color and sweeter flavor. Consider companion planting to further enhance your asparagus patch. Marigolds can deter nematodes, while basil can repel asparagus beetles.
And remember, patience is key. While using crowns speeds up the process, it still takes a few years for your asparagus patch to reach its full potential. Resist the urge to harvest heavily in the first couple of years, allowing the plants to establish a strong root system.
We wholeheartedly encourage you to give this DIY trick a try. Imagine the satisfaction of harvesting your own fresh asparagus, knowing you nurtured it from crown to table. It’s a rewarding experience that connects you with nature and provides a healthy, delicious addition to your meals.
Don’t be shy! Share your experiences with us. Did you try a different variety of asparagus? Did you find a particularly effective companion plant? What challenges did you encounter, and how did you overcome them? Your insights can help other aspiring asparagus growers achieve success. Post your photos and stories in the comments below – we can’t wait to see your asparagus patches flourish! Let’s build a community of effortless asparagus growers!
Frequently Asked Questions (FAQ)
What exactly are asparagus crowns, and why are they better than seeds?
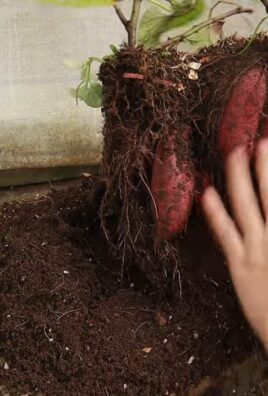
Asparagus crowns are essentially one-year-old asparagus plants that have already developed a root system. Starting with crowns significantly reduces the time it takes to harvest asparagus. Seeds can take up to three years to produce harvestable spears, while crowns can yield spears as early as the second year, and sometimes even the first, with light harvesting. Crowns also offer a higher success rate, as they are more resilient than seedlings. They’ve already overcome the initial hurdles of germination and early growth, making them more likely to thrive in your garden.
How do I prepare the raised bed for my asparagus crowns?
Preparing the raised bed is crucial for successful asparagus cultivation. First, choose a location that receives at least six to eight hours of sunlight per day. Asparagus needs plenty of sun to thrive. Next, build a raised bed that is at least 12 inches deep, but ideally 18-24 inches. This depth allows for ample root growth and good drainage. Fill the bed with a mixture of equal parts topsoil, compost, and well-rotted manure. This combination provides the necessary nutrients and ensures excellent drainage. Before planting, amend the soil with a slow-release fertilizer specifically formulated for vegetables. This will give your asparagus crowns a boost as they establish themselves.
How far apart should I plant my asparagus crowns?
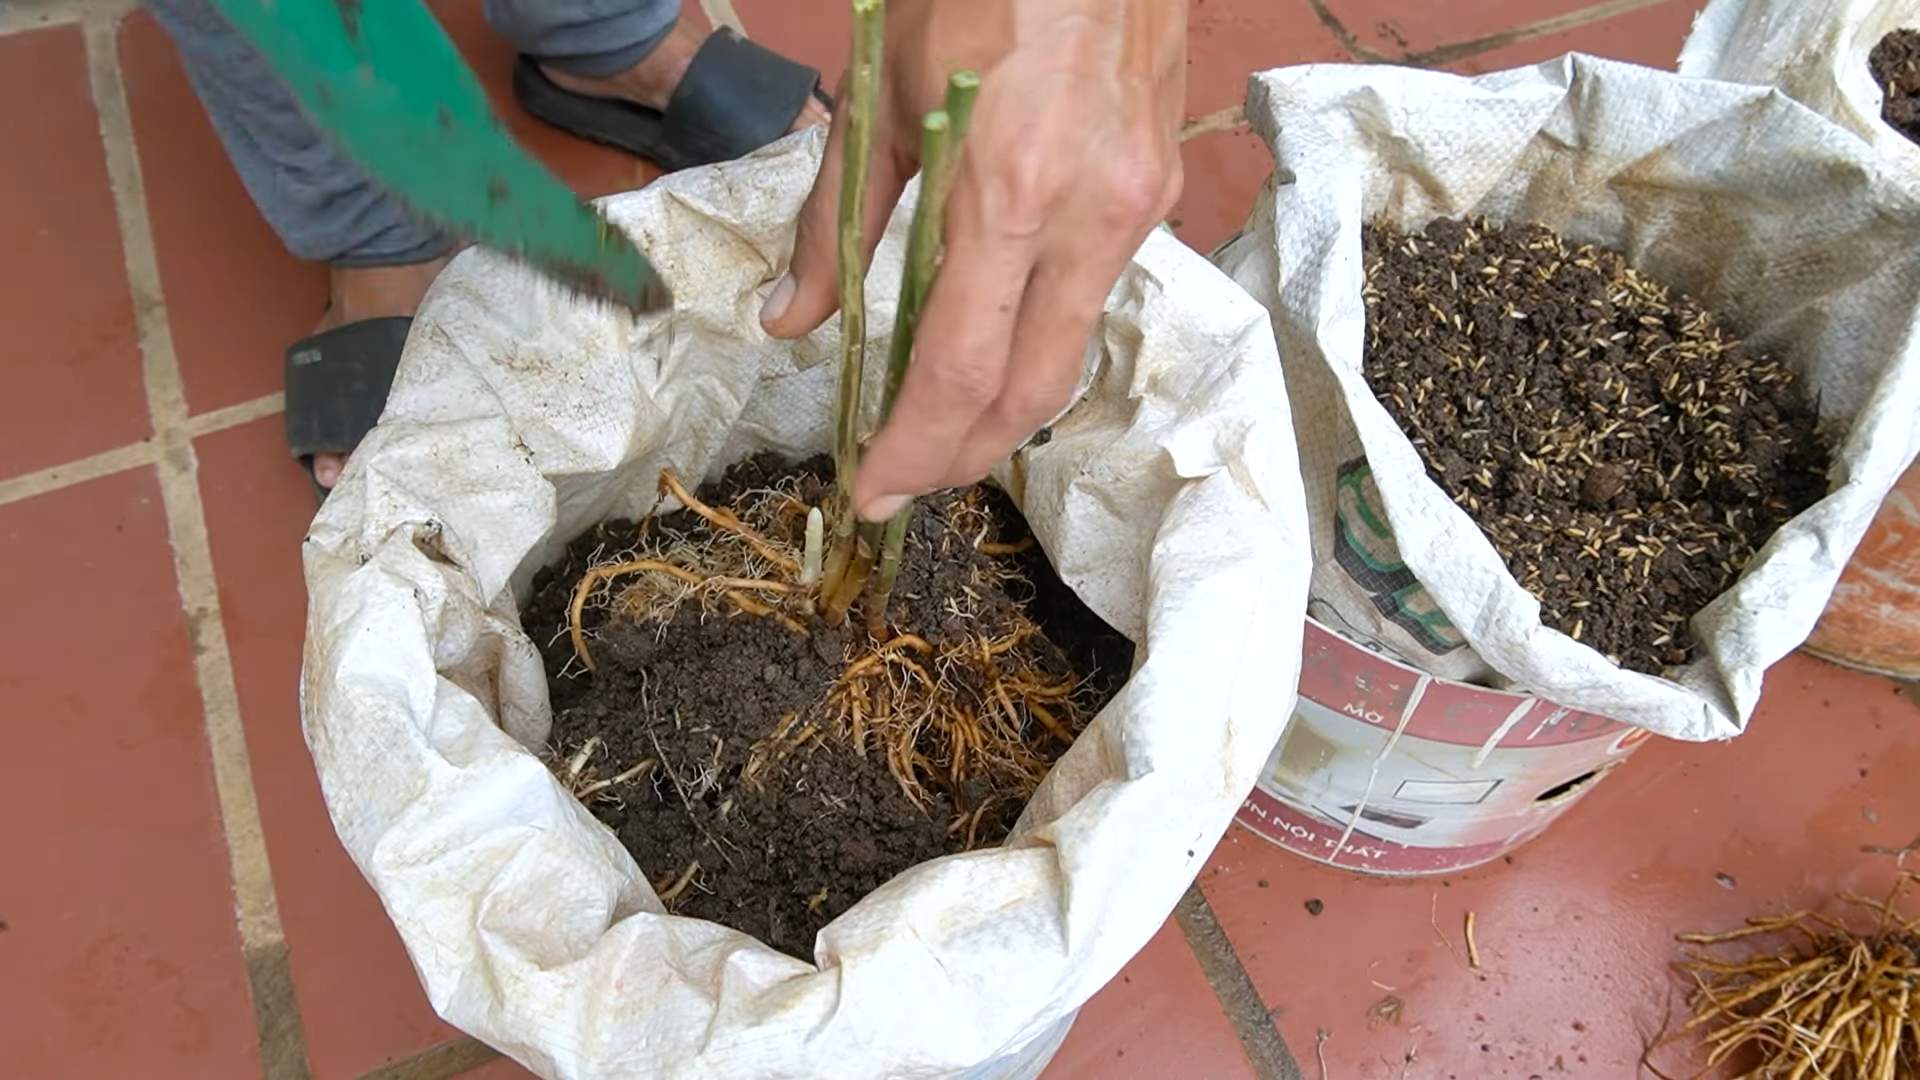
Proper spacing is essential for healthy asparagus growth. Plant your asparagus crowns approximately 12-18 inches apart within the row. If you are planting multiple rows, space the rows 3-4 feet apart. This spacing allows the plants to have adequate room to grow and prevents overcrowding, which can lead to disease and reduced yields. When planting, dig a trench that is about 6-8 inches deep. Place the crown in the trench with the roots spread out. Cover the crown with about 2 inches of soil. As the asparagus spears emerge, gradually fill in the trench with soil until it is level with the surrounding ground.
How often should I water my asparagus plants?
Asparagus needs consistent moisture, especially during the growing season. Water deeply and regularly, aiming to keep the soil consistently moist but not waterlogged. A good rule of thumb is to water about once a week, or more frequently during hot, dry weather. Use a soaker hose or drip irrigation to deliver water directly to the roots, minimizing water loss through evaporation and reducing the risk of fungal diseases. Avoid overhead watering, as this can create a humid environment that encourages disease.
When can I start harvesting asparagus spears?
Patience is key when it comes to harvesting asparagus. In the first year after planting crowns, resist the urge to harvest any spears. This allows the plants to focus on establishing a strong root system. In the second year, you can harvest lightly, taking only a few spears per plant and only for a short period (about 2-3 weeks). In the third year and beyond, you can harvest more heavily, taking spears for a longer period (about 6-8 weeks). Harvest spears when they are about 6-8 inches tall and about as thick as your finger. Snap the spears off at ground level.
How do I care for my asparagus patch after the harvest season?
After the harvest season ends, allow the asparagus plants to fern out. The ferns are the leafy growth that develops after the spears are harvested. These ferns are essential for photosynthesis and help the plants store energy for the following year’s growth. Fertilize the asparagus patch with a balanced fertilizer in late spring or early summer. Keep the area weeded and watered regularly. In the fall, after the ferns have turned brown and died back, cut them down to ground level. This helps to prevent disease and pests from overwintering in the patch. You can also apply a layer of compost or well-rotted manure to the soil to provide nutrients for the following year.
What are some common pests and diseases that affect asparagus, and how can I prevent them?
Asparagus beetles are a common pest that can damage asparagus spears and ferns. Handpicking the beetles and their larvae is an effective way to control them. You can also use insecticidal soap or neem oil. Asparagus rust is a fungal disease that can cause orange or reddish-brown pustules on the ferns. To prevent rust, ensure good air circulation around the plants and avoid overhead watering. If rust does occur, remove and destroy the affected ferns. Crown rot is another fungal disease that can cause the crowns to rot. To prevent crown rot, ensure good drainage and avoid overwatering. Choose disease-resistant asparagus varieties whenever possible.
Can I grow asparagus in containers?
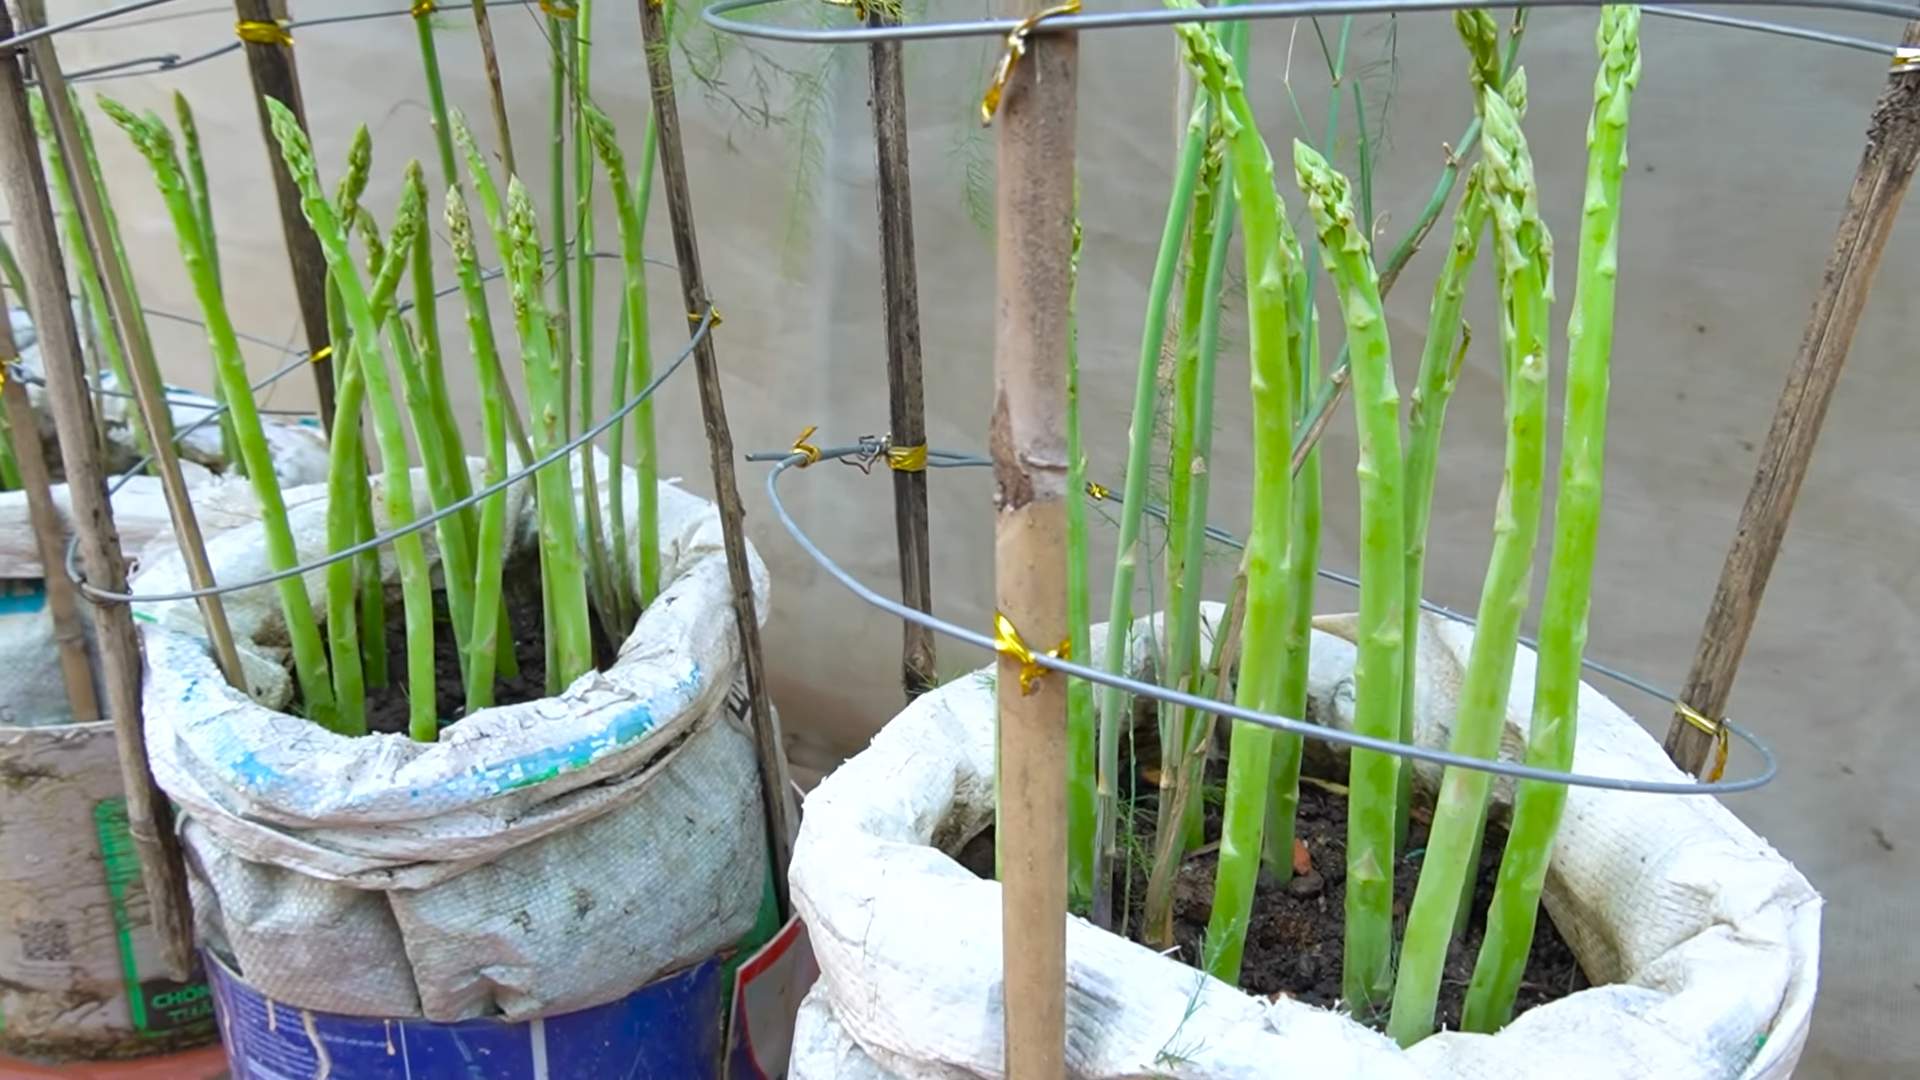
Yes, you can grow asparagus in containers, but it requires a large container (at least 24 inches in diameter and 24 inches deep) to accommodate the extensive root system. Use a well-draining potting mix and water regularly. Container-grown asparagus may not be as productive as asparagus grown in the ground, but it can still provide a decent harvest. Be sure to fertilize regularly, as nutrients can leach out of the container more quickly than in the ground.
What are some good companion plants for asparagus?
Several plants can benefit asparagus when planted nearby. Marigolds deter nematodes, which can damage asparagus roots. Basil repels asparagus beetles. Tomatoes, parsley, and carrots are also good companion plants for asparagus. Avoid planting asparagus near onions, garlic, or potatoes, as these plants can inhibit asparagus growth.
How long will my asparagus patch last?
With proper care, an asparagus patch can last for 15-20 years or even longer. The key is to provide the plants with the right growing conditions, including well-draining soil, plenty of sunlight, and regular fertilization. Protect the plants from pests and diseases, and allow them to fern out after the harvest season to replenish their energy reserves. By following these tips, you can enjoy fresh, delicious asparagus from your own garden for many years to come.
Leave a Comment