
Grow watermelons indoors? Absolutely! Forget sprawling vines taking over your entire backyard. I’m about to let you in on a secret that will have you harvesting juicy, sweet watermelons right from the comfort of your own home.
For centuries, watermelons have been a symbol of summer, abundance, and pure refreshment. From ancient Egyptian tombs where they were placed as provisions for the afterlife, to elaborate still-life paintings showcasing their vibrant colors, watermelons hold a special place in our cultural history. But traditionally, growing them required vast open spaces and a whole lot of sunshine. Not anymore!
Let’s face it, not everyone has a sprawling garden. Apartment dwellers, city residents, or those with limited outdoor space often miss out on the joy of growing their own food. That’s where this DIY guide comes in. I’m going to show you simple, effective tricks and hacks to successfully grow watermelons indoors, regardless of your living situation. Imagine the satisfaction of biting into a homegrown watermelon, knowing you nurtured it from seed to fruit, all within the cozy confines of your home. Get ready to ditch the store-bought melons and embark on a rewarding indoor gardening adventure!
Growing Watermelons Indoors: Your DIY Guide for a Sweet Harvest!
Hey everyone! Are you tired of waiting for summer to finally enjoy juicy watermelons? Me too! That’s why I decided to take matters into my own hands and simply grow watermelons indoors. Sound crazy? Maybe a little, but with the right preparation and a few tricks, it’s absolutely doable. And the best part: you can enjoy your own sun-ripened (well, lamp-ripened) watermelons in the middle of winter! Let’s get started!
What you need: The Shopping List
Before we start, we’ll obviously need the right equipment. Here is a list of everything you’ll need for your indoor watermelon project:
- Watermelon seeds: It’s best to choose a compact variety that is suitable for growing in pots. “Sugar Baby” or “Bush Sugar Baby” are good options.
- Seed starting pots: Small pots or seed trays for germinating the seeds.
- Seed starting mix: Special soil for starting seeds that is loose and low in nutrients.
- Large pots: At least 30 liters (about 8 gallons) capacity per plant. Watermelons need space!
- High-quality potting soil: A mixture of potting soil, compost, and perlite or vermiculite for good drainage.
- Grow light: An LED grow light with sufficient power (at least 100 watts) is essential to compensate for the lack of sunlight.
- Fertilizer: A balanced liquid fertilizer for vegetables that is rich in potassium and phosphorus.
- Trellis: A trellis or support structure for the watermelon plant to climb up.
- Spray bottle: For moistening the soil and leaves.
- Thermometer and hygrometer: To keep an eye on temperature and humidity.
- Paintbrush: For pollinating the flowers (more on that later).
- Patience: Watermelons take time to grow!
Phase 1: Sowing – The Start of a Sweet Adventure
- Prepare the seeds: To speed up germination, you can soak the seeds in lukewarm water for 24 hours. This softens the seed coat.
- Sowing: Fill the starter pots with seed starting mix and press it down lightly. Place 2-3 seeds about 1-2 cm (0.5-1 inch) deep in each pot.
- Watering: Gently moisten the soil with a spray bottle. It should be damp, but not wet.
- Warmth and light: Place the starter pots in a warm place (25-30°C or 77-86°F) and provide sufficient light. A heating mat can help maintain the temperature. The grow light should already be in operation at this point.
- Waiting: After about 5-10 days, the first seedlings should appear. Once the plants have a few leaves, you can remove the weakest ones, leaving only the strongest plant per pot.
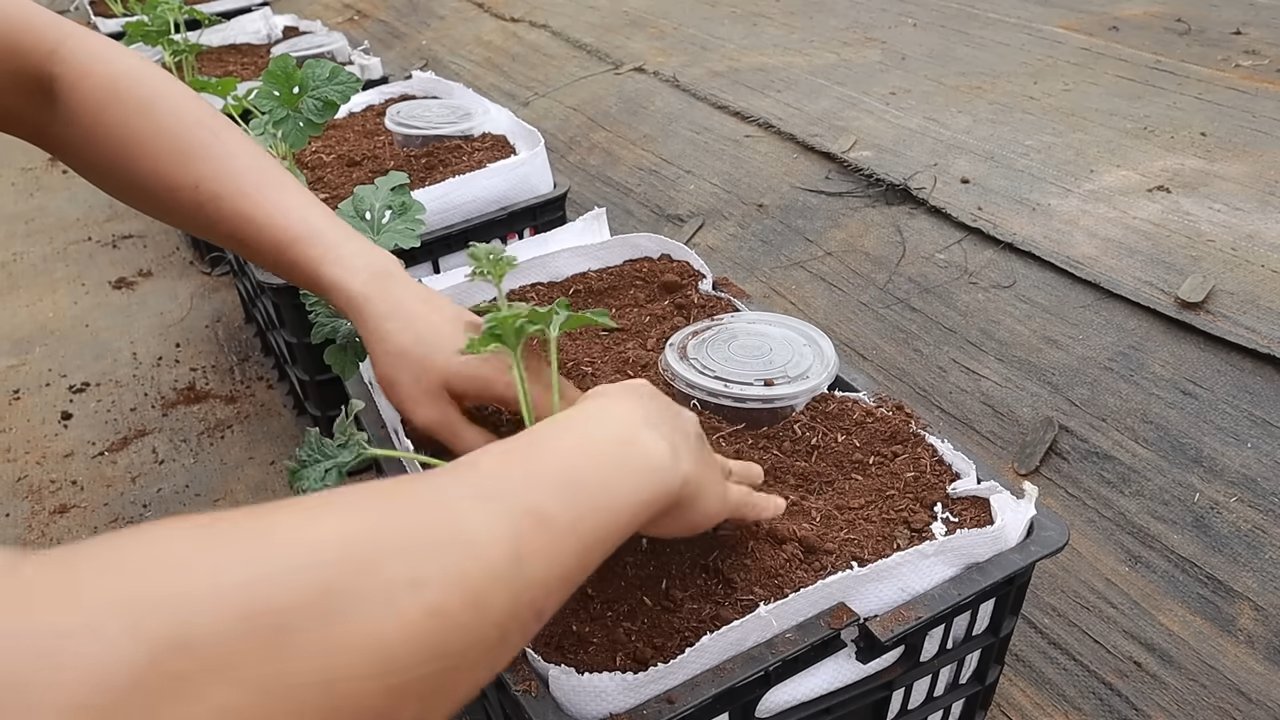
Phase 2: Repotting and Creating the Right Environment
- Preparation: Fill the large pots with the prepared potting soil. Make sure the pots have holes in the bottom so excess water can drain.
- Repotting: Once the plants are large enough (about 15-20 cm or 6-8 inches high), you can transplant them into the large pots. Carefully remove the plants from the starter pots and place them in the center of the large pots. Fill the pots with soil and press it down lightly.
- Watering: Water the plants thoroughly after repotting.
- Location: Place the pots in a bright and warm location. The grow light should hang about 15-20 cm (6-8 inches) above the plants.
- Temperature and humidity: Watermelons love warmth! The ideal temperature is between 25 and 30°C (77-86°F). The humidity should be around 60-70%. If necessary, you can increase the humidity with a humidifier.
- Trellis: Install a trellis so the plants can climb.
Phase 3: Care and Pollination – The Path to Fruit
- Watering: Water the plants regularly, but avoid waterlogging. The soil should always be slightly moist.
- Fertilizing: Start fertilizing about 2 weeks after repotting. Use a balanced liquid fertilizer for vegetables and follow the dosage instructions.
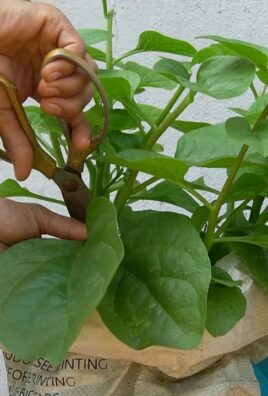
- Pruning: Regularly remove side shoots to concentrate the plant’s energy on the main vines and fruit production.
- Pollination: This is where the paintbrush comes in! Watermelons have male and female flowers. You can identify the male flowers by their thin stem; the female flowers have a small baby fruit (ovary) just below the blossom. Since we don’t have bees in the house, we have to do the pollination ourselves. Use a paintbrush to pick up pollen from a male flower and transfer it to the stigma of a female flower. It’s best to do this in the morning when the flowers are open. Repeat the process several times to ensure pollination is successful.
- Fruit set: If pollination was successful, the baby fruit will begin to grow. Mark the pollinated flowers with a small ribbon to keep track.
- Fruit care: When the fruits reach about the size of a tennis ball, you should leave only 2-3 fruits per plant. Remove the rest of the fruits so that the remaining ones have enough energy to grow.
- Support: As the fruits get larger, it may be necessary to support them with a net or a cloth sling so the vines don’t break.
Phase 4: Harvest – The Reward for Your Effort
- Signs of ripeness: You can tell a watermelon is ripe by several factors:
- The tendril closest to the fruit stem will turn dry and brown.
- The spot where the fruit rests on the ground (the “field spot”) will turn yellowish.
- When you tap the fruit, it should sound hollow.
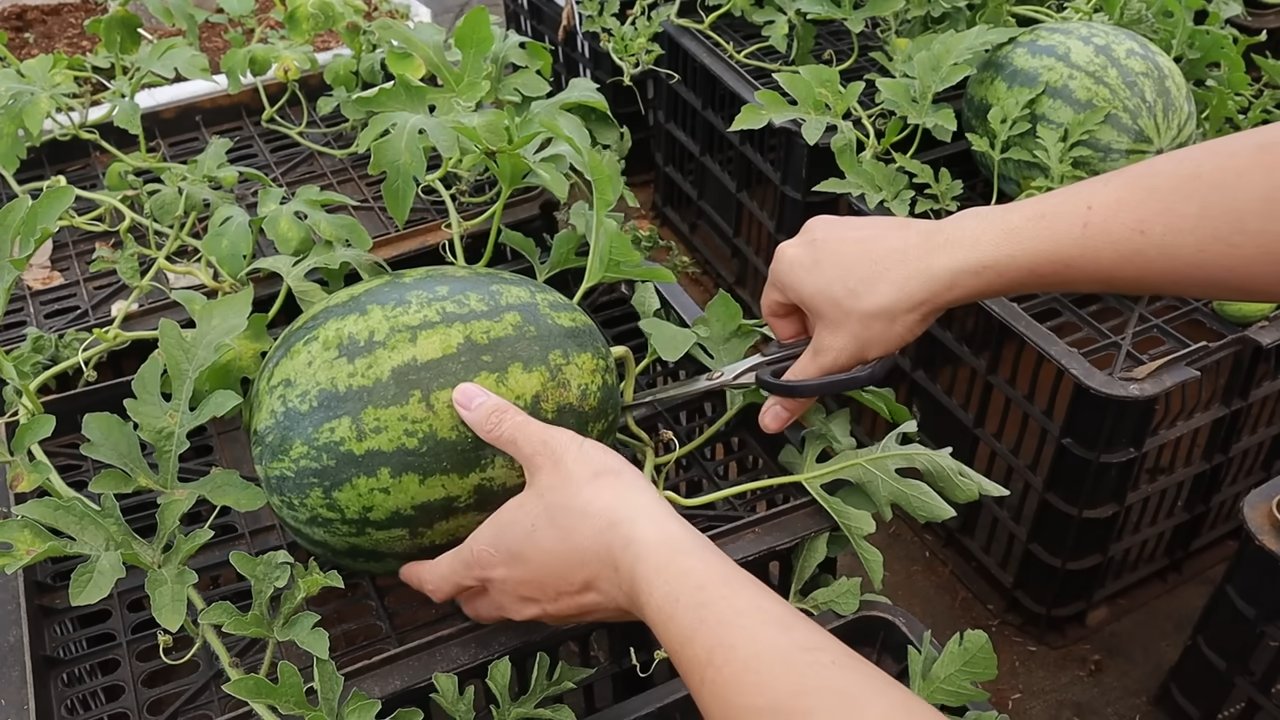
- Harvesting: Carefully cut the ripe watermelon from the vine.
- Enjoy: Enjoy your homegrown watermelon!
Additional Tips for a Successful Harvest
- Pests: Keep an eye out for pests like aphids or spider mites. If infested, you can treat the plants with an organic insecticide.
- Diseases: Watermelons can be susceptible to fungal diseases. Ensure good air circulation and avoid waterlogging.
- Patience: Watermelons take time to grow. Be patient and don’t give up!
I hope this guide helps you grow your own watermelons indoors. It’s a bit of work, but it’s definitely worth it! Good luck and enjoy
Conclusion
So, there you have it! Growing watermelons indoors might seem like a daunting task, but with a little patience, the right setup, and this straightforward DIY trick, you can absolutely enjoy the sweet taste of homegrown watermelon, even without a sprawling outdoor garden. This isn’t just about saving money; it’s about the satisfaction of nurturing a plant from seed to fruit, controlling the growing environment, and experiencing the unique flavor of a watermelon you’ve personally cultivated.
This DIY approach offers several advantages over relying solely on store-bought watermelons. You have complete control over the growing process, ensuring no harmful pesticides or chemicals are used. You can choose specific watermelon varieties that are known for their exceptional flavor or smaller size, perfect for indoor cultivation. Plus, the entire process is incredibly rewarding, providing a connection to nature and a sense of accomplishment.
Why is this DIY trick a must-try? Because it empowers you to enjoy fresh, delicious watermelons year-round, regardless of your climate or living situation. It’s a sustainable and cost-effective way to access high-quality produce, and it’s a fun and educational project for the whole family.
Don’t be afraid to experiment with different watermelon varieties. Consider smaller, bush-type watermelons like ‘Sugar Baby’ or ‘Bush Sugar Baby,’ which are specifically bred for container gardening. You can also try different soil mixes to find what works best for your indoor environment. Some gardeners have had success with hydroponic systems, which can further optimize growth and yield.
Another variation to consider is the use of grow tents. These enclosed spaces provide a controlled environment with adjustable lighting, temperature, and humidity, making it even easier to cultivate watermelons indoors. You can also explore different pollination techniques, such as hand-pollination with a small brush, to ensure successful fruit set.
We encourage you to embrace this DIY project and discover the joy of growing your own watermelons indoors. It’s a rewarding experience that will not only provide you with delicious fruit but also connect you to the natural world in a meaningful way.
Ready to embark on your indoor watermelon growing adventure? Give this DIY trick a try and let us know how it goes! Share your experiences, tips, and photos in the comments below. We’re eager to hear about your successes and learn from your challenges. Together, we can create a community of indoor watermelon enthusiasts and unlock the secrets to successful indoor cultivation. Remember, the sweetest watermelons are the ones you grow yourself!
Frequently Asked Questions (FAQ)
1. What are the best watermelon varieties to grow indoors?
Smaller, bush-type watermelon varieties are generally the best choice for indoor growing. ‘Sugar Baby’ and ‘Bush Sugar Baby’ are popular options because they are compact and produce relatively small fruits. Other suitable varieties include ‘Golden Midget’ (which turns yellow when ripe) and ‘Tiger Baby’ (a personal-sized watermelon with striped rind). Consider the size of your growing space and choose a variety that will fit comfortably. Research the specific needs of each variety, such as days to maturity and preferred growing conditions, before making your selection.
2. How much light do indoor watermelons need?
Watermelons require a significant amount of light to thrive and produce fruit. Ideally, they need at least 6-8 hours of direct sunlight per day. If you don’t have access to sufficient natural light, you’ll need to supplement with grow lights. Full-spectrum LED grow lights are a good option because they provide the necessary wavelengths for photosynthesis and are energy-efficient. Position the grow lights close to the plants (but not so close that they burn the leaves) and adjust the height as the plants grow. A timer can be used to automate the lighting schedule.
3. What type of soil is best for growing watermelons in containers?
Watermelons need well-draining soil that is rich in organic matter. A good potting mix for watermelons should contain a blend of peat moss, perlite, and vermiculite. You can also add compost or aged manure to improve soil fertility and drainage. Avoid using garden soil, as it can be too heavy and compact for container gardening. Ensure the container has drainage holes to prevent waterlogging, which can lead to root rot. The ideal pH range for watermelon soil is between 6.0 and 6.8.
4. How often should I water my indoor watermelon plants?
Watermelons need consistent moisture, especially during the fruiting stage. Water deeply whenever the top inch of soil feels dry to the touch. Avoid overwatering, as this can lead to root rot. The frequency of watering will depend on factors such as the size of the container, the temperature, and the humidity. Check the soil moisture regularly and adjust your watering schedule accordingly. Consider using a moisture meter to get an accurate reading of the soil moisture level.
5. How do I pollinate my indoor watermelon plants?
Since there are no bees or other pollinators indoors, you’ll need to hand-pollinate your watermelon flowers. Watermelons have separate male and female flowers. The female flowers have a small, immature fruit (a tiny watermelon) at the base of the flower, while the male flowers do not. To hand-pollinate, use a small, soft brush to collect pollen from the male flower and then gently transfer it to the stigma (the center part) of the female flower. It’s best to do this in the morning, when the flowers are fully open. Repeat the process for several days to ensure successful pollination.
6. What kind of fertilizer should I use for indoor watermelons?
Watermelons are heavy feeders and require regular fertilization. Start with a balanced fertilizer (e.g., 10-10-10) during the early stages of growth. Once the plants start to flower, switch to a fertilizer that is higher in phosphorus and potassium (e.g., 5-10-10) to promote fruit development. Follow the instructions on the fertilizer label and avoid over-fertilizing, as this can damage the plants. You can also supplement with organic fertilizers, such as compost tea or fish emulsion.
7. How long does it take to grow a watermelon indoors?
The time it takes to grow a watermelon indoors depends on the variety, the growing conditions, and your level of care. Generally, it takes about 70-90 days from planting to harvest. Keep in mind that indoor growing conditions may differ from outdoor conditions, which can affect the growth rate. Monitor your plants closely and adjust your care as needed.
8. What are some common problems when growing watermelons indoors?
Some common problems when growing watermelons indoors include powdery mildew, aphids, and spider mites. Powdery mildew is a fungal disease that can be prevented by ensuring good air circulation and avoiding overhead watering. Aphids and spider mites are common pests that can be controlled with insecticidal soap or neem oil. Regularly inspect your plants for signs of pests or diseases and take action promptly to prevent them from spreading.
9. How do I know when my indoor watermelon is ripe?
There are several ways to tell when a watermelon is ripe. One method is to check the tendril closest to the fruit stem. When the tendril turns brown and dries out, the watermelon is usually ripe. Another method is to thump the watermelon. A ripe watermelon will have a deep, hollow sound. You can also check the underside of the watermelon (the part that rests on the ground). When this spot turns from white to yellow or cream-colored, the watermelon is likely ripe.
10. Can I grow watermelons indoors year-round?
Yes, with the right setup and care, you can grow watermelons indoors year-round. The key is to provide consistent growing conditions, including adequate light, temperature, and humidity. You may need to adjust your growing practices depending on the season. For example, you may need to provide supplemental heat during the winter months. By carefully monitoring your plants and adjusting your care as needed, you can enjoy fresh, homegrown watermelons any time of year.
Leave a Comment