
Grow Taro Indoors Organically? Absolutely! Imagine harvesting your own vibrant, edible taro leaves right from your living room. Forget those pricey grocery store runs – with a few simple tricks, you can cultivate this tropical delight in the comfort of your own home.
Taro, a staple in many cultures across the Pacific and Asia for centuries, isn’t just a delicious and nutritious food source; it’s a symbol of sustenance and connection to the land. Historically, taro cultivation was a communal activity, deeply intertwined with traditions and rituals. While we might not be replicating ancient farming practices in our apartments, we can still tap into that spirit of self-sufficiency and bring a piece of that heritage into our lives.
But why should you bother learning to grow taro indoors organically? Well, for starters, it’s incredibly rewarding to nurture a plant from start to finish, especially one that provides you with fresh, healthy food. Plus, growing your own taro allows you to control exactly what goes into it, ensuring it’s free from harmful pesticides and chemicals. In this article, I’ll share my favorite DIY tricks and hacks to help you successfully cultivate taro indoors, even if you don’t have a green thumb. Get ready to embark on a fun and fulfilling gardening adventure!
Growing Taro Indoors Organically: A Step-by-Step Guide
Hey there, fellow plant enthusiasts! Ever thought about growing your own taro indoors? It’s totally doable, and trust me, the satisfaction of harvesting your own organically grown taro is amazing. I’ve been doing it for a while now, and I’m excited to share my secrets with you. This guide will walk you through everything you need to know, from choosing the right taro variety to harvesting your delicious, homegrown crop. Let’s get started!
Choosing Your Taro Variety
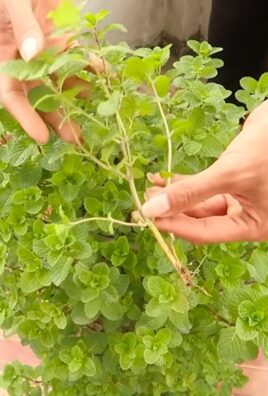
Not all taro varieties are created equal, especially when it comes to indoor growing. You’ll want to pick one that’s well-suited for container gardening and doesn’t require a ton of space. Here are a few of my favorites:
* Bun Long: This variety is known for its smaller size and adaptability to container growing. The corms are delicious, and the leaves are also edible (when cooked, of course!).
* Elephant Ear (Colocasia esculenta): While technically a taro relative, many people refer to it as taro. Some varieties of Elephant Ear stay relatively compact, making them suitable for indoor spaces. Just be sure to check the mature size before you commit.
* Black Magic: This is another type of Elephant Ear, known for its dramatic dark purple to black foliage. It adds a beautiful aesthetic to your indoor garden.
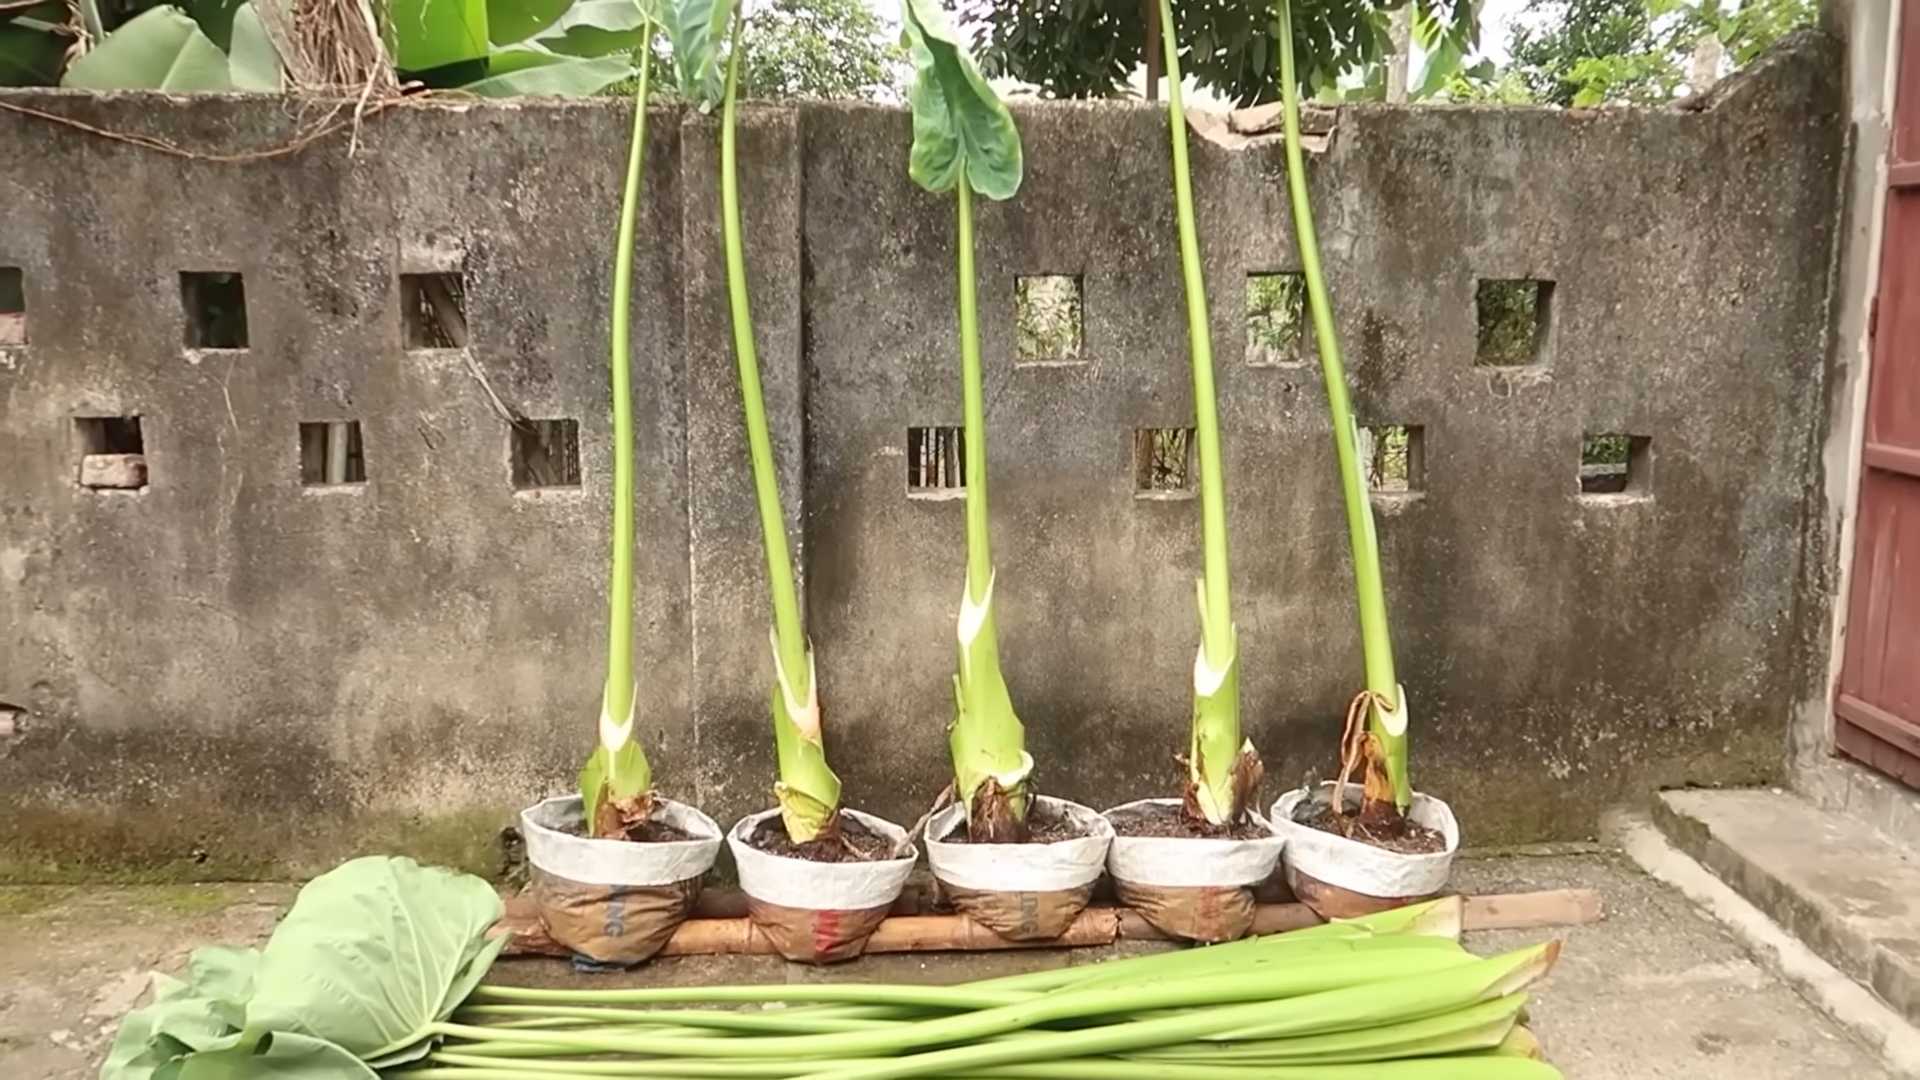
Preparing Your Taro Corm or Seedling
Okay, so you’ve chosen your taro variety. Now it’s time to get it ready for planting. You can start taro from either a corm (the underground stem) or a seedling. I usually start with a corm because it’s a bit easier, but both methods work.
Starting from a Corm
1. Inspect the Corm: Make sure your corm is firm and healthy, with no signs of rot or mold. A few small sprouts are a good sign!
2. Prepare the Corm: If the corm has any dried roots, gently trim them off. You can also cut the top of the corm off, leaving about an inch or two above the sprouting point. This encourages new growth.
3. Sprout the Corm (Optional): While you can plant the corm directly into the soil, I like to sprout it first. Place the corm in a shallow dish of water, making sure the bottom is submerged. Keep it in a warm, bright location, and change the water every day or two. You should see roots and sprouts emerging within a week or two.
Starting from a Seedling
1. Inspect the Seedling: Check for any signs of pests or diseases. The leaves should be a healthy green color, and the stem should be sturdy.
2. Gently Remove from Container: If your seedling is in a small nursery pot, gently remove it, being careful not to damage the roots.
3. Loosen the Root Ball: Gently tease apart the roots to encourage them to spread out when you plant it in its new home.
Choosing the Right Pot and Soil
Taro loves moisture, so choosing the right pot and soil is crucial.
1. Pot Size: Select a pot that’s at least 12 inches in diameter and 12 inches deep. Taro needs room for its roots to grow. A larger pot is always better than a smaller one.
2. Drainage: Make sure your pot has drainage holes. Taro loves moisture, but it doesn’t like to sit in soggy soil.
3. Soil Mix: Use a well-draining potting mix that’s rich in organic matter. I like to mix equal parts of potting soil, compost, and perlite. The compost provides nutrients, and the perlite helps with drainage. You can also add a bit of peat moss to help retain moisture.
Planting Your Taro
Now for the fun part – planting!
1. Fill the Pot: Fill your pot with the soil mix, leaving a few inches of space at the top.
2. Plant the Corm or Seedling: If you’re planting a corm, place it in the center of the pot, with the sprouting point facing upwards. Cover it with soil, leaving the top of the corm slightly exposed. If you’re planting a seedling, create a small hole in the center of the pot and gently place the seedling in the hole. Backfill with soil and gently pat it down.
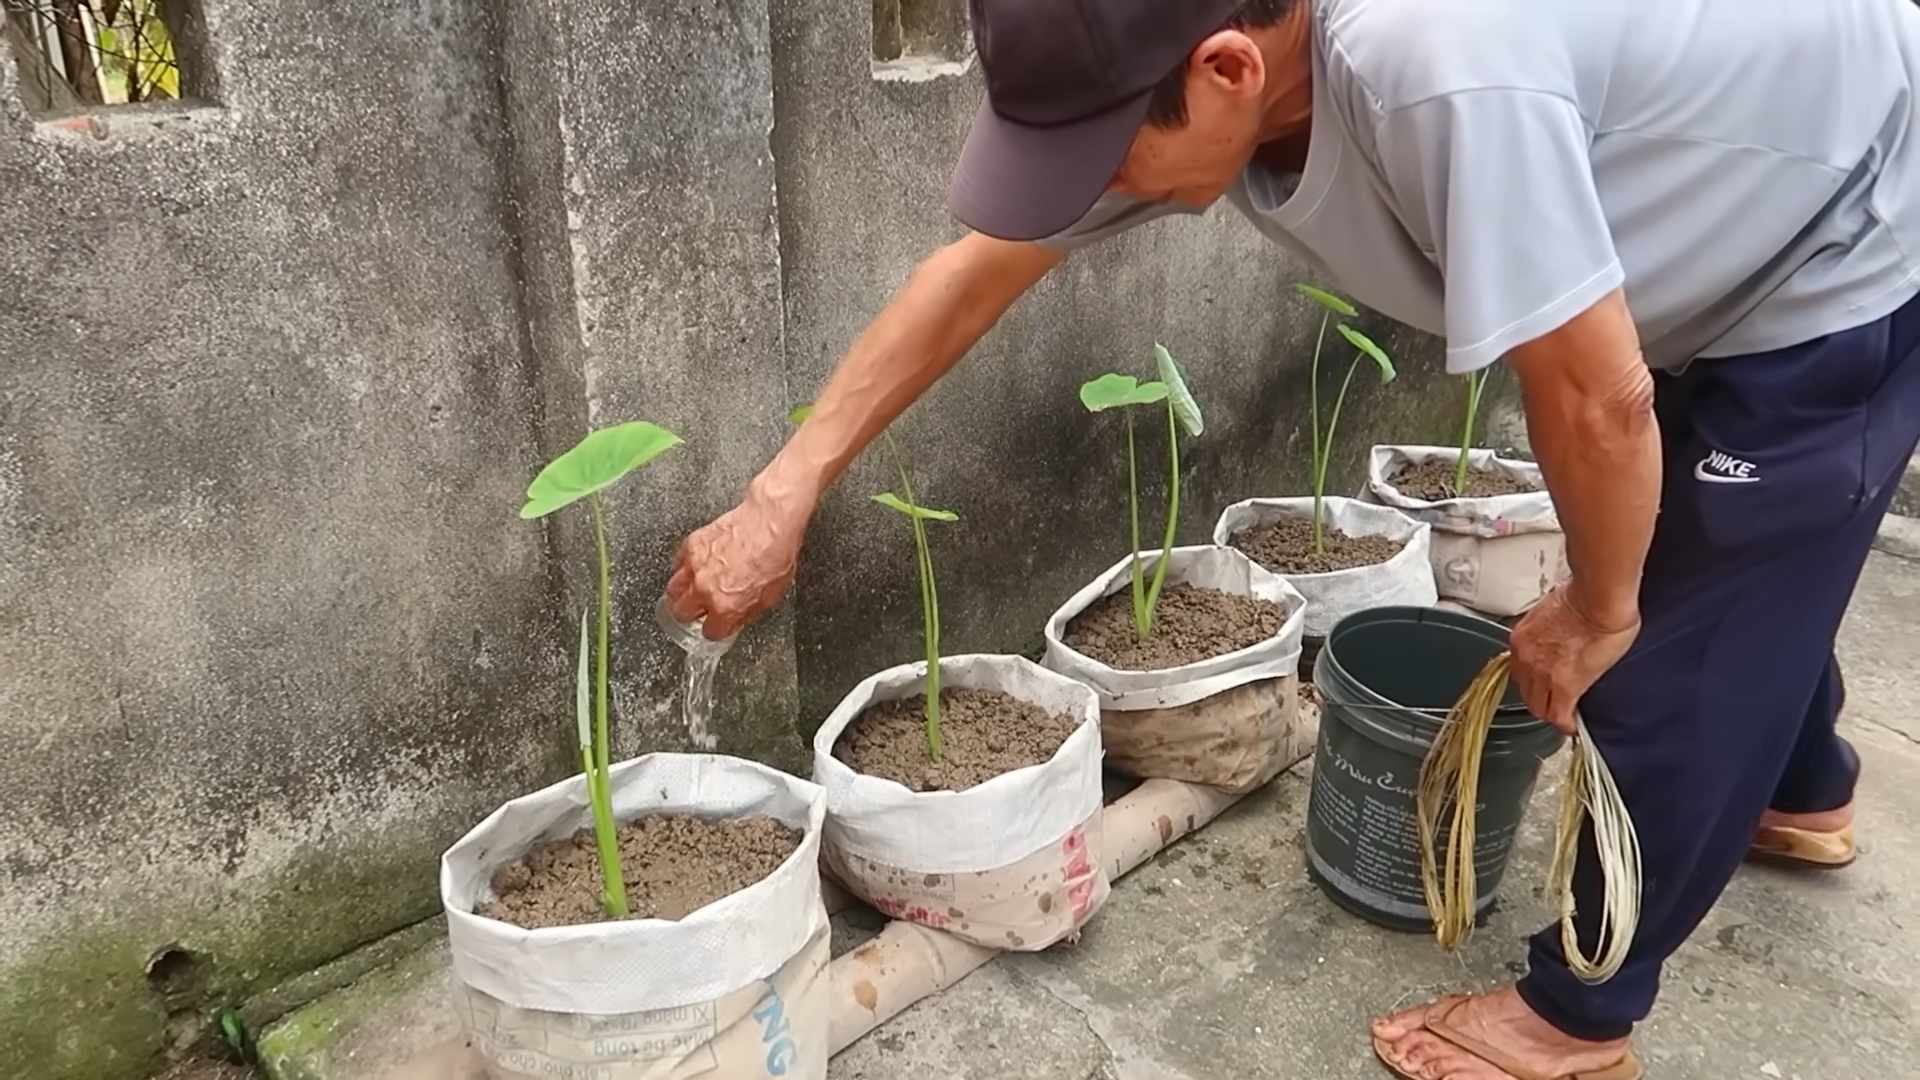
3. Water Thoroughly: Water the soil thoroughly until water drains out of the drainage holes. This helps settle the soil and ensures that the roots are well-hydrated.
Caring for Your Indoor Taro Plant
Taro is relatively easy to care for, but here are a few things to keep in mind:
1. Light: Taro needs bright, indirect light. Place your plant near a sunny window, but avoid direct sunlight, which can scorch the leaves. If you don’t have enough natural light, you can supplement with a grow light.
2. Watering: Taro loves moisture, so water it regularly. The soil should always be moist, but not soggy. Check the soil moisture by sticking your finger into the soil. If the top inch feels dry, it’s time to water.
3. Humidity: Taro thrives in high humidity. If your indoor environment is dry, you can increase humidity by misting the leaves regularly, placing a humidifier nearby, or setting the pot on a tray filled with pebbles and water. Make sure the bottom of the pot isn’t sitting directly in the water, as this can lead to root rot.
4. Fertilizing: Feed your taro plant every two to three weeks during the growing season (spring and summer) with a balanced organic fertilizer. Follow the instructions on the fertilizer label.
5. Temperature: Taro prefers warm temperatures, between 65°F and 85°F (18°C and 29°C). Avoid exposing your plant to cold drafts or sudden temperature changes.
6. Pest Control: Keep an eye out for pests like aphids, spider mites, and mealybugs. If you spot any pests, treat them with an organic insecticide or insecticidal soap. I like to use neem oil, which is a natural and effective pest control option.
7. Pruning: Remove any yellow or brown leaves to keep your plant healthy and attractive. You can also prune the plant to control its size and shape.
Harvesting Your Taro
The moment you’ve been waiting for! Harvesting your own taro is so rewarding.
1. When to Harvest: Taro is typically ready to harvest in about 6-9 months after planting. The leaves will start to turn yellow and die back, which is a sign that the corm is mature.
2. Harvesting the Corm: Gently dig around the base of the plant to expose the corm. Carefully lift the corm out of the soil, being careful not to damage it.
3. Cleaning the Corm: Wash the corm thoroughly to remove any dirt or debris.
4. Storing the Corm: Store the corm in a cool, dry place. It can be stored for several weeks.
Enjoying Your Homegrown Taro
Now that you’ve harvested your taro, it’s time to enjoy it! Taro can be cooked in many different ways. It can be boiled, steamed, baked, or fried. It’s a staple ingredient in many cuisines around the world. Remember that raw taro contains calcium oxalate crystals, which can cause irritation. Always cook taro thoroughly before eating it.
Here are a few ideas for using your homegrown taro:
* Taro Chips: Slice the taro thinly and bake or fry it into crispy chips.
* Taro Mash: Boil the taro until tender and mash it with butter, milk, and seasonings.
* Taro Curry: Add taro to your favorite curry recipe.
* Poi: In Hawaiian cuisine, taro is traditionally pounded into a starchy paste called poi.
Troubleshooting
Even with the best care, you might encounter some problems along the way. Here are a few common issues and how to fix them:
* Yellowing Leaves: This could be a sign of overwatering, underwatering, or nutrient deficiency. Check the soil moisture and adjust your watering schedule accordingly. Fertilize your plant with a balanced organic fertilizer.
* Brown Leaf Tips: This is often caused by dry air. Increase humidity by misting the leaves regularly or using a humidifier.
* Root Rot: This is caused by overwatering and poor drainage. Make sure your pot has drainage holes and that you’re not overwatering your plant. If you suspect root rot, repot your plant in fresh soil.
* Pests: Inspect your plant regularly for pests. Treat any infestations with an organic insecticide or insecticidal soap.
Final Thoughts
Growing taro indoors organically is a rewarding experience. With a little bit of care and attention, you can enjoy fresh, homegrown taro all year round. Don
Conclusion
So, there you have it! Growing taro indoors organically is not only achievable but also incredibly rewarding. We’ve walked you through the process, from selecting the right corm to nurturing your plant in a controlled indoor environment. Why is this DIY trick a must-try? Because it brings a touch of the tropics into your home, provides you with fresh, organically grown taro, and offers a fascinating glimpse into the life cycle of this unique plant. Forget relying solely on grocery stores; with a little patience and care, you can cultivate your own supply of this versatile and nutritious root vegetable.
But the journey doesn’t end here! Feel free to experiment with different varieties of taro to discover your favorite flavor profile. Consider using different types of organic potting mixes to see which one yields the best results for your specific indoor conditions. You could even try hydroponic systems for a soil-free approach to growing taro indoors. The possibilities are endless!
Don’t be afraid to get creative and adapt the techniques we’ve discussed to suit your own preferences and resources. Perhaps you’ll find that adding a specific type of organic fertilizer gives your taro an extra boost, or maybe you’ll discover a unique way to manage humidity levels in your growing space. The beauty of DIY gardening is the opportunity to learn and innovate.
We wholeheartedly encourage you to embark on this exciting adventure of growing taro indoors organically. It’s a fantastic way to connect with nature, learn new skills, and enjoy the satisfaction of harvesting your own food. And most importantly, we want to hear about your experiences! Share your successes, your challenges, and your tips with us in the comments below. Let’s create a community of indoor taro enthusiasts and learn from each other’s journeys. Your insights could be invaluable to someone just starting out, and together, we can unlock the full potential of this amazing plant. So, grab a taro corm, get your hands dirty, and let the growing begin! We can’t wait to see what you create.
Frequently Asked Questions (FAQs)
Q: What is the best time of year to start growing taro indoors?
A: While you can technically start growing taro indoors at any time of year, the ideal time is generally in the spring or early summer. This allows the plant to take advantage of the longer daylight hours and warmer temperatures, which can promote faster growth. However, with proper lighting and temperature control, you can successfully grow taro indoors year-round. Just be mindful of providing adequate light during the shorter days of winter.
Q: How much light does taro need when grown indoors?
A: Taro thrives in bright, indirect light. Aim for at least 6-8 hours of sunlight per day. If you don’t have a naturally sunny spot, consider using grow lights to supplement the natural light. LED grow lights are a great option as they are energy-efficient and provide the full spectrum of light that plants need to thrive. Observe your plant closely; if the leaves start to look pale or leggy, it may not be getting enough light.
Q: What type of potting mix is best for growing taro indoors organically?
A: Taro prefers a well-draining, nutrient-rich potting mix. A good option is a mix of equal parts peat moss, perlite, and compost. You can also add some organic fertilizer to the mix to provide extra nutrients. Avoid using heavy clay soils, as they can retain too much moisture and lead to root rot. Ensure the potting mix is certified organic to maintain the organic integrity of your growing process.
Q: How often should I water my indoor taro plant?
A: Taro loves moisture, but it’s important to avoid overwatering. Water your plant when the top inch of soil feels dry to the touch. Ensure that the pot has drainage holes to prevent water from accumulating at the bottom. During the warmer months, you may need to water more frequently than in the cooler months. Monitor the soil
So, there you have it! Growing taro indoors organically is not only achievable but also incredibly rewarding. We’ve walked you through the process, from selecting the right corm to nurturing your plant in a controlled indoor environment. Why is this DIY trick a must-try? Because it brings a touch of the tropics into your home, provides you with fresh, organically grown taro, and offers a fascinating glimpse into the life cycle of this unique plant. Forget relying solely on grocery stores; with a little patience and care, you can cultivate your own supply of this versatile and nutritious root vegetable.
But the journey doesn’t end here! Feel free to experiment with different varieties of taro to discover your favorite flavor profile. Consider using different types of organic potting mixes to see which one yields the best results for your specific indoor conditions. You could even try hydroponic systems for a soil-free approach to growing taro indoors. The possibilities are endless!
Don’t be afraid to get creative and adapt the techniques we’ve discussed to suit your own preferences and resources. Perhaps you’ll find that adding a specific type of organic fertilizer gives your taro an extra boost, or maybe you’ll discover a unique way to manage humidity levels in your growing space. The beauty of DIY gardening is the opportunity to learn and innovate.
We wholeheartedly encourage you to embark on this exciting adventure of growing taro indoors organically. It’s a fantastic way to connect with nature, learn new skills, and enjoy the satisfaction of harvesting your own food. And most importantly, we want to hear about your experiences! Share your successes, your challenges, and your tips with us in the comments below. Let’s create a community of indoor taro enthusiasts and learn from each other’s journeys. Your insights could be invaluable to someone just starting out, and together, we can unlock the full potential of this amazing plant. So, grab a taro corm, get your hands dirty, and let the growing begin! We can’t wait to see what you create.
Frequently Asked Questions (FAQs)
Q: What is the best time of year to start growing taro indoors?
A: While you can technically start growing taro indoors at any time of year, the ideal time is generally in the spring or early summer. This allows the plant to take advantage of the longer daylight hours and warmer temperatures, which can promote faster growth. However, with proper lighting and temperature control, you can successfully grow taro indoors year-round. Just be mindful of providing adequate light during the shorter days of winter.
Q: How much light does taro need when grown indoors?
A: Taro thrives in bright, indirect light. Aim for at least 6-8 hours of sunlight per day. If you don’t have a naturally sunny spot, consider using grow lights to supplement the natural light. LED grow lights are a great option as they are energy-efficient and provide the full spectrum of light that plants need to thrive. Observe your plant closely; if the leaves start to look pale or leggy, it may not be getting enough light.
Q: What type of potting mix is best for growing taro indoors organically?
A: Taro prefers a well-draining, nutrient-rich potting mix. A good option is a mix of equal parts peat moss, perlite, and compost. You can also add some organic fertilizer to the mix to provide extra nutrients. Avoid using heavy clay soils, as they can retain too much moisture and lead to root rot. Ensure the potting mix is certified organic to maintain the organic integrity of your growing process.
Q: How often should I water my indoor taro plant?
A: Taro loves moisture, but it’s important to avoid overwatering. Water your plant when the top inch of soil feels dry to the touch. Ensure that the pot has drainage holes to prevent water from accumulating at the bottom. During the warmer months, you may need to water more frequently than in the cooler months. Monitor the soil moisture regularly and adjust your watering schedule accordingly.
Q: How can I maintain the humidity levels for my indoor taro plant?
A: Taro thrives in high humidity. You can increase the humidity around your plant by using a humidifier, placing the pot on a pebble tray filled with water, or misting the leaves regularly. Grouping your taro plant with other plants can also help to create a more humid microclimate. Aim for a humidity level of around 60-80%.
Q: What are some common pests and diseases that affect indoor taro plants?
A: Common pests that can affect indoor taro plants include aphids, spider mites, and mealybugs. Regularly inspect your plant for signs of infestation and treat promptly with organic pest control methods such as insecticidal soap or neem oil. Root rot can also be a problem if the soil is too wet. Ensure proper drainage and avoid overwatering to prevent this.
Q: How long does it take for taro to mature when grown indoors?
A: The time it takes for taro to mature when grown indoors can vary depending on the variety, growing conditions, and your level of care. Generally, it can take anywhere from 6 to 12 months for the corm to reach a harvestable size. Be patient and continue to provide your plant with the necessary care, and you’ll eventually be rewarded with a delicious and nutritious harvest.
Q: Can I eat the leaves of my indoor taro plant?
A: Yes, the leaves of taro are edible, but they must be cooked thoroughly to remove calcium oxalate crystals, which can cause irritation. Boiling or steaming the leaves for at least 30 minutes will render them safe to eat. The leaves can be used in a variety of dishes, such as stews, soups, and curries. Always exercise caution and ensure the leaves are properly cooked before consumption.
Q: How do I harvest taro corms from my indoor plant?
A: When the leaves of your taro plant start to turn yellow and die back, it’s a sign that the corm is ready to be harvested. Gently dig around the base of the plant and carefully lift the corm out of the soil. Wash off any excess soil and store the corm in a cool, dry place. You can then use the corm in your favorite taro recipes.
Q: What are some creative ways to use organically grown indoor taro?
A: The possibilities are endless! You can use taro to make poi, a traditional Hawaiian dish. You can also roast, bake, or fry taro to create delicious side dishes or snacks. Taro can be added to soups, stews, and curries for a creamy and flavorful texture. You can even use taro flour to make gluten-free baked goods. Get creative and experiment with different recipes to discover your favorite ways to enjoy your homegrown taro.
Leave a Comment