
Grow sweet peppers at home and unlock a world of vibrant flavors and fresh ingredients right at your fingertips! Imagine plucking a sun-ripened, juicy sweet pepper straight from your own garden – the taste is simply unmatched. But let’s be honest, the idea of home gardening can sometimes feel a little daunting, right? That’s where these easy DIY tricks and hacks come in.
For centuries, cultivating peppers has been a cherished tradition across various cultures. From the ancient civilizations of South America, where peppers originated, to the bustling markets of Asia, these colorful fruits have added zest and vitality to countless dishes. Now, you can bring that rich history and culinary magic to your own backyard, balcony, or even windowsill!
Why should you bother with these DIY tricks? Well, for starters, growing your own sweet peppers allows you to control exactly what goes into your food – no harmful pesticides or mystery ingredients! Plus, it’s incredibly rewarding to nurture a plant from seed to harvest. And let’s not forget the cost savings! Store-bought peppers can be pricey, but with a little know-how, you can grow sweet peppers at home for a fraction of the cost. So, get ready to roll up your sleeves and discover the secrets to a bountiful pepper harvest. I’m excited to share these simple, yet effective, techniques that will transform you into a confident home gardener in no time!
Growing Sweet Peppers: A Beginner’s Guide to a Bountiful Harvest
Hey there, fellow gardening enthusiasts! I’m so excited to share my secrets to growing delicious, vibrant sweet peppers right in your own backyard (or even on your balcony!). Trust me, there’s nothing quite like biting into a pepper you’ve nurtured from seed to fruit. This guide will walk you through every step, from choosing the right variety to harvesting your colorful bounty. Let’s get started!
Choosing Your Pepper Varieties
Before we dive into the nitty-gritty, let’s talk about pepper varieties. Sweet peppers come in a rainbow of colors and sizes, each with its own unique flavor profile. Here are a few of my personal favorites:
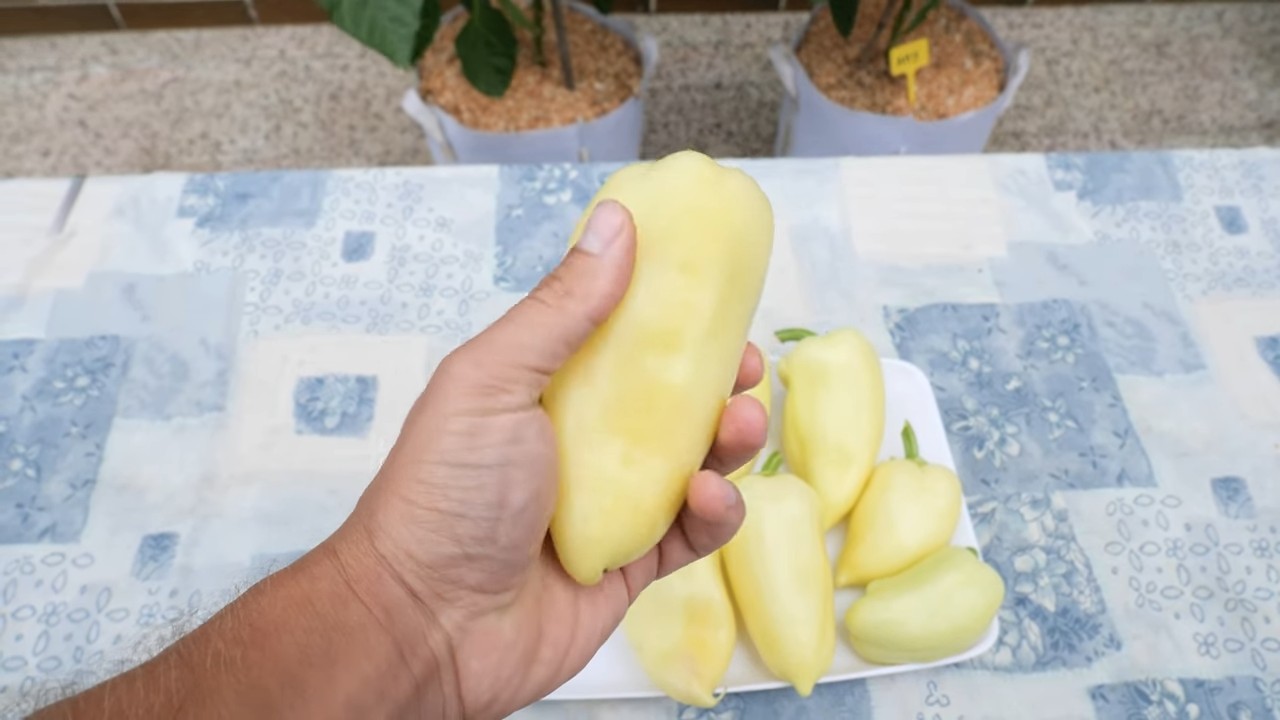
* Bell Peppers: The classic choice! They come in red, yellow, orange, and even purple. Red bell peppers are the sweetest.
* Banana Peppers: Mild and slightly tangy, perfect for pickling or adding to sandwiches.
* Pimiento Peppers: Sweet, heart-shaped peppers often used in pimento cheese.
* Mini Sweet Peppers: These bite-sized peppers are great for snacking and roasting.
Consider your climate and growing space when making your selection. Some varieties are more heat-tolerant than others, and some are better suited for container gardening.
Starting Your Peppers from Seed (Optional, but Recommended!)
Starting your peppers from seed gives you a head start on the growing season and allows you to choose from a wider variety of peppers. I highly recommend it!
What You’ll Need:
* Pepper seeds (of course!)
* Seed starting trays or small pots
* Seed starting mix (a light, sterile soil mix)
* A heat mat (optional, but helpful)
* A grow light (optional, but highly recommended)
* A spray bottle
Step-by-Step Instructions:
1. Sow Your Seeds: Fill your seed starting trays or pots with seed starting mix. Moisten the mix thoroughly. Sow your pepper seeds about ¼ inch deep, placing 2-3 seeds per cell or pot. Gently cover the seeds with more mix.
2. Provide Warmth: Peppers need warmth to germinate. Place your seed starting trays on a heat mat if you have one. Otherwise, find a warm spot in your house, like on top of your refrigerator.
3. Maintain Moisture: Keep the soil consistently moist, but not soggy. Use a spray bottle to gently mist the soil as needed.
4. Provide Light: Once the seedlings emerge (usually in 7-14 days), they’ll need plenty of light. Place them under a grow light or in a very sunny window. If using a window, rotate the trays regularly to prevent the seedlings from becoming leggy.
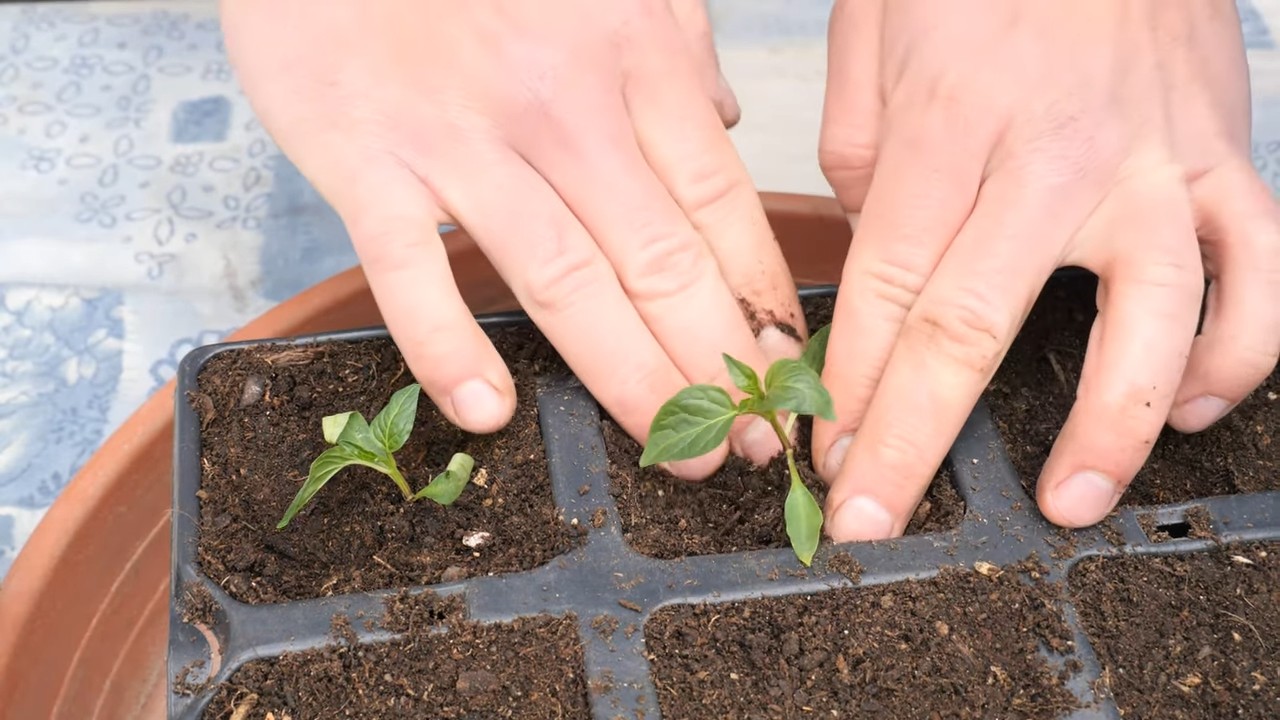
5. Thin Your Seedlings: Once the seedlings have their first true leaves (the second set of leaves), thin them to one seedling per cell or pot. Choose the strongest, healthiest seedling and snip off the others at the soil line.
6. Harden Off Your Seedlings: Before transplanting your seedlings outdoors, you’ll need to “harden them off.” This process gradually acclimates them to the outdoor environment. Start by placing the seedlings outdoors in a sheltered location for an hour or two each day, gradually increasing the amount of time they spend outside over the course of a week or two. Protect them from direct sunlight and strong winds.
Transplanting Your Pepper Seedlings (or Buying Transplants)
Whether you started your peppers from seed or purchased transplants from a nursery, the transplanting process is the same.
What You’ll Need:
* Your pepper seedlings or transplants
* Garden soil or potting mix
* Compost or other organic matter
* A trowel
* Water
Step-by-Step Instructions:
1. Choose a Sunny Location: Peppers need at least 6-8 hours of sunlight per day. Choose a location in your garden that receives plenty of sun.
2. Prepare the Soil: Peppers prefer well-drained soil that is rich in organic matter. Amend your soil with compost or other organic matter before planting.
3. Dig Your Holes: Dig holes that are slightly larger than the root balls of your pepper seedlings or transplants. Space the holes about 18-24 inches apart.
4. Transplant Your Peppers: Gently remove the pepper seedlings or transplants from their containers. Loosen the root ball slightly and place the plant in the hole. Backfill the hole with soil and gently firm the soil around the base of the plant.
5. Water Thoroughly: Water the newly transplanted peppers thoroughly.
Caring for Your Pepper Plants
Now that your peppers are in the ground, it’s time to provide them with the care they need to thrive.
Watering:
Peppers need consistent moisture, especially during hot weather. Water deeply whenever the top inch of soil feels dry. Avoid overhead watering, as this can lead to fungal diseases. I prefer using a soaker hose or drip irrigation to water my peppers.
Fertilizing:
Peppers are heavy feeders and benefit from regular fertilization. Use a balanced fertilizer (like 10-10-10) every few weeks, or a fertilizer specifically formulated for peppers and tomatoes. You can also side-dress your plants with compost or other organic matter.
Mulching:
Mulching helps to retain moisture in the soil, suppress weeds, and regulate soil temperature. Apply a layer of organic mulch, such as straw, wood chips, or shredded leaves, around the base of your pepper plants.
Pruning:
While not essential, pruning can help to improve air circulation and encourage fruit production. Remove any suckers (small shoots that grow from the base of the plant) and any yellowing or diseased leaves.
Supporting Your Plants:
As your pepper plants grow, they may need support to prevent them from toppling over, especially when loaded with fruit. Use stakes, cages, or trellises to support your plants. I find that tomato cages work perfectly for bell peppers.
Dealing with Pests and Diseases
Even with the best care, your pepper plants may still encounter pests and diseases. Here are a few common problems and how to deal with them:
* Aphids: These tiny insects suck the sap from plants, causing them to become weak and stunted. Spray aphids with a strong stream of water or use insecticidal soap.
* Flea Beetles: These small beetles chew holes in the leaves of plants. Cover your plants with row covers or use insecticidal soap.
* Blossom End Rot: This condition causes the bottom of the pepper to rot. It’s usually caused by calcium deficiency. Ensure consistent watering and amend your soil with calcium-rich amendments like bone meal.
* Fungal Diseases: Fungal diseases, such as powdery mildew and leaf spot, can affect pepper plants. Improve air circulation by pruning and avoid overhead watering. Use a fungicide if necessary.
Harvesting Your Sweet Peppers
The moment you’ve been waiting for! Harvesting your sweet peppers is the most rewarding part of the process.
When to Harvest:
Sweet peppers are typically ready to harvest when they reach their mature size and color. The color will depend on the variety you’re growing. For example, red bell peppers are ready when they are fully red and firm.
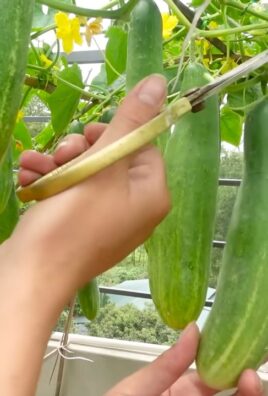
How to Harvest:
Use a sharp knife or pruning shears to cut the pepper from the plant. Leave a small piece of stem attached to the pepper.
Storing Your Peppers:
Store your harvested peppers in the refrigerator for up to a week. For longer storage, you can freeze, pickle, or dry them.
Troubleshooting Common Pepper Problems
Even with the best intentions, sometimes things don’t go as planned. Here are some common pepper growing problems and how to fix them:
* Peppers Not Setting Fruit: This can be caused by several factors, including high temperatures, lack of pollination, or nutrient deficiencies. Ensure consistent watering, provide shade during the hottest part of the day, and fertilize regularly. You can also try hand-pollinating your peppers by gently shaking the plants.
* Yellowing Leaves: Yellowing leaves can be a sign of nutrient deficiency, overwatering, or underwatering. Check the soil moisture and fertilize if necessary.
* Stunted Growth: Stunted growth can be caused by pests, diseases, or poor soil conditions. Inspect your plants for pests and diseases and amend your soil with compost or other organic matter.
Enjoying Your Homegrown Sweet Peppers
Congratulations! You’ve successfully grown your own sweet peppers. Now it’s time to enjoy the fruits (or vegetables!) of your labor. Here are just a few ways to use your homegrown peppers:
* Eat them raw: Slice them up and add them to salads, sandwiches, or veggie platters.
* Roast them: Roasting peppers brings out their sweetness and adds a smoky flavor.
* Grill them: Grilled peppers are a delicious addition to burgers, tacos, and fajitas.
* Stuff them:
Conclusion
So, there you have it! Growing sweet peppers at home is not only achievable, but it’s also incredibly rewarding. Forget those bland, overpriced peppers from the grocery store. Imagine biting into a juicy, sun-ripened sweet pepper that you nurtured from seed to harvest. The difference in flavor and texture is simply unparalleled. This DIY approach empowers you to control the entire process, ensuring you get the freshest, most flavorful peppers possible.
This isn’t just about saving money; it’s about connecting with your food, understanding where it comes from, and enjoying the satisfaction of creating something delicious with your own two hands. Plus, it’s a fantastic way to reduce your environmental impact by minimizing transportation and packaging waste.
But the benefits don’t stop there. Growing your own sweet peppers allows for incredible customization. Want a rainbow of colors? Plant a variety of seeds! Prefer a specific level of sweetness or heat? Choose your pepper varieties accordingly. You can even experiment with different growing techniques, like container gardening, raised beds, or hydroponics, to find what works best for your space and preferences.
Consider these variations to elevate your sweet pepper growing experience:
* **Stuffed Sweet Peppers:** Once you have a bountiful harvest, use your homegrown peppers to make delicious stuffed peppers. Experiment with different fillings like rice, ground meat, quinoa, or vegetables.
* **Roasted Sweet Pepper Dip:** Roast your sweet peppers until they are soft and slightly charred, then blend them with garlic, olive oil, and spices for a flavorful dip.
* **Sweet Pepper Relish:** Preserve your harvest by making a sweet pepper relish. This is a great way to enjoy the taste of summer all year round.
* **Spicy Sweet Peppers:** If you like a little heat, try growing some sweet peppers with a touch of spice, such as shishito peppers or pimientos de Padrón.
We understand that starting a new gardening project can feel daunting, but trust us, the results are well worth the effort. With a little patience, care, and the tips we’ve shared, you’ll be harvesting your own delicious sweet peppers in no time.
Don’t just take our word for it – give it a try! We’re confident that you’ll be amazed by the flavor and satisfaction of growing your own sweet peppers. And once you do, we want to hear all about it! Share your experiences, tips, and photos with us in the comments below. Let’s build a community of home gardeners who are passionate about growing their own food. Let us know what varieties you tried, what challenges you faced, and what successes you celebrated. Your insights can help other aspiring gardeners embark on their own sweet pepper growing journey.
So, grab some seeds, get your hands dirty, and prepare to enjoy the unparalleled taste of homegrown sweet peppers. Happy gardening!
Frequently Asked Questions (FAQ)
What is the best time to start growing sweet peppers from seed?
The ideal time to start growing sweet peppers from seed depends on your climate. In general, you should start seeds indoors 6-8 weeks before the last expected frost. This gives the seedlings enough time to develop before being transplanted outdoors. If you live in a warmer climate with a longer growing season, you can start seeds directly in the ground after the last frost. However, starting indoors provides a head start and allows you to control the growing environment.
What kind of soil is best for growing sweet peppers?
Sweet peppers thrive in well-draining, fertile soil that is rich in organic matter. The ideal soil pH is between 6.0 and 7.0. Before planting, amend your soil with compost, aged manure, or other organic materials to improve drainage and fertility. If you are growing in containers, use a high-quality potting mix specifically formulated for vegetables. Avoid using garden soil in containers, as it can become compacted and restrict drainage.
How much sunlight do sweet peppers need?
Sweet peppers require at least 6-8 hours of direct sunlight per day to produce a bountiful harvest. Choose a location in your garden that receives full sun throughout the day. If you are growing in containers, make sure to place them in a sunny spot. If you live in a particularly hot climate, providing some afternoon shade can help prevent the peppers from getting sunburned.
How often should I water my sweet pepper plants?
Water your sweet pepper plants regularly, especially during hot, dry weather. The soil should be kept consistently moist, but not waterlogged. Water deeply at the base of the plants, avoiding wetting the foliage, which can increase the risk of fungal diseases. A good rule of thumb is to water when the top inch of soil feels dry to the touch. Mulching around the plants can help retain moisture and suppress weeds.
What are some common pests and diseases that affect sweet peppers?
Sweet peppers can be susceptible to various pests and diseases, including aphids, whiteflies, spider mites, blossom-end rot, and fungal diseases. Regularly inspect your plants for signs of pests or diseases. If you notice any problems, take action promptly. For aphids, whiteflies, and spider mites, you can try spraying the plants with insecticidal soap or neem oil. Blossom-end rot is caused by a calcium deficiency and can be prevented by ensuring the soil is properly amended with calcium and by watering consistently. Fungal diseases can be prevented by providing good air circulation and avoiding overhead watering.
Do I need to fertilize my sweet pepper plants?
Yes, sweet pepper plants benefit from regular fertilization. Use a balanced fertilizer that is specifically formulated for vegetables. Apply fertilizer according to the package directions. You can also supplement with organic fertilizers, such as compost tea or fish emulsion. Avoid over-fertilizing, as this can lead to excessive foliage growth and reduced fruit production.
How do I know when my sweet peppers are ripe?
Sweet peppers are typically ready to harvest when they have reached their mature size and color. The color will vary depending on the variety. Gently squeeze the pepper; it should feel firm and slightly yielding. Use pruning shears or a sharp knife to cut the pepper from the plant, leaving a short stem attached.
Can I grow sweet peppers in containers?
Absolutely! Sweet peppers are well-suited for container gardening. Choose a container that is at least 12 inches in diameter and has drainage holes. Use a high-quality potting mix and provide regular watering and fertilization. Container-grown peppers may need to be watered more frequently than those grown in the ground, especially during hot weather.
How can I encourage more pepper production?
To encourage more pepper production, try these tips:
* **Pinch off the first few flowers:** This will encourage the plant to focus on vegetative growth, resulting in a stronger plant that can support more fruit later on.
* **Provide support:** As the peppers grow, they can become heavy and cause the branches to break. Provide support with stakes or cages to prevent this.
* **Water consistently:** Consistent watering is essential for pepper production. Avoid letting the soil dry out completely.
* **Fertilize regularly:** Regular fertilization will provide the plants with the nutrients they need to produce a bountiful harvest.
* **Harvest regularly:** Harvesting peppers as they ripen will encourage the plant to produce more.
What are some good companion plants for sweet peppers?
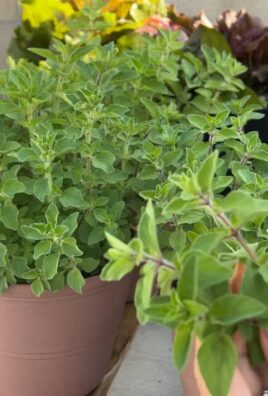
Companion planting can help improve the health and productivity of your sweet pepper plants. Some good companion plants for sweet peppers include basil, marigolds, carrots, onions, and garlic. Basil helps repel pests, while marigolds attract beneficial insects. Carrots, onions, and garlic can help deter soil-borne pests. Avoid planting sweet peppers near fennel or brassicas (such as cabbage, broccoli, and cauliflower), as these can inhibit their growth.
Leave a Comment