
Grow Snap Peas Kitchen Garden: Imagine stepping outside your back door and harvesting crisp, sweet snap peas, bursting with flavor, just moments before adding them to your salad or stir-fry. Sounds dreamy, right? Well, it doesn’t have to be just a dream! For centuries, kitchen gardens have been a source of fresh, readily available produce, connecting us to the earth and providing a sustainable way to nourish ourselves. From the elaborate potagers of French royalty to the humble victory gardens of wartime, the concept of growing food close to home has deep roots.
But let’s be honest, not everyone has acres of land or hours to dedicate to gardening. That’s where these simple, yet effective, DIY tricks come in. I’m here to show you how easy it is to grow snap peas kitchen garden, even if you’re short on space or time. We’ll explore clever hacks and easy-to-follow steps that will have you enjoying a bountiful harvest in no time. Why spend money on store-bought snap peas when you can have fresher, tastier ones right at your fingertips? Plus, there’s nothing quite like the satisfaction of nurturing your own food from seed to table. So, grab your gardening gloves, and let’s get started!
Growing Snap Peas Indoors: A Beginner’s Guide to a Kitchen Garden Delight
Okay, so you want to grow snap peas indoors? Awesome! I’m so excited for you. Fresh, crunchy snap peas right from your kitchen – it’s a game-changer. This guide will walk you through everything you need to know, from setting up your indoor garden to harvesting your delicious peas. Let’s get started!
What You’ll Need: The Essentials
Before we dive into the nitty-gritty, let’s gather our supplies. Here’s a checklist to make sure you’re all set:
* Snap Pea Seeds: Choose a bush variety specifically bred for smaller spaces. These tend to be more compact and manageable indoors. Look for varieties like ‘Sugar Ann’ or ‘Sugar Daddy’.
* Containers: You’ll need pots that are at least 6-8 inches deep and wide. Snap peas have relatively shallow roots, but they still need room to grow. Fabric pots are great because they allow for good drainage and aeration.
* Potting Mix: Use a high-quality, well-draining potting mix. Avoid using garden soil, as it can compact and not drain well in containers.
* Grow Lights: Snap peas need a lot of light, especially indoors. A full-spectrum LED grow light is ideal.
* Trellis or Support System: Even bush varieties benefit from some support. A small trellis, bamboo stakes, or even some sturdy twigs will do the trick.
* Watering Can or Spray Bottle: For gentle watering.
* Optional: Seed starting tray, heat mat (for faster germination), liquid fertilizer.
Phase 1: Getting Started – Sowing the Seeds
This is where the magic begins! We’re going to get those little seeds started on their journey to becoming delicious snap peas.
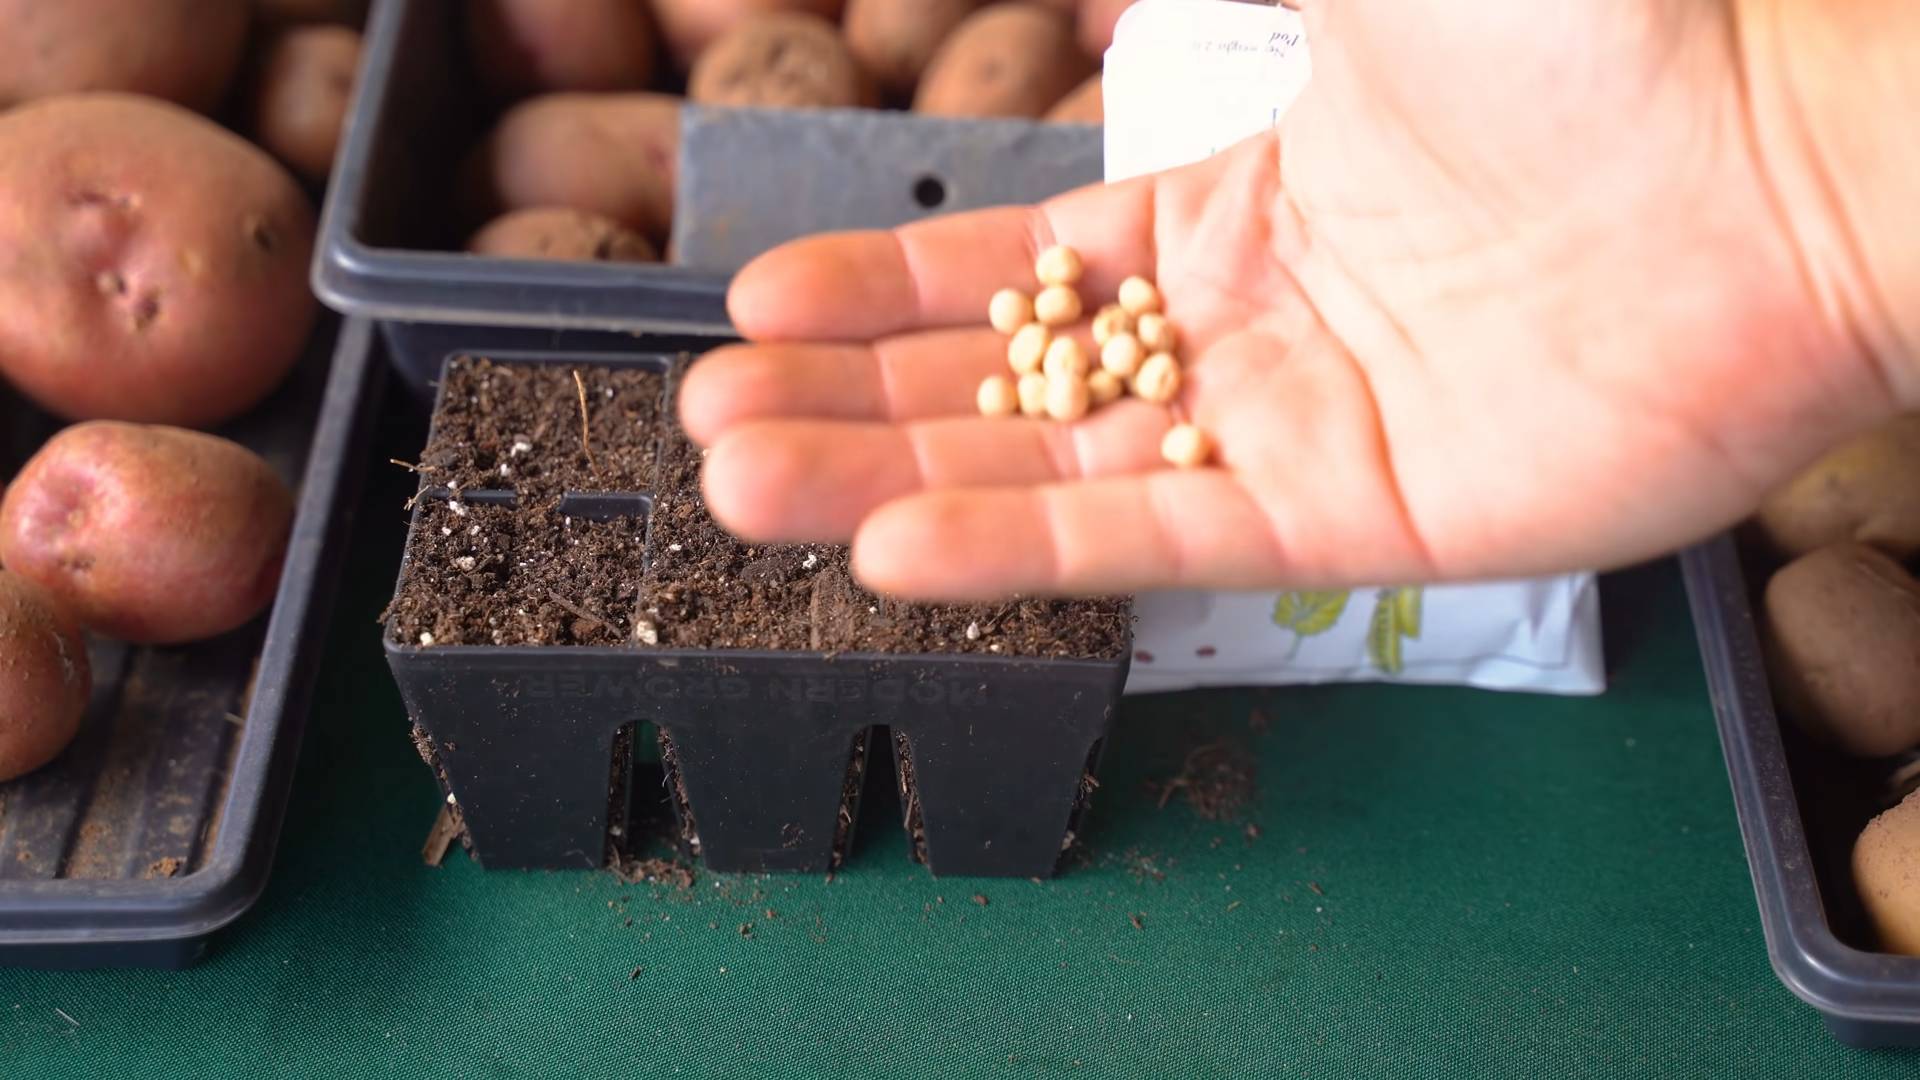
1. Soaking the Seeds (Optional but Recommended): To speed up germination, soak your snap pea seeds in lukewarm water for 12-24 hours before planting. This helps soften the seed coat and encourages sprouting.
2. Preparing the Containers: Fill your containers with the potting mix, leaving about an inch of space at the top. Gently pat down the soil.
3. Sowing the Seeds: Make small indentations in the soil, about 1 inch deep and 2 inches apart. Place one or two seeds in each indentation. Covering with two seeds increases the chances of at least one sprouting.
4. Covering the Seeds: Gently cover the seeds with potting mix and lightly water the soil. You want the soil to be moist but not soggy.
5. Creating a Humid Environment (Optional): If you’re using a seed starting tray with a dome, place your containers inside. This will help create a humid environment that encourages germination. Alternatively, you can cover the containers with plastic wrap, making sure to poke a few holes for ventilation.
6. Providing Warmth (Optional): Place the containers on a heat mat to speed up germination. Snap peas germinate best at temperatures between 65-70°F (18-21°C).
7. Finding the Right Spot: Place the containers in a warm location, away from direct sunlight until the seeds germinate.
Phase 2: Nurturing Your Seedlings – Light, Water, and Support
Once your seeds have sprouted, it’s time to focus on providing them with the right conditions to thrive.
1. Providing Adequate Light: Once the seedlings emerge, they need plenty of light. Place them under your grow lights, positioning the lights about 6-12 inches above the plants. Adjust the height as the plants grow. Aim for 12-16 hours of light per day. If you don’t have grow lights, place them in the sunniest window you have, rotating the pots regularly to ensure even growth.
2. Watering Regularly: Keep the soil consistently moist, but not waterlogged. Water when the top inch of soil feels dry to the touch. Use a watering can or spray bottle to gently water the plants, avoiding getting the leaves wet. Overwatering can lead to root rot, so be careful!
3. Thinning Seedlings (If Necessary): If you planted two seeds per indentation and both sprouted, thin them out by snipping off the weaker seedling at the soil line. This will give the remaining seedling more room to grow.
4. Providing Support: As your snap peas grow, they’ll need some support to climb. Insert your trellis, bamboo stakes, or twigs into the containers, making sure they’re securely anchored. Gently guide the pea tendrils towards the support, and they’ll start to climb on their own.
5. Fertilizing (Optional): Snap peas are relatively light feeders, but you can give them a boost with a diluted liquid fertilizer every 2-3 weeks. Choose a fertilizer that’s balanced or slightly higher in phosphorus, which promotes flowering and pod development. Follow the instructions on the fertilizer label carefully.
Phase 3: Maintaining Your Plants – Pruning and Pest Control
Keeping your snap peas healthy and productive requires a little bit of ongoing maintenance.
1. Pruning (Optional): While not strictly necessary, pruning can help encourage bushier growth and more pod production. You can pinch off the tips of the vines to encourage side shoots. Remove any yellowing or dead leaves to prevent disease.
2. Pest Control: Keep an eye out for common pests like aphids, spider mites, and whiteflies. If you spot any pests, you can try spraying them with a solution of soapy water (a few drops of dish soap in a spray bottle filled with water). You can also use insecticidal soap or neem oil, following the instructions on the product label. Regularly inspect your plants to catch any infestations early.
3. Air Circulation: Good air circulation is important for preventing fungal diseases. Make sure your plants have enough space between them, and consider using a small fan to circulate the air.
4. Temperature Control: Snap peas prefer cooler temperatures, ideally between 60-75°F (15-24°C). Avoid placing them near heat sources or in direct sunlight during the hottest part of the day.
Phase 4: Harvesting Your Bounty – Enjoying the Fruits (or Peas!) of Your Labor
This is the best part! Harvesting your own homegrown snap peas is incredibly rewarding.
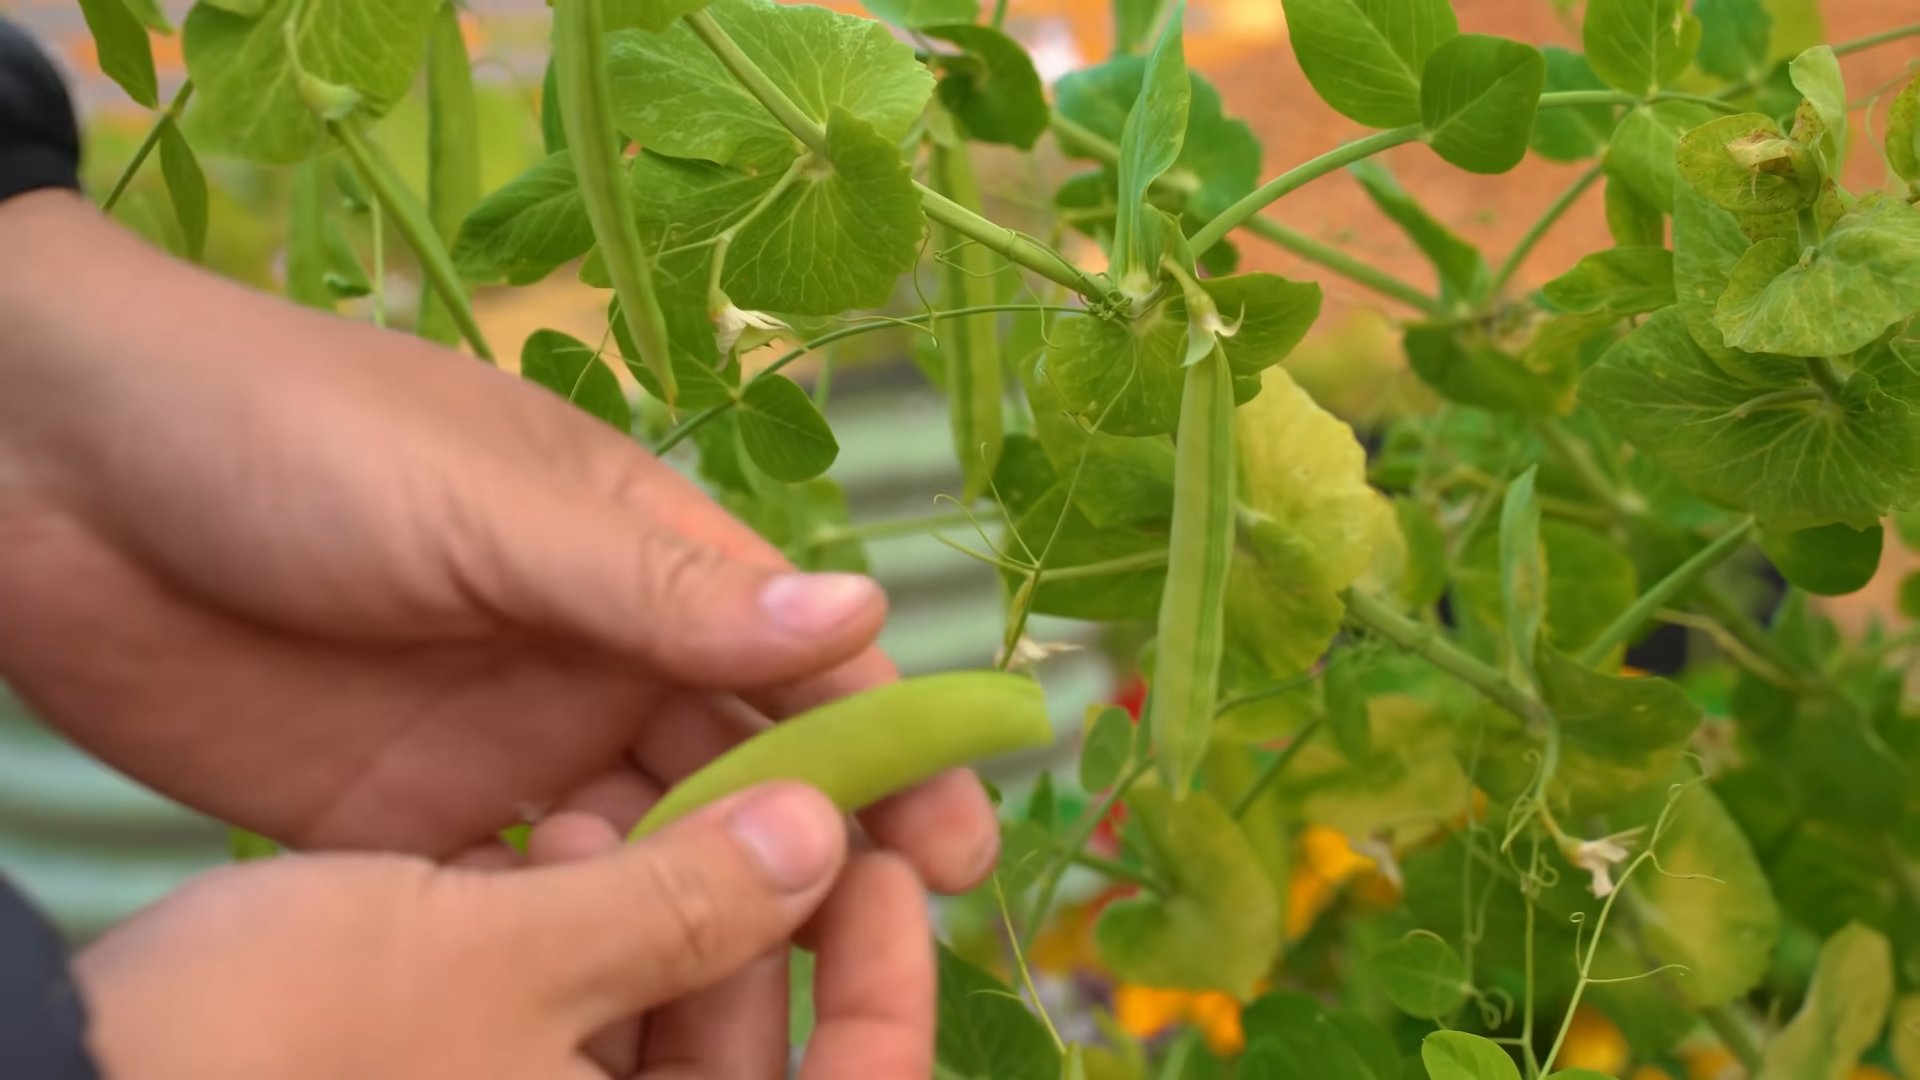
1. Knowing When to Harvest: Snap peas are ready to harvest when the pods are plump and the peas inside are well-developed but not too large. The pods should be bright green and crisp.
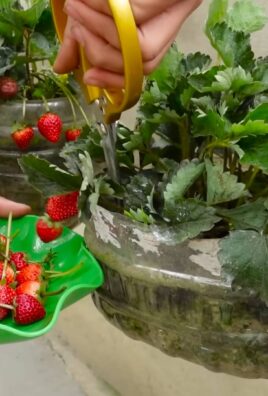
2. Harvesting Techniques: Gently snap the pods off the vine, being careful not to damage the plant. Use scissors or pruning shears if necessary.
3. Harvesting Regularly: Harvest your snap peas regularly to encourage continued production. The more you harvest, the more the plant will produce.
4. Enjoying Your Harvest: Snap peas are delicious eaten raw, steamed, stir-fried, or added to salads. They’re a healthy and versatile vegetable that you can enjoy in countless ways.
5. Storing Your Harvest: Store your snap peas in the refrigerator in a plastic bag or container. They’ll stay fresh for several days.
Troubleshooting Common Problems
Even with the best care, you might encounter some challenges along the way. Here are some common problems and how to address them:
* Poor Germination: If your seeds aren’t germinating, make sure the soil is moist and warm. You can also try scarifying the seeds (gently scratching the seed coat) before planting to help them absorb water.
* Yellowing Leaves: Yellowing leaves can be a sign of overwatering, underwatering, nutrient deficiency, or pest infestation. Check the soil moisture and adjust your watering accordingly. Fertilize if necessary, and inspect the plants for pests.
* Leggy Growth: Leggy growth (tall, spindly plants) is usually a sign of insufficient light. Make sure your plants are getting enough light, either from grow lights or a sunny window.
* Lack of Pod Production: Lack of pod production can be caused by insufficient light, poor pollination, or nutrient deficiency. Make sure your plants are getting enough light and fertilize if necessary. Snap peas are self-pollinating, but you can gently shake the plants to help with pollination.
* Powdery Mildew: Powdery mildew is a fungal disease that appears as a white, powdery coating on the leaves. Improve air circulation and avoid getting the leaves wet when watering. You can also spray the plants with a fungicide if necessary.
Choosing the Right Snap Pea Variety
As I mentioned earlier, choosing the right variety is crucial for indoor growing. Here are a few of my favorites:
* Sugar Ann: This is a super early variety that’s perfect for impatient gardeners. It produces small, sweet pods in about 50 days.
* Sugar Daddy: This is a stringless variety, which means you don’t have to remove the strings before eating. It’s also very productive and disease-resistant.
Conclusion
So, there you have it! Transforming your kitchen into a mini-farm with your very own snap pea garden is not only achievable but incredibly rewarding. We’ve walked you through the simple steps, from selecting the right seeds to providing the optimal growing environment, and hopefully, you’re feeling inspired to embark on this green adventure.
But why is this DIY trick a must-try? Beyond the sheer joy of nurturing life and watching those delicate tendrils climb, growing your own snap peas offers a multitude of benefits. First and foremost, you gain access to the freshest, most flavorful snap peas imaginable. Forget the limp, store-bought varieties that have traveled miles – these are bursting with sweetness and crispness, picked at their peak ripeness just moments before you enjoy them.
Furthermore, you have complete control over the growing process. No need to worry about harmful pesticides or herbicides; you can cultivate your snap peas organically, ensuring a healthy and wholesome harvest for you and your family. Plus, it’s a fantastic way to reduce your carbon footprint by minimizing transportation and packaging waste.
And let’s not forget the therapeutic aspect. Gardening is a proven stress reliever, offering a calming and meditative escape from the hustle and bustle of daily life. Tending to your snap peas can be a mindful activity, allowing you to connect with nature and appreciate the simple beauty of growth.
Ready to take your snap pea growing to the next level? Consider these variations:
* Vertical Gardening: If you’re short on space, embrace vertical gardening! Use trellises, netting, or even repurposed materials like old ladders to create a stunning and space-saving snap pea display.
* Succession Planting: Extend your harvest season by planting snap peas in staggered intervals. Sow a new batch of seeds every few weeks to ensure a continuous supply of fresh pods.
* Companion Planting: Enhance your snap pea garden by planting beneficial companion plants like carrots, radishes, or cucumbers. These companions can help deter pests, improve soil health, and even enhance the flavor of your snap peas.
* Different Varieties: Explore the diverse world of snap pea varieties! Experiment with different colors, sizes, and flavors to find your favorites. Consider trying ‘Sugar Ann’ for early harvests, ‘Super Sugar Snap’ for extra-large pods, or ‘Royal Snap II’ for beautiful purple pods.
We are confident that with a little effort and enthusiasm, you can successfully grow snap peas in your kitchen garden. It’s a fun, educational, and delicious experience that will bring joy to your home.
So, what are you waiting for? Grab some seeds, prepare your soil, and get ready to witness the magic of growing your own food. We encourage you to try this DIY trick and share your experience with us! Post photos of your snap pea garden on social media using #KitchenGardenSnapPeas and let us know how it goes. We can’t wait to see your green thumbs in action! Happy growing!
Frequently Asked Questions (FAQ)
What is the best time of year to grow snap peas?
Snap peas are a cool-season crop, meaning they thrive in cooler temperatures. The best time to plant them is in early spring, as soon as the soil is workable, or in late summer/early fall for a fall harvest. Avoid planting during the hottest months of summer, as high temperatures can inhibit germination and growth. In most regions, you’ll want to plant them about 4-6 weeks before the last expected frost in spring, or 8-10 weeks before the first expected frost in fall. Pay attention to your local climate and adjust planting times accordingly.
How much sunlight do snap peas need?
Snap peas require at least 6-8 hours of direct sunlight per day to thrive. Choose a location in your kitchen garden that receives ample sunlight throughout the day. If you’re growing them indoors, consider using grow lights to supplement natural sunlight, especially during the shorter days of winter. Insufficient sunlight can lead to leggy growth, reduced pod production, and increased susceptibility to diseases.
What kind of soil is best for growing snap peas?
Snap peas prefer well-draining soil that is rich in organic matter. Amend your soil with compost or well-rotted manure before planting to improve its fertility and drainage. The ideal soil pH for snap peas is between 6.0 and 7.0. Avoid heavy clay soils, as they can become waterlogged and inhibit root growth. If you have clay soil, consider adding sand or perlite to improve drainage.
How often should I water my snap peas?
Water your snap peas regularly, especially during dry periods. Keep the soil consistently moist, but avoid overwatering, which can lead to root rot. Water deeply and less frequently, rather than shallowly and more often. A good rule of thumb is to water when the top inch of soil feels dry to the touch. Mulching around your snap pea plants can help retain moisture and suppress weeds.
Do snap peas need support to grow?
Yes, snap peas are climbing plants and require support to grow properly. Provide them with a trellis, netting, or other support structure to climb on. This will help keep the pods off the ground, improve air circulation, and make harvesting easier. Without support, snap peas will sprawl on the ground, making them more susceptible to diseases and pests.
How long does it take for snap peas to mature?
Snap peas typically take 60-70 days to mature from planting. However, the exact time can vary depending on the variety, growing conditions, and climate. You can start harvesting snap peas when the pods are plump and the peas inside are still small and tender. Regular harvesting will encourage the plant to produce more pods.
What are some common pests and diseases that affect snap peas?
Some common pests that can affect snap peas include aphids, pea weevils, and slugs. Common diseases include powdery mildew, fusarium wilt, and root rot. To prevent pests and diseases, practice good garden hygiene, such as removing plant debris and weeds. Use organic pest control methods, such as insecticidal soap or neem oil, to control pests. Ensure good air circulation to prevent fungal diseases.
Can I grow snap peas in containers?
Yes, snap peas can be successfully grown in containers, as long as you choose a large enough container (at least 12 inches in diameter) and provide adequate support for the vines. Use a well-draining potting mix and water regularly. Container-grown snap peas may require more frequent fertilization than those grown in the ground.
How do I harvest snap peas?
Harvest snap peas when the pods are plump and the peas inside are still small and tender. Gently snap the pods off the vine, being careful not to damage the plant. Harvest regularly to encourage the plant to produce more pods. Snap peas are best eaten fresh, but they can also be stored in the refrigerator for a few days.
Can I save seeds from my snap peas?
Yes, you can save seeds from your snap peas, but it’s important to choose open-pollinated varieties, as hybrid varieties may not produce true-to-type seeds. Allow some pods to mature fully on the vine until they are dry and brown. Remove the seeds from the pods and store them in a cool, dry place until the next planting season.
Leave a Comment