
Grow Pumpkins Continuously? Yes, you read that right! Imagine a never-ending supply of those vibrant orange gourds, perfect for pies, decorations, and even carving spooky faces year-round. Forget waiting for that single autumn harvest; with a few clever tricks and a little DIY magic, you can extend your pumpkin season indefinitely.
For centuries, pumpkins have held a special place in cultures around the world, symbolizing abundance, harvest, and even transformation. From Native American traditions to the modern-day Halloween craze, these versatile fruits (yes, they’re fruits!) have woven their way into our lives. But what if we could enjoy their bounty beyond the traditional fall season?
That’s where this DIY guide comes in! I know, I know, it sounds ambitious, but trust me, it’s totally achievable. Many gardeners struggle with the short growing season, often missing out on a full pumpkin harvest due to early frosts or other environmental challenges. This article is designed to equip you with the knowledge and techniques to overcome those obstacles and grow pumpkins continuously, maximizing your yield and enjoying fresh pumpkins whenever you crave them. We’ll explore everything from succession planting to clever season extension methods, ensuring you have a pumpkin patch that keeps on giving. So, grab your gardening gloves, and let’s get started!
How to Grow Pumpkins Continuously: A DIY Guide to Year-Round Pumpkin Patch Fun!
Okay, pumpkin lovers, let’s talk about something ambitious: growing pumpkins *continuously*. Now, I know what you’re thinking: “Pumpkins are a fall thing!” And you’re right, traditionally they are. But with a little planning, some indoor starting, and a whole lot of love, you can have pumpkins ripening at different times throughout the year. It’s not exactly a walk in the park, but trust me, the bragging rights (and the pumpkin pie) are totally worth it!
Understanding the Challenge: Pumpkin Growth Cycles
Before we dive into the nitty-gritty, let’s understand why growing pumpkins continuously is a bit tricky. Pumpkins need:
* Warm weather: They thrive in temperatures between 65°F and 85°F (18°C and 29°C). Frost is a pumpkin’s worst enemy.
* Plenty of sunlight: At least 6-8 hours of direct sunlight per day is crucial.
* A long growing season: Depending on the variety, pumpkins can take anywhere from 90 to 120 days (or even longer!) to mature.
* Lots of space: Pumpkin vines are notorious for sprawling.
So, how do we overcome these challenges to achieve continuous pumpkin production? The key is staggered planting and, in some cases, indoor growing.
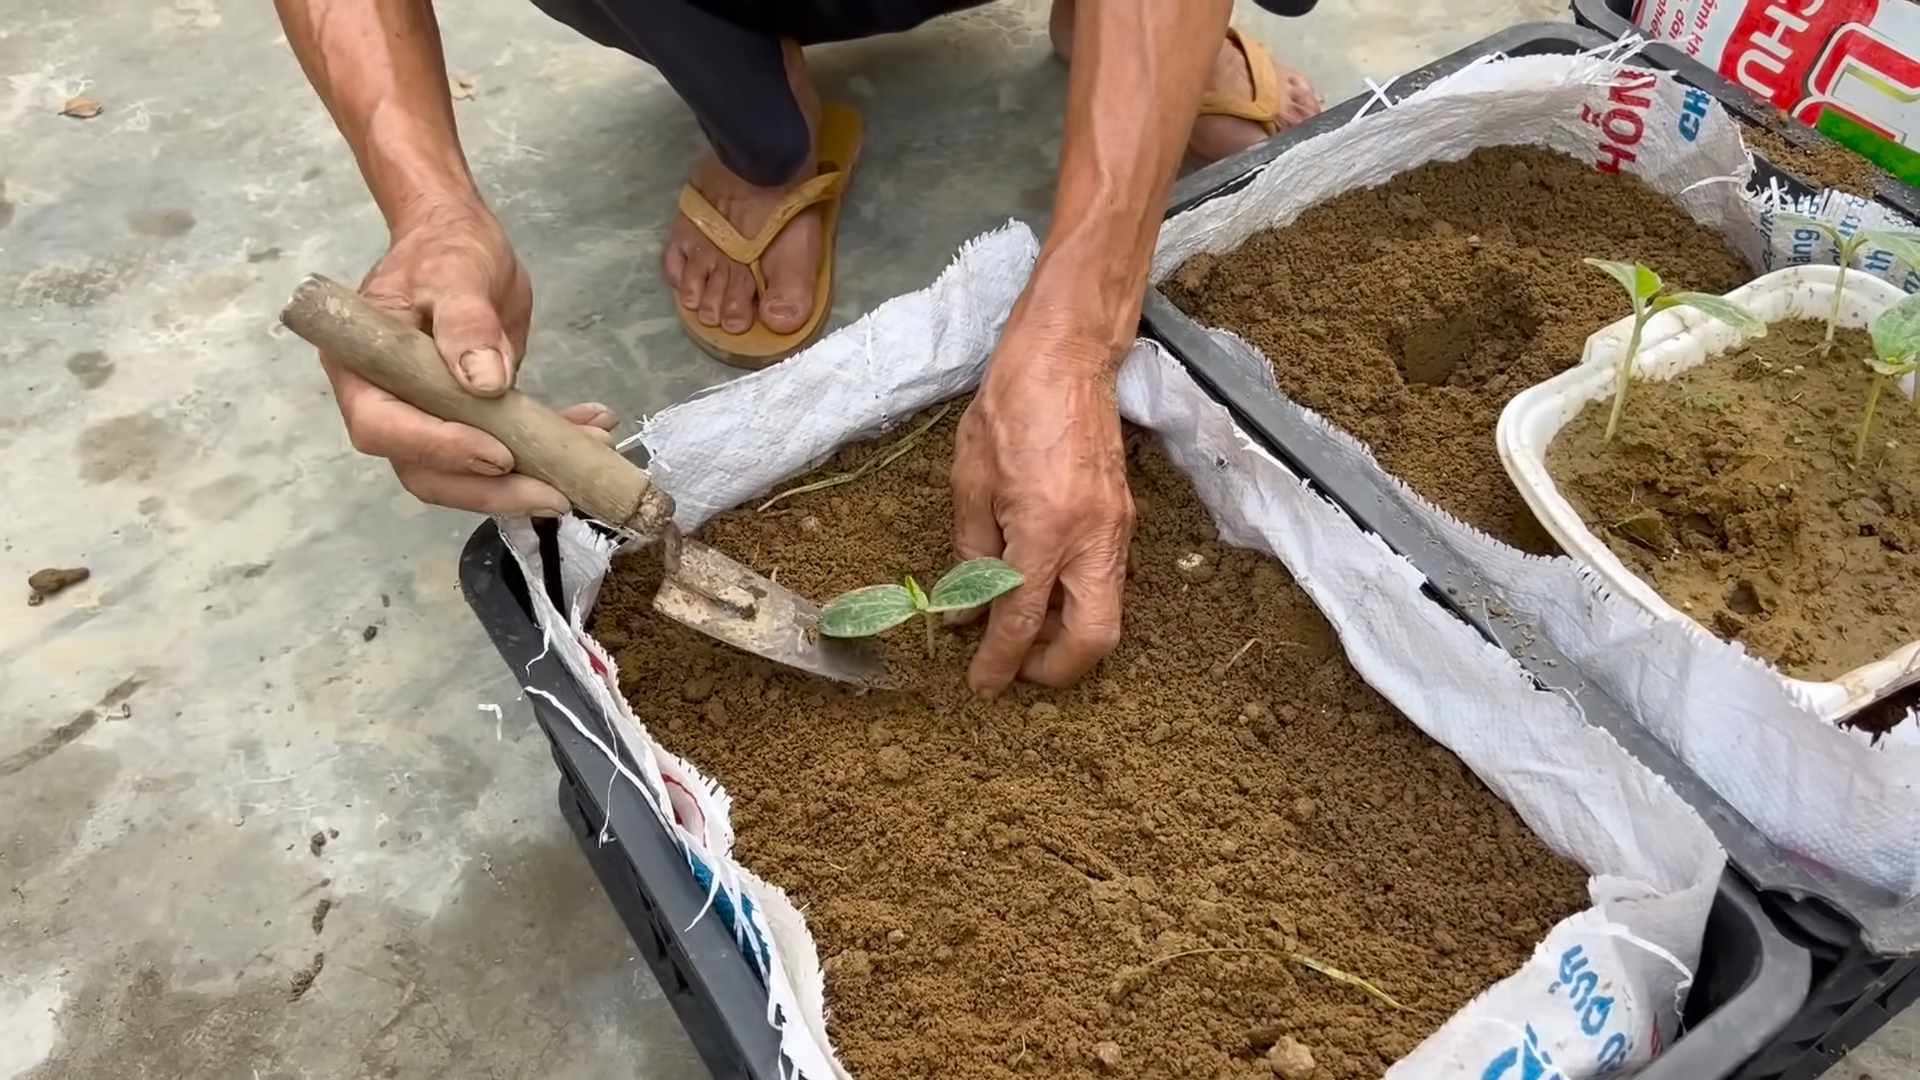
Phase 1: Indoor Seed Starting (The Secret Weapon!)
This is where we cheat the system a little! Starting seeds indoors allows us to get a head start on the growing season, especially if you live in a region with shorter summers.
1. Gather Your Supplies:
* Pumpkin seeds (choose varieties with shorter growing seasons for best results – more on that later!)
* Seed starting trays or small pots (biodegradable pots are great for easy transplanting)
* Seed starting mix (this is lighter and better draining than regular potting soil)
* A spray bottle filled with water
* A heat mat (optional, but helpful for germination)
* A grow light (essential if you don’t have a very sunny windowsill)
2. Sow the Seeds:
* Moisten the seed starting mix. It should be damp, but not soaking wet.
* Fill the seed starting trays or pots with the moistened mix.
* Plant 2-3 pumpkin seeds per cell or pot, about 1 inch deep.
* Gently cover the seeds with more seed starting mix.
* Lightly mist the surface with water.
3. Provide Warmth and Light:
* Place the seed starting trays on a heat mat (if using) and under a grow light.
* Keep the grow light on for 14-16 hours per day.
* Maintain a consistent temperature of around 70-75°F (21-24°C).
4. Keep the Soil Moist:
* Check the soil moisture daily.
* Water gently with a spray bottle when the top inch of soil feels dry.
* Avoid overwatering, as this can lead to rot.
5. Thin the Seedlings:
* Once the seedlings emerge (usually within 5-10 days), thin them to one strong seedling per cell or pot.
* Simply snip off the weaker seedlings at the soil line with scissors. Don’t pull them out, as this can disturb the roots of the remaining seedling.
Phase 2: Choosing the Right Pumpkin Varieties
Not all pumpkins are created equal! For continuous harvesting, you’ll want to focus on varieties that mature quickly. Here are a few of my favorites:
* ‘Baby Boo’: These adorable white pumpkins mature in about 90 days. Perfect for decorations and small pies.
* ‘Jack Be Little’: Another miniature variety, these orange pumpkins are ready in around 95 days.
* ‘Small Sugar’: A classic pie pumpkin that matures in about 100 days.
* ‘Wee Be Little’: Similar to ‘Jack Be Little’, but slightly smaller and matures in about 90 days.
* ‘Rouge Vif d’Etampes’: This French heirloom pumpkin is beautiful and matures in about 90-100 days.
By planting a mix of these varieties, you can extend your harvest window.
Phase 3: Staggered Planting – The Key to Continuous Harvest
This is where the magic happens! The idea is to plant new seeds every few weeks, so you always have pumpkins at different stages of development.
1. Create a Planting Schedule:
* Determine your first planting date based on your last expected frost date. You want to start seeds indoors about 4-6 weeks before you plan to transplant them outdoors.
* After your initial planting, sow a new batch of seeds every 2-3 weeks. This will ensure a continuous supply of pumpkins.
* Keep a calendar or notebook to track your planting dates. Trust me, it’s easy to lose track!
2. Prepare the Garden Bed:
* Pumpkins need rich, well-drained soil. Amend your garden bed with compost or well-rotted manure before planting.
* Choose a location that receives at least 6-8 hours of direct sunlight per day.
* Consider using raised beds if your soil is heavy or poorly drained.
3. Transplant the Seedlings:
* Once the seedlings have developed a few sets of true leaves (about 2-3 weeks after germination), they’re ready to be transplanted outdoors.
* Harden off the seedlings by gradually exposing them to outdoor conditions for a week before transplanting. Start by placing them in a sheltered spot for a few hours each day, gradually increasing the amount of time they spend outdoors.
* Transplant the seedlings on a cloudy day or in the late afternoon to minimize stress.
* Space the plants according to the variety’s mature size. Miniature varieties can be planted closer together than larger varieties.
* Water the seedlings thoroughly after transplanting.
Phase 4: Ongoing Care and Maintenance
Growing pumpkins is more than just planting seeds. Here’s how to keep your pumpkin patch thriving:
1. Watering:
* Pumpkins need consistent moisture, especially during fruit development.
* Water deeply and regularly, especially during dry spells.
* Avoid overhead watering, as this can promote fungal diseases. Drip irrigation or soaker hoses are ideal.
2. Fertilizing:
* Pumpkins are heavy feeders. Fertilize them regularly with a balanced fertilizer.
* Apply a fertilizer high in phosphorus and potassium during fruit development to encourage strong growth and vibrant color.
* Consider using organic fertilizers like compost tea or fish emulsion.
3. Weeding:
* Keep the garden bed free of weeds, as they can compete with the pumpkins for nutrients and water.
* Mulch around the plants to suppress weeds and retain moisture.
4. Pest and Disease Control:
* Keep an eye out for common pumpkin pests like squash bugs, squash vine borers, and aphids.
* Use organic pest control methods whenever possible, such as hand-picking pests, using insecticidal soap, or introducing beneficial insects.
* Prevent fungal diseases by providing good air circulation, avoiding overhead watering, and applying a fungicide if necessary.
5. Pollination:
* Pumpkins rely on pollinators like bees to produce fruit.
* If you’re not seeing enough bees in your garden, you may need to hand-pollinate the flowers.
* To hand-pollinate, use a small paintbrush to transfer pollen from the male flowers (which have a long, thin stem) to the female flowers (which have a small, immature pumpkin at the base).
Phase 5: Extending the Season (If Needed)
If you live in a region with a short growing season, you may need to take extra steps to extend the harvest.
1. Row Covers:
* Use row covers to protect the plants from frost and cold temperatures.
* Remove the row covers during the day to allow for pollination.
2. Cold Frames:
* Build or purchase cold frames to provide extra protection for the plants.
3. Indoor Growing:
* If you have the space and resources, you can even grow pumpkins indoors under grow lights.
* Choose compact varieties and provide them with plenty of light, water, and nutrients.
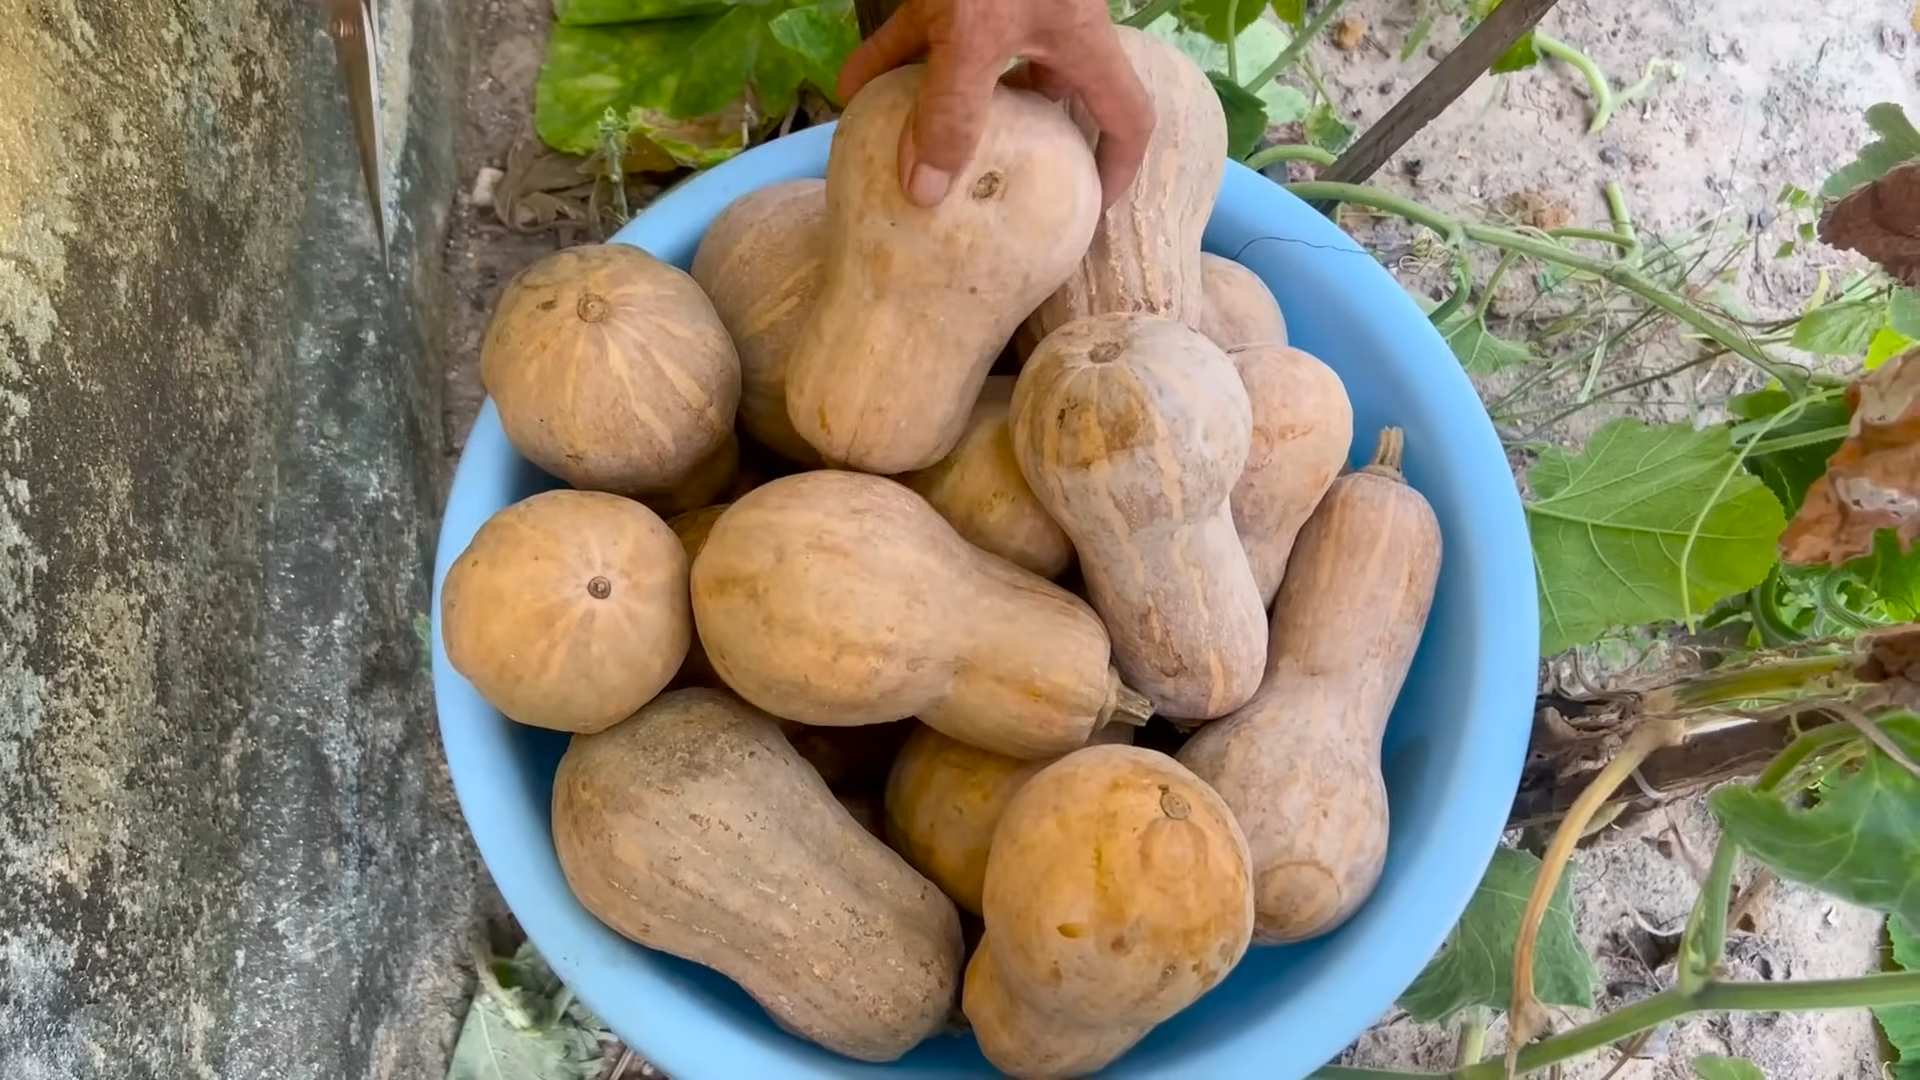
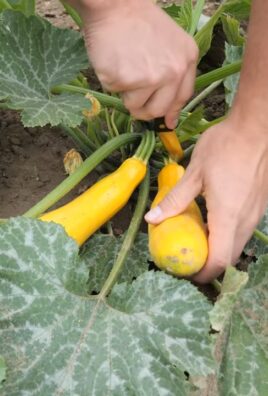
Harvesting Your Pumpkins
Knowing when to harvest is crucial. Here’s what to look for:
* Color: The pumpkin should be a deep, rich color.
* Hardness: The rind should be hard and resistant to scratching.
Conclusion
So, there you have it! The secret to potentially enjoying a continuous harvest of pumpkins, all thanks to this simple yet effective DIY trick. Forget the frustration of waiting months for a single crop; with a little planning and effort, you can extend your pumpkin season and enjoy these autumnal delights for longer.
Why is this a must-try? Because it empowers you to take control of your pumpkin growing journey. It’s about more than just planting seeds and hoping for the best. It’s about understanding the plant’s needs, manipulating its environment, and maximizing its potential. Imagine the satisfaction of harvesting pumpkins throughout the season, knowing that you played an active role in making it happen. Think of the delicious pumpkin pies, soups, and lattes you can create with your extended harvest!
But the beauty of this DIY approach is its adaptability. Feel free to experiment with different pumpkin varieties. Perhaps you want to try smaller, pie pumpkins for individual desserts, or maybe you’re aiming for those giant pumpkins that are perfect for carving. You can also adjust the timing of your successive plantings to align with your local climate and desired harvest schedule. Consider using different types of fertilizer to see which yields the best results for your soil.
Another variation to consider is the use of companion planting. Certain plants, like marigolds, can help deter pests and attract beneficial insects, creating a healthier environment for your pumpkins. Others, like beans and corn, can provide support and shade. Researching companion planting options can further enhance your pumpkin growing success.
Don’t be afraid to get creative and tailor this DIY trick to your specific needs and preferences. The key is to observe your plants closely, learn from your experiences, and adjust your approach accordingly.
We wholeheartedly encourage you to give this DIY pumpkin growing method a try. It’s a rewarding experience that connects you with nature and allows you to enjoy the fruits (or vegetables!) of your labor for an extended period.
And most importantly, we want to hear about your experiences! Share your successes, your challenges, and your tips in the comments below. Let’s create a community of pumpkin enthusiasts who are passionate about growing their own delicious and beautiful pumpkins. Your insights could help others achieve their pumpkin growing goals and contribute to a collective knowledge base that benefits everyone. So, grab your seeds, get your hands dirty, and embark on your continuous pumpkin growing adventure today! Let’s see how many pumpkins we can all grow together! This DIY trick to grow pumpkins continuously is a game changer.
FAQ
Frequently Asked Questions About Growing Pumpkins Continuously
Q: What exactly does “growing pumpkins continuously” mean?
A: Growing pumpkins continuously, in the context of this DIY trick, refers to extending your pumpkin harvest beyond the typical single harvest season. Instead of planting once and harvesting all your pumpkins at once, you strategically plant successive crops to ensure a more consistent supply of pumpkins over a longer period. This is achieved through careful planning, timing, and potentially utilizing techniques like starting seeds indoors to get a head start.
Q: What are the benefits of growing pumpkins continuously?
A: The benefits are numerous! Firstly, you get a longer harvest season, meaning you can enjoy fresh pumpkins for a more extended period. Secondly, it reduces the risk of losing your entire crop to a single pest infestation or weather event. If one planting fails, you have others coming up behind it. Thirdly, it allows you to experiment with different pumpkin varieties and harvest them at different stages of maturity. Finally, it’s simply more rewarding to have a continuous supply of pumpkins throughout the season.
Q: What kind of pumpkins are best suited for continuous growing?
A: While you can technically try this method with any pumpkin variety, smaller to medium-sized pumpkins, like pie pumpkins, sugar pumpkins, or even some of the smaller decorative varieties, tend to be easier to manage and mature more quickly. This makes them ideal for successive plantings. Larger varieties, like giant pumpkins, require a longer growing season and may be more challenging to grow continuously, but it’s certainly not impossible with careful planning and execution.
Q: How do I determine the timing for my successive plantings?
A: The timing depends on several factors, including your local climate, the specific pumpkin variety you’re growing, and the length of its growing season. A good starting point is to determine the average time it takes for your chosen pumpkin variety to mature. Then, stagger your plantings by that amount of time. For example, if your pumpkin variety takes 90 days to mature, plant your second crop 90 days after your first. You may need to adjust the timing based on your specific conditions and observations. Starting seeds indoors can also give you a head start, allowing you to plant seedlings outdoors once the weather is favorable.
Q: What if I don’t have a lot of space? Can I still grow pumpkins continuously?
A: Absolutely! Even if you have limited space, you can still grow pumpkins continuously by choosing smaller varieties and utilizing vertical growing techniques. Train your pumpkin vines to grow up a trellis or fence to save space. You can also grow pumpkins in containers, although you’ll need to choose a large container and provide adequate support for the vines. Consider dwarf or bush varieties that are specifically bred for container gardening.
Q: What are some common challenges I might face when growing pumpkins continuously, and how can I overcome them?
A: Some common challenges include pest infestations, diseases, and nutrient deficiencies. To prevent pest infestations, practice good garden hygiene, use companion planting, and consider using organic pest control methods. To prevent diseases, ensure good air circulation around your plants and avoid overwatering. To address nutrient deficiencies, amend your soil with compost or other organic matter and fertilize regularly with a balanced fertilizer. Monitor your plants closely for any signs of problems and address them promptly.
Q: How do I know when my pumpkins are ready to harvest?
A: Pumpkins are typically ready to harvest when their skin is hard and resistant to scratching. The stem should also be dry and brown. You can also tap the pumpkin; a ripe pumpkin will sound hollow. Leave a few inches of stem attached when you harvest to help prevent rot.
Q: Can I save seeds from my pumpkins to plant next year?
A: Yes, you can save seeds from your pumpkins, but keep in mind that if you’re growing multiple varieties of pumpkins or other squash in the same area, there’s a chance they may cross-pollinate. This means that the seeds you save may not produce pumpkins that are true to type. If you want to ensure that your seeds are true to type, you’ll need to hand-pollinate your pumpkins.
Q: What kind of fertilizer should I use for pumpkins?
A: Pumpkins benefit from a balanced fertilizer that is rich in phosphorus and potassium. You can use a commercially available fertilizer or make your own organic fertilizer using ingredients like bone meal, kelp meal, and compost. Be sure to follow the instructions on the fertilizer label and avoid over-fertilizing, as this can damage your plants.
Q: How important is sunlight for growing pumpkins continuously?
A: Sunlight is crucial for pumpkin growth. Pumpkins need at least 6-8 hours of direct sunlight per day to thrive. Choose a planting location that receives plenty of sunlight throughout the day. If you’re growing pumpkins in containers, make sure to move them to a sunny location as needed.
Q: What if I live in an area with a short growing season? Can I still grow pumpkins continuously?
A: Yes, even if you live in an area with a short growing season, you can still grow pumpkins continuously by starting your seeds indoors several weeks before the last expected frost. This will give your plants a head start and allow you to harvest pumpkins earlier in the season. You can also choose pumpkin varieties that have a shorter growing season. Consider using row covers or other protective measures to extend your growing season.
Leave a Comment