
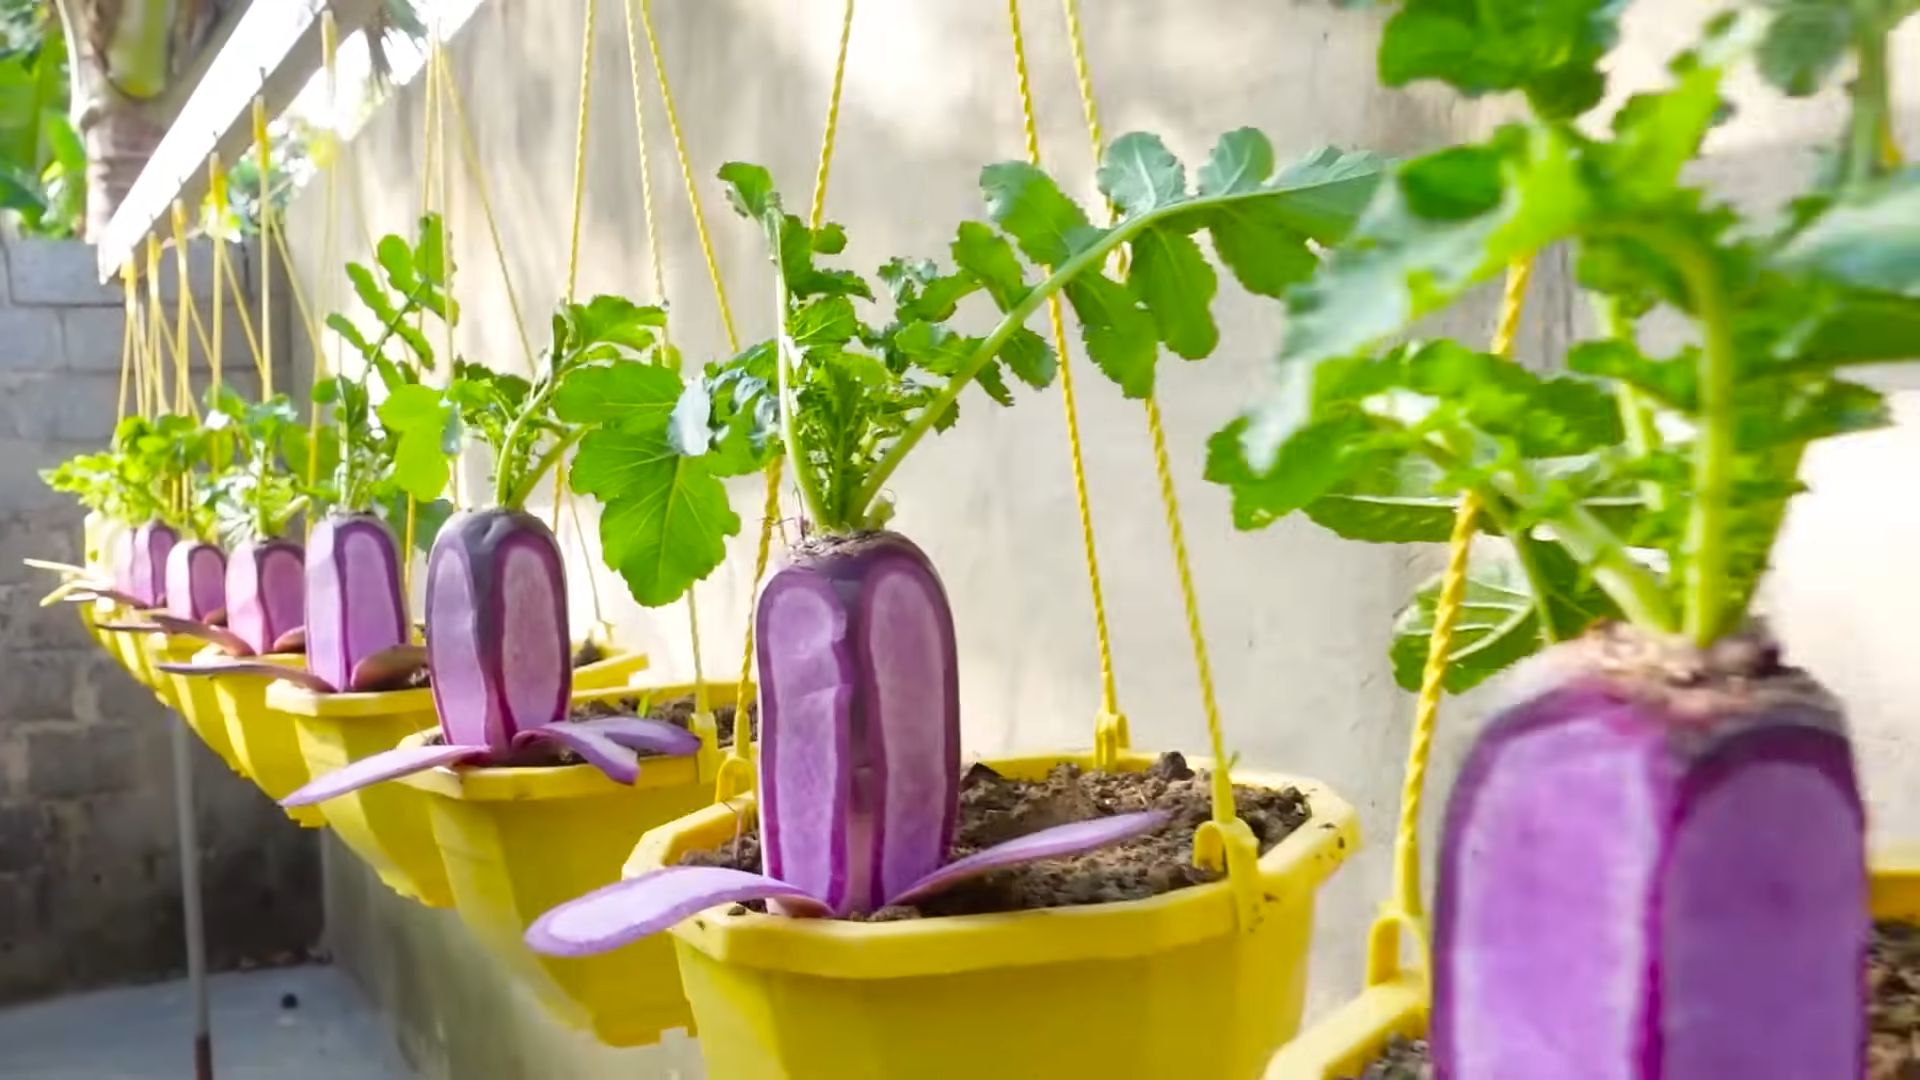
Grow Pink Radishes Easily and add a vibrant splash of color and peppery zest to your garden and your plate! Have you ever dreamed of harvesting rows of perfectly pink radishes, ready to add a delightful crunch to your salads or a playful garnish to your dishes? Well, dream no more! This DIY guide is your key to unlocking the secrets of cultivating these delightful root vegetables, even if you’re a complete beginner.
Radishes, in general, have a rich history, dating back to ancient times. They were cultivated in Egypt before the pyramids were built and were even valued by the Greeks and Romans for their medicinal properties. While the classic red radish is well-known, the pink variety offers a unique aesthetic appeal that can elevate your home garden.
But why should you bother learning how to grow pink radishes easily? Because fresh, homegrown radishes are simply superior! They boast a crisper texture, a more intense flavor, and are free from the chemicals often found in store-bought produce. Plus, growing your own food is incredibly rewarding and connects you to the natural world. This DIY trick will show you how to bypass common gardening pitfalls and enjoy a bountiful harvest of these beautiful and tasty vegetables in just a few short weeks. Let’s get started!
Grow Your Own Delicious Pink Radishes: A Beginner’s Guide
Hey there, fellow gardening enthusiasts! I’m so excited to share my foolproof method for growing vibrant, crisp, and oh-so-delicious pink radishes right in your own backyard (or even in a container on your balcony!). Radishes are incredibly rewarding because they grow super fast, making them perfect for impatient gardeners like me. Plus, that peppery bite adds a fantastic zing to salads, sandwiches, and even just enjoyed raw with a sprinkle of salt. Let’s get started!
What You’ll Need
Before we dive into the planting process, let’s gather our supplies. Here’s a checklist to make sure you’re all set:
* Radish Seeds: Obviously! Look for varieties like ‘Cherry Belle’ (a classic), ‘French Breakfast’ (mild and elongated), or ‘Pink Beauty’ (for a vibrant pink hue). I personally love ‘Cherry Belle’ for its reliability and beautiful color.
* Well-Draining Soil: Radishes thrive in loose, fertile soil. If your garden soil is heavy clay, amend it with compost or well-rotted manure. You can also use a good quality potting mix if you’re growing in containers.
* Gardening Tools: You’ll need a trowel or hand cultivator for preparing the soil, a watering can or hose with a gentle spray nozzle, and possibly some garden gloves to keep your hands clean.
* Sunlight: Radishes need at least 6 hours of sunlight per day. Choose a sunny spot in your garden or on your balcony.
* Optional: Compost or well-rotted manure for enriching the soil, row covers to protect against pests, and a fertilizer specifically formulated for root vegetables.
Preparing the Soil: The Foundation for Success
The secret to plump, juicy radishes lies in proper soil preparation. Radishes need loose soil to develop properly; otherwise, they’ll struggle and become small and misshapen.
1. Choose Your Location: Select a spot in your garden that receives at least 6 hours of direct sunlight each day. If you’re using containers, make sure they’re placed in a sunny location.
2. Clear the Area: Remove any weeds, rocks, or debris from the planting area. Weeds compete with radishes for nutrients and water, so it’s important to get rid of them.
3. Loosen the Soil: Use a trowel or hand cultivator to loosen the soil to a depth of at least 6 inches. Break up any clumps and remove any large stones. This is crucial for root development.
4. Amend the Soil (If Necessary): If your soil is heavy clay or sandy, amend it with compost or well-rotted manure. This will improve drainage, aeration, and fertility. Mix the compost or manure thoroughly into the soil. I usually add a generous amount – about 2-3 inches worked into the top 6 inches of soil.
5. Level the Surface: Rake the soil to create a smooth, level surface. This will make it easier to plant the seeds evenly.
Planting the Seeds: The Heart of the Matter
Now comes the fun part – planting the radish seeds! Radishes are cool-season crops, so the best time to plant them is in early spring or late summer/early fall. Avoid planting them during the hottest part of the summer, as they tend to bolt (go to seed) in hot weather.
1. Create Rows: Use your trowel or finger to create shallow rows in the soil, about ½ inch deep and 1 inch apart. I like to use a ruler or a piece of wood to make sure my rows are straight and evenly spaced.
2. Sow the Seeds: Sprinkle the radish seeds evenly along the rows, spacing them about ½ inch apart. Don’t overcrowd the seeds, as this will result in smaller radishes.
3. Cover the Seeds: Gently cover the seeds with a thin layer of soil. You can use your fingers or a rake to do this.
4. Water Gently: Water the soil gently with a watering can or hose with a gentle spray nozzle. Avoid washing away the seeds. The soil should be moist but not soggy.
Caring for Your Radishes: Nurturing Growth
Radishes are relatively low-maintenance, but they do need regular watering and occasional thinning.
1. Water Regularly: Keep the soil consistently moist, but not waterlogged. Water deeply whenever the top inch of soil feels dry to the touch. Radishes need consistent moisture to develop properly.
2. Thin Seedlings: Once the seedlings emerge (usually within 4-7 days), thin them to about 1 inch apart. This will give the radishes enough space to grow. To thin, gently pull out the weaker seedlings, leaving the strongest ones in place. Don’t be afraid to thin! It’s better to have fewer, larger radishes than a crowded bunch of small ones.
3. Weed Regularly: Keep the planting area free of weeds. Weeds compete with radishes for nutrients and water. Hand-pull weeds carefully to avoid disturbing the radish roots.
4. Fertilize (Optional): If your soil is poor, you can fertilize your radishes with a fertilizer specifically formulated for root vegetables. Follow the instructions on the fertilizer package. I usually don’t fertilize unless I notice the plants are looking pale or stunted. A side dressing of compost tea can also work wonders.
5. Protect from Pests (Optional): If you’re having problems with pests like flea beetles, you can cover your radishes with row covers. Row covers are lightweight fabric covers that protect plants from insects and other pests.
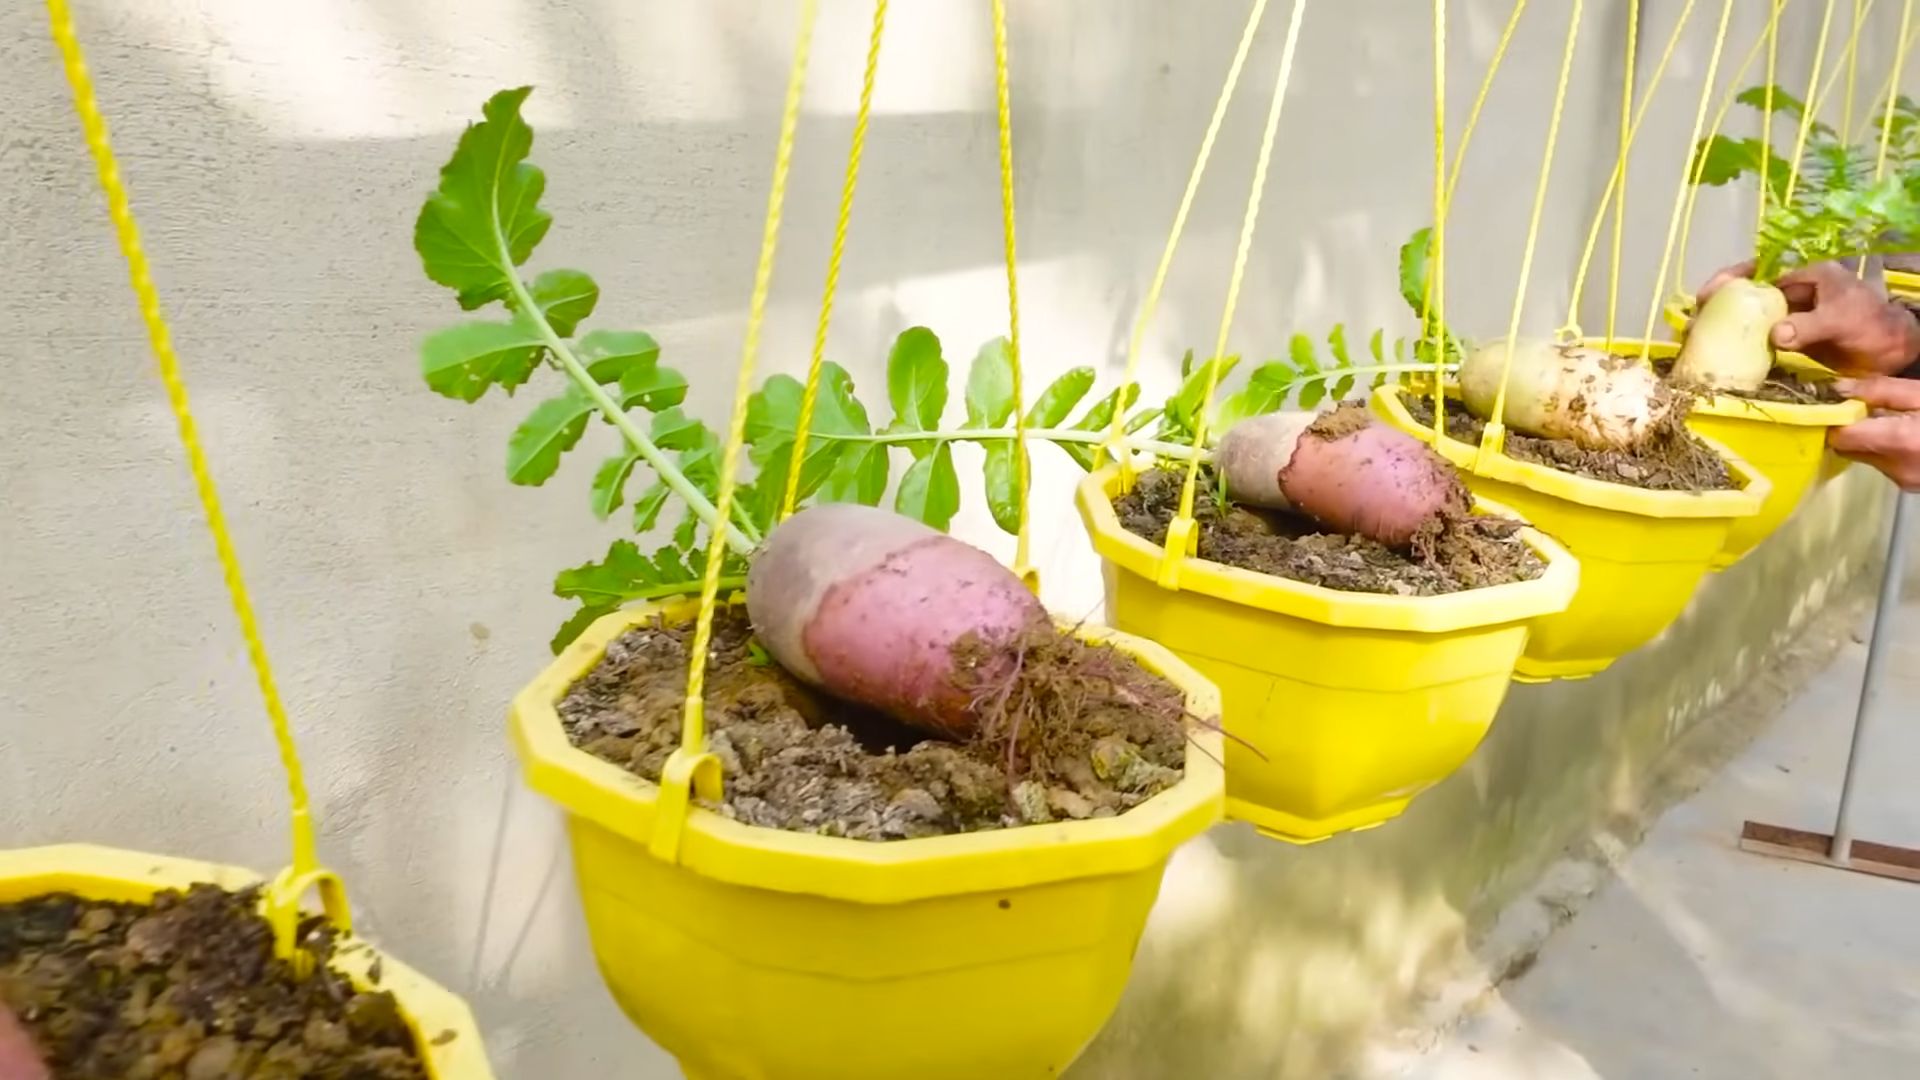
Harvesting Your Radishes: The Sweet Reward
Radishes are ready to harvest in as little as 3-4 weeks after planting, depending on the variety. This is what makes them so satisfying to grow!
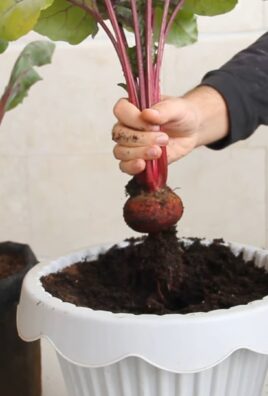
1. Check for Maturity: Radishes are ready to harvest when the roots are about 1 inch in diameter. You can gently brush away the soil around the base of the plant to check the size of the root.
2. Harvest Carefully: Gently pull the radishes from the soil. If the soil is dry, you may need to loosen it with a trowel first.
3. Wash and Store: Wash the radishes thoroughly and remove the tops. Store them in a plastic bag in the refrigerator for up to a week. I find they taste best when eaten fresh!
Troubleshooting: Addressing Common Problems
Even with the best care, you might encounter a few problems while growing radishes. Here are some common issues and how to address them:
* Radishes are small and misshapen: This is usually caused by poor soil or overcrowding. Make sure your soil is loose and well-draining, and thin the seedlings properly.
* Radishes are bolting (going to seed): This is usually caused by hot weather or inconsistent watering. Plant radishes in early spring or late summer/early fall, and keep the soil consistently moist.
* Radishes are split or cracked: This is usually caused by inconsistent watering. Water deeply and regularly, especially during dry spells.
* Radishes are infested with pests: Common radish pests include flea beetles, aphids, and root maggots. Use row covers to protect your plants, or treat them with an appropriate insecticide.
Succession Planting: Keeping the Radishes Coming
To enjoy a continuous harvest of radishes, practice succession planting. This means planting a new batch of seeds every 1-2 weeks. This way, you’ll always have fresh radishes to enjoy. I usually plant a small row every week or so during the growing season.
Enjoying Your Harvest: Delicious Ways to Eat Radishes
Now that you’ve grown your own beautiful pink radishes, it’s time to enjoy them! Here are a few of my favorite ways to eat radishes:
* Raw: Simply wash and slice the radishes and enjoy them raw with a sprinkle of salt. They’re a great addition to salads, crudités platters, and sandwiches.
* Roasted: Roasting radishes mellows their flavor and brings out their sweetness. Toss them with olive oil, salt, and pepper, and roast them in a 400°F oven for 20-25 minutes.
* Pickled: Pickled radishes are a tangy and delicious condiment. There are tons of recipes online!
* In Salads: Thinly sliced radishes add a peppery crunch to any salad.
* With Butter and Salt: A classic French snack – thinly sliced radishes spread with butter and sprinkled with sea salt. Trust me, it’s delicious!
* Radish Greens: Don’t throw away the radish greens! They’re edible and nutritious. You can sauté them, add them to salads, or use them in soups.
Growing your own pink radishes is a fun and rewarding experience. With a little bit of care and attention, you can enjoy a bountiful harvest of these delicious and versatile vegetables.
Conclusion
So, there you have it! Growing pink radishes easily at home is not only achievable, but it’s also incredibly rewarding. Forget those bland, store-bought radishes that lack that vibrant color and peppery punch. With this simple DIY trick, you can cultivate a garden brimming with crisp, flavorful, and beautifully pink radishes that will elevate your salads, snacks, and side dishes to a whole new level.
The beauty of this method lies in its simplicity and adaptability. Whether you’re a seasoned gardener or a complete beginner, you’ll find this process straightforward and satisfying. Imagine the pride you’ll feel when you harvest your first batch of homegrown pink radishes, knowing you nurtured them from seed to table.
But the fun doesn’t stop there! Feel free to experiment with different radish varieties to discover your personal favorite. Try mixing in some French Breakfast radishes for a milder flavor, or add a touch of black Spanish radishes for a more intense, earthy taste. You can also adjust the amount of sunlight your radishes receive to influence their spiciness – more sun generally means a hotter radish.
Consider companion planting your radishes with carrots or lettuce. These plants benefit each other, creating a thriving and diverse garden ecosystem. Plus, the vibrant green foliage of lettuce and carrots provides a beautiful contrast to the bright pink globes of your radishes.
Don’t be afraid to get creative with your radish recipes, too! Beyond salads, try pickling them for a tangy condiment, roasting them for a sweet and savory side dish, or even using their greens in a pesto. The possibilities are endless!
Growing pink radishes easily is more than just a gardening project; it’s an opportunity to connect with nature, nourish your body, and add a touch of beauty to your life. It’s a chance to experience the satisfaction of growing your own food and enjoying the freshest, most flavorful ingredients possible.
We wholeheartedly encourage you to give this DIY trick a try. We’re confident that you’ll be amazed by the results. And once you’ve harvested your first crop of homegrown pink radishes, we’d love to hear about your experience! Share your photos, tips, and recipes with us in the comments below. Let’s build a community of radish enthusiasts and inspire others to discover the joy of growing their own food. Happy gardening!
Frequently Asked Questions (FAQ)
What are the best conditions for growing pink radishes?
Radishes thrive in cool weather, making spring and fall the ideal seasons for planting. They prefer well-drained soil that is rich in organic matter. Aim for a sunny location that receives at least six hours of sunlight per day, although they can tolerate partial shade, especially in hotter climates. Consistent moisture is crucial for plump, juicy radishes, so water regularly, especially during dry spells. Avoid overwatering, as this can lead to root rot.
How long does it take for pink radishes to mature?
One of the great things about radishes is their quick growth rate. Most varieties mature in just 20-30 days, making them one of the fastest-growing vegetables you can cultivate. This rapid growth makes them perfect for impatient gardeners or those looking for a quick and easy gardening project. Keep an eye on your radishes and harvest them as soon as they reach the desired size, as they can become woody and bitter if left in the ground for too long.
What are some common problems when growing radishes and how can I prevent them?
Several common problems can affect radish crops, including pests, diseases, and poor growing conditions. Flea beetles can create small holes in the leaves, while root maggots can damage the roots. To prevent these issues, use row covers to protect your plants from pests, and practice crop rotation to avoid soilborne diseases. Ensure your soil is well-drained to prevent root rot, and water consistently to avoid cracking. If you notice any signs of infestation or disease, take action promptly to prevent the problem from spreading.
Can I grow pink radishes in containers?
Absolutely! Radishes are well-suited for container gardening, making them a great option for those with limited space. Choose a container that is at least 6 inches deep and has drainage holes. Use a high-quality potting mix and follow the same planting and care instructions as you would for growing radishes in the ground. Container-grown radishes may require more frequent watering, as the soil in containers tends to dry out more quickly.
What are some creative ways to use pink radishes in cooking?
Beyond salads, pink radishes can be used in a variety of creative and delicious ways. Try pickling them for a tangy condiment that adds a pop of color and flavor to sandwiches and tacos. Roast them with other root vegetables for a sweet and savory side dish. Use their greens in a pesto or add them to soups and stews for a peppery kick. You can even juice radishes for a refreshing and detoxifying beverage. Don’t be afraid to experiment and discover your own favorite ways to enjoy these versatile vegetables.
How do I know when my pink radishes are ready to harvest?
The best way to determine if your radishes are ready to harvest is to check their size. Most varieties are ready when they reach about 1 inch in diameter. You can also gently brush away the soil around the base of the plant to get a better look at the radish. If they look plump and well-formed, they’re likely ready to harvest. Don’t wait too long to harvest, as radishes can become woody and bitter if left in the ground for too long.
Are radish greens edible?
Yes, radish greens are absolutely edible and packed with nutrients! They have a slightly peppery flavor similar to the radish itself. You can use them in salads, stir-fries, soups, or even make a pesto. Be sure to wash them thoroughly before using them. If the greens are particularly large or hairy, you may want to cook them to soften them up a bit.
Can I save radish seeds for future planting?
Yes, you can save radish seeds, but it requires allowing some of your radishes to bolt (flower and go to seed). This process takes longer than harvesting them for eating. Allow the seed pods to dry completely on the plant before harvesting them. Once dry, you can break open the pods and collect the seeds. Store the seeds in a cool, dry place until you’re ready to plant them. Keep in mind that radishes are cross-pollinating, so if you’re growing multiple varieties, the seeds may not be true to type.
What type of soil is best for growing pink radishes easily?
Radishes prefer loose, well-drained soil that is rich in organic matter. Amend your soil with compost or well-rotted manure before planting to improve its fertility and drainage. Avoid heavy clay soils, as they can become compacted and prevent the radishes from developing properly. A slightly acidic to neutral soil pH (around 6.0 to 7.0) is ideal for radish growth.
Leave a Comment