
Grow peanuts at home? Absolutely! Imagine the satisfaction of harvesting your own homegrown peanuts, ready to be roasted, turned into creamy peanut butter, or simply enjoyed as a healthy snack. It’s easier than you might think, and this DIY guide will walk you through every step of the process.
Peanuts, also known as groundnuts, have a rich history, dating back thousands of years in South America. They weren’t always a staple in Western diets, but their versatility and nutritional value quickly made them a global favorite. From ancient Incan tombs to modern-day ballparks, peanuts have a fascinating cultural significance.
But why should you bother growing them yourself? Well, for starters, you’ll have access to the freshest, most flavorful peanuts imaginable. Plus, you’ll know exactly what went into growing them – no harmful pesticides or mystery ingredients. In a world where we’re increasingly conscious of where our food comes from, grow peanuts at home offers a fantastic way to connect with nature and enjoy a truly rewarding gardening experience. I’m excited to share these simple tricks and hacks that will help you succeed, even if you’re a beginner gardener!

Erdnüsse zu Hause anbauen: Dein umfassender DIY-Leitfaden
Hallo liebe Gartenfreunde! Habt ihr euch jemals gefragt, wie Erdnüsse eigentlich wachsen? Und noch besser: Habt ihr euch vorgestellt, sie einfach selbst im eigenen Garten oder sogar auf dem Balkon anzubauen? Ich zeige euch, wie das geht! Es ist einfacher, als ihr denkt, und das Ergebnis ist unglaublich befriedigend. Frische, selbst angebaute Erdnüsse – was will man mehr?
Was du brauchst: Die Vorbereitung
Bevor wir loslegen, brauchen wir natürlich die richtigen Materialien und Werkzeuge. Keine Sorge, die meisten davon habt ihr wahrscheinlich schon zu Hause!
* Erdnüsse: Wichtig! Nehmt rohe, ungeröstete Erdnüsse. Die gerösteten aus dem Supermarkt keimen leider nicht. Am besten Bio-Erdnüsse kaufen, um sicherzustellen, dass sie nicht behandelt wurden.
* Töpfe oder Beet: Erdnüsse brauchen Platz! Wählt große Töpfe (mindestens 30 cm Durchmesser und Tiefe) oder ein Beet mit lockerem, gut durchlässigem Boden.
* Erde: Eine Mischung aus Gartenerde, Kompost und Sand ist ideal. Die Erde sollte nährstoffreich, aber nicht zu schwer sein.
* Wasser: Regelmäßiges Gießen ist wichtig, besonders während der Blütezeit.
* Sonnenlicht: Erdnüsse lieben die Sonne! Wählt einen sonnigen Standort mit mindestens 6-8 Stunden direkter Sonneneinstrahlung pro Tag.
* Optional: Dünger (organisch oder mineralisch), Mulch (Stroh oder Grasschnitt).
Schritt-für-Schritt-Anleitung: So gelingt der Erdnussanbau
Jetzt geht’s ans Eingemachte! Folgt diesen Schritten, und schon bald könnt ihr eure eigenen Erdnüsse ernten.
1. Die Erdnüsse vorbereiten: Das Keimen
Dieser Schritt ist optional, aber er beschleunigt den Prozess und erhöht die Erfolgsrate.
1. Erdnüsse einweichen: Legt die rohen Erdnüsse für 24 Stunden in lauwarmes Wasser. Das weicht die Schale auf und erleichtert das Keimen.
2. Keimen lassen (optional): Wickelt die eingeweichten Erdnüsse in ein feuchtes Papiertuch und legt sie in einen Gefrierbeutel. Verschließt den Beutel und stellt ihn an einen warmen Ort (z.B. auf die Heizung).
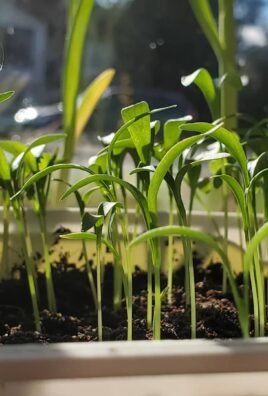
3. Kontrollieren: Überprüft die Erdnüsse täglich. Nach ein paar Tagen sollten kleine Wurzeln austreten. Sobald die Wurzeln etwa 1 cm lang sind, könnt ihr die Erdnüsse einpflanzen.
2. Die Erdnüsse einpflanzen: Ab in die Erde!
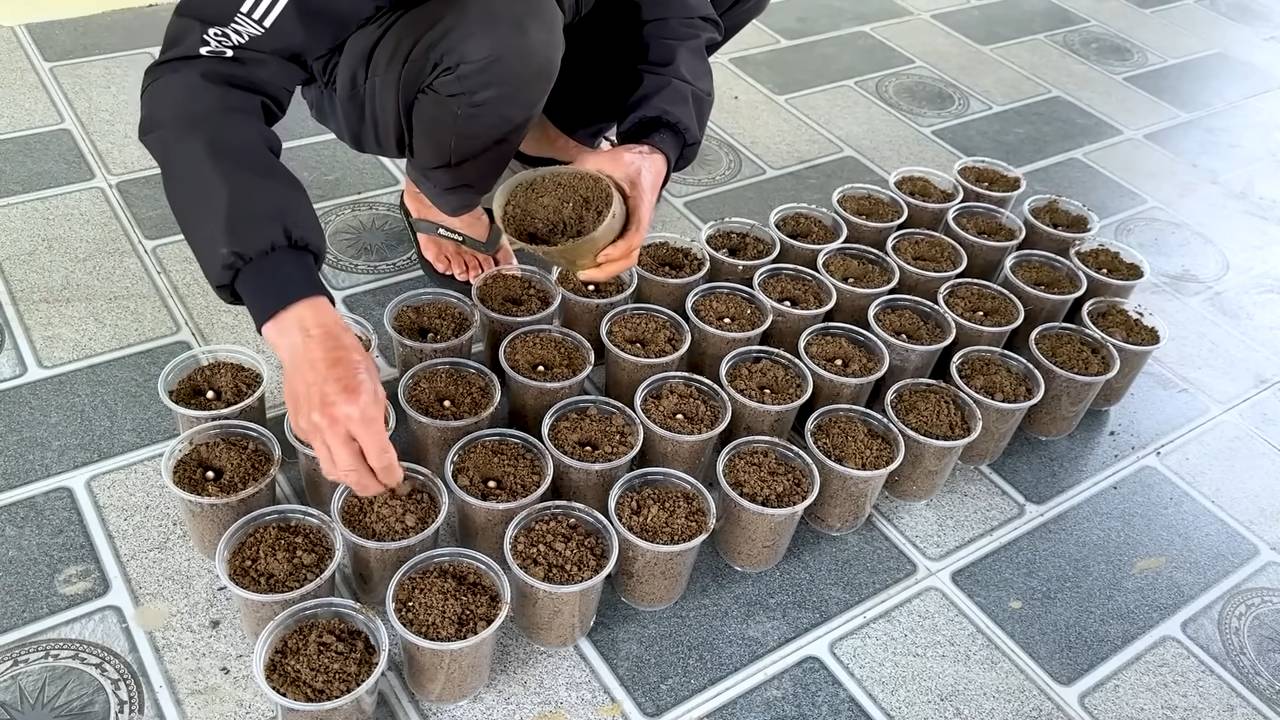
1. Töpfe oder Beet vorbereiten: Füllt die Töpfe oder das Beet mit der vorbereiteten Erde. Lasst oben etwa 5 cm Platz.
2. Erdnüsse pflanzen: Pflanzt die vorgekeimten (oder direkt die eingeweichten) Erdnüsse etwa 5 cm tief in die Erde. Achtet darauf, dass die Wurzeln nach unten zeigen.
3. Abstand: Wenn ihr mehrere Erdnüsse in einen Topf pflanzt, lasst etwa 10-15 cm Abstand zwischen den Pflanzen. Im Beet könnt ihr die Pflanzen in Reihen mit einem Abstand von 30-40 cm pflanzen.
4. Angießen: Gießt die Erde vorsichtig an, sodass sie gut durchfeuchtet ist.
3. Die Pflege: Gießen, Düngen, Beobachten
Jetzt heißt es: Geduld haben und die Pflanzen gut pflegen.
1. Gießen: Gießt die Erdnusspflanzen regelmäßig, besonders während der Blütezeit. Die Erde sollte immer leicht feucht sein, aber nicht nass. Vermeidet Staunässe, da dies zu Wurzelfäule führen kann.
2. Düngen: Düngt die Erdnusspflanzen etwa alle zwei Wochen mit einem organischen oder mineralischen Dünger. Achtet darauf, dass der Dünger nicht zu stickstofflastig ist, da dies das Wachstum der Blätter fördert, aber die Erdnussbildung behindert.
3. Mulchen (optional): Mulcht die Erde um die Pflanzen herum mit Stroh oder Grasschnitt. Das hält die Feuchtigkeit im Boden und unterdrückt Unkraut.
4. Beobachten: Beobachtet die Pflanzen regelmäßig auf Schädlinge und Krankheiten. Erdnüsse können von Blattläusen, Spinnmilben oder Pilzkrankheiten befallen werden. Bei Bedarf könnt ihr biologische Schädlingsbekämpfungsmittel einsetzen.
4. Die Blütezeit: Das Besondere an Erdnüssen
Die Blütezeit ist ein faszinierender Prozess, der bei Erdnüssen etwas anders abläuft als bei anderen Pflanzen.
1. Die Blüten: Erdnusspflanzen bilden kleine, gelbe Blüten. Diese Blüten sind selbstbestäubend.
2. Die Fruchtbildung: Nach der Bestäubung welken die Blüten und bilden sogenannte “Pegs”. Das sind Stiele, die sich nach unten biegen und in die Erde wachsen. An den Enden dieser Pegs entwickeln sich die Erdnüsse.
3. Anhügeln: Wenn die Pegs in die Erde wachsen, könnt ihr die Pflanzen leicht anhäufeln. Das fördert die Erdnussbildung.
5. Die Ernte: Der Lohn der Mühe
Nach etwa 4-5 Monaten (je nach Sorte und Klima) sind die Erdnüsse reif für die Ernte.
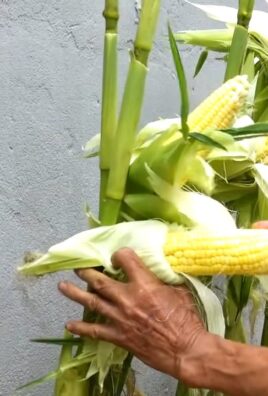
1. Der richtige Zeitpunkt: Der beste Zeitpunkt für die Ernte ist, wenn die Blätter der Pflanzen gelb werden und absterben.
2. Die Ernte: Grabt die Pflanzen vorsichtig aus. Schüttelt die Erde ab und lasst die Erdnüsse an den Pflanzen hängen.
3. Trocknen: Hängt die Pflanzen kopfüber an einem trockenen, luftigen Ort auf. Lasst sie dort etwa 2-3 Wochen trocknen.
4. Erdnüsse abnehmen: Nach dem Trocknen könnt ihr die Erdnüsse von den Pflanzen abnehmen.
5. Lagern: Lagert die Erdnüsse an einem kühlen, trockenen Ort. Sie halten sich mehrere Monate.
Zusätzliche Tipps und Tricks für den erfolgreichen Erdnussanbau
Hier sind noch ein paar zusätzliche Tipps, die euch helfen, eure Erdnussernte zu optimieren:
* Bodenprobe: Wenn ihr unsicher seid, ob euer Boden für den Erdnussanbau geeignet ist, könnt ihr eine Bodenprobe nehmen und analysieren lassen.
* Fruchtfolge: Baut Erdnüsse nicht jedes Jahr am selben Standort an. Eine Fruchtfolge hilft, den Boden gesund zu halten und Krankheiten vorzubeugen.
* Sortenwahl: Es gibt verschiedene Erdnusssorten. Informiert euch, welche Sorte für euer Klima am besten geeignet ist.
* Schutz vor Nagetieren: Nagetiere lieben Erdnüsse! Schützt eure Pflanzen vor Mäusen und Ratten, indem ihr z.B. ein Netz um das Beet spannt.
* Erdnüsse rösten: Selbst angebaute Erdnüsse schmecken geröstet besonders gut! Röstet sie einfach im Ofen oder in der Pfanne.
Häufige Probleme und Lösungen
Auch beim Erdnussanbau können Probleme auftreten. Hier sind einige der häufigsten Probleme und wie ihr sie lösen könnt:
* Keine Keimung: Wenn die Erdnüsse nicht keimen, kann das verschiedene Ursachen haben. Möglicherweise sind die Erdnüsse zu alt, wurden falsch gelagert oder sind behandelt. Verwendet frische, unbehandelte Erdnüsse und achtet auf die richtige Lagerung.
* Gelbe Blätter: Gelbe Blätter können ein Zeichen für Nährstoffmangel sein. Düngt die Pflanzen mit einem geeigneten Dünger.
* Wurzelfäule: Wurzelfäule wird durch Staunässe verursacht. Achtet darauf, dass die Erde gut durchlässig ist und gießt nicht zu viel.
* Schädlinge: Bekämpft Schädlinge mit biologischen Schädlingsbekämpfungsmitteln.
Fazit: Selbst angebaute Erdnüsse – ein lohnendes Projekt
Ich hoffe, dieser Leitfaden hat euch Mut gemacht, selbst Erdnüsse anzubauen. Es ist ein spannendes und lohnendes Projekt, das euch mit frischen, selbst geernteten Erdnüssen belohnt. Viel Spaß beim Gärtnern! Und vergesst nicht
Conclusion
So, there you have it! Growing peanuts at home is not only achievable, but it’s also a deeply rewarding experience that connects you to the source of your food in a tangible way. Forget the store-bought peanuts that may have traveled thousands of miles; imagine the satisfaction of harvesting your own fresh, flavorful peanuts right from your backyard or even a container on your balcony.
This DIY trick is a must-try for several compelling reasons. First, it’s incredibly cost-effective. Once you have your initial seeds or raw peanuts, the ongoing expenses are minimal compared to consistently purchasing peanuts from the grocery store. Second, you have complete control over the growing process. You can choose organic methods, avoiding harmful pesticides and herbicides, ensuring that your peanuts are as healthy and natural as possible. Third, it’s a fantastic educational opportunity, especially for children. They can learn about plant life cycles, the importance of soil health, and the origins of their favorite snacks.
But perhaps the most significant reason to try growing peanuts at home is the unparalleled flavor. Freshly harvested peanuts have a sweetness and richness that you simply can’t find in commercially processed varieties. Roasting them yourself intensifies this flavor, creating a truly unforgettable culinary experience.
Don’t be afraid to experiment with different varieties of peanuts to find your favorite. Virginia peanuts are known for their large size and are excellent for roasting. Spanish peanuts are smaller and have a reddish skin, making them ideal for peanut butter. Runner peanuts are commonly used in commercial peanut butter production and are a reliable choice for home growing.
Consider these variations to enhance your peanut-growing adventure:
* **Container Gardening:** If you have limited space, growing peanuts in containers is a perfect solution. Choose a large container with good drainage and use a well-draining potting mix.
* **Companion Planting:** Plant peanuts alongside beneficial companion plants like marigolds, which deter nematodes, or basil, which repels insects.
* **Soil Amendments:** Incorporate organic matter like compost or aged manure into the soil to improve its fertility and drainage.
* **Roasting Techniques:** Experiment with different roasting methods, such as oven roasting, pan roasting, or even grilling, to discover your preferred flavor profile.
* **Peanut Butter Creations:** Once you’ve harvested your peanuts, try making your own homemade peanut butter. You can add honey, cinnamon, or other spices to create unique and delicious variations.
Growing peanuts at home is more than just a gardening project; it’s an opportunity to connect with nature, learn new skills, and enjoy the fruits (or rather, nuts) of your labor. So, grab some seeds, prepare your soil, and get ready to embark on this exciting adventure.
We encourage you to try this DIY trick and share your experiences with us. Let us know what varieties you grew, what challenges you faced, and what delicious creations you made with your homegrown peanuts. Your insights and tips can help other aspiring peanut growers succeed. Share your photos and stories on social media using #HomegrownPeanuts and let’s build a community of peanut enthusiasts!
Frequently Asked Questions (FAQ)
What kind of climate is best for growing peanuts?
Peanuts thrive in warm climates with a growing season of at least 120 frost-free days. They need plenty of sunshine and well-drained soil. The ideal temperature range for peanut growth is between 68°F and 86°F (20°C and 30°C). While they can tolerate some heat, extremely high temperatures can negatively impact yield. If you live in a cooler climate, you can still grow peanuts in containers and move them indoors during colder periods.
How much space do peanuts need to grow?
Peanuts require adequate spacing to allow for proper growth and development. Generally, you should space peanut plants about 6-8 inches apart in rows that are 2-3 feet apart. This spacing allows for sufficient sunlight penetration and air circulation, which helps prevent fungal diseases. If you’re growing peanuts in containers, make sure to choose a large container (at least 18 inches in diameter) and plant only 2-3 plants per container.
What type of soil is best for growing peanuts?
Peanuts prefer well-drained, sandy loam soil with a slightly acidic to neutral pH (between 6.0 and 7.0). The soil should be loose and friable to allow the pegs (the structures that develop into peanuts) to easily penetrate the ground. Avoid heavy clay soils, as they can become compacted and hinder peanut development. Amend heavy soils with organic matter like compost or aged manure to improve drainage and aeration.
How often should I water my peanut plants?
Peanuts need consistent moisture, especially during flowering and pegging. Water deeply and regularly, ensuring that the soil remains consistently moist but not waterlogged. Avoid overhead watering, as it can promote fungal diseases. Drip irrigation or soaker hoses are ideal for delivering water directly to the roots. Reduce watering frequency as the plants mature and the peanuts begin to ripen.
How long does it take for peanuts to mature?
Peanuts typically take 120-150 days to mature, depending on the variety and growing conditions. You’ll know your peanuts are ready to harvest when the foliage begins to yellow and the inner shells of the peanuts turn dark. You can also dig up a few plants to check the peanut development. If the peanuts are plump and the shells are well-formed, it’s time to harvest.
What are common pests and diseases that affect peanuts?
Peanuts can be susceptible to various pests and diseases, including aphids, spider mites, nematodes, leaf spot, and white mold. Regularly inspect your plants for signs of infestation or disease. Use organic pest control methods like insecticidal soap or neem oil to control pests. Ensure good air circulation and avoid overhead watering to prevent fungal diseases. Crop rotation and soil solarization can also help reduce the incidence of soilborne diseases.
How do I harvest peanuts?
To harvest peanuts, carefully dig up the entire plant, being careful not to damage the peanuts. Gently shake off any excess soil and allow the plants to dry in the sun for a few days. Once the plants are dry, you can remove the peanuts from the vines.
How do I cure and store peanuts?
After harvesting, peanuts need to be properly cured to ensure optimal flavor and storage life. Spread the peanuts in a single layer on a screen or tray and allow them to air dry in a well-ventilated area for 2-3 weeks. Once the peanuts are completely dry, store them in an airtight container in a cool, dry place. Properly cured and stored peanuts can last for several months.
Can I grow peanuts indoors?
While it’s possible to grow peanuts indoors, it can be challenging due to the need for ample sunlight and space. If you want to try growing peanuts indoors, choose a sunny location and provide supplemental lighting if necessary. Use a large container with good drainage and a well-draining potting mix. Be sure to pollinate the flowers manually, as there may not be enough insects indoors to do so naturally.
Are there any specific fertilizer requirements for peanuts?
Peanuts are legumes, which means they can fix nitrogen from the atmosphere, reducing the need for nitrogen fertilizers. However, they still benefit from other nutrients like phosphorus and potassium. Amend the soil with compost or aged manure before planting to provide these essential nutrients. You can also use a balanced fertilizer specifically formulated for legumes, following the manufacturer’s instructions. Avoid over-fertilizing, as it can lead to excessive vegetative growth and reduced peanut production.
Leave a Comment