
Grow Oranges Indoors? Absolutely! Imagine plucking a sun-kissed, juicy orange straight from a tree thriving in your living room. Sounds like a tropical dream, right? Well, it’s more attainable than you might think! For centuries, citrus trees have been cherished symbols of prosperity and good fortune, gracing courtyards and orangeries of the wealthy. Now, you can bring that same touch of elegance and freshness into your own home, regardless of your outdoor space.
But why bother growing oranges indoors? Well, for starters, it’s incredibly rewarding! There’s something magical about nurturing a plant from a tiny sapling to a fruit-bearing tree. Plus, if you live in a region with harsh winters, bringing your citrus indoors is often the only way to enjoy the vibrant beauty and delicious fruit of an orange tree. This DIY guide will provide you with all the essential tricks and hacks you need to successfully grow oranges indoors, from selecting the right variety to providing the perfect light and care. Say goodbye to store-bought oranges and hello to your own homegrown citrus paradise!

Growing Oranges at Home: Your DIY Guide for a Sunny Harvest Within Your Own Four Walls
Hey everyone, are you tired of gray winter days and longing for a bit of sunshine? Then I have just the thing for you: let’s grow oranges together in our own homes! Yes, you heard that right. With a little patience and the right tricks, you can create your own little citrus plantation. I’ll show you how!
What You Need: The Ingredients for Your Orange Success
Before we get started, we’ll obviously need the right materials. Don’t worry, you probably already have most of these at home or can easily get them.
- Orange seeds: Preferably from an organic orange, as these are usually untreated. The more seeds, the better, because not all will germinate.
- Small pots or seed starting trays: Small containers are sufficient to start, but we will need to repot later.
- Seed starting mix: This soil is low in nutrients and loose, ideal for the delicate seedlings.
- All-purpose potting soil: For later, when the little plants are bigger.
- Expanded clay or gravel: For good drainage in the pot.
- Spray bottle: For moistening the soil.
- Plastic bags or plastic wrap: To create a humid climate for germination.
- A sunny location: Oranges love light!
- Patience: The most important thing of all!
The Preparation: The Foundation for Your Orange Trees
Before we put the seeds in the soil, we need to prepare them. This is important so that they germinate faster and better.
- Harvest the seeds: Cut open a ripe orange and remove the seeds. Choose the plumpest and healthiest-looking seeds.
- Clean: Rinse the seeds under running water to remove any fruit pulp.
- Stratify (optional, but recommended): Wrap the seeds in a damp paper towel and place them in a sealed freezer bag in the refrigerator for about 30 days. This simulates winter and can speed up germination.
Sowing: The Start of Your Orange Adventure
Now let’s get down to business! We are sowing the prepared seeds.
- Prepare the pots: Fill the small pots or seed starting trays with seed starting mix.
- Sow the seeds: Press the seeds about 1-2 cm (0.5-1 inch) deep into the soil. Feel free to place several seeds per pot to increase the chances of success.
- Moisten: Gently spray the soil with water so that it is moist but not wet.
- Create a humid climate: Cover the pots with plastic bags or plastic wrap to create a humid environment. Poke a few small holes in the plastic to prevent the soil from molding.
- Place in a warm and bright spot: Put the pots in a warm and bright place, but not in direct sun. A temperature of 20-25°C (68-77°F) is ideal.
The Care: Helping Your Orange Trees Grow Big and Strong
Germination can take several weeks, so don’t get impatient! Once the first green tips emerge from the soil, the real care begins.
- Ventilate regularly: Air out the pots daily by briefly removing the plastic cover. This helps prevent mold growth.
- Control moisture: Make sure the soil is always slightly moist. Spray it with water as needed. Avoid waterlogging!
- Brightness: Place the seedlings in a bright location, but avoid direct midday sun.
- Fertilize (optional): Once the seedlings have a few leaves, you can fertilize them with a special citrus fertilizer. But be careful not to over-fertilize!
- Repotting: When the seedlings get bigger and their roots fill the pots, it’s time to repot them into larger pots with all-purpose soil. Ensure good drainage (expanded clay or gravel at the bottom of the pot).
The Challenges: What You Should Know
Growing orange trees from seeds is an exciting project, but there are also a few challenges you should be prepared for.
- Long waiting time: It can take several years for your orange tree to bear fruit. Have patience!
- Fruit quality: Orange trees grown from seeds do not always bear fruit that tastes the same as the orange the seeds came from. Genetic variations can occur.
- Pests: Watch out for pests like aphids or spider mites. If infested, you can combat them with natural remedies.
- Overwintering: Orange trees are not winter-hardy. In winter, you must place them in a cool but frost-free location.
Special Tips for Your Orange Trees
Here are a few additional tips that can help you successfully grow your orange trees:
- Pollination: When your orange tree blooms, you can pollinate the flowers with a brush to encourage fruit production.
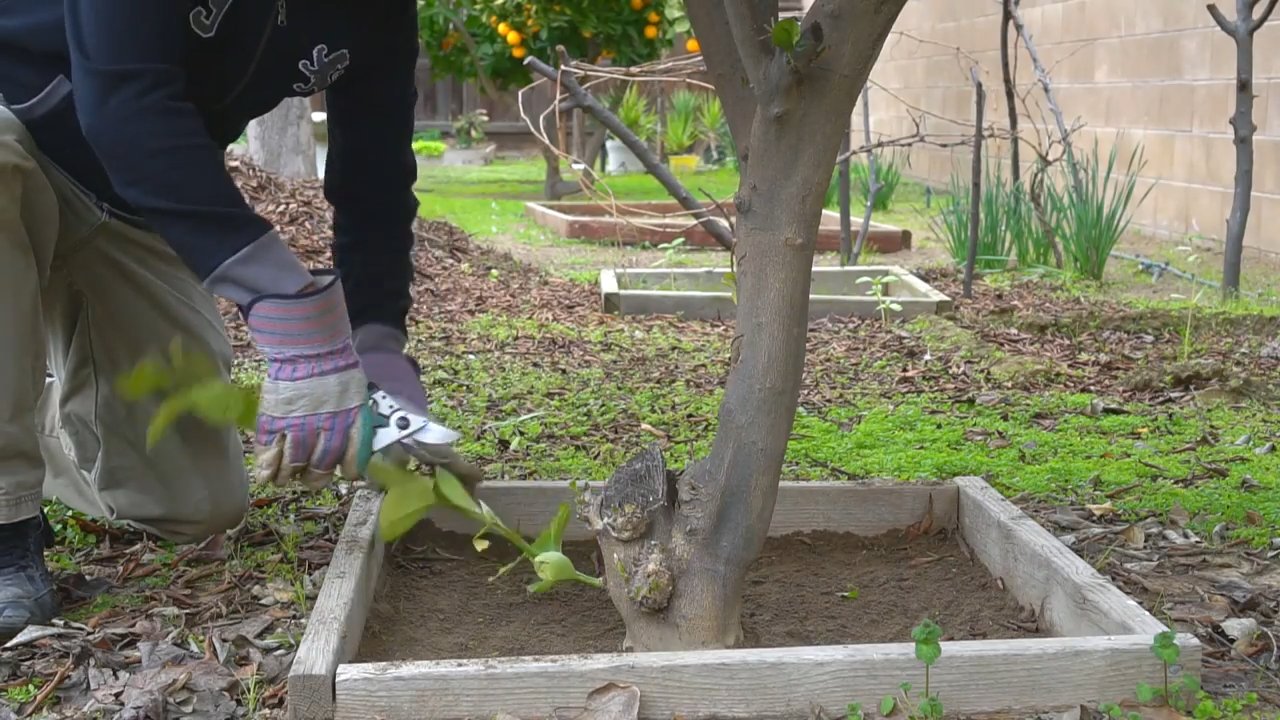
- Pruning: Prune your orange tree regularly to keep it in shape and stimulate fruit production.
- Watering: Water your orange tree regularly, but avoid waterlogging. Let the soil dry out slightly between waterings.
- Fertilizing: Fertilize your orange tree regularly during the growing season with a special citrus fertilizer.
- Light: Orange trees need a lot of light. Place them in the brightest possible location. A grow light can help in the winter.
- Humidity: Orange trees like high humidity. Spray them regularly with water or place them near a humidifier.
Avoiding Common Mistakes: How to Guarantee Success
To ensure your orange project is a complete success, you should avoid these common mistakes:
- Wrong soil: Do not use regular potting soil for starting seeds. Seed starting mix is low in nutrients and loose, ideal for delicate seedlings.
- Too much water: Waterlogging is the death of orange saplings. Make sure the soil can dry out well.
- Too little light: Orange trees need a lot of light. Place them in the brightest possible location.
- Over-fertilizing: Too much fertilizer can burn the roots. Fertilize sparingly and only with a special citrus fertilizer.
- Impatience: It takes time for an orange tree to bear fruit. Be patient and don’t give up!
Additional Information: Interesting Facts About Oranges
- Grafting: To ensure your orange tree bears fruit that meets your expectations, you can graft it. This involves attaching a branch from a proven orange variety onto your tree.
- Variety: There are countless orange varieties. Find out which variety is suitable for growing in a pot.
- Health benefits: Oranges are rich in Vitamin C and other important nutrients. They strengthen the immune system and protect against diseases.
I hope this guide has helped and inspired you to grow your own orange trees. It’s an exciting and rewarding project that, with a little patience and care, will reward you with delicious, homegrown oranges. Good luck
Conclusion
So, there you have it! Growing oranges indoors might seem like a tropical dream reserved for sun-drenched groves, but with a little know-how and dedication, it’s an achievable and incredibly rewarding experience. This DIY trick isn’t just about adding a touch of greenery to your home; it’s about cultivating a living, breathing piece of nature that offers the promise of fragrant blossoms and, eventually, delicious, homegrown fruit.
Why is this a must-try? Because it connects you to the natural world in a tangible way. It’s a project that engages your senses, from the earthy scent of the soil to the vibrant color of the ripening fruit. It’s a lesson in patience, observation, and the sheer magic of plant life. And, let’s be honest, there’s nothing quite like the satisfaction of enjoying an orange you nurtured from a tiny seed or sapling.
But the benefits extend beyond personal gratification. Indoor orange trees can improve air quality, adding a touch of humidity to dry environments and filtering out harmful toxins. They also serve as a beautiful and unique decorative element, bringing a touch of the Mediterranean to any room.
Looking for variations? Consider experimenting with different citrus varieties. While navel oranges are a popular choice, you could also try growing mandarin oranges, Meyer lemons (which are technically a lemon-orange hybrid), or even calamondin oranges, known for their ornamental value and tart flavor. Each variety offers its own unique characteristics and challenges, adding another layer of excitement to the process. You can also explore different potting mixes to find what works best for your specific environment and tree. Some growers swear by a mix of peat moss, perlite, and vermiculite, while others prefer a more soil-based blend. Don’t be afraid to experiment and find what your orange tree thrives on.
Another variation involves the training of your tree. You can prune it to maintain a desired shape and size, or even train it to grow along a trellis or espalier. This not only adds visual interest but can also help maximize fruit production by improving air circulation and sunlight exposure.
We understand that embarking on this journey might seem daunting, but we assure you, the rewards are well worth the effort. The key is to start with a healthy plant, provide it with the right conditions, and be patient. Remember to pay close attention to your tree’s needs and adjust your care routine accordingly.
We wholeheartedly encourage you to give this DIY trick a try. Imagine the joy of harvesting your own homegrown oranges, knowing that you played a part in bringing that fruit to life. It’s an experience that will connect you to nature, enrich your home, and provide you with a delicious and healthy treat.
And most importantly, we want to hear about your experiences! Share your successes, your challenges, and your tips with us and the rest of the community. Let’s learn from each other and create a thriving network of indoor orange growers. Post pictures of your trees, share your favorite recipes using your homegrown oranges, and let us know what you’ve learned along the way. Together, we can unlock the secrets to successfully **grow oranges indoors** and enjoy the fruits (literally!) of our labor. So, grab a pot, some soil, and an orange tree, and let’s get growing!
Frequently Asked Questions (FAQ)
1. What kind of orange tree is best for growing indoors?
The best orange trees for indoor growing are typically dwarf or semi-dwarf varieties that are self-pollinating. Popular choices include:
* **’Improved Meyer’ Lemon:** While technically a lemon-orange hybrid, it’s often grown as an orange due to its sweeter flavor. It’s a reliable producer and relatively easy to care for indoors.
* **Calamondin Orange:** This is a small, ornamental orange tree that produces tart, juicy fruit. It’s very tolerant of indoor conditions and makes a beautiful addition to any home.
* **’Trovita’ Orange:** A sweet, seedless orange that is well-suited for container growing.
* **’Washington Navel’ Orange:** While it can be grown indoors, it may require more attention and specific conditions to thrive.
Consider the size of your space and the amount of sunlight available when choosing a variety.
2. How much sunlight does an indoor orange tree need?
Orange trees need a lot of sunlight, ideally 6-8 hours per day. If you don’t have a south-facing window that provides sufficient light, you’ll need to supplement with grow lights. LED grow lights are a good option as they are energy-efficient and don’t produce excessive heat. Position the grow lights about 12-18 inches above the tree. Rotate the tree regularly to ensure all sides receive adequate light.
3. What kind of soil should I use for my indoor orange tree?
Use a well-draining potting mix specifically formulated for citrus trees. A good mix typically includes peat moss, perlite, and vermiculite. Avoid using garden soil, as it can become compacted and doesn’t drain well, which can lead to root rot. You can also amend a general-purpose potting mix with extra perlite to improve drainage.
4. How often should I water my indoor orange tree?
Water your orange tree when the top inch of soil feels dry to the touch. Water thoroughly until water drains out of the bottom of the pot. Avoid overwatering, as this can lead to root rot. During the winter months, when the tree is not actively growing, you may need to water less frequently. Check the soil moisture regularly and adjust your watering schedule accordingly.
5. How do I fertilize my indoor orange tree?
Fertilize your orange tree regularly during the growing season (spring and summer) with a citrus-specific fertilizer. Follow the instructions on the fertilizer label. Avoid fertilizing during the winter months when the tree is dormant. Look for a fertilizer that contains micronutrients like iron, zinc, and manganese, which are essential for healthy citrus growth.
6. How do I pollinate my indoor orange tree?
While many indoor orange tree varieties are self-pollinating, you can improve fruit set by hand-pollinating. Use a small paintbrush to transfer pollen from one flower to another. Gently brush the pollen from the stamen (the male part of the flower) onto the pistil (the female part of the flower). Repeat this process for all the flowers on the tree.
7. What are some common problems with indoor orange trees?
Common problems include:
* **Leaf drop:** This can be caused by overwatering, underwatering, insufficient light, or sudden changes in temperature.
* **Pests:** Common pests include spider mites, aphids, and scale. Inspect your tree regularly and treat any infestations promptly with insecticidal soap or neem oil.
* **Yellowing leaves:** This can be a sign of nutrient deficiency, particularly iron deficiency. Use a citrus fertilizer that contains micronutrients.
* **Root rot:** This is caused by overwatering and poor drainage. Ensure your pot has drainage holes and use a well-draining potting mix.
8. How do I prune my indoor orange tree?
Prune your orange tree in late winter or early spring to remove dead, damaged, or crossing branches. You can also prune to maintain the desired shape and size of the tree. Use clean, sharp pruning shears to make clean cuts. Avoid pruning too heavily, as this can reduce fruit production.
9. How do I increase humidity for my indoor orange tree?
Orange trees prefer a humid environment. You can increase humidity by:
* **Using a humidifier:** Place a humidifier near the tree.
* **Grouping plants together:** Plants release moisture into the air, creating a more humid microclimate.
* **Placing the pot on a pebble tray:** Fill a tray with pebbles and water, and place the pot on top of the pebbles. As the water evaporates, it will increase the humidity around the tree.
* **Misting the leaves:** Mist the leaves regularly with water.
10. How long does it take for an indoor orange tree to produce fruit?
It can take several years for an indoor orange tree to produce fruit, especially if grown from seed. Grafted trees typically produce fruit sooner, often within 2-3 years. Be patient and provide your tree with the best possible care, and you will eventually be rewarded with delicious, homegrown oranges.

Leave a Comment