
Grow Okra Kitchen Garden: Imagine stepping outside your back door and harvesting fresh, vibrant okra, ready to be transformed into a delicious and healthy meal. Sounds idyllic, right? Well, it’s more achievable than you might think! For generations, cultivating okra in home gardens has been a cherished tradition, particularly in the Southern United States and across many parts of Africa and Asia, where it’s a culinary staple. Okra, with its unique texture and mild flavor, has been a source of nourishment and cultural pride for centuries.
But let’s be honest, sometimes getting that perfect okra harvest can feel like a challenge. Pests, soil conditions, and even just knowing when to pick those pods can be tricky. That’s where this DIY guide comes in! I’m going to share some of my favorite home gardening tricks and hacks that will help you grow okra kitchen garden successfully, even if you’re a beginner. We’ll cover everything from seed starting to pest control, ensuring you have a bountiful harvest of this versatile vegetable.
Why do you need these tricks? Because store-bought okra simply can’t compare to the taste and satisfaction of growing your own. Plus, knowing exactly where your food comes from and how it’s grown is incredibly empowering. So, grab your gardening gloves, and let’s get started on your okra-growing adventure!
Growing Okra in Your Kitchen Garden: A Comprehensive DIY Guide
Hey there, fellow gardening enthusiasts! I’m so excited to share my tried-and-true method for growing okra right in your kitchen garden. Okra, also known as lady’s fingers, is a fantastic addition to any garden. It’s not only delicious but also incredibly nutritious and relatively easy to grow, even for beginners. I’ve had great success with this method, and I’m confident you will too!
Why Grow Okra in Your Kitchen Garden?
Before we dive into the how-to, let’s quickly touch on why okra is such a great choice for your kitchen garden.
* Nutrient-Rich: Okra is packed with vitamins, minerals, and fiber, making it a healthy addition to your diet.
* Easy to Grow: Okra is relatively low-maintenance and can thrive in warm climates.
* Beautiful Plant: Okra plants have attractive flowers, adding visual appeal to your garden.
* Continuous Harvest: Once established, okra plants produce pods continuously throughout the growing season.
* Versatile in the Kitchen: Okra can be used in various dishes, from soups and stews to fried snacks.
Getting Started: What You’ll Need
To successfully grow okra, you’ll need a few essential supplies. Here’s a checklist to get you started:
* Okra Seeds: Choose a variety that suits your climate and preferences. Clemson Spineless is a popular and reliable choice.
* Well-Draining Soil: Okra thrives in fertile, well-draining soil. You can amend your existing soil with compost or aged manure.
* Sunlight: Okra needs at least 6-8 hours of direct sunlight per day.
* Water: Consistent watering is crucial, especially during hot weather.
* Fertilizer: A balanced fertilizer will help your okra plants grow strong and produce abundant pods.
* Gardening Tools: You’ll need basic tools like a trowel, gardening gloves, and a watering can or hose.
* Optional: Mulch (straw, wood chips, or shredded leaves) to help retain moisture and suppress weeds.
Step-by-Step Guide to Growing Okra
Now, let’s get down to the nitty-gritty. Here’s a detailed step-by-step guide to growing okra in your kitchen garden:
1. Preparing the Soil
The first step is to prepare the soil. Okra needs well-draining soil that’s rich in organic matter.
1. Choose a Sunny Location: Select a spot in your garden that receives at least 6-8 hours of direct sunlight daily. This is crucial for okra’s growth and pod production.
2. Clear the Area: Remove any weeds, rocks, or debris from the planting area.
3. Amend the Soil: If your soil is heavy clay or sandy, amend it with compost or aged manure. This will improve drainage and fertility. I usually add a generous amount 鈥?about 2-3 inches 鈥?and mix it in thoroughly.
4. Till the Soil: Till the soil to a depth of about 12 inches. This will loosen the soil and make it easier for the okra roots to penetrate.
5. Level the Soil: Rake the soil to create a smooth, level surface.
2. Sowing the Seeds
Okra seeds have a hard outer shell, so soaking them before planting can significantly improve germination rates.
1. Soak the Seeds: Soak the okra seeds in warm water for 12-24 hours before planting. This will soften the seed coat and encourage germination. I usually put them in a small bowl and cover them with warm water.
2. Planting Time: Okra is a warm-season crop, so it’s best to plant the seeds after the last frost. The soil temperature should be at least 65掳F (18掳C).
3. Planting Depth: Plant the seeds about 1/2 to 1 inch deep.
4. Spacing: Space the seeds about 6-12 inches apart in rows that are 3-4 feet apart. This gives the plants enough room to grow and prevents overcrowding.
5. Water Gently: Water the soil gently after planting to avoid disturbing the seeds.
3. Caring for Your Okra Plants
Once the seeds have germinated, it’s essential to provide proper care to ensure healthy growth.
1. Watering: Water the okra plants regularly, especially during hot weather. Aim to keep the soil consistently moist but not waterlogged. I usually water deeply once or twice a week, depending on the weather.
2. Fertilizing: Fertilize the okra plants every 4-6 weeks with a balanced fertilizer. Follow the instructions on the fertilizer package. I like to use a fertilizer with a higher phosphorus content to encourage flowering and pod production.
3. Weeding: Keep the area around the okra plants free of weeds. Weeds compete with the okra plants for nutrients and water. I usually hand-pull weeds or use a hoe to remove them.
4. Mulching: Apply a layer of mulch around the okra plants to help retain moisture, suppress weeds, and regulate soil temperature. I use straw, but wood chips or shredded leaves also work well.
5. Pest Control: Keep an eye out for pests like aphids, flea beetles, and stink bugs. If you notice any pests, treat them with an appropriate insecticide or organic pest control method. I prefer using neem oil for pest control, as it’s a natural and effective option.
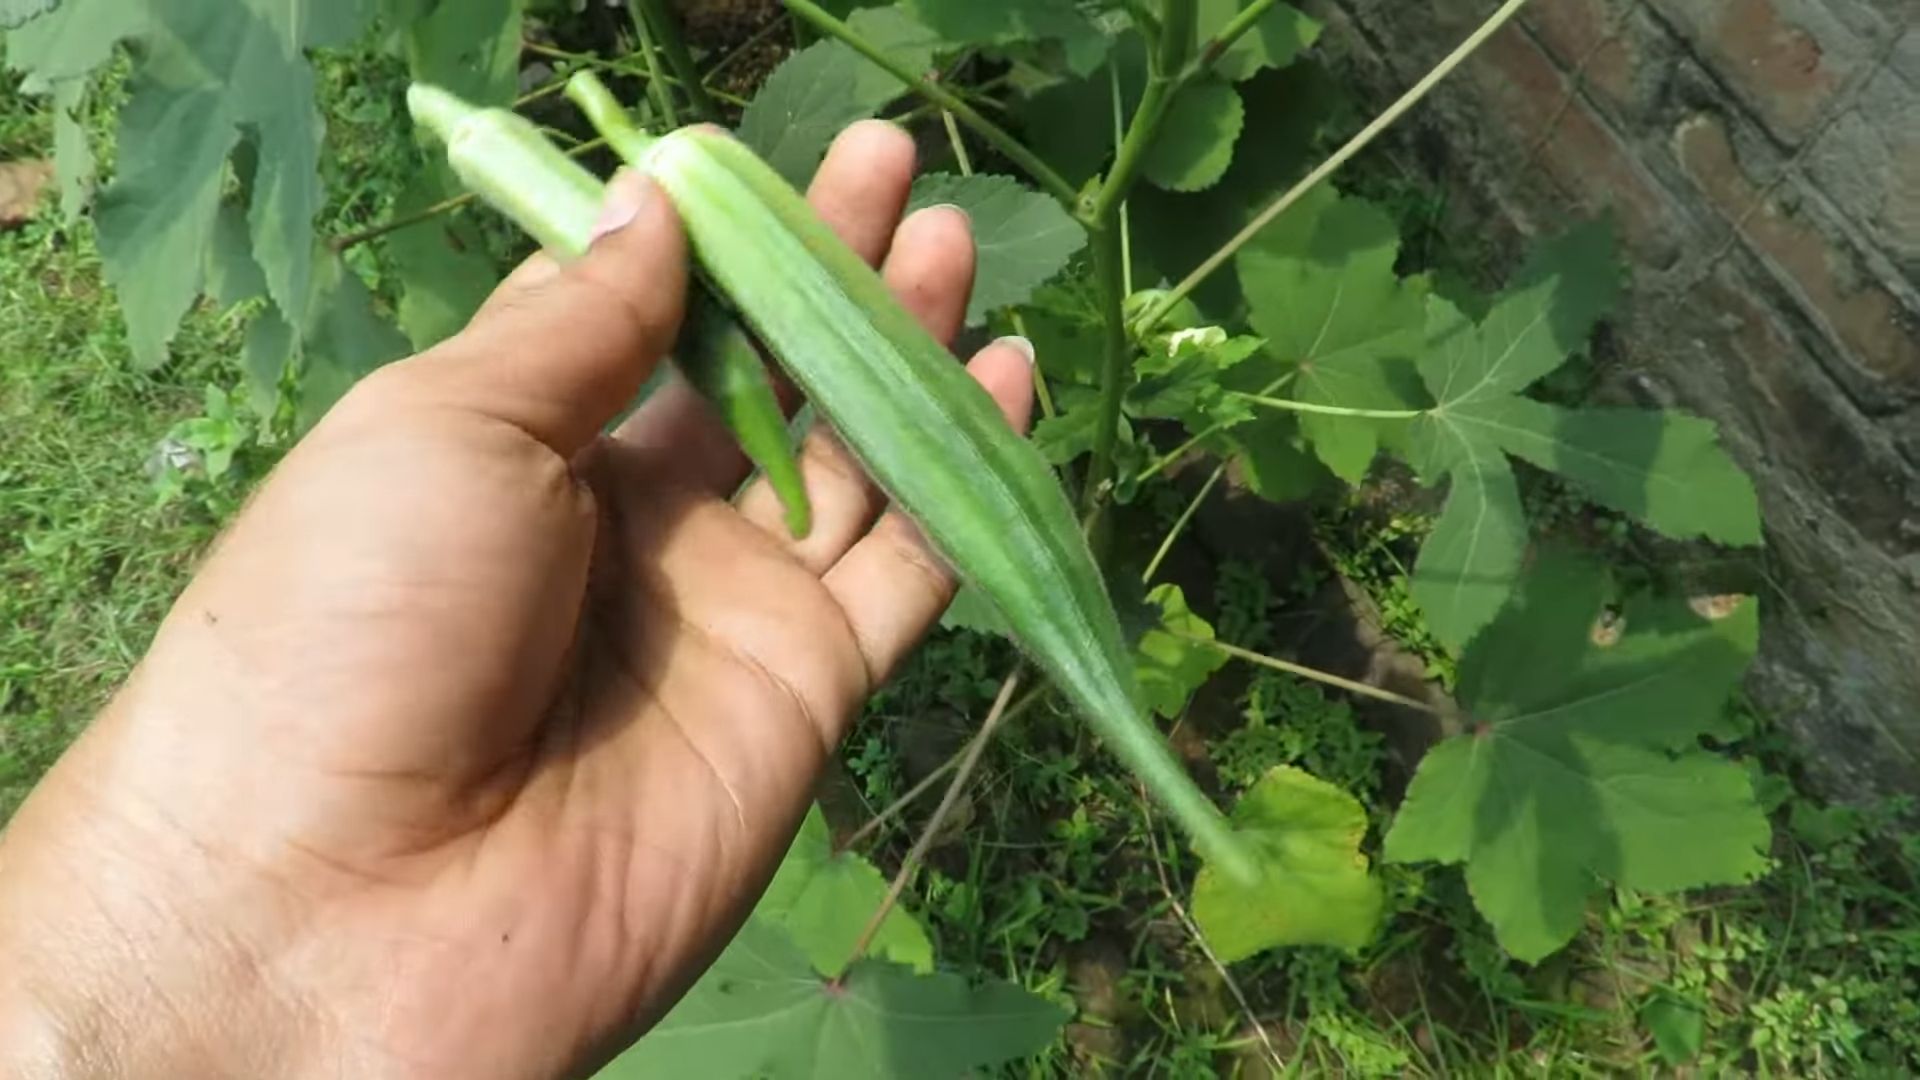
4. Harvesting Your Okra
Harvesting okra at the right time is crucial for getting tender and flavorful pods.
1. Harvest Time: Okra pods are typically ready to harvest 50-65 days after planting.
2. Pod Size: Harvest the pods when they are 2-4 inches long. Larger pods tend to be tough and fibrous.
3. Harvesting Technique: Use a sharp knife or pruning shears to cut the pods from the plant. Be careful not to damage the plant.
4. Frequency: Harvest the pods every 1-2 days to encourage continuous production. The more you harvest, the more the plant will produce.
5. Handling: Okra pods can be prickly, so wear gloves when harvesting.
5. Dealing with Common Okra Problems
Even with the best care, you might encounter some common problems when growing okra. Here’s how to deal with them:
* Yellowing Leaves: Yellowing leaves can indicate a nutrient deficiency or overwatering. Check the soil drainage and fertilize the plants if necessary.
* Stunted Growth: Stunted growth can be caused by poor soil, lack of sunlight, or pest infestations. Ensure the plants are getting enough sunlight, amend the soil if needed, and treat any pests.
* Lack of Pod Production: Lack of pod production can be due to insufficient sunlight, poor pollination, or nutrient deficiencies. Make sure the plants are getting enough sunlight, attract pollinators to your garden, and fertilize the plants with a balanced fertilizer.
* Root Knot Nematodes: These microscopic worms can damage okra roots, leading to stunted growth and reduced yields. Rotate your crops and amend the soil with organic matter to help prevent nematode infestations.
Tips for a Bountiful Okra Harvest
Here are a few extra tips to help you maximize your okra harvest:
* Choose the Right Variety: Select an okra variety that is well-suited to your climate and growing conditions.
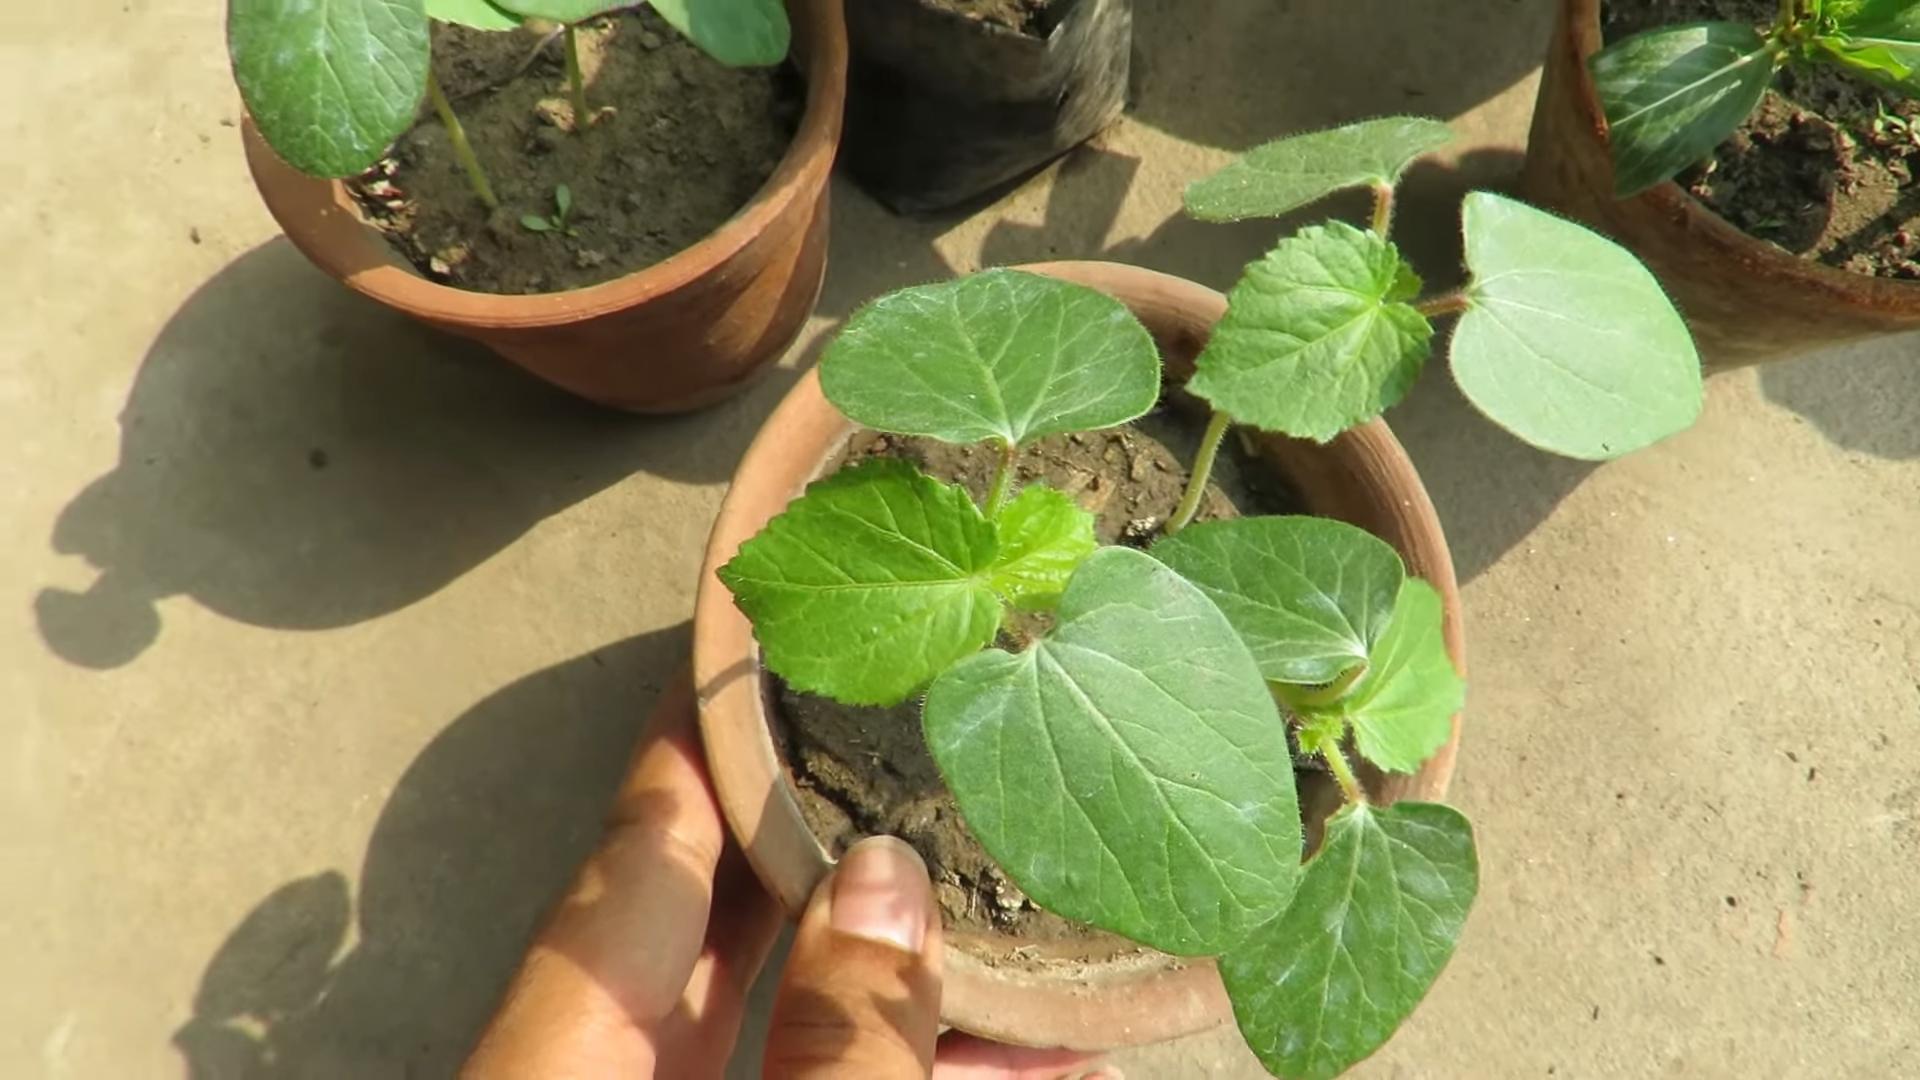
* Start Seeds Indoors: If you live in a cooler climate, start the seeds indoors 4-6 weeks before the last frost. This will give the plants a head start.
* Attract Pollinators: Plant flowers near your okra plants to attract pollinators like bees and butterflies. Pollination is essential for pod production.
* Prune the Plants: Prune the lower leaves of the okra plants to improve air circulation and prevent disease.
* Succession Planting: Plant okra seeds every 2-3 weeks to ensure a continuous harvest throughout the growing season.
Saving Okra Seeds for Next Year
If you want to save seeds from your okra plants for next year, here’s how:
1. Allow Pods to Mature: Allow a few pods to mature fully on the plant. They will become dry and brown.
2. Harvest the Pods: Harvest the dry pods and remove the seeds.
3. Dry the Seeds: Spread the seeds out on a tray and allow them to dry completely.
4. Store the Seeds: Store the dried seeds in an airtight container in a cool, dry place.
Enjoying Your Homegrown Okra
Now that you’ve successfully grown okra in your kitchen garden, it’s time to enjoy the fruits (or rather, pods) of your labor! Okra is
Conclusion
So, there you have it! Growing okra in your kitchen garden isn’t just a possibility; it’s a rewarding and surprisingly simple endeavor. We’ve walked through the steps, from selecting the right seeds to harvesting those beautiful, nutritious pods. But why should you dedicate precious space in your garden to this Southern staple?
The answer is multifaceted. First and foremost, the taste of homegrown okra is simply unparalleled. Forget the slimy, often disappointing okra you find in grocery stores. Freshly picked okra, bursting with flavor and a satisfying crunch, is a revelation. Imagine the satisfaction of serving a dish featuring okra you nurtured from a tiny seed to a thriving plant.
Beyond the taste, growing your own okra offers complete control over the growing process. You can ensure your plants are free from harmful pesticides and herbicides, providing your family with healthy, organic produce. This is especially important if you’re conscious about what you put on your table.
Furthermore, okra plants are incredibly productive. A few well-cared-for plants can yield a substantial harvest, providing you with a steady supply of okra throughout the growing season. This abundance allows you to experiment with different recipes, from classic fried okra to flavorful gumbos and even pickled okra.
But the benefits don’t stop there. Okra plants are also beautiful additions to any garden. Their large, hibiscus-like flowers add a touch of elegance and attract beneficial pollinators, contributing to the overall health of your garden ecosystem.
Ready to take your okra growing to the next level? Consider these variations:
* **Container Gardening:** If you’re short on space, okra thrives in large containers. Choose a pot at least 12 inches in diameter and ensure it has good drainage.
* **Companion Planting:** Plant okra alongside basil, peppers, or cucumbers to deter pests and improve growth.
* **Heirloom Varieties:** Explore different heirloom okra varieties for unique flavors and colors. ‘Red Burgundy’ okra, for example, adds a beautiful visual element to your garden and your plate.
* **Succession Planting:** Plant okra seeds every few weeks to extend your harvest season.
Growing okra in your kitchen garden is more than just a gardening project; it’s an investment in your health, your taste buds, and your connection to nature. It’s a chance to experience the joy of growing your own food and sharing it with loved ones.
We encourage you to give this DIY trick a try. Don’t be intimidated if you’re a beginner gardener; okra is surprisingly forgiving. Start small, follow the steps outlined in this article, and watch your okra plants flourish.
And most importantly, we want to hear about your experience! Share your photos, tips, and recipes in the comments below. Let’s create a community of okra enthusiasts and inspire others to discover the joys of growing their own food. What are you waiting for? Get those seeds in the ground and prepare to enjoy the delicious rewards of your labor!
Frequently Asked Questions (FAQ)
What is the best time to plant okra seeds?
The ideal time to plant okra seeds is after the last frost when the soil has warmed to at least 65 degrees Fahrenheit (around 18 degrees Celsius). Okra thrives in warm weather, so waiting until the soil is consistently warm will ensure better germination and growth. In most regions, this is typically late spring or early summer. If you live in a warmer climate with a longer growing season, you may be able to plant okra seeds earlier.
How much sunlight does okra need?
Okra requires at least 6-8 hours of direct sunlight per day to thrive. Choose a location in your garden that receives ample sunlight throughout the day. Insufficient sunlight can result in leggy plants with reduced yields. If you’re growing okra in containers, make sure to place them in a sunny spot.
How often should I water my okra plants?
Okra plants need consistent moisture, especially during hot weather. Water deeply and regularly, aiming for about 1 inch of water per week. Avoid overwatering, which can lead to root rot. Check the soil moisture regularly and water when the top inch feels dry. Mulching around the plants can help retain moisture and suppress weeds.
What kind of soil is best for growing okra?
Okra prefers well-drained, fertile soil with a slightly acidic to neutral pH (6.0-7.0). Amend your soil with compost or other organic matter to improve drainage and fertility. If your soil is heavy clay, consider adding sand or perlite to improve drainage. A soil test can help you determine the pH and nutrient levels of your soil.
How do I fertilize my okra plants?
Okra benefits from regular fertilization. Before planting, incorporate compost or a balanced fertilizer into the soil. During the growing season, fertilize every 4-6 weeks with a fertilizer that is relatively high in phosphorus, which promotes flowering and fruiting. Avoid over-fertilizing with nitrogen, which can lead to excessive foliage growth at the expense of pod production.
When and how should I harvest okra?
Okra pods are typically ready to harvest 50-65 days after planting. Harvest the pods when they are 2-4 inches long and still tender. Use a sharp knife or pruning shears to cut the pods from the plant. Harvest regularly, every 1-2 days, to encourage continued production. Overripe pods become tough and fibrous.
Why is my okra plant not producing pods?
There are several reasons why your okra plant might not be producing pods:
* **Insufficient Sunlight:** Okra needs at least 6-8 hours of direct sunlight per day.
* **Poor Soil:** Okra prefers well-drained, fertile soil.
* **Lack of Pollination:** Okra flowers need to be pollinated to produce pods. Attract pollinators to your garden by planting flowers that attract bees and other beneficial insects.
* **Over-Fertilization with Nitrogen:** Excessive nitrogen can lead to lush foliage growth but reduced pod production.
* **Water Stress:** Both underwatering and overwatering can affect pod production.
* **Temperature:** Okra needs warm temperatures to thrive.
How do I deal with pests and diseases on my okra plants?
Okra can be susceptible to pests such as aphids, flea beetles, and stink bugs. Regularly inspect your plants for signs of infestation and take action promptly. You can use insecticidal soap, neem oil, or other organic pest control methods to manage pests. Common diseases that affect okra include powdery mildew and root rot. Ensure good air circulation around your plants and avoid overwatering to prevent these diseases.
Can I save okra seeds for next year?
Yes, you can save okra seeds for next year. Allow some of the pods to mature fully on the plant until they are dry and brown. Harvest the pods and remove the seeds. Store the seeds in a cool, dry place in an airtight container. Okra seeds can remain viable for several years if stored properly.
Is okra a perennial or annual plant?
Okra is an annual plant, meaning it completes its life cycle in one growing season. You will need to plant new seeds each year to grow okra. However, in very warm climates with mild winters, okra may survive as a short-lived perennial.
Leave a Comment