
Grow Malabar Spinach Indoors? Absolutely! Imagine fresh, vibrant, and nutritious greens readily available right in your kitchen, no matter the season. Forget those bland, pre-packaged spinach options from the grocery store. This isn’t just about having a plant; it’s about cultivating a sustainable food source and adding a touch of green serenity to your living space.
For centuries, leafy greens like Malabar spinach have been a staple in diets across Asia and Africa, prized not only for their delicious flavor but also for their impressive nutritional benefits. Now, you can bring this culinary tradition into your own home. But why should you bother with growing your own Malabar spinach indoors? Well, for starters, it’s incredibly rewarding! There’s something deeply satisfying about nurturing a plant from seed to harvest.
More practically, growing Malabar spinach indoors allows you to control the growing environment, ensuring optimal conditions for healthy growth and a bountiful harvest. No more worrying about unpredictable weather or pesky garden pests! Plus, it’s a fantastic way to reduce your carbon footprint and enjoy fresh, organic produce without ever leaving your home. I’m excited to share some simple yet effective DIY tricks and hacks that will empower you to successfully grow Malabar Spinach Indoors, even if you don’t have a green thumb. Let’s get started!
Growing Malabar Spinach Indoors: Your Comprehensive DIY Guide
Hey plant friends! Are you interested in trying something new and growing your own Malabar spinach indoors? Malabar spinach, also known as Ceylon spinach or climbing spinach, is not only super delicious but also a beautiful vining plant that will add a touch of green to your home. And the best part? It’s easier than you think! I’ll show you step by step how you can grow your own Malabar spinach at home. Let’s get started!
What You Need: The Preparation
Before we begin, let’s make sure we have everything we need. Here is a list of the things you’ll need for your indoor Malabar spinach project:
- Malabar spinach seeds: You can get these at most garden centers or online. Make sure you buy fresh seeds to get the best results.
- Seedling pots or trays: Small pots or trays are ideal for starting the seeds.
- Seed starting mix: This soil is specially formulated for starting seedlings and provides the best conditions for growth.
- A larger pot: Once the seedlings are a bit larger, they will need a bigger pot for transplanting.
- Potting soil: Good potting soil is important for the healthy growth of Malabar spinach.
- Support/Trellis: Since Malabar spinach is a climbing plant, it needs a support structure, e.g., a small trellis, bamboo stakes, or a grid.
- Spray bottle: For moistening the soil.
- Watering can: For watering the plants.
- A bright windowsill or plant lamp: Malabar spinach needs a lot of light.
- Optional: A heating mat for starting seeds (accelerates germination).
Phase 1: Sowing – The Start of Your Malabar Spinach Adventure
Sowing is the first and most important step. Here I’ll show you how to do it right:
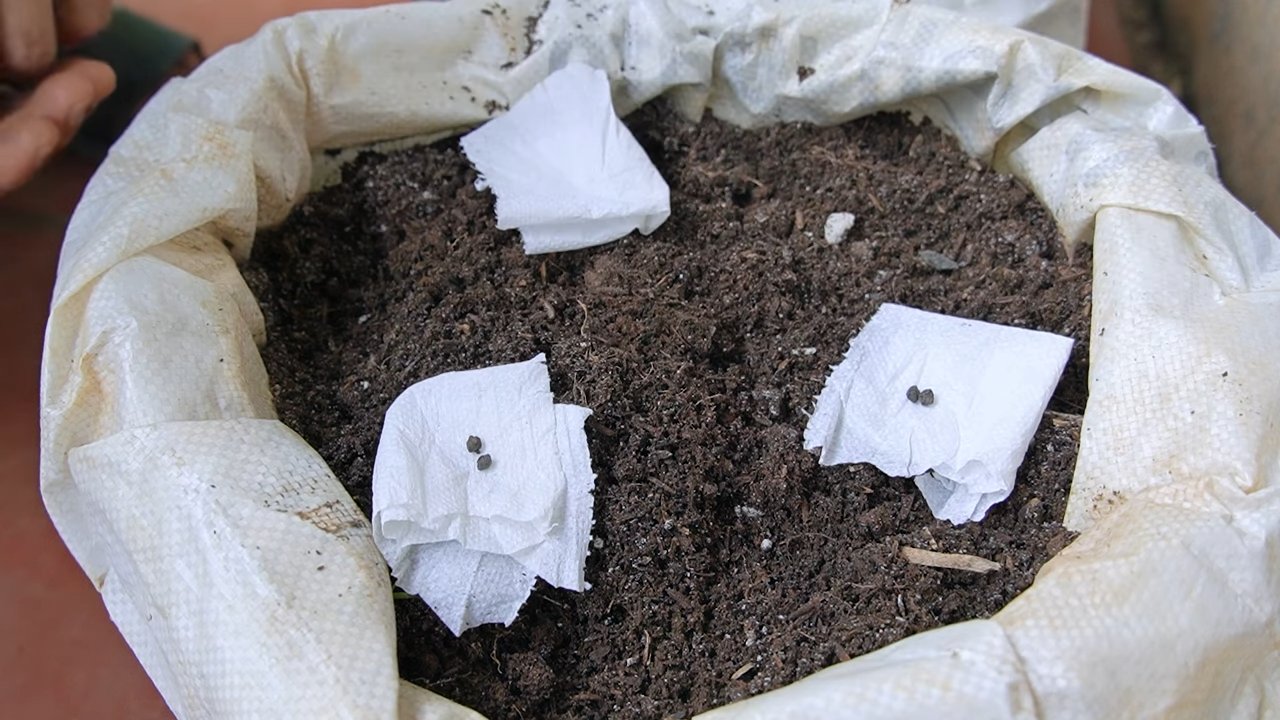
- Prepare the seeds: Malabar spinach seeds have a hard shell. To speed up germination, you can soak them in lukewarm water for 24 hours before sowing. This helps to soften the shell.
- Prepare the seedling pots: Fill the seedling pots or trays with seed starting mix. Press the soil down lightly.
- Sow the seeds: Place 2-3 seeds in each pot. Cover the seeds with a thin layer of seed starting mix (approx. 0.5 cm).
- Water: Moisten the soil carefully with a spray bottle. The soil should be damp, but not wet.
- Choose a location: Place the seedling pots in a warm and bright place. A windowsill with plenty of sunlight is ideal. If you don’t have a bright windowsill, you can use a plant lamp.
- Optional: Use a heating mat: A heating mat under the seedling pots can speed up germination. The ideal germination temperature is 20-25°C.
- Be patient: Germination can take 1-3 weeks. Keep the soil moist during this time.
Phase 2: Caring for the Seedlings – From a Small Sprout to a Strong Spinach
As soon as the seedlings sprout from the soil, the real work begins. Here are a few tips on how to best care for your small Malabar spinach plants:
- Light: Malabar spinach needs a lot of light. Make sure the seedlings get at least 6 hours of direct sunlight per day. If that’s not possible, use a plant lamp.
- Watering: Keep the soil moist, but not wet. Water the seedlings regularly, but avoid waterlogging. Check the soil before you water. If the top layer feels dry, it’s time to water.
- Temperature: Malabar spinach likes it warm. The ideal temperature is between 20 and 30°C. Avoid drafts and sudden temperature fluctuations.
- Fertilizing: Once the seedlings have a few leaves, you can fertilize them with a mild liquid fertilizer. Use a fertilizer that is suitable for vegetables. Fertilize the plants every 2-3 weeks.
- Thinning: If several seedlings have grown in one pot, you should thin them out. Choose the strongest seedling and carefully remove the others.
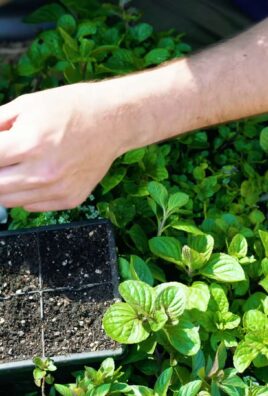
Phase 3: Repotting – A New Home for Your Malabar Spinach
When the seedlings are large enough (approx. 10-15 cm high), it’s time to repot them into larger pots.
- Prepare the pot: Choose a pot with a diameter of at least 20 cm. Fill the pot with potting soil.
- Carefully remove the seedling from the pot: Be very careful not to damage the roots. Gently squeeze the seedling pot to loosen the seedling.
- Plant the seedling in the new pot: Place the seedling in the center of the new pot. Fill the pot with potting soil and press the soil down lightly.
- Water: Water the plant thoroughly.
- Install a support: Since Malabar spinach is a climbing plant, it needs a support. Insert a small trellis, bamboo stakes, or a grid into the pot. Guide the plant’s shoots along the support.
Phase 4: Caring for the Mature Plant – Helping Your Malabar Spinach Thrive
After repotting, your Malabar spinach continues to need regular care. Here are a few tips:
- Light: Make sure the plant continues to get plenty of light.
- Watering: Water the plant regularly, but avoid waterlogging.
- Fertilizing: Fertilize the plant every 2-3 weeks with a liquid fertilizer.
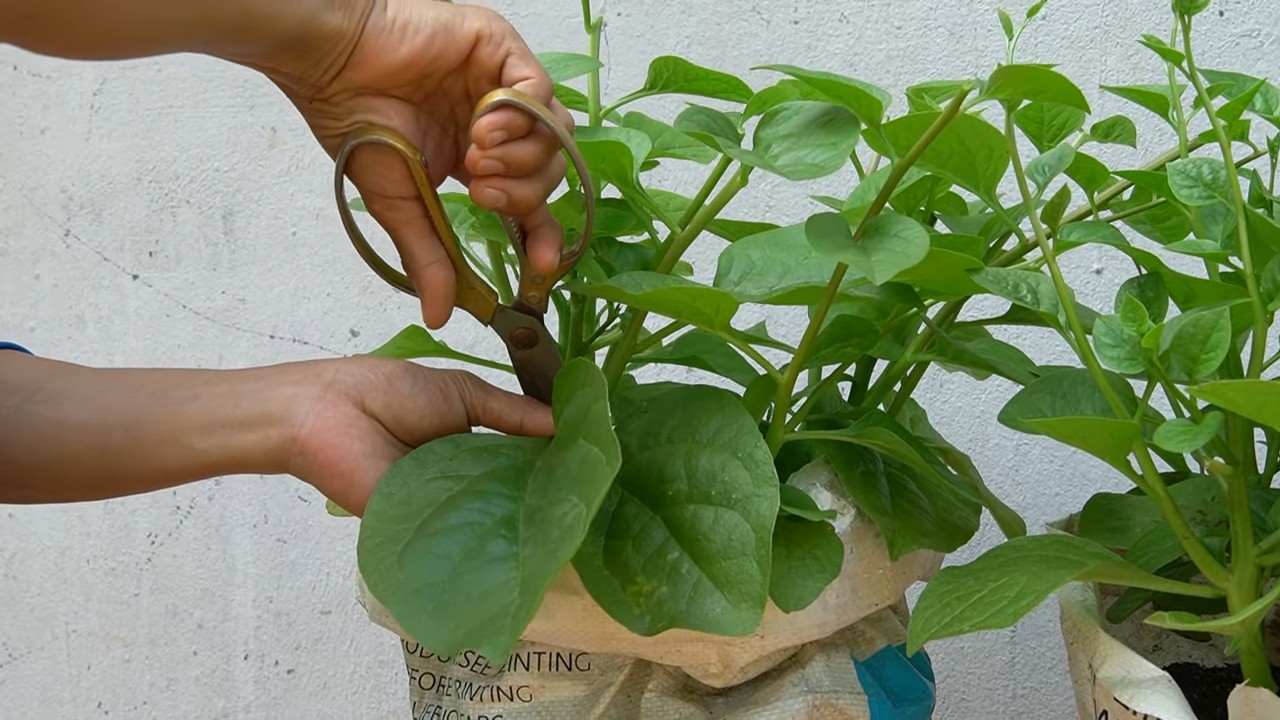
- Pruning: To stimulate growth, you can prune the shoots regularly. This also encourages the plant to branch out.
- Pests: Watch out for pests like aphids or spider mites. If you discover pests, treat the plant with a suitable insecticide or with natural remedies like neem oil.
- Support: Regularly guide the plant’s shoots along the support structure.
Phase 5: The Harvest – Enjoyment from Your Own Garden
After about 6-8 weeks, you can begin to harvest.
- Harvesting leaves: Pick the leaves as needed. You can use the young, tender leaves raw in salads or cook them like spinach.
- Harvesting shoots: You can also harvest the young shoots. They are particularly tender and aromatic.
- Harvest regularly: By harvesting regularly, you encourage the plant’s growth.
Additional Tips for Success
- Good ventilation: Ensure good air circulation to prevent fungal diseases.
- Regular checks: Check the plant regularly for pests and diseases.
- Patience: Be patient! It can take a while for your Malabar spinach to grow properly and for you to be able to harvest.
I hope this guide helps you to grow your own Malabar spinach indoors. It is a…
Conclusion
So, there you have it! Growing Malabar spinach indoors is not only achievable but also incredibly rewarding. Forget those wilted, overpriced greens at the grocery store. With a little effort and the right setup, you can have a constant supply of fresh, vibrant, and nutritious Malabar spinach right at your fingertips. This DIY trick transforms any sunny corner into a miniature edible garden, offering a unique and satisfying gardening experience.
Why is this a must-try? Because it empowers you to control the quality and freshness of your food. You know exactly what goes into your plants – no harmful pesticides or mysterious additives. Plus, the taste of homegrown Malabar spinach is simply superior. It’s more vibrant, more flavorful, and bursting with life. Beyond the culinary benefits, nurturing a plant from seed to harvest is a deeply fulfilling activity, connecting you to the natural world in a tangible way.
But the benefits don’t stop there. Growing Malabar spinach indoors is also a fantastic way to add a touch of greenery to your home. Its beautiful, climbing vines create a visually appealing display, transforming your living space into a more vibrant and inviting environment. Think of it as functional decor – a living, breathing piece of art that also happens to be delicious!
Looking for variations? Consider experimenting with different growing mediums. While a standard potting mix works well, you could also try a soilless mix or even a hydroponic setup for faster growth. You can also train your Malabar spinach to climb up a trellis or support structure, creating a stunning vertical garden. And don’t be afraid to get creative with your containers! Upcycle old buckets, baskets, or even repurposed plastic bottles to add a personal touch to your indoor garden.
Another exciting variation is to experiment with different cultivars of Malabar spinach. While the green-stemmed variety is the most common, you can also find red-stemmed cultivars that add a splash of color to your garden and your plate. Each cultivar has its own unique flavor profile, so exploring different options can be a fun and rewarding culinary adventure.
Don’t just take our word for it – give it a try! We’re confident that you’ll be amazed at how easy and rewarding it is to grow your own Malabar spinach indoors. Start small, experiment with different techniques, and don’t be afraid to make mistakes. Gardening is a learning process, and every challenge is an opportunity to grow (pun intended!).
We encourage you to share your experiences with us. Post photos of your indoor Malabar spinach gardens on social media using #IndoorMalabarSpinach and tag us! We’d love to see your creations and hear your tips and tricks. Let’s build a community of indoor gardeners and share the joy of growing our own food. So, grab some seeds, get your hands dirty, and start growing your own delicious and nutritious Malabar spinach today! You won’t regret it.
Frequently Asked Questions (FAQ)
What are the ideal growing conditions for Malabar spinach indoors?
Malabar spinach thrives in warm, humid environments with plenty of sunlight. Aim for a temperature range of 70-85°F (21-29°C) and provide at least 6-8 hours of direct sunlight per day. If you don’t have enough natural light, supplement with grow lights. Humidity is also crucial, so consider using a humidifier or misting your plants regularly. A well-draining potting mix is essential to prevent root rot.
How often should I water my indoor Malabar spinach?
Water your Malabar spinach regularly, keeping the soil consistently moist but not waterlogged. Check the soil moisture level daily and water when the top inch feels dry to the touch. Avoid overwatering, as this can lead to root rot. During the warmer months, you may need to water more frequently. Ensure your pot has drainage holes to allow excess water to escape.
What kind of fertilizer should I use for my Malabar spinach?
Malabar spinach is a heavy feeder, so regular fertilization is essential for optimal growth. Use a balanced liquid fertilizer diluted to half strength every 2-3 weeks. Look for a fertilizer with an NPK ratio of around 10-10-10. You can also supplement with organic fertilizers like compost tea or worm castings. Avoid over-fertilizing, as this can burn the roots.
How do I harvest Malabar spinach?
You can start harvesting Malabar spinach leaves as soon as the plant is established and has produced several mature leaves. Simply snip off the leaves you need with scissors or pruning shears. Regular harvesting encourages the plant to produce more leaves. Focus on harvesting the larger, more mature leaves first. You can also harvest the tender stems, which are also edible.
What pests and diseases affect Malabar spinach?
Malabar spinach is generally resistant to pests and diseases, but it can be susceptible to aphids, spider mites, and whiteflies. Inspect your plants regularly for signs of infestation and take action promptly. You can control these pests with insecticidal soap or neem oil. Overwatering can lead to fungal diseases like root rot, so ensure proper drainage and avoid overwatering. Good air circulation can also help prevent fungal problems.
Can I grow Malabar spinach from cuttings?
Yes, you can easily propagate Malabar spinach from cuttings. Take a 4-6 inch cutting from a healthy stem and remove the lower leaves. Place the cutting in a glass of water or directly into moist potting mix. Keep the cutting in a warm, humid environment and wait for roots to develop. Once the roots are established, you can transplant the cutting into a larger pot.
Is Malabar spinach the same as regular spinach?
No, Malabar spinach is not the same as regular spinach. While both are leafy greens, they belong to different plant families. Malabar spinach is a tropical vine, while regular spinach is a cool-season annual. Malabar spinach has a thicker, more succulent texture and a slightly different flavor profile than regular spinach. It is also more heat-tolerant than regular spinach, making it a great option for summer gardens.
How long does it take to grow Malabar spinach indoors?
From seed, it typically takes about 60-70 days to harvest your first Malabar spinach leaves. However, you can start harvesting sooner if you purchase a transplant from a nursery. The growth rate will depend on the growing conditions, such as temperature, light, and humidity. With proper care, your Malabar spinach plant can continue to produce leaves for several months.
Is Malabar spinach safe to eat?
Yes, Malabar spinach is safe to eat and is a nutritious addition to your diet. It is rich in vitamins A and C, as well as iron and calcium. However, like other leafy greens, it contains oxalates, which can interfere with calcium absorption. If you have kidney problems, consult with your doctor before consuming large amounts of Malabar spinach.
Can I grow Malabar spinach in a hanging basket?
Absolutely! Malabar spinach is well-suited for growing in hanging baskets. Its trailing vines will cascade beautifully over the sides of the basket, creating a stunning display. Just make sure the basket is large enough to accommodate the plant’s root system and that it has good drainage. You’ll also need to provide a support structure for the vines to climb on.
Leave a Comment