
Grow Kale at Home: Imagine stepping into your backyard and harvesting vibrant, nutrient-packed kale leaves for your dinner – all thanks to your own green thumb! Forget those limp, overpriced bunches at the grocery store. This isn’t just about saving money; it’s about connecting with nature and enjoying the freshest possible ingredients.
For centuries, kale has been a staple in diets around the world, from the hearty stews of Europe to the vibrant salads of the Mediterranean. Its resilience and nutritional power have made it a beloved crop. But you don’t need to be a seasoned farmer to enjoy its benefits.
In this DIY guide, I’m going to share some simple yet effective tricks to help you grow kale at home, even if you have limited space or gardening experience. We’ll cover everything from choosing the right variety to protecting your plants from pests. With these easy-to-follow tips, you’ll be enjoying homegrown kale in no time! Ready to ditch the store-bought stuff and embrace the joy of homegrown goodness? Let’s get started!
Growing Kale: Your DIY Guide for Your Own Garden
Hey garden friends! Do you want to grow super healthy and delicious kale right on your doorstep? I’ll show you how it’s done! Kale is not only incredibly nutritious but also surprisingly easy to grow, even if you don’t have a huge garden. Whether in a garden bed, a raised bed, or even in a pot on the balcony—kale feels at home almost anywhere. Let’s go!
What You Need for Growing Kale
Before we get started, here is a list of everything you’ll need:
- Kale seeds or young plants: Choose your favorite variety! There’s curly kale, Lacinato kale (Cavolo Nero), feathered kale, and many more.
- Seed-starting mix: For starting seeds indoors or in a greenhouse.
- Pots or seed trays: For starting seeds.
- Garden soil: Preferably nutrient-rich and well-draining.
- Compost or organic fertilizer: to enrich the soil.
- Watering can or garden hose: For watering.
- Garden tools: Spade, shovel, possibly a hoe.
- Protective netting (optional): To protect your plants from pests.
- Plant stakes (optional): For particularly tall-growing varieties.
Growing Kale: Step by Step
Here is a detailed guide on how to grow your own kale. I have divided the process into two main phases: starting seeds and planting out.
Phase 1: Starting Seeds Indoors (optional, but recommended)
Starting seeds indoors is not mandatory, but it gives your kale plants a head start and extends the growing season.
- Prepare for sowing: Fill your seed trays or pots with seed-starting mix. Press the soil down lightly.
- Sow the seeds: Place the kale seeds at small intervals (approx. 2-3 cm / 1 inch) on the soil. Cover them with a thin layer of soil (approx. 0.5 cm / 0.2 inches).
- Water: Gently moisten the soil with a spray bottle or a watering can with a fine rose. The soil should be damp, but not wet.
- Choose a location: Place the seed trays in a bright and warm spot. A greenhouse or a windowsill with plenty of sunlight is ideal. The temperature should be between 18 and 22 degrees Celsius (64-72°F).
- Maintain moisture: Make sure the soil always stays moist during germination. Spray it with water regularly if needed.
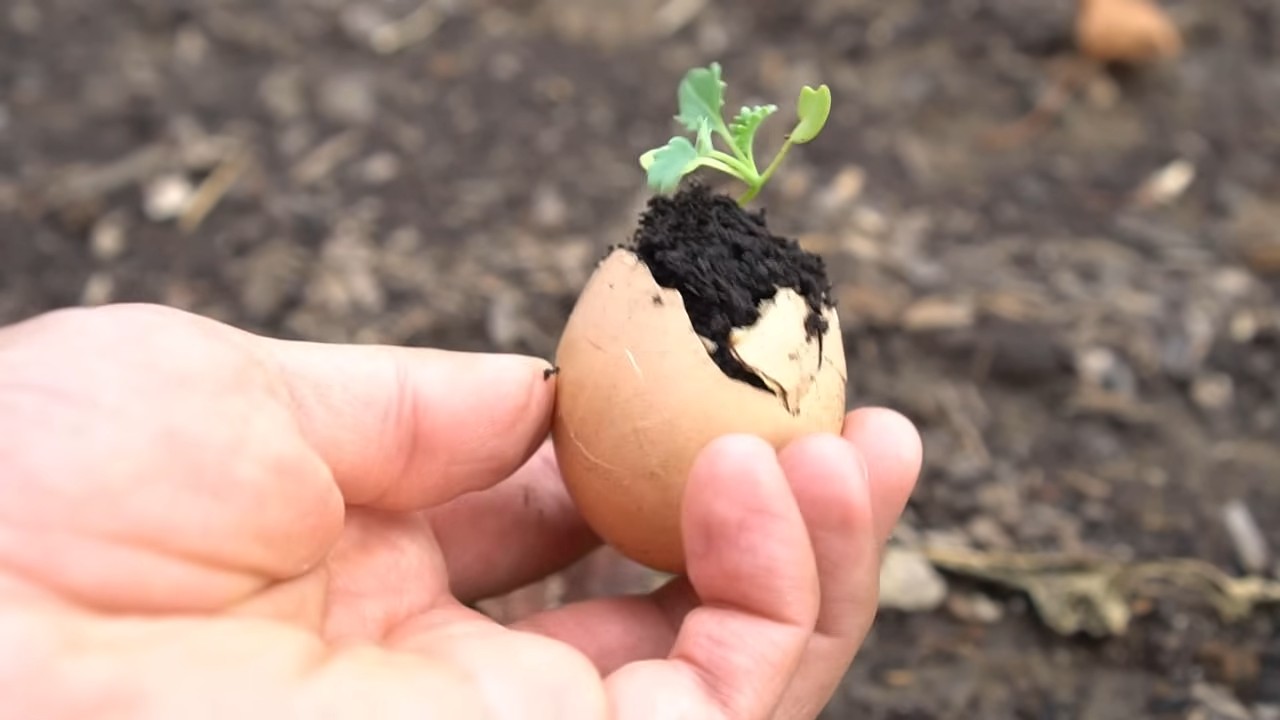
- Pricking out: As soon as the seedlings have developed their first true leaves (besides the initial seed leaves), it’s time to prick them out. This means transplanting them into larger pots so they have more space to grow.
- Fill larger pots with seed-starting mix.
- Carefully lift the seedlings out of the seed tray with a dibber or a spoon.
- Place each seedling in its own pot and fill it with soil.
- Press the soil down lightly and water the plants.
- Continue care: Place the pricked-out plants back in a bright location and water them regularly. Fertilize them with a mild liquid fertilizer if needed.
Phase 2: Planting Out into the Garden
Once the young plants are strong enough and the danger of frost has passed (usually from mid-May), they can be planted outdoors.
- Prepare the location: Choose a sunny spot for your kale. Kale needs at least 6 hours of sunlight per day. The soil should be well-draining and nutrient-rich.
- Prepare the soil: Loosen the soil with a spade and remove weeds. Work compost or organic fertilizer into the soil to enrich it.
- Dig planting holes: Dig planting holes that are slightly larger than the root balls of the young plants. The distance between plants should be between 40 and 60 cm (16-24 inches), depending on the variety.
- Place the plants: Carefully remove the young plants from their pots and place them in the planting holes. Be careful not to damage the root ball.
- Fill with soil: Fill the planting holes with soil and press it down lightly.
- Water in: Water the plants thoroughly.
- Protective measures (optional): To protect your plants from pests like cabbage white butterflies, you can stretch a protective net over them.
Kale Care: How to Keep Your Kale Healthy and Strong
Proper care is crucial for a bountiful harvest. Here are some tips:
- Watering: Kale needs regular water, especially during dry periods. Make sure the soil is always moist, but not wet. It’s best to water in the morning or evening to avoid evaporation.
- Fertilizing: Kale is a heavy feeder and needs a lot of nutrients. Fertilize your plants regularly with compost, organic fertilizer, or a special kale fertilizer. Start fertilizing about 2-3 weeks after planting out.
- Weed control: Keep the area around your kale plants free of weeds. Weeds compete with the kale for nutrients and water.
- Pest control: Kale can be infested by various pests, such as cabbage white butterflies, cabbage root flies, or aphids. Check your plants regularly for pests and take action if necessary.
- Cabbage Whites: The caterpillars of the cabbage white butterfly eat the leaves of the kale. You can pick them off by hand or use a protective net.
- Cabbage Root Flies: The larvae of the cabbage root fly feed on the roots of the kale. You can combat them with nematodes or place cabbage collars around the plants.
- Aphids: Aphids suck plant sap and can weaken the plants. You can rinse them off with a jet of water or use a biological insecticide.
- Diseases: Kale can also be affected by various diseases, such as clubroot or downy mildew. Watch for signs of disease and take action if necessary.
- Clubroot: Clubroot is a fungal disease that affects the roots of the kale. You can avoid it with good soil preparation and crop rotation.
- Downy Mildew: Downy mildew is a fungal disease that appears as yellowish spots on the leaves. You can combat it with a fungicide.
The Harvest: When is the Kale Ready?
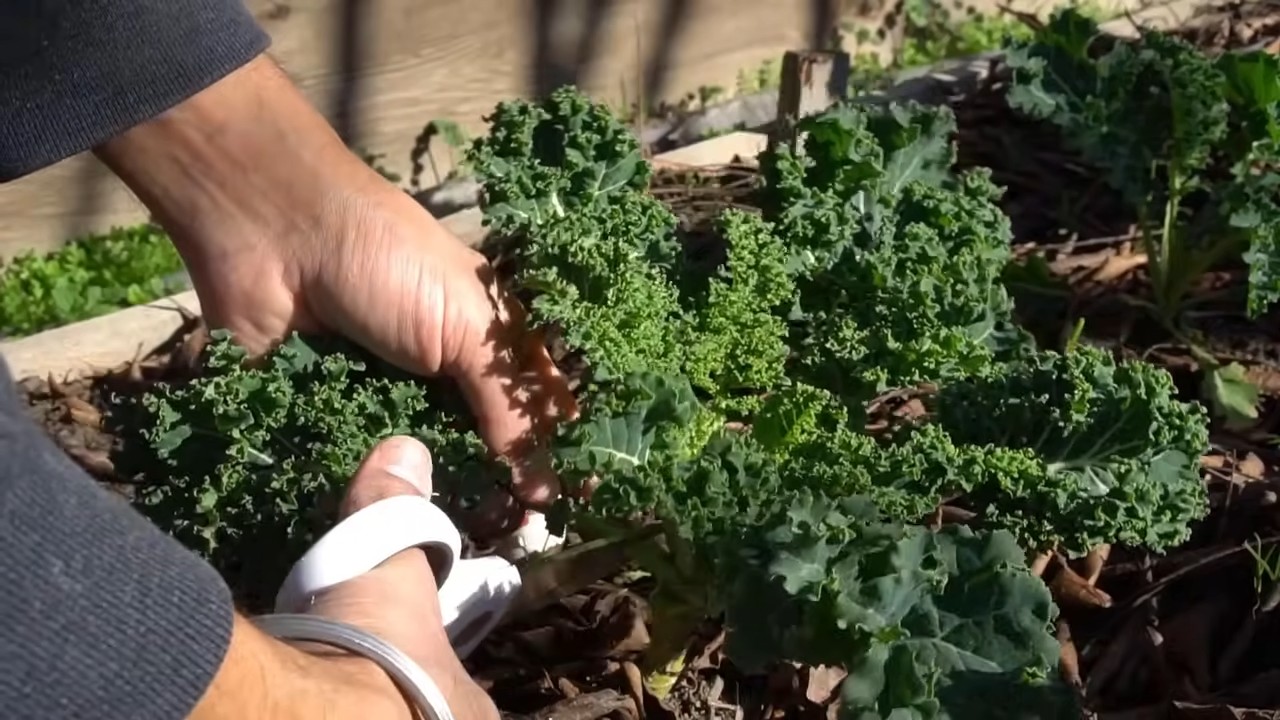
The harvest time depends on the kale variety and the growing conditions. As a rule, heading cabbage is ready when the heads are firm and closed. For curly kale, you can harvest the leaves as needed once they are large enough.
Lacinato Kale (Cavolo Nero): The leaves of Lacinato kale can be harvested as needed once they are large enough. Start with the lower leaves and work your way up.
Curly Kale: The leaves of curly kale can be harvested as needed once they are large enough. Start with the lower leaves and work your way up.
Heading Cabbage: Heading cabbage is ready for harvest when the heads are firm and closed. Cut the head with a sharp knife.
Conclusion
So, there you have it! Growing kale at home isn’t just a trendy gardening fad; it’s a genuinely rewarding experience that puts fresh, nutritious greens right at your fingertips. We’ve walked through the simple steps, from choosing the right kale variety to harvesting your bountiful crop. But why is this DIY trick a must-try?
First and foremost, consider the unparalleled freshness. Store-bought kale, no matter how organic, simply can’t compete with the vibrant flavor and crisp texture of kale harvested moments before you eat it. The difference is truly remarkable. Secondly, you gain complete control over the growing process. You know exactly what goes into your kale – no harmful pesticides or herbicides, just good old-fashioned sunshine, water, and love. This is especially important for those concerned about their health and the environment.
Beyond the health benefits, growing kale at home is incredibly cost-effective. A single packet of kale seeds can yield a continuous supply of greens for months, far surpassing the cost of repeatedly buying kale from the grocery store. Think of all the delicious kale salads, smoothies, and stir-fries you can enjoy without breaking the bank!
But the benefits don’t stop there. Gardening, in general, is a fantastic stress reliever. The simple act of nurturing a plant, watching it grow, and harvesting its bounty can be incredibly therapeutic. Plus, it’s a great way to get some fresh air and sunshine.
Ready to take your kale growing to the next level? Consider these variations:
* Succession Planting: Plant new kale seeds every few weeks to ensure a continuous harvest throughout the growing season.
* Container Gardening: If you’re short on space, kale thrives in containers. Choose a pot that’s at least 12 inches in diameter and fill it with well-draining potting mix.
* Companion Planting: Plant kale alongside other vegetables like carrots, onions, and garlic to deter pests and improve growth.
* Experiment with Varieties: Don’t be afraid to try different kale varieties, such as Lacinato (dinosaur) kale, Red Russian kale, or Curly kale, to find your favorites.
Growing kale at home is more than just a gardening project; it’s an investment in your health, your well-being, and your connection to nature. It’s a chance to experience the satisfaction of growing your own food and enjoying the freshest, most nutritious greens imaginable.
So, what are you waiting for? Grab some kale seeds, find a sunny spot, and get growing! We’re confident that you’ll be amazed at how easy and rewarding it is to grow your own kale. And once you’ve harvested your first crop, we’d love to hear about your experience. Share your photos, tips, and recipes in the comments below. Let’s build a community of home kale growers and inspire others to discover the joy of growing their own food! We encourage you to share your journey and any unique methods you discover while growing kale at home. Happy gardening!
Frequently Asked Questions (FAQ)
Q: What is the best time of year to plant kale?
A: Kale is a cool-season crop, meaning it thrives in cooler temperatures. The best time to plant kale depends on your climate. In areas with mild winters, you can plant kale in the fall for a winter harvest. In colder climates, plant kale in the early spring, a few weeks before the last expected frost, or start seeds indoors 6-8 weeks before the last frost. You can also plant kale in late summer for a fall harvest. Avoid planting kale during the hottest months of the year, as high temperatures can cause it to bolt (go to seed) and become bitter.
Q: How much sunlight does kale need?
A: Kale needs at least 6 hours of sunlight per day to thrive. Choose a location in your garden that receives full sun for the best results. If you’re growing kale in containers, make sure to place them in a sunny spot. If you live in a particularly hot climate, some afternoon shade can be beneficial to prevent the leaves from scorching.
Q: What kind of soil is best for growing kale?
A: Kale prefers well-draining soil that is rich in organic matter. Amend your soil with compost or aged manure before planting to improve its fertility and drainage. Kale also prefers a slightly acidic to neutral soil pH, between 6.0 and 7.0. You can test your soil pH with a soil testing kit and amend it accordingly.
Q: How often should I water kale?
A: Kale needs consistent moisture to thrive. Water your kale plants regularly, especially during dry periods. Aim to keep the soil consistently moist but not waterlogged. Water deeply and less frequently, rather than shallowly and more often. Mulching around your kale plants can help to retain moisture in the soil.
Q: What are some common pests and diseases that affect kale?
A: Some common pests that affect kale include aphids, cabbage worms, flea beetles, and slugs. You can control these pests with organic methods such as handpicking, insecticidal soap, or diatomaceous earth. Common diseases that affect kale include black rot, clubroot, and downy mildew. Prevent these diseases by practicing good garden hygiene, such as removing infected leaves and rotating your crops.
Q: How do I harvest kale?
A: You can start harvesting kale leaves when they are about 4-6 inches long. Harvest the outer leaves first, leaving the inner leaves to continue growing. You can harvest kale leaves continuously throughout the growing season. Avoid harvesting more than one-third of the plant at a time to allow it to continue growing.
Q: How do I store kale after harvesting?
A: Store kale in the refrigerator in a plastic bag or container. Kale will stay fresh for up to a week in the refrigerator. You can also freeze kale for longer storage. To freeze kale, wash and chop the leaves, then blanch them in boiling water for 2-3 minutes. Drain the kale and cool it in ice water. Squeeze out the excess water and freeze the kale in freezer bags or containers.
Q: Can I grow kale indoors?
A: Yes, you can grow kale indoors, but it requires a bit more effort. You’ll need to provide your kale plants with plenty of light, either from a sunny window or a grow light. You’ll also need to water them regularly and fertilize them with a balanced fertilizer. Choose a container that is at least 12 inches in diameter and fill it with well-draining potting mix.
Q: Is kale a good source of nutrients?
A: Absolutely! Kale is a nutritional powerhouse, packed with vitamins, minerals, and antioxidants. It’s an excellent source of vitamins A, C, and K, as well as calcium, iron, and potassium. Kale is also a good source of fiber and protein. Adding kale to your diet can help to improve your overall health and well-being.
Q: My kale leaves are turning yellow. What could be the problem?
A: Yellowing kale leaves can indicate several issues. It could be due to overwatering or underwatering, nutrient deficiencies (especially nitrogen), or a disease. Check the soil moisture and adjust your watering accordingly. Consider adding a balanced fertilizer to provide essential nutrients. Inspect the leaves for signs of disease and take appropriate action if necessary. If the yellowing is only on the older, lower leaves, it’s likely a natural part of the plant’s growth cycle.
Q: How can I make kale taste less bitter?
A: Some people find kale to be slightly bitter. There are several ways to reduce the bitterness. Massaging the kale leaves with olive oil and lemon juice can help to break down the cell walls and make them more tender and less bitter. Cooking kale can also reduce its bitterness. Try sautéing, steaming, or roasting kale to mellow its flavor. Choosing younger, smaller kale leaves can also help, as they tend to be less bitter than older leaves.
Leave a Comment