
Grow Gourds Easily and transform your garden into a whimsical wonderland! Have you ever dreamed of crafting your own birdhouses, dippers, or even unique musical instruments? Gourds, with their fascinating shapes and textures, offer endless possibilities for DIY projects. For centuries, gourds have held a special place in various cultures, serving as essential tools, decorative items, and even symbols of prosperity. From ancient civilizations using them as water containers to modern artisans crafting intricate art pieces, the humble gourd boasts a rich history.
But let’s be honest, sometimes growing these beauties can feel a bit daunting. That’s where I come in! I’m here to share some simple yet effective home gardening tricks and DIY hacks that will help you grow gourds easily, even if you’re a beginner. Imagine the satisfaction of harvesting your own gourds and turning them into something truly special. Whether you’re looking to add a touch of rustic charm to your home or explore your creative side, these tips will empower you to cultivate a thriving gourd garden and unlock a world of DIY possibilities. Let’s get our hands dirty and start growing!
Grow Gourds Like a Pro: My Foolproof DIY Guide
Hey there, fellow gardening enthusiasts! I’m so excited to share my tried-and-true method for growing gourds. I’ve been experimenting with these fascinating plants for years, and I’ve finally perfected a system that yields a bountiful harvest. Get ready to transform your garden into a gourd-geous wonderland!
What You’ll Need
Before we dive in, let’s gather our supplies. Here’s a comprehensive list of everything you’ll need to successfully grow gourds:
* Gourd Seeds: Choose your favorite varieties! I personally love birdhouse gourds, dipper gourds, and ornamental gourds for their unique shapes and uses. Make sure you get them from a reputable source.
* Seed Starting Trays or Pots: These will help you get a head start on the growing season.
* Seed Starting Mix: A light and airy mix is crucial for healthy seedling development.
* Potting Soil: For transplanting your seedlings into larger containers.
* Garden Soil: The foundation for your gourd patch. Amend it with compost for best results.
* Compost: This organic matter will enrich your soil and provide essential nutrients.
* Fertilizer: A balanced fertilizer will give your gourds a boost throughout the growing season. I recommend a slow-release granular fertilizer.
* Trellis or Support Structure: Gourds are vines, so they need something to climb on. A sturdy trellis, fence, or even a repurposed ladder will work wonders.
* Gardening Gloves: Protect your hands from dirt and potential irritants.
* Watering Can or Hose: Essential for keeping your gourds hydrated.
* Pruning Shears: For trimming and shaping your gourd vines.
* Insecticidal Soap: To combat common gourd pests like squash bugs and vine borers.
* Mulch: To retain moisture, suppress weeds, and regulate soil temperature. Straw, wood chips, or shredded leaves are all great options.
* Measuring Tape: To ensure proper spacing between plants.
* Row Covers (Optional): To protect young seedlings from frost and pests.
* Patience: Growing gourds takes time and dedication, but the rewards are well worth it!
Starting Your Gourd Seeds Indoors
Starting your gourd seeds indoors gives them a head start, especially if you live in a region with a shorter growing season. Here’s how I do it:
1. Soak the Seeds: Before planting, soak your gourd seeds in warm water for 24-48 hours. This helps soften the hard outer shell and encourages germination. I usually put them in a small bowl and cover them with water.
2. Prepare Your Seed Starting Trays: Fill your seed starting trays or pots with seed starting mix. Gently press the mix down to remove any air pockets.
3. Plant the Seeds: Plant one or two seeds per cell, about 1 inch deep. Cover the seeds with the seed starting mix and gently water.
4. Provide Warmth and Light: Place the trays in a warm location, such as on top of a refrigerator or on a heat mat. Gourds need warmth to germinate. Once the seedlings emerge, move them to a sunny windowsill or under grow lights. I use grow lights to ensure they get enough light, especially during cloudy days.
5. Keep the Soil Moist: Water the seedlings regularly, keeping the soil consistently moist but not waterlogged. I usually check the soil moisture daily and water when the top inch feels dry.
6. Harden Off the Seedlings: Before transplanting your seedlings outdoors, you need to “harden them off.” This process gradually acclimates them to the outdoor environment. Start by placing the seedlings outdoors in a sheltered location for a few hours each day, gradually increasing the amount of time they spend outside over the course of a week.
Preparing Your Gourd Patch
Gourds need plenty of space and sunshine to thrive. Choose a location that receives at least 6-8 hours of direct sunlight per day.
1. Choose the Right Location: Select a sunny spot with well-drained soil. Gourds are heavy feeders, so the soil should be rich in organic matter.
2. Prepare the Soil: Amend your garden soil with plenty of compost. This will improve drainage, aeration, and nutrient content. I usually dig in a generous amount of compost, about 4-6 inches deep.
3. Install Your Trellis: Before planting, install your trellis or support structure. This will give your gourd vines something to climb on as they grow. Make sure the trellis is sturdy enough to support the weight of the mature gourds. I’ve found that a strong wooden trellis works best.
4. Space Your Plants: Gourds need plenty of space to spread out. Space your plants at least 3-4 feet apart. This will allow them to get enough sunlight and air circulation.
Transplanting Your Gourd Seedlings
Once your seedlings have developed a few sets of true leaves and the danger of frost has passed, it’s time to transplant them into your garden.
1. Choose a Cloudy Day: Transplanting on a cloudy day will help prevent transplant shock.
2. Dig Holes: Dig holes that are slightly larger than the root balls of your seedlings.
3. Gently Remove Seedlings: Carefully remove the seedlings from their containers, being careful not to damage the roots.
4. Plant the Seedlings: Place the seedlings in the holes and backfill with soil. Gently firm the soil around the base of the plants.
5. Water Thoroughly: Water the seedlings thoroughly after transplanting. This will help settle the soil and encourage root growth.
6. Mulch Around the Plants: Apply a layer of mulch around the plants to retain moisture, suppress weeds, and regulate soil temperature.
Caring for Your Gourd Plants
Once your gourd plants are established, it’s important to provide them with proper care to ensure a bountiful harvest.
1. Water Regularly: Gourds need consistent moisture, especially during hot, dry weather. Water deeply and regularly, aiming for about 1 inch of water per week. I usually water early in the morning to allow the foliage to dry before nightfall, which helps prevent fungal diseases.
2. Fertilize Regularly: Feed your gourd plants with a balanced fertilizer every few weeks. This will provide them with the nutrients they need to grow and produce fruit. I use a slow-release granular fertilizer and supplement with liquid fertilizer every now and then.
3. Prune the Vines: Pruning can help improve air circulation and encourage fruit production. Remove any dead or diseased leaves and stems. You can also prune the tips of the vines to encourage branching.
4. Control Pests and Diseases: Gourds are susceptible to a variety of pests and diseases, including squash bugs, vine borers, and powdery mildew. Inspect your plants regularly for signs of trouble and take action promptly. I use insecticidal soap to control pests and a fungicide to prevent fungal diseases.
5. Provide Support: As your gourd vines grow, they will need support to climb on. Train the vines to climb your trellis or support structure. You may need to tie the vines to the trellis with twine or plant ties.
6. Hand Pollinate (If Necessary): If you’re not seeing a lot of fruit set, you may need to hand pollinate your gourds. This involves transferring pollen from the male flowers to the female flowers. The female flowers have a small gourd-like structure at the base of the flower. I usually do this early in the morning, using a small paintbrush to transfer the pollen.
Harvesting and Curing Your Gourds
The most exciting part! Knowing when and how to harvest and cure your gourds is crucial for long-term preservation.
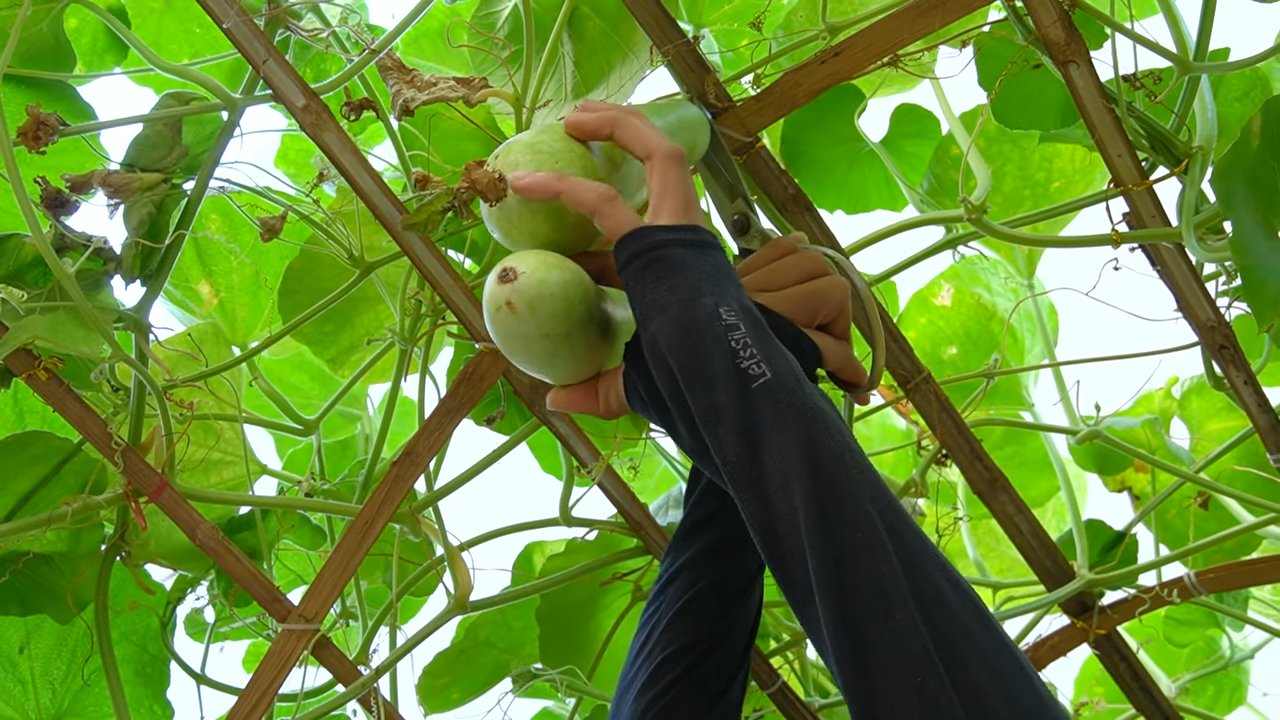
1. Harvest When Mature: Gourds are ready to harvest when the stems have dried and turned brown. The gourds should also feel hard and lightweight.
2. Cut the Gourds: Use pruning shears to cut the gourds from the vine, leaving a few inches of stem attached.
3. Wash the Gourds: Wash the gourds with soapy water to remove any dirt or debris.
4. Cure the Gourds: Cure the gourds in a well-ventilated area for several weeks. This will allow the outer shell to harden and prevent rotting. I usually cure my gourds in a shed or garage, making sure they are not touching each other.
5. Monitor for Mold: Check the gourds regularly for signs of mold. If you see any mold, wipe it off with a solution of bleach and water.
6. Store the Gourds: Once the gourds are fully cured, you can store them in a cool, dry place. They should last for several years.
Troubleshooting Common Gourd Growing Problems
Even with the best care, you might encounter some challenges. Here’
Conclusion
So, there you have it! Growing gourds easily doesn’t have to be a daunting task reserved for seasoned gardeners. With a little planning, preparation, and these simple DIY tricks, you can cultivate a thriving gourd patch that will be the envy of your neighborhood. This isn’t just about growing a plant; it’s about connecting with nature, fostering creativity, and reaping the rewards of your own hard work.
The beauty of this method lies in its adaptability. Feel free to experiment with different gourd varieties to find your favorites. Try growing birdhouse gourds for your feathered friends, ornamental gourds for fall decorations, or even luffa gourds for natural sponges. The possibilities are endless!
Consider adding companion plants like marigolds to deter pests or beans to fix nitrogen in the soil, further enriching your gourd-growing experience. You can also adjust the watering schedule based on your local climate and soil conditions. Remember, observation is key. Pay attention to your plants, and they will tell you what they need.
This DIY approach to growing gourds easily empowers you to take control of your garden and create something truly special. Imagine the satisfaction of crafting your own unique decorations, gifts, or even musical instruments from gourds you’ve grown yourself. It’s a rewarding experience that connects you to the earth and allows you to express your creativity.
Don’t be afraid to get your hands dirty and embrace the learning process. Gardening is all about experimentation and discovery. Even if you encounter challenges along the way, remember that every mistake is an opportunity to learn and improve.
We wholeheartedly encourage you to try these DIY tricks for growing gourds easily. We are confident that you’ll be amazed by the results. And most importantly, we want to hear about your experience! Share your photos, tips, and stories with us in the comments below. Let’s build a community of gourd enthusiasts and inspire others to embark on this rewarding journey. Happy growing!
Frequently Asked Questions (FAQ)
What are the best gourd varieties to start with for beginners?
For beginners, we recommend starting with smaller, easier-to-manage gourd varieties like ornamental gourds or birdhouse gourds. These tend to be more forgiving and mature relatively quickly, providing a faster sense of accomplishment. Luffa gourds are also a good option if you’re interested in growing your own natural sponges. Avoid starting with very large or long-season gourds until you have some experience under your belt. Remember to check your local climate and growing season to choose varieties that are well-suited to your area.
How much space do gourds need to grow?
Gourds are vigorous vines that require ample space to spread. As a general rule, allow at least 6-8 feet between plants. If you’re growing them on a trellis, ensure the trellis is sturdy enough to support the weight of the mature vines and gourds. Consider the mature size of the specific gourd variety you’re growing, as some can be significantly larger than others. Crowding can lead to poor air circulation, increased risk of disease, and reduced fruit production.
What kind of soil is best for growing gourds?
Gourds thrive in well-drained, fertile soil that is rich in organic matter. Before planting, amend your soil with compost, aged manure, or other organic amendments to improve its structure and nutrient content. A slightly acidic to neutral soil pH (around 6.0 to 7.0) is ideal. If your soil is heavy clay, consider adding sand or perlite to improve drainage. Conduct a soil test to determine its pH and nutrient levels, and amend accordingly.
How often should I water my gourd plants?
Gourds need consistent moisture, especially during hot, dry weather. Water deeply and regularly, aiming to keep the soil consistently moist but not waterlogged. Avoid overhead watering, as this can increase the risk of fungal diseases. Instead, water at the base of the plants. Mulching around the plants can help retain moisture and suppress weeds. The frequency of watering will depend on your local climate, soil type, and the size of your plants. Check the soil moisture regularly and adjust your watering schedule accordingly.
What are some common pests and diseases that affect gourds, and how can I prevent them?
Common pests that affect gourds include squash bugs, squash vine borers, and aphids. Diseases include powdery mildew, downy mildew, and fungal rots. To prevent these problems, practice good garden hygiene, such as removing plant debris and weeds. Rotate your crops each year to avoid the buildup of soilborne diseases. Use row covers to protect young plants from pests. Inspect your plants regularly for signs of pests or diseases, and take action promptly if you spot any problems. Organic pest control methods, such as insecticidal soap or neem oil, can be effective for controlling many pests. Ensure good air circulation around your plants to reduce the risk of fungal diseases.
When is the best time to harvest gourds?
The timing of harvest depends on the type of gourd you’re growing and its intended use. Ornamental gourds are typically harvested when they are fully mature and their stems have dried out. Birdhouse gourds should be left on the vine until they are completely dry and the seeds rattle inside. Luffa gourds can be harvested when they are still green and tender for use as vegetables, or allowed to mature and dry on the vine for use as sponges. Always use clean, sharp tools to harvest gourds to prevent damage and disease.
How do I cure gourds after harvesting them?
Curing is essential for preserving gourds and preventing them from rotting. After harvesting, wash the gourds with soapy water and allow them to dry completely. Place them in a well-ventilated, dry, and dark location for several weeks or months, until they are completely dry and hard. Turn the gourds regularly to ensure even drying. Discard any gourds that show signs of rot or mold. The curing process can take several months, depending on the size and type of gourd.
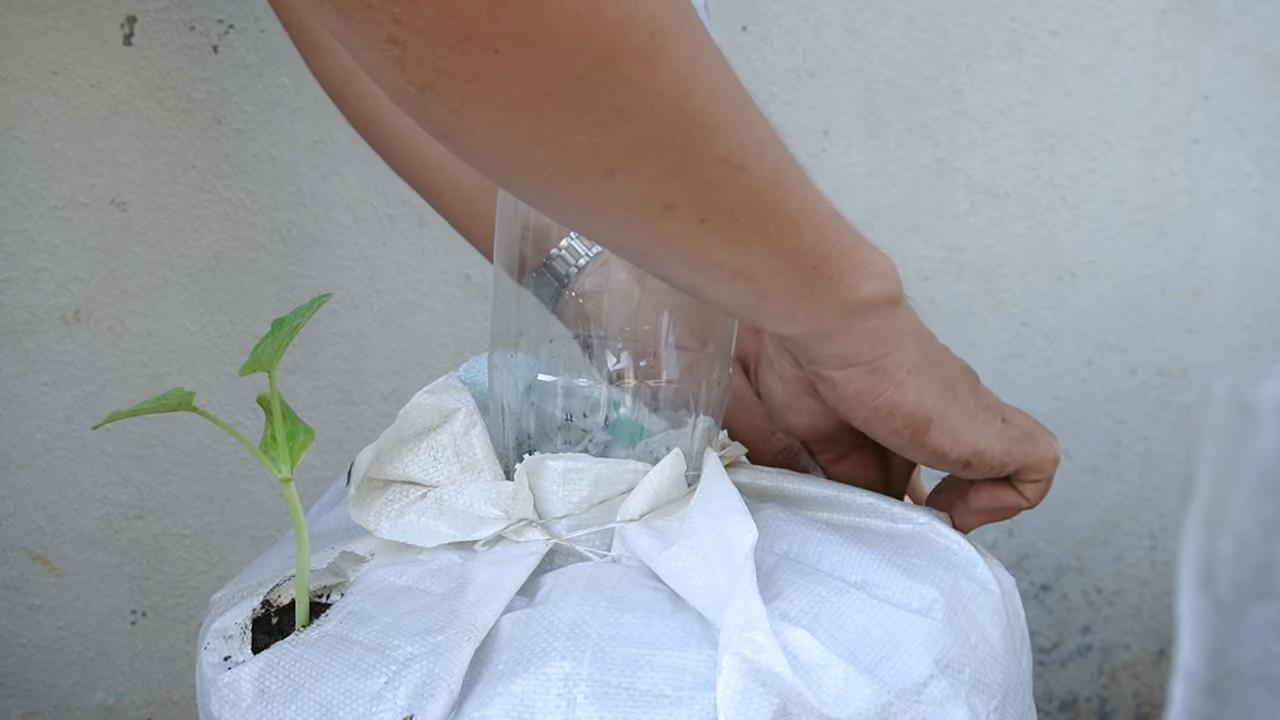
Can I grow gourds in containers?
Yes, you can grow gourds in containers, but you’ll need to choose a large container (at least 20 gallons) and provide adequate support for the vines. Use a well-draining potting mix and fertilize regularly. Container-grown gourds may require more frequent watering than those grown in the ground. Choose smaller gourd varieties that are well-suited to container growing.
How can I use gourds in crafts and decorations?
The possibilities are endless! Once your gourds are cured, you can paint them, carve them, decorate them with beads or other embellishments, or use them to create birdhouses, bowls, musical instruments, and much more. Search online for gourd craft ideas for inspiration. Remember to seal your finished gourd crafts with a clear coat of varnish or sealant to protect them from moisture and damage.
What if my gourds don’t seem to be growing?
Several factors can contribute to poor gourd growth, including insufficient sunlight, poor soil, inadequate watering, pests, and diseases. Ensure your plants are getting at least 6-8 hours of sunlight per day. Amend your soil with compost or other organic matter to improve its fertility. Water deeply and regularly, especially during hot, dry weather. Inspect your plants regularly for signs of pests or diseases, and take action promptly if you spot any problems. If your plants are not producing fruit, they may need to be pollinated by hand.
Leave a Comment