
Grow Corn Kitchen Garden: Imagine stepping outside your back door and harvesting fresh, sweet corn, ready to be grilled, boiled, or added to your favorite summer salad. Sounds like a dream, right? Well, it doesn’t have to be! I’m here to tell you that growing your own corn, even in a small kitchen garden, is totally achievable with a few simple tricks and DIY hacks.
Corn, a staple in diets around the world, has a rich history dating back thousands of years to its origins in Mexico. It was a sacred crop for many indigenous cultures, providing sustenance and playing a vital role in their traditions. While large-scale corn farming is common, the joy of nurturing your own corn stalks and reaping the rewards of your labor is something truly special.
Why should you try this DIY project? Well, for starters, homegrown corn tastes infinitely better than anything you’ll find in the supermarket. Plus, you’ll know exactly where your food is coming from and what (or rather, what isn’t) going into it. In this article, I’ll share my favorite tips and tricks for successfully grow corn kitchen garden, even if you’re short on space. From choosing the right varieties to maximizing your yield, I’ll guide you through every step of the process. Get ready to enjoy the sweet taste of success – and homegrown corn!
Maisanbau im eigenen Küchengarten: Eine Schritt-für-Schritt-Anleitung
Hallo liebe Gartenfreunde! Habt ihr euch jemals gefragt, ob ihr euren eigenen Mais anbauen könnt? Die Antwort ist: Ja, absolut! Es ist einfacher als ihr denkt und unglaublich befriedigend, eure eigenen Maiskolben zu ernten. In diesem Artikel zeige ich euch, wie ihr das ganz einfach in eurem eigenen Küchengarten hinbekommt. Lasst uns loslegen!
Die Grundlagen: Was ihr für den Maisanbau braucht
Bevor wir mit dem Pflanzen beginnen, brauchen wir ein paar Dinge. Keine Sorge, die meisten davon habt ihr wahrscheinlich schon zu Hause oder könnt sie leicht besorgen.
* Maissamen: Wählt eine Sorte, die für eure Region geeignet ist. Es gibt viele verschiedene Sorten, von Zuckermais bis hin zu Popcornmais. Informiert euch am besten im Gartencenter oder online, welche Sorte in eurer Gegend gut wächst.
* Gartenwerkzeug: Eine Schaufel, eine Harke und eventuell ein Pflanzholz sind hilfreich.
* Guter Boden: Mais liebt nährstoffreichen, gut durchlässigen Boden.
* Sonnenlicht: Mais braucht mindestens 6-8 Stunden Sonnenlicht pro Tag.
* Wasser: Regelmäßiges Gießen ist wichtig, besonders während der Keimung und der Kolbenbildung.
* Dünger: Ein stickstoffreicher Dünger hilft dem Mais beim Wachsen.
* Geduld: Mais braucht Zeit, um zu wachsen. Seid geduldig und gebt nicht auf!
Schritt-für-Schritt-Anleitung: Mais pflanzen und pflegen
Jetzt geht’s ans Eingemachte! Hier ist eine detaillierte Anleitung, wie ihr euren eigenen Mais anbauen könnt.
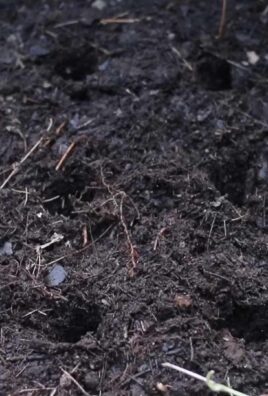
1. Den Boden vorbereiten:
* Wählt einen sonnigen Standort in eurem Garten. Mais braucht viel Sonne, um gut zu wachsen.
* Lockert den Boden mit einer Schaufel auf und entfernt Steine und Unkraut.
* Verbessert den Boden mit Kompost oder gut verrottetem Mist. Mais ist ein Starkzehrer und braucht viele Nährstoffe.
* Harkt den Boden glatt.
2. Die Maissamen aussäen:
* Der beste Zeitpunkt zum Aussäen ist, wenn keine Frostgefahr mehr besteht und der Boden sich erwärmt hat (mindestens 10°C). Das ist meistens im Mai oder Juni.
* Sät die Samen in Reihen aus. Der Abstand zwischen den Reihen sollte etwa 60-75 cm betragen.
* Legt die Samen etwa 2-3 cm tief in den Boden.
* Pflanzt die Samen in Gruppen von 3-4 Körnern, mit einem Abstand von etwa 20-25 cm innerhalb der Reihe. Das sorgt für eine bessere Bestäubung.
* Bedeckt die Samen mit Erde und drückt sie leicht an.
* Gießt die Erde vorsichtig an.
3. Die Keimung und das Wachstum:
* Die Samen keimen in der Regel innerhalb von 7-14 Tagen.
* Sobald die Pflanzen etwa 10-15 cm hoch sind, könnt ihr die schwächsten Pflanzen in jeder Gruppe entfernen, so dass nur die stärkste Pflanze übrig bleibt.
* Gießt die Pflanzen regelmäßig, besonders während trockener Perioden.
* Hackt regelmäßig Unkraut, um die Konkurrenz um Nährstoffe und Wasser zu reduzieren.
4. Die Düngung:
* Etwa 4-6 Wochen nach der Aussaat könnt ihr den Mais zum ersten Mal düngen.
* Verwendet einen stickstoffreichen Dünger, um das Wachstum zu fördern.
* Düngt den Mais ein zweites Mal, wenn die ersten Blütenstände (die “Fahnen”) erscheinen.
5. Die Bestäubung:
* Mais ist windbestäubt. Das bedeutet, dass der Pollen von den männlichen Blütenständen (den “Fahnen” oben an der Pflanze) zu den weiblichen Blütenständen (den “Seidenfäden” an den Kolben) gelangen muss.
* Um die Bestäubung zu fördern, solltet ihr den Mais in einem Block und nicht in einer einzelnen Reihe pflanzen. Das erhöht die Wahrscheinlichkeit, dass der Pollen die Seidenfäden erreicht.
* Bei windstillem Wetter könnt ihr die Pflanzen leicht schütteln, um den Pollen zu verteilen.
6. Die Pflege der Kolben:
* Sobald die Kolben sich entwickeln, solltet ihr sie regelmäßig kontrollieren.
* Entfernt Seitentriebe, die unterhalb der Kolben wachsen. Diese nehmen der Pflanze unnötig Energie weg.
* Achtet auf Schädlinge wie den Maiszünsler.
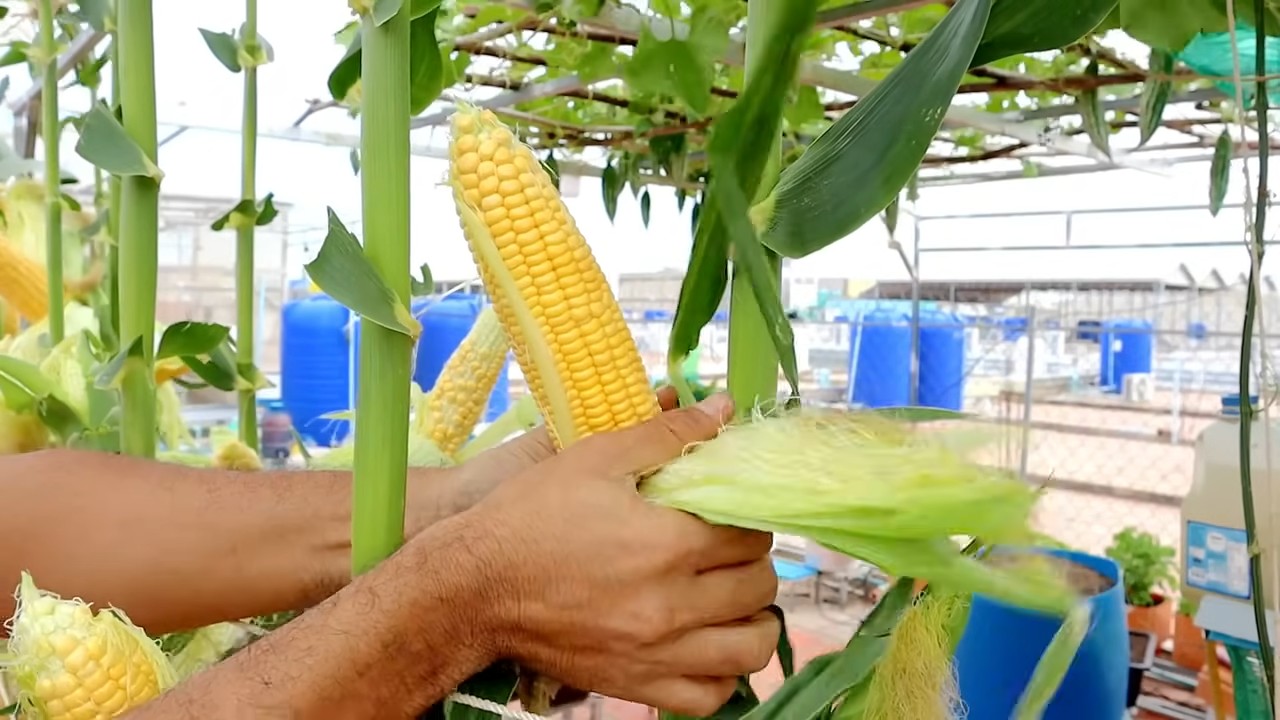
7. Die Ernte:
* Die Erntezeit hängt von der Maissorte ab. In der Regel ist der Mais erntereif, wenn die Seidenfäden braun und trocken sind und die Kolben sich prall anfühlen.
* Um zu testen, ob der Mais reif ist, könnt ihr ein Korn aufbrechen. Wenn es milchig ist, ist der Mais reif.
* Brecht die Kolben vorsichtig von der Pflanze ab.
Schutz vor Schädlingen und Krankheiten
Leider ist auch Mais nicht vor Schädlingen und Krankheiten gefeit. Hier sind ein paar Tipps, wie ihr eure Pflanzen schützen könnt:
* Maiszünsler: Dieser Schädling bohrt sich in die Kolben und kann großen Schaden anrichten. Ihr könnt ihn mit biologischen Mitteln bekämpfen, z.B. mit Nützlingen wie Schlupfwespen.
* Vögel: Vögel lieben Maissamen und junge Pflanzen. Ihr könnt die Pflanzen mit Netzen schützen.
* Pilzkrankheiten: Bei feuchtem Wetter können Pilzkrankheiten auftreten. Achtet auf eine gute Belüftung und entfernt befallene Blätter.
Zusätzliche Tipps für den erfolgreichen Maisanbau
* Fruchtfolge beachten: Baut Mais nicht jedes Jahr am selben Standort an. Eine Fruchtfolge hilft, Krankheiten und Schädlinge zu vermeiden.
* Gründüngung: Nach der Maisernte könnt ihr eine Gründüngung aussäen, um den Boden zu verbessern.
* Mulchen: Mulchen hilft, den Boden feucht zu halten und Unkraut zu unterdrücken.
Fazit: Eigener Mais – ein lohnendes Projekt
Ich hoffe, diese Anleitung hat euch Mut gemacht, euren eigenen Mais anzubauen. Es ist ein wirklich lohnendes Projekt, das euch mit frischen, selbst geernteten Maiskolben belohnt. Und das Beste daran: Ihr wisst genau, was drin ist! Also, ran an die Schaufel und viel Spaß beim Gärtnern!

Conclusion
So, there you have it! Growing your own corn, right in your kitchen garden, is not just a whimsical dream; it’s an achievable reality. We’ve walked you through the steps, demystified the process, and hopefully, ignited a spark of excitement for this rewarding endeavor. But why is this DIY trick a must-try?
Firstly, the taste. Forget the bland, commercially grown corn you find in supermarkets. Homegrown corn, picked at its peak ripeness, bursts with a sweetness and flavor that is simply unparalleled. It’s a taste of summer sunshine, captured in every juicy kernel. Imagine the satisfaction of biting into a cob you nurtured from a tiny seed, knowing exactly where it came from and what went into its growth.
Secondly, the sustainability aspect. By growing your own corn, you’re reducing your reliance on industrial agriculture, minimizing your carbon footprint, and contributing to a more sustainable food system. You’re also avoiding the pesticides and herbicides often used in large-scale corn production, ensuring a healthier and more natural food source for you and your family.
Thirdly, the sheer joy of gardening. There’s something incredibly therapeutic about nurturing a plant from seed to harvest. Watching your corn stalks grow taller and stronger each day, witnessing the formation of the ears, and finally, harvesting your own crop is an experience that connects you to nature and provides a sense of accomplishment that’s hard to replicate.
But don’t stop there! The beauty of this DIY project lies in its adaptability. Experiment with different varieties of corn to discover your favorites. Try growing ornamental corn for stunning fall decorations. Consider companion planting with beans and squash to create a thriving, self-sustaining ecosystem in your kitchen garden. You can even try succession planting, staggering your planting dates to ensure a continuous harvest throughout the growing season.
Ready to embark on your corn-growing adventure? We wholeheartedly encourage you to give this DIY trick a try. It’s easier than you might think, and the rewards are immeasurable. Don’t be afraid to experiment, learn from your mistakes, and most importantly, have fun!
And once you’ve harvested your first crop of homegrown corn, we want to hear all about it! Share your experiences, tips, and photos with us in the comments below. Let’s create a community of corn-growing enthusiasts and inspire others to embrace the joy of growing their own food. Your success story could be the inspiration someone else needs to start their own kitchen garden. So, grab your seeds, get your hands dirty, and get ready to enjoy the sweet taste of success! Let’s get growing!
Frequently Asked Questions (FAQ)
What is the best variety of corn to grow in a small kitchen garden?
Choosing the right variety is crucial for success in a limited space. Look for “dwarf” or “compact” varieties specifically bred for smaller gardens or containers. Some excellent options include ‘On Deck’ sweet corn, which matures quickly and produces smaller stalks, or ‘Golden Bantam,’ a classic heirloom variety known for its sweet flavor and relatively compact size. Research the specific needs of each variety, including days to maturity and space requirements, before making your selection. Consider your local climate and growing conditions as well. Local nurseries can provide valuable insights into which varieties thrive in your area.
How much sunlight does corn need to grow successfully?
Corn is a sun-loving plant and requires at least 6-8 hours of direct sunlight per day to thrive. Without sufficient sunlight, the stalks will become weak and spindly, and the ears will be small and underdeveloped. Choose a location in your kitchen garden that receives ample sunlight throughout the day. If you’re growing corn in containers, make sure you can easily move them to follow the sun. If you live in an area with intense afternoon sun, providing some afternoon shade can prevent the plants from getting scorched.
What kind of soil is best for growing corn?
Corn prefers well-draining, fertile soil that is rich in organic matter. The ideal soil pH is between 6.0 and 7.0. Before planting, amend your soil with compost, well-rotted manure, or other organic materials to improve its fertility and drainage. Avoid heavy clay soils, which can become waterlogged and inhibit root growth. If you have clay soil, consider growing your corn in raised beds or containers filled with a well-draining potting mix. Regular soil testing can help you determine if your soil is lacking any essential nutrients.
How often should I water my corn plants?
Corn requires consistent moisture, especially during germination and ear development. Water deeply and regularly, aiming to keep the soil consistently moist but not waterlogged. The frequency of watering will depend on your climate, soil type, and the size of your plants. As a general rule, water when the top inch of soil feels dry to the touch. During hot, dry weather, you may need to water daily. Use a soaker hose or drip irrigation to deliver water directly to the roots, minimizing water loss through evaporation.
How do I pollinate corn if I’m only growing a few plants?
Corn is wind-pollinated, meaning that pollen from the tassels (the male flowers at the top of the plant) needs to reach the silks (the female flowers on the ears) for fertilization to occur. If you’re only growing a few plants, you may need to hand-pollinate them to ensure good ear development. To hand-pollinate, gently shake the tassels over the silks, or collect pollen from the tassels with a small brush and apply it directly to the silks. Repeat this process every day for several days to ensure that all the silks are pollinated.
When is the best time to harvest my corn?
Knowing when to harvest corn is key to enjoying its sweet flavor. The silks will turn brown and dry, but this isn’t the only indicator. Feel the ear through the husk; it should feel plump and full. The kernels should be milky when punctured with a fingernail. If the liquid is clear, the corn is not ripe yet. If it’s pasty, it’s overripe. Harvest in the morning for the best flavor, as the sugars will be at their highest.
What are some common pests and diseases that affect corn, and how can I prevent them?
Common pests include corn earworms, aphids, and Japanese beetles. Diseases include corn smut and various fungal infections. Preventative measures include crop rotation, companion planting (e.g., planting marigolds to deter pests), and using organic pest control methods such as insecticidal soap or neem oil. Regularly inspect your plants for signs of pests or diseases and take action promptly. Ensure good air circulation around your plants to prevent fungal diseases.
Can I grow corn in containers? What size container is needed?
Yes, you can grow corn in containers, but you’ll need a large container to accommodate the plant’s extensive root system. A container that is at least 12 inches in diameter and 12 inches deep is recommended. Use a high-quality potting mix and ensure that the container has good drainage. Container-grown corn may require more frequent watering and fertilization than corn grown in the ground.
How can I improve the flavor of my homegrown corn?
The key to improving the flavor of your homegrown corn is to harvest it at its peak ripeness and cook it as soon as possible after harvesting. The sugars in corn begin to convert to starch soon after picking, so the sooner you cook it, the sweeter it will taste. You can also add a pinch of sugar to the cooking water to enhance the sweetness.
What are some creative ways to use my homegrown corn?
Beyond the classic corn on the cob, there are countless ways to enjoy your homegrown corn. You can grill it, roast it, steam it, or boil it. You can also cut the kernels off the cob and use them in salads, soups, stews, salsas, and cornbread. Try making homemade corn tortillas or corn chowder. You can even dry the kernels and grind them into cornmeal for polenta or other dishes. Don’t forget to save some of the kernels for planting next year!
Leave a Comment